Your Leftover Turkey’s Grandest Finale: The Coziest Pot Pie Ever
Hey there, friend! Isla here, from my cozy kitchen to yours. Can we just take a moment to appreciate the sheer magic of a homemade pot pie? That flaky, golden-brown crust, cracked open to reveal a steaming, savory, creamy filling that just smells like… well, like a hug. It’s the culinary equivalent of your favorite worn-in sweater. And today, we’re giving that beautiful leftover turkey from your holiday feast the glorious second act it so richly deserves.
Now, I know what you might be thinking. “Isla, a from-scratch pot pie sounds like a project.” But I’m here to tell you, with a few simple tricks and a whole lot of heart, this recipe is as fuss-free as it gets. We’re talking about a one-dish wonder that turns simple ingredients into a show-stopping meal that will have everyone at the table asking for seconds. This isn’t just about using up leftovers; it’s about transforming them into something even more special and delicious. So, tie on your favorite apron, put on some feel-good music, and let’s turn that turkey into a warm, bubbling masterpiece that’s pure comfort in a pie dish.
The Pot Pie That Started It All
My love for pot pie is deeply rooted in the post-Thanksgiving chaos of my childhood. Picture this: our small coastal kitchen, still smelling of roasted turkey and sage, every surface covered in mixing bowls and serving platters. The “grown-up” cooking was done, but the real magic was just beginning. My grandma, a woman who could make a feast out of practically nothing, would pull me onto a step-stool and hand me the biggest bowl. “Alright, Isla-bug,” she’d say, her eyes twinkling. “Time for the best part.”
Together, we’d gather all the little Tupperware containers of leftover turkey, the half-eaten bags of peas and carrots, and the last of the gravy. It felt less like cooking and more like a delicious puzzle. I was in charge of stirring the filling, and she’d guide my small hands, showing me how to roll the pastry just right. The wait for it to bake felt like an eternity, but that first steamy, buttery bite was always worth it. It taught me that the most memorable meals aren’t always the fancy ones—they’re the resourceful, love-filled creations that bring everyone together, long after the main event is over. This recipe is my homage to her, and to every cook who knows the joy of a delicious second act.
Print
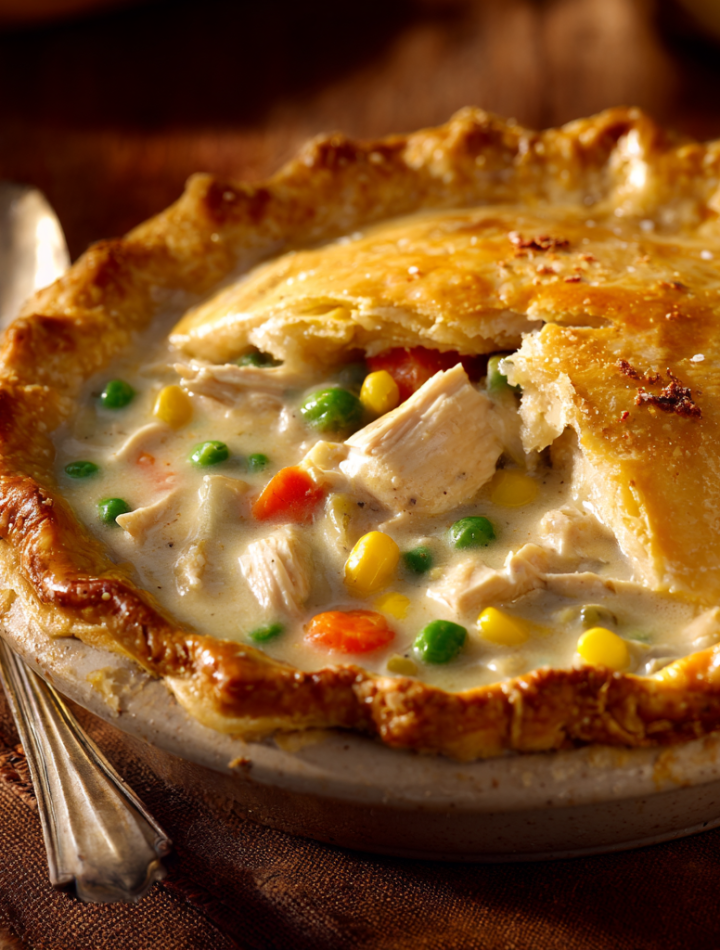
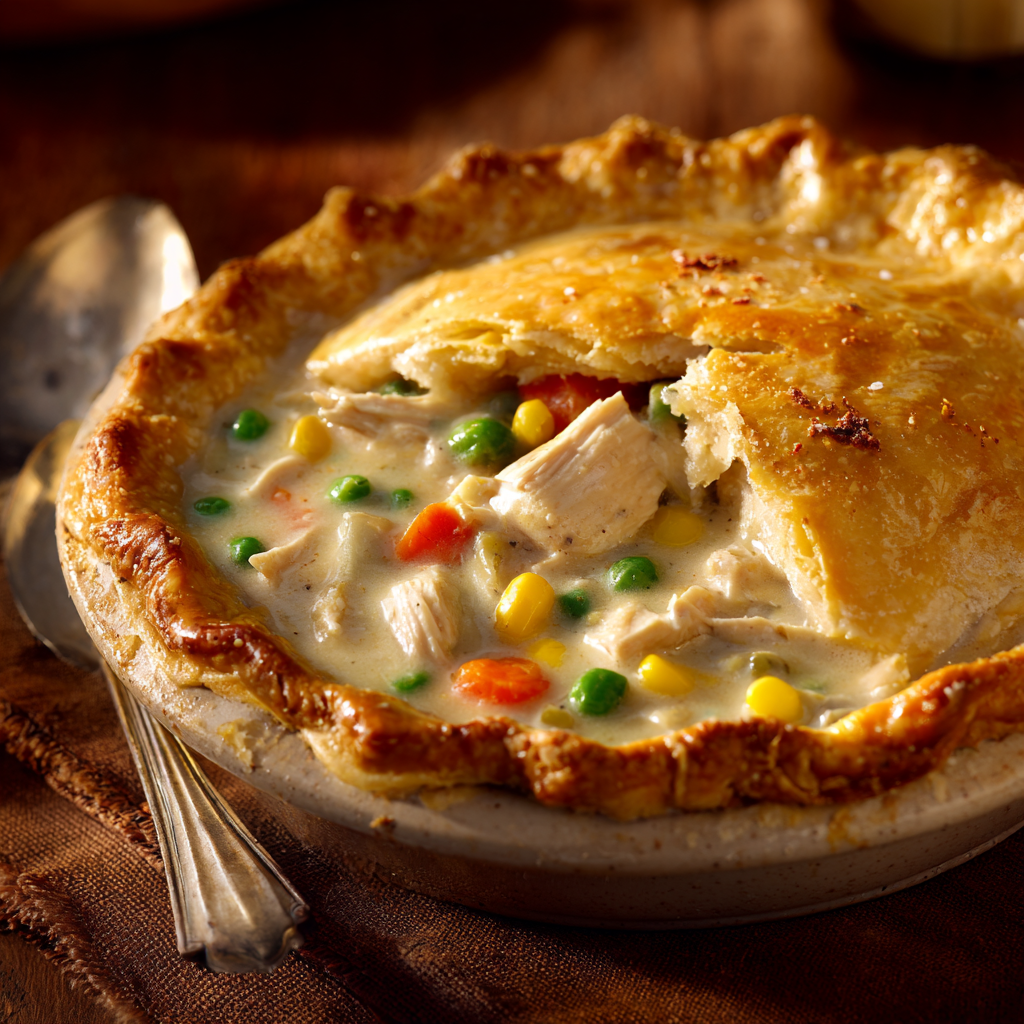
Turkey Pot Pie — Great for Leftover Turkey!
- Total Time: 55 minutes
- Yield: 6 servings 1x
Description
Nothing beats the comfort of a creamy, golden turkey pot pie. This recipe turns your leftover turkey into a warm, savory dish that feels like a hug in pie form. Perfect for cozy nights or lazy weekends—dig in and give those leftovers a second life.
Ingredients
2 cups cooked turkey, chopped
1 cup frozen peas and carrots
½ cup frozen corn
⅓ cup butter
⅓ cup chopped onion
⅓ cup all-purpose flour
½ teaspoon salt
¼ teaspoon black pepper
¼ teaspoon celery seed
1¾ cups chicken or turkey broth
⅔ cup milk
2 unbaked pie crusts (store-bought or homemade)
Instructions
Preheat oven to 425°F (220°C).
In a saucepan, melt butter over medium heat. Add onions and cook until soft. Stir in flour, salt, pepper, and celery seed until smooth.
Gradually stir in broth and milk. Cook and stir until thick and bubbly.
Add turkey and vegetables. Mix well, then remove from heat.
Fit one pie crust into a 9-inch pie dish. Pour the filling into the crust. Top with the second crust, seal the edges, and cut small slits in the top to vent.
Bake for 30–35 minutes or until the crust is golden. Let cool for 10 minutes before serving.
- Prep Time: 20 minutes
- Cook Time: 35 mins
Nutrition
- Calories: 400
- Carbohydrates: 32g
- Protein: 20g
Gathering Your Flavor Crew
This is where the fun begins! Don’t be intimidated by the list; think of it as gathering your favorite flavor friends for a party in a pie crust. Here’s what you’ll need, with a few of my favorite chef-y insights and swaps to make it your own.
- 2 cups cooked turkey, chopped – This is your star! I love a mix of white and dark meat for the best flavor and texture. Chef’s Swap: No turkey? Shredded chicken or even canned tuna (drained well) works in a pinch!
- 1 cup frozen peas and carrots – The frozen veggie aisle is your weeknight hero. No chopping required, and they hold their color and texture perfectly. Chef’s Insight: Using frozen means they won’t get mushy in the filling.
- ½ cup frozen corn – A little pop of sweetness that balances the savory gravy so beautifully.
- ⅓ cup butter – This is the base of our luxurious sauce. It creates a “roux” with the flour that thickens everything up.
- ⅓ cup chopped onion – The aromatic foundation. I like a yellow or white onion for a mellow sweetness.
- ⅓ cup all-purpose flour – Our thickening agent. It’s essential for creating that creamy, velvety sauce that holds the filling together.
- ½ teaspoon salt & ¼ teaspoon black pepper – The dynamic duo of seasoning. Always taste your filling before it goes in the crust and adjust if needed!
- ¼ teaspoon celery seed – This is my secret weapon! It adds a subtle, savory depth that reminds me of classic stuffing. Don’t skip it if you can help it!
- 1¾ cups chicken or turkey broth – The liquid gold. Using a good-quality broth makes a world of difference in flavor. Chef’s Tip: If you have homemade turkey stock from your carcass, this is its moment to shine!
- ⅔ cup milk – This adds a touch of creaminess to our sauce. Whole milk is great, but 2% works perfectly fine. For a richer sauce, use half-and-half.
- 2 unbaked pie crusts – Absolutely no judgment from me on store-bought! They are a fantastic shortcut. But if you’re feeling ambitious, my foolproof pie crust recipe is always here for you.
Let’s Build Some Magic: Step-by-Step
Ready to create some kitchen alchemy? Follow these steps, and you’ll have a perfect pot pie in no time. I’ve sprinkled in all my best tips to ensure your success!
- Preheat and Prep: Fire up that oven to 425°F (220°C). Getting your oven nice and hot is key for a flaky, well-lifted crust. While it’s heating, take your pie crusts out of the fridge to let them soften up a touch—it makes them easier to work with. Chef’s Hack: Place your pie dish on a baking sheet. This makes it easier to handle and catches any potential bubbly-over mess, saving you from oven cleanup!
- The Aromatics: In a medium saucepan, melt your butter over medium heat. Once it’s foaming slightly, add your chopped onion. We’re not looking for color here, just softness and sweetness. Cook them for about 4-5 minutes, until they’re translucent and smell amazing. This step builds the flavor base for your entire sauce.
- Create the Roux: Sprinkle the flour, salt, pepper, and celery seed right over the buttery onions. Now, stir, stir, stir! You’ll end up with a thick paste. Cook this for a full minute. This cooks out the raw flour taste and is the secret to a sauce that won’t taste pasty. Little Chef Story: My dad called this the “flour-and-butter dance,” and I still do a little shimmy while I stir it!
- Whisk in the Liquids: Here’s the key to a lump-free gravy: gradually whisk in your broth and milk. I mean it—start with a small splash, whisk until it’s completely smooth, then add a little more. Once it’s all incorporated, keep whisking or stirring constantly. You’ll see it start to thicken beautifully. Let it come to a gentle bubble and thicken enough to coat the back of a spoon. This is your sign that it’s ready!
- Bring It All Together: Take the saucepan off the heat. Now, stir in your superstar turkey and all those frozen veggies. The residual heat from the sauce is enough to thaw the veggies perfectly, so they don’t get overcooked and mushy in the oven. Give it one big, final, joyful stir. Look at that! You just made the most incredible filling.
- Crust Assembly: Gently fit one pie crust into your 9-inch pie dish. Don’t stretch it—just let it slump naturally into the corners. Pour that glorious filling right in. Top it with the second crust, and crimp the edges together with a fork or your fingers to seal in all that goodness. Don’t forget to cut a few small slits in the top! This is non-negotiable—it lets the steam escape so your pie doesn’t explode or get a soggy top. I like to make a little design, like a small “T” for turkey.
- Bake to Golden Perfection: Slide your masterpiece (on its baking sheet!) into the preheated oven. Bake for 30-35 minutes. You’re waiting for that crust to be a deep, golden brown and the filling to be bubbly. You’ll hear it and see it peeking through the vents. Your kitchen will smell like heaven.
- The Hardest Part: The Wait: I know, I know. You want to dive right in. But trust me on this—let the pie cool on a wire rack for at least 10 minutes before you slice into it. This allows the filling to set up, so you get perfect, clean slices instead of a soupy mess. It’s a test of willpower, but so worth it.
How to Serve Your Masterpiece
Presentation is part of the fun! I love placing the whole pie right in the center of the table and letting everyone watch as I make that first crack into the crust—the collective “oooh” is the best sound. Serve up big, hearty wedges right onto plates. This pie is a full meal in itself, but if you want to gild the lily, a simple side of a crisp green salad with a sharp vinaigrette cuts through the richness beautifully. It’s also fantastic with a side of cranberry sauce for a little sweet and tangy reminder of the holidays.
Ride Your Own Flavor Wave: Fun Variations!
This recipe is a fantastic canvas for your creativity! Here are a few of my favorite ways to mix it up:
- Hearty Herb Upgrade: Stir in a tablespoon of fresh, chopped herbs like thyme, rosemary, or sage along with the turkey.
- Everything-but-the-Kitchen-Sink: Got other leftovers? Toss in some diced potatoes, green beans, or even a handful of chopped mushrooms!
- Biscuit-Topped Bliss: Skip the top crust and instead, top the filling with drop biscuits or canned, flaky layers biscuits before baking.
- Cheesy Dream: For the ultimate comfort, stir a half-cup of shredded sharp cheddar or gruyère cheese into the filling right before you pour it into the crust.
- From-Scratch Crust: Feeling fancy? Use my go-to all-butter pie crust recipe for the most incredible, flaky, flavorful shell.
Isla’s Chef’s Notes & Kitchen Confessions
This recipe has been my trusty companion for years, and it’s evolved with me. The first time I made it on my own in my first apartment, I was so nervous I forgot the celery seed and over-salted it. My roommates still ate the whole thing, but I learned a valuable lesson: taste as you go! Over time, I’ve learned that the beauty of a pot pie is its flexibility. It forgives your mistakes and celebrates your improvisations.
One of my favorite kitchen stories involves this very pie. I once made it for a new neighbor who had just had a baby. In my sleep-deprived state (from celebrating, not a baby!), I accidentally used a bag of frozen mixed berries instead of mixed vegetables. I realized my mistake just as I was about to pour it in! We had a good laugh, I made a frantic grocery run, and the final pie was delivered with a note that said, “Hopefully this one is more savory than sweet!” It’s a reminder that we’re all human in the kitchen, and sometimes the best stories come from the little mishaps.
Your Pot Pie Questions, Answered!
I’ve gotten a lot of questions about this recipe over the years, so here are the answers to the most common head-scratchers.
Q: My filling came out a bit runny. What happened?
A: This usually means the roux (the flour-butter mixture) wasn’t cooked long enough, or the sauce didn’t come to a full bubble to activate the thickening power of the flour. Don’t worry! Next time, make sure to cook the roux for a full 60 seconds and let the sauce bubble and thicken noticeably before adding the turkey and veggies. If it happens again, you can mix a tablespoon of cornstarch with two tablespoons of cold broth and stir it into the simmering sauce to thicken it up quickly.
Q: Can I make this ahead of time?
A: Absolutely! You can assemble the entire pie, cover it tightly, and keep it in the fridge for up to 24 hours before baking. You might need to add 5-10 extra minutes to the baking time since it’s going into the oven cold. You can also freeze the unbaked pie for up to 3 months. Bake from frozen, adding about 20-25 minutes to the baking time, and tent the crust with foil if it browns too quickly.
Q: The bottom of my crust is soggy. How can I prevent that?
A> This is a classic pot pie predicament! My two best tricks are: 1) Blind Bake: Bake the bottom crust for about 10 minutes at 425°F before adding the filling. Let it cool slightly. 2) Egg Wash: Brush the bottom crust with a thin layer of beaten egg white before adding the filling. This creates a barrier that keeps the crust crisp. The baking sheet trick also helps by ensuring heat gets to the bottom of the pan quickly.
Q: I don’t have a pie dish. Can I use something else?
A> Of course! A 9-inch deep-dish pie plate is ideal, but a 10-inch cast-iron skillet, an 8×8 or 9×9 square baking dish, or even individual ramekins work wonderfully. If using a different dish, you may need to adjust the amount of filling or the baking time slightly.
Nutritional Info (Approximate)
Servings: 6 | Prep Time: 20 minutes | Cook Time: 35 minutes
Calories: ~400 | Protein: 20g | Carbohydrates: 32g | Fat: 22g
Please note: These values are estimates based on the ingredients used and can vary significantly with substitutions.