Loaded Bundt Pan Nachos – The Party Ring Everyone Will Love!
Hey there, flavor friend! Isla here from BiteTide. Have you ever been to a party, seen a platter of nachos, and felt that tiny pang of disappointment? You know the one. All the good stuff—the melty cheese, the perfectly seasoned beef, the zesty jalapeños—is piled gloriously in the center, leaving the edges with, well, a whole lot of lonely, topping-less chips. It’s a snack-time tragedy I’ve witnessed one too many times.
Well, my friends, I’m here to declare that those days are officially over. Get ready to meet the ultimate party hero, the conversation starter, the snack that will have everyone gathering ‘round in awe: Loaded Bundt Pan Nachos!
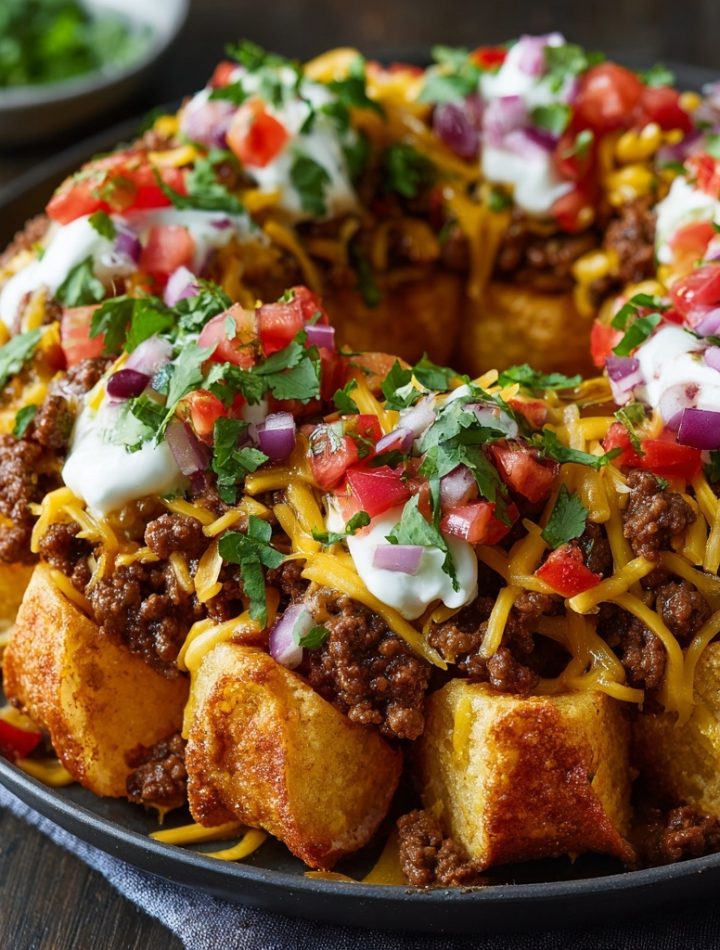
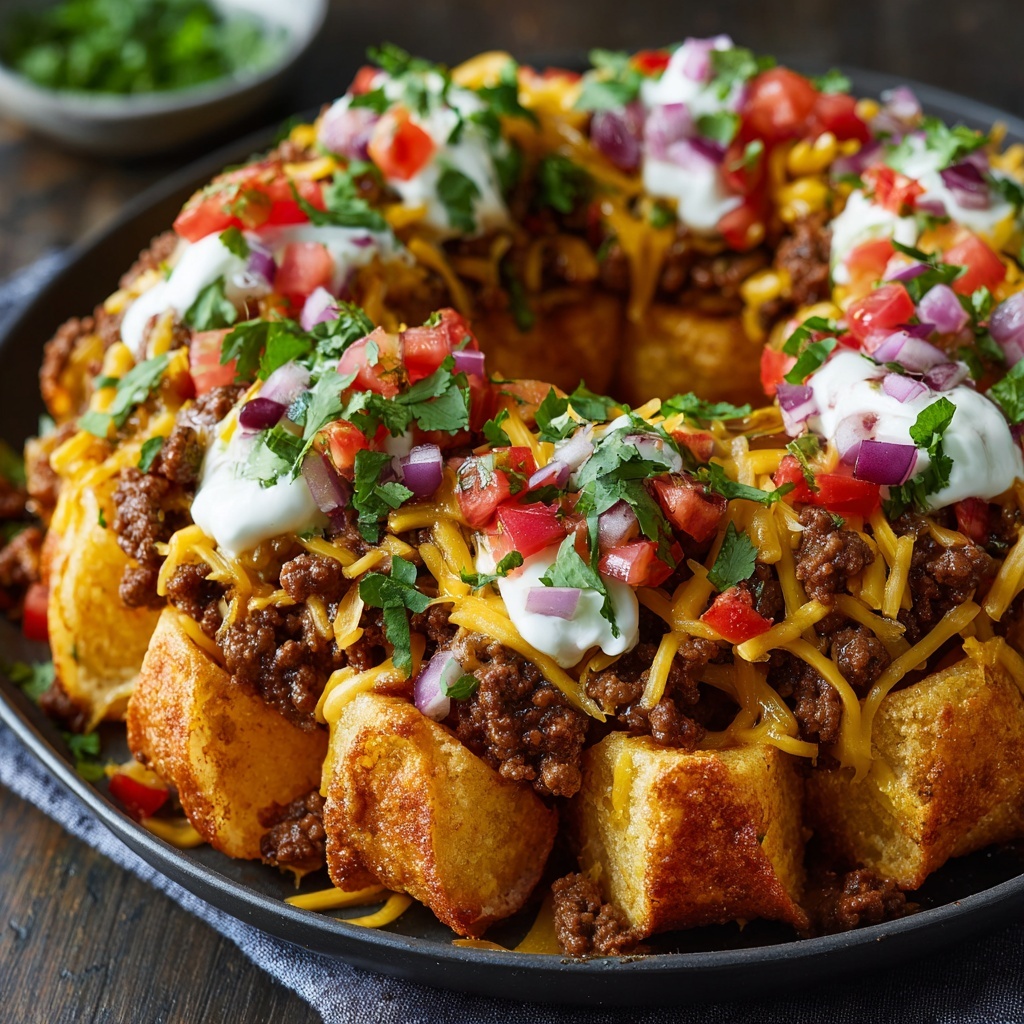
We’re taking all the bold, craveable Tex-Mex flavors we adore and baking them into a magnificent, shareable ring of deliciousness. Imagine: a golden crown of tortilla chips, each one perfectly coated in melted cheese and savory beef, with every single bite delivering the perfect ratio of crunch to topping. No more fighting over the “good spot.” This is snack democracy in action, and it’s as fun to make as it is to eat. So, preheat your oven, grab your favorite Bundt pan, and let’s turn your next get-together into a full-blown fiesta!
The Night We Almost Lost the Nachos (And Found a Better Way)
This recipe was born out of pure, unadulterated chaos—the kind I fully embrace in my kitchen. It was my best friend’s game-day party, and I was on snack duty. I had assembled a mountain of nachos on a standard baking sheet, feeling pretty proud of myself. But as I carried my masterpiece from the kitchen to the living room, it happened. A slight wobble, a dramatic slide, and a near-catastrophic nacho avalanche that left my heart pounding.
I saved the nachos that day (with some creative spatula work and a prayer), but the experience stuck with me. I started dreaming of a sturdier, more stable way to serve this crowd-pleaser. Later that week, while baking a lemon Bundt cake, it hit me. The pan! That beautiful, ring-shaped vessel was the answer. It would contain the chaos, ensure even distribution, and look absolutely stunning on the table. The first time I inverted that cheesy, beefy wonder onto a platter and heard the collective “Ooooh!” from my friends, I knew we had a winner. It’s a recipe built for real life, where a little ingenuity makes everything more fun and a whole lot less messy.
Print
Loaded Bundt Pan Nachos : The Party Ring Everyone Will Love!
- Total Time: 30 mins
- Yield: 6 servings 1x
Description
Bring some bold Tex-Mex flair to your next get-together with these epic Bundt Pan Nachos! Shaped like a savory crown and loaded with seasoned beef, melty cheese, and fresh toppings, this dish is as show-stopping as it is delicious. One pan, tons of flavor—let’s turn snack time into a fiesta!
Ingredients
½ lb lean ground beef
½ cup diced yellow onion
½ tsp salt
¼ tsp black pepper
¼ cup water
2 tbsp taco seasoning
8 oz Colby Jack cheese, shredded
12 oz tortilla chips
Sour cream (for garnish)
Diced tomatoes (for garnish)
Fresh cilantro (for garnish)
Instructions
Cook the Beef: In a skillet over medium heat, cook ground beef and diced onion until browned. Add salt, pepper, taco seasoning, and water. Simmer until thickened.
Assemble in Bundt Pan: In a greased Bundt pan, layer tortilla chips, beef mixture, and cheese. Repeat layers until ingredients are used up.
Bake: Preheat oven to 375°F (190°C). Bake the nacho ring for 10–15 minutes, until the cheese is melted and bubbly.
Unmold & Serve: Carefully invert onto a serving plate. Top with sour cream, diced tomatoes, and fresh cilantro.
Enjoy immediately with your favorite salsa or guac!
- Prep Time: 15 mins
- Cook Time: 15 mins
- Category: Snack
Gather Your Flavor Crew: What You’ll Need
Here’s everything you need to build your very own nacho crown. Don’t stress about having the exact brands—this is about using what you love and what you have!
- ½ lb Lean Ground Beef: I like 90/10 for a great flavor without too much grease. Feel free to swap in ground turkey, chicken, or even a plant-based crumble for a fantastic vegetarian version!
- ½ cup Diced Yellow Onion: This is our aromatic base, adding a touch of sweetness and depth. No yellow onion? A white or red onion will work in a pinch.
- ½ tsp Salt & ¼ tsp Black Pepper: The fundamental flavor boosters. We’re seasoning every layer for maximum tastiness.
- ¼ cup Water: This little splash helps our taco seasoning cling to the beef and creates a saucy, cohesive mixture that won’t dry out in the oven.
- 2 tbsp Taco Seasoning: The soul of the operation! Use your favorite store-bought packet, or be a superstar and whip up your own blend with chili powder, cumin, paprika, and a pinch of garlic powder.
- 8 oz Colby Jack Cheese, Shredded: I adore Colby Jack for its perfect meltiness and mild flavor. Chef’s Hack: Always shred your own cheese! Pre-shredded bags contain anti-caking agents that can make the melt less smooth and glorious.
- 12 oz Tortilla Chips: Go for a sturdy, restaurant-style chip here. The thick ones can stand up to the weight of the toppings without turning to mush. A hint of lime flavor is a delicious bonus!
- Sour Cream, Diced Tomatoes & Fresh Cilantro (for garnish): The fresh, cool, and colorful finishing touches that make the dish pop. This is where you can really get creative!
Let’s Build the Ultimate Snack Ring: Your Step-by-Step Guide
Ready to create some magic? Follow these steps, and you’ll be a Bundt Pan Nacho pro in no time. I’ve sprinkled in my favorite chef hacks to make the process even smoother.
- Cook the Beef to Perfection: Grab a large skillet and place it over medium heat. Add your ground beef and diced onion. Cook, breaking the meat up with a wooden spoon, until it’s beautifully browned and the onion is soft and translucent. This usually takes about 6-8 minutes. Now, drain off any excess grease—this is the secret to non-greasy nachos! Return the skillet to the heat and stir in the salt, pepper, taco seasoning, and that crucial ¼ cup of water. Let it simmer for 2-3 minutes until the mixture thickens slightly and your kitchen smells incredible. Chef’s Tip: Taste your beef mixture now! This is your chance to adjust the seasoning. Want more heat? Add a pinch of cayenne. Love garlic? A minced clove would be heavenly here.
- The Art of Assembly: While the beef is cooking, give your Bundt pan a quick spritz with non-stick cooking spray. This is our insurance policy for a flawless release later. Now, let’s start layering! Begin with a solid base of tortilla chips, creating an even layer on the bottom of the pan. Don’t be shy about breaking a few chips to fill in any gaps. Next, spoon a generous portion of the seasoned beef mixture over the chips, followed by a hearty handful of your freshly shredded Colby Jack cheese. Repeat the layers: chips, beef, cheese, until you’ve used up all your ingredients, ending with a final, glorious blanket of cheese. Chef’s Hack: Gently press down on the layers as you go. This helps everything compact and stick together, creating a stable ring that won’t crumble when you flip it.
- Bake Until Bubbly & Golden: Preheat your oven to 375°F (190°C). Once it’s hot and ready, carefully place your loaded Bundt pan in the center of the oven. Bake for 10-15 minutes. You’re looking for the cheese to be completely melted, bubbly, and just starting to get those gorgeous golden-brown spots on top. Your house will smell like a gourmet Mexican restaurant, and your family will probably start hovering. This is a good sign!
- The Grand Reveal (Unmolding!): This is the most thrilling part! Using oven mitts, carefully remove the hot pan from the oven. Place a large, sturdy serving platter upside-down over the top of the Bundt pan. Now, with confidence (and those mitts on!), grab the platter and the pan together and flip the whole thing over in one swift, steady motion. Give the Bundt pan a little gentle shake, and then slowly lift it straight up to reveal your magnificent nacho ring. Be prepared for applause! Chef’s Tip: If a few chips stick, don’t panic! Just use a spatula to gently pry them loose and tuck them back into the ring. It’s all part of the rustic, homemade charm.
- Top It Off & Serve Immediately: Now for the finishing touches! Dollop cool, creamy sour cream all over the warm ring. Sprinkle on the bright, juicy diced tomatoes and a flurry of fresh, chopped cilantro. I like to add a final squeeze of lime juice over everything for a zesty kick. Serve it right away while the chips are still crisp and the cheese is gloriously gooey!
How to Serve Your Nacho Masterpiece
Presentation is part of the fun! Place your Bundt Pan Nacho ring right in the center of the table as the star of the show. I love serving it with small bowls of extra toppings on the side so everyone can customize their own section: think chunky salsa, smooth guacamole, pickled jalapeños for heat, and a bowl of black beans. It’s the ultimate interactive snack experience. Don’t forget plenty of napkins and ice-cold drinks—a crisp lager or a tangy margarita is the perfect partner for this flavor fiesta!
Ride Your Own Flavor Wave: Recipe Variations
The beauty of this recipe is its versatility. Make it your own with these simple twists!
- Fiesta Chicken: Swap the beef for 2 cups of shredded rotisserie chicken mixed with the taco seasoning and a splash of water.
- Fully Loaded Veggie: Skip the meat and use a mix of black beans, corn, and sautéed bell peppers for a vibrant vegetarian option.
- Spicy Southwest: Use a Pepper Jack cheese blend and mix a diced jalapeño or two into the beef while it’s cooking for a serious kick.
- Breakfast Nachos: Turn it into brunch! Use a base of sturdy potato tots, top with scrambled eggs, cooked breakfast sausage, and a blend of cheddar and Monterey Jack cheese.
- Pizza Ring: Swap the taco seasoning for Italian seasoning, use pepperoni slices and cooked Italian sausage, and top with mozzarella. Serve with marinara for dipping!
Isla’s Chef Notes & Kitchen Confessions
This recipe has become my go-to for pretty much every gathering, and it’s evolved in the best ways. The first time I made it, I was so nervous about the flip that I practiced with an empty pan! Now, it’s second nature. One of my favorite kitchen memories is of my nephew, who is usually skeptical of “mixed-up” food, devouring three helpings because he thought the ring shape was the coolest thing he’d ever seen.
My biggest piece of advice? Don’t wait for a party. I’ve made a half-batch of this just for myself and my partner on a lazy Friday movie night. It’s that easy and that satisfying. The recipe is a template for joy—so play with it, make it yours, and most importantly, have fun with it. The occasional happy dance when it comes out of the pan perfectly is always encouraged.
Nacho Questions? I’ve Got Answers!
Let’s tackle some common questions to ensure your nacho ring is a flawless success.
Q: My chips got a little soft. How can I keep them extra crispy?
A: This is the number one question! The key is assembly speed and oven temperature. Make sure your beef mixture isn’t piping hot when you layer it—let it cool for a few minutes. Also, ensure your oven is fully preheated so the cheese melts quickly without steaming the chips. Using extra-sturdy chips is a game-changer here!
Q: Can I make this ahead of time?
A: You can do some prep to make life easier! You can cook the beef mixture up to two days in advance and keep it stored in the fridge. You can also shred your cheese ahead of time. But for the best texture, I highly recommend assembling and baking the whole ring just before you want to serve it. That perfect chip crunch is worth the last-minute effort!
Q: What if I don’t have a Bundt pan?
A: No Bundt pan, no problem! You can create a “nacho ring” free-form on a parchment-lined baking sheet. Just arrange your chips in a large circle, build your layers, and bake as directed. It won’t have the same defined ring shape, but it will still have that amazing 360-degree topping access!
Q: Any tips for getting it out of the pan without breaking?
A> Absolutely! First, don’t skimp on the non-stick spray. Second, while the ring is still hot from the oven, take a thin knife or a small offset spatula and gently run it around the outer and inner edges of the pan to loosen any cheese that might be stuck. The confident flip is also crucial—no hesitation!
Nutritional Information (Estimated Per Serving)
Disclaimer: This is an estimated breakdown for 8 servings, based on the ingredients used. Values can vary based on specific brands and toppings.
- Calories: ~310
- Protein: 15g
- Fat: 18g
- Carbohydrates: 22g
Prep Time: 15 mins | Cook Time: 15 mins | Total Time: 30 mins | Servings: 6-8 people