Why Settle for the Box When You Can Bake Magic?
Hey flavor chaser! Isla here from BiteTide, and I’ve got a confession: I’m a recovering Pop-Tart addict. You know those mornings—stumbling into the kitchen, ripping open that crinkly foil, and toasting those sugar-dusted rectangles until they’re just shy of volcanic? Yeah, I lived for that… until I realized homemade versions exist. And friends, once you taste a warm, flaky, cinnamon-spiced pop-tart fresh from your oven, you’ll never look at that cardboard box the same way.
These aren’t just pastries—they’re edible nostalgia with a serious upgrade. Imagine buttery layers shattering like autumn leaves, revealing molten brown sugar-cinnamon lava, all crowned with a crackly cinnamon glaze. They’re the love child of a croissant and your favorite childhood breakfast, and they’re easier than you think! We’re talking real ingredients (no unpronounceable preservatives), crave-worthy textures (goodbye, stale pastry!), and that unbeatable homemade pride. Perfect for slow Sundays, brunch showstoppers, or “I survived parenting” rewards. Ready to make your kitchen smell like a cinnamon roll hug? Let’s bake!
A Pop-Tart Epiphany & My Grandma’s Rolling Pin
My obsession started in my grandma’s seaside kitchen. She’d never touch a toaster pastry—”Sugar in foil? Pah!”—but she adored cinnamon anything. Every fall, she’d bake these incredible hand pies with apples and cinnamon from her spice drawer (which smelled like heaven and mystery). One rainy day, 10-year-old me had a revelation: “What if we made Pop-Tarts… but like YOUR pies, Grandma?”
She chuckled, flour dusting her apron like snow. “Alright, sprite. But we do it proper.” We rolled buttery dough thicker than the boxed version, mixed dark brown sugar with enough cinnamon to make our noses tingle, and glazed them with a vanilla-kissed icing. That first bite? Life-changing. The filling oozed onto my fingers, the crust shattered delicately, and the glaze set with a gentle crunch. Grandma winked: “See? Real food beats foil.” Decades later, whenever I roll out this dough, I swear I feel her guiding my hands—and I know she’d approve of these brown sugar beauties.
Print
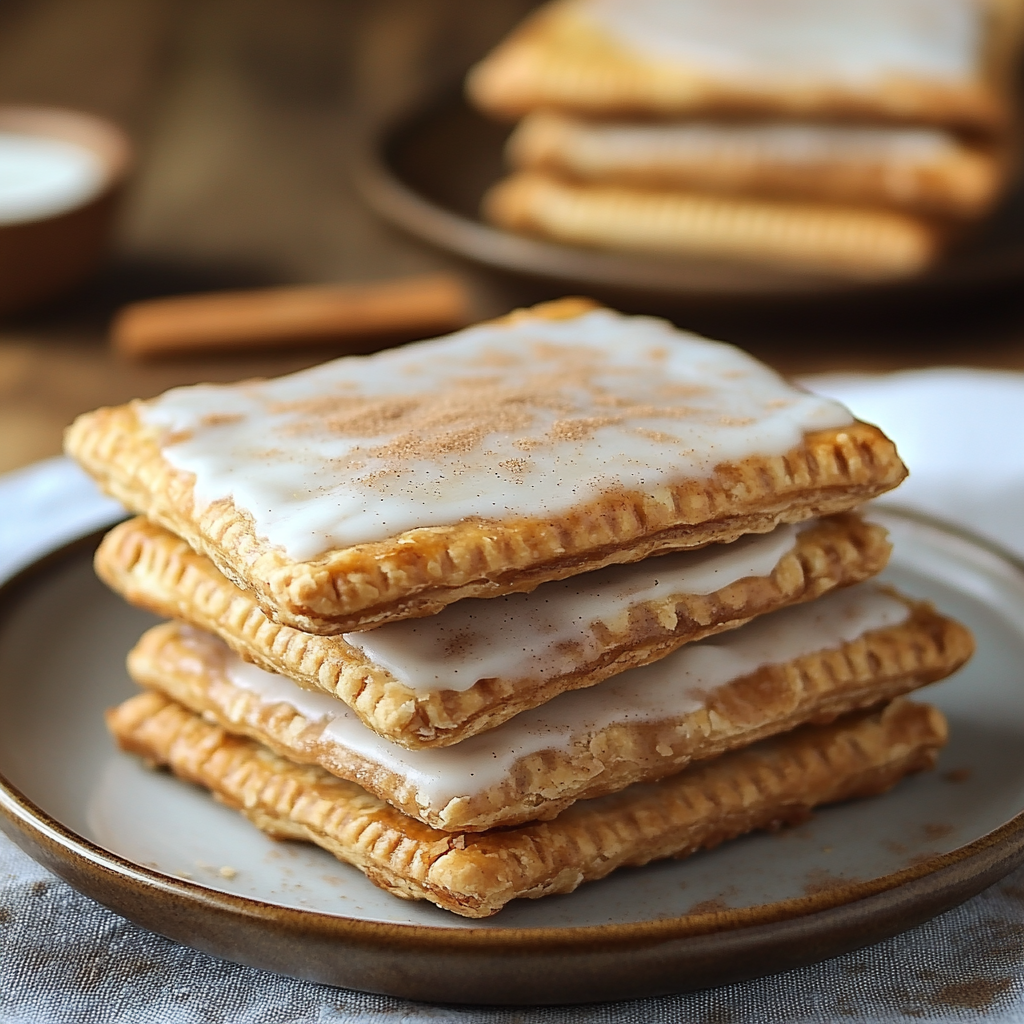
Homemade Frosted Brown Sugar Cinnamon Pop-Tarts
- Total Time: 56 minute
- Yield: Makes ~8 Pop-Tarts
Description
Forget the box—these homemade pop-tarts are buttery, flaky, and bursting with rich brown sugar cinnamon flavor. Topped with a cinnamon glaze that sets just right, they taste like childhood mornings—but better. Whether you’re baking for brunch, dessert, or a nostalgic treat, these are pure comfort in every bite.
Ingredients
For the Dough:
2½ cups (313g) all-purpose flour, plus extra for dusting
2 tsp granulated sugar
1 tsp salt
1 cup (226g) unsalted butter, chilled & cubed
½ cup (120ml) ice water (add more if needed)
For the Filling:
½ cup (100g) packed light or dark brown sugar
2 tsp ground cinnamon
1 tbsp (8g) all-purpose flour
Egg Wash:
1 large egg + 2 tsp milk (whisked together)
For the Glaze:
¾ cup (90g) confectioners’ sugar, sifted
1 tbsp (15ml) milk (plus more as needed)
½ tsp ground cinnamon
¼ tsp pure vanilla extract
Instructions
Make the Dough:
In a large bowl, whisk flour, sugar, and salt.
Cut in chilled butter with a pastry cutter or fork until crumbly.
Slowly add ice water, mixing until dough comes together.
Divide dough in half, shape into discs, wrap, and chill for 1 hour.
Prepare Filling:
Mix brown sugar, cinnamon, and flour in a small bowl.
Roll & Assemble:
On a floured surface, roll each dough disc to ⅛-inch thickness. Cut into rectangles (approx. 3×4 inches).
Place half of the rectangles on a lined baking sheet. Spoon filling into the center (about 1–1½ tbsp).
Brush edges with egg wash, then top with remaining dough pieces. Press edges with a fork to seal.
Chill assembled pop-tarts in the fridge for 15–20 minutes.
Bake:
Preheat oven to 375°F (190°C). Brush tops with remaining egg wash.
Bake 22–26 minutes or until lightly golden. Cool completely.
Make the Glaze:
Mix all glaze ingredients until smooth. Add more milk for a thinner consistency if needed.
Spoon glaze over cooled pop-tarts and let set.
- Prep Time: 1 hr (plus chill)
- Cook Time: 25 mins
- Category: Dessert
Nutrition
- Calories: ~320
- Sugar: 20g
- Fat: 16g
- Carbohydrates: 42g
- Protein: 3g
Ingredients: Your Flavor Toolkit
Makes 8 glorious pop-tarts
- All-purpose flour (2½ cups / 313g): The backbone! Spoon & level it—don’t scoop or your dough gets tough. Chef tip: Freeze your flour for 10 mins for extra flakiness!
- Granulated sugar (2 tsp) & salt (1 tsp): Sugar balances; salt amplifies flavor. Use fine sea salt if you have it.
- Unsalted butter (1 cup / 226g), CHILLED & cubed: Non-negotiable cold! European-style butter (like Kerrygold) = next-level richness. Vegan? Swap equal amounts plant-based butter (freeze first!).
- Ice water (½ cup / 120ml): Key word: ICE. Add 1 tsp at a time after ½ cup—dough shouldn’t be sticky.
- Brown sugar (½ cup / 100g), packed: Dark brown for deeper molasses notes, light for milder sweetness. Pack it tight!
- Ground cinnamon (2 tsp + ½ tsp for glaze): Use fresh, fragrant cinnamon. Cassia cinnamon (common in stores) has bold spice; Ceylon is sweeter.
- Egg + milk (for wash): Gives that golden shine. Vegan? Use plant milk + maple syrup.
- Confectioners’ sugar (¾ cup / 90g), sifted: Lumps are glaze enemies! Sift religiously.
- Milk (for glaze) & vanilla extract (¼ tsp): Whole milk = creamiest glaze. Almond extract? Fun twist!
Step-by-Step: Let’s Build Some Magic!
1. Make the Dough (Channel Your Inner Pastry Chef): Whisk flour, sugar, and salt in a big bowl. Now, attack that butter! Toss cubes in flour, then use a pastry cutter (or two forks) to cut butter into pea-sized crumbs. Hack: Grate frozen butter for faster results! Drizzle ice water slowly, mixing with a fork until shaggy clumps form. Squeeze a bit—if it holds, stop! Divide dough into two discs, wrap in plastic, and chill 1 hour (or overnight). Why chill? Relaxed gluten = tender layers.
2. Filling Fun: Mix brown sugar, cinnamon, and flour (this thickens the goo!). Taste—want more spice? Add ½ tsp cinnamon. Set aside.
3. Roll & Assemble (The Art of Pie Pockets): Flour your surface and rolling pin. Roll one dough disc to ⅛” thick—about a 9×12″ rectangle. Cut into 8 rectangles (3×4”). Place 4 on a parchment-lined baking sheet. Spoon 1-1½ tbsp filling in the center, leaving a ½” border. Brush edges with egg wash—this is your “glue”! Top with second dough rectangles. Press edges with a fork to seal. Critical step: Chill 15 mins! This prevents melting butter from leaking.
4. Bake to Golden Bliss: Preheat oven to 375°F (190°C). Brush pop-tart tops with remaining egg wash—hello, shine! Bake 22-26 mins until puffed and golden. Chef secret: Rotate pan halfway for even browning! Cool completely on a rack—glaze won’t set on warm pastries.
5. Glaze Glory: Whisk sifted powdered sugar, cinnamon, vanilla, and 1 tbsp milk. Want thick drizzle? Stop here. Prefer crackly-thin? Add milk ½ tsp at a time. Spoon over cooled pop-tarts. Let set 20 mins—if you can wait!
Serving: Where Nostalgia Meets Fancy
Serve these warm (reheat 10 secs in microwave) or room temp. Stack ’em high on a vintage plate for brunch drama. Kid appeal? Cut into “soldiers” (strips). Fancy upgrade: Dust with extra cinnamon or flaky salt. Pair with cold milk, hot coffee, or—my fave—a scoop of vanilla ice cream for “pop-tart à la mode.” Breakfast? Dessert? Yes.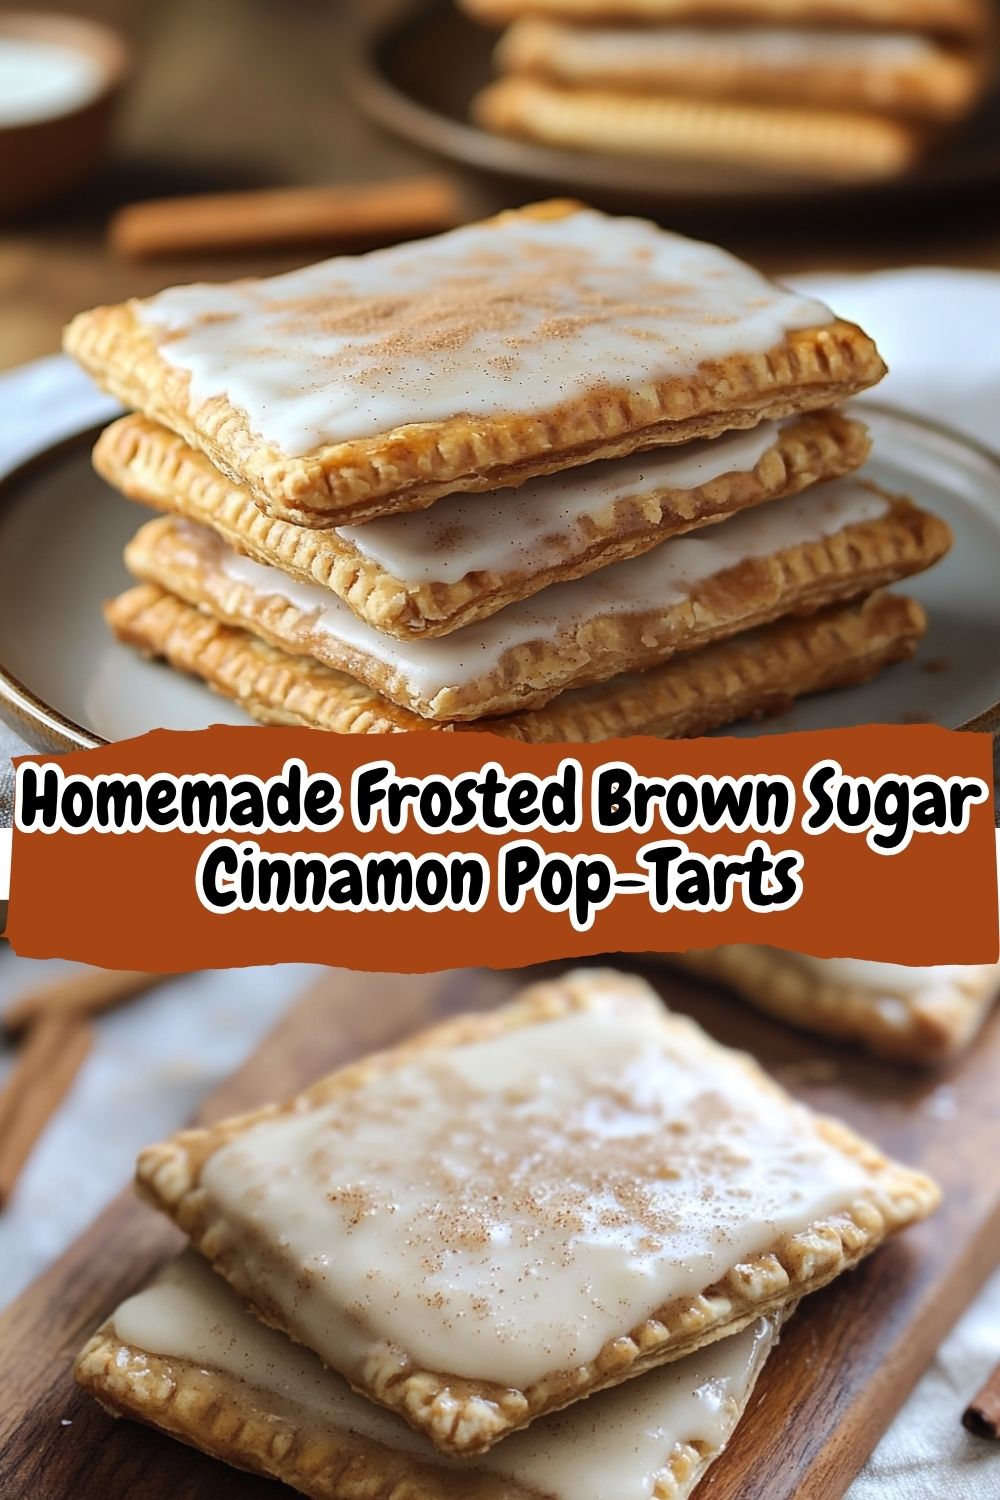
Switch It Up: Your Pop-Tart Playground
- Apple Cinnamon: Swap filling for ½ cup finely diced apples + 1 tsp lemon juice + extra cinnamon.
- Maple Bacon: Add 2 tbsp real maple syrup to filling + crumble cooked bacon into glaze.
- Vegan Delight: Use plant butter, flax egg (1 tbsp ground flax + 3 tbsp water) for wash, and almond milk.
- Chocolate Craving: Mix 2 tbsp cocoa powder into filling + chocolate chips. Glaze with chocolate icing.
- Berry Burst: Replace cinnamon filling with ⅓ cup jam (raspberry or strawberry!). Poke steam holes in top crust before baking.
Isla’s Insider Scoop
Okay, truth bomb: My first batch leaked like a sieve. Why? I skipped the flour in the filling (it thickens the sugar!) and didn’t chill before baking. Learn from my mess! Over years, I’ve tweaked this: using European butter (higher fat = flakier layers), adding a pinch of cardamom to the filling for intrigue, and freezing unbaked pop-tarts for emergency cravings (bake frozen + add 5 mins). They’re also surprisingly sturdy—toss in lunchboxes or picnic baskets! My kids call them “Mom’s Magic Pockets,” and honestly? I’ll take it.
Pop-Tart Pitfalls? Solved!
Q: My filling bubbled out everywhere! Help!
A: Three culprits: 1) Overfilled pastries (stick to 1½ tbsp max!), 2) Forgot to leave ½” border, or 3) Skipped sealing edges with fork tines. Chill before baking—it solidifies butter.
Q: Dough is too sticky/hard to roll.
A: Sticky? Chill longer. Cracking? Let it sit 5 mins at room temp. Still tough? You overworked it. Next time, handle less!
Q: Can I make these ahead?
A: Absolutely! Unbaked pop-tarts freeze beautifully (3 months). Bake from frozen +5 mins. Baked? Store airtight 3 days or freeze 1 month—glaze after thawing.
Q: Glaze is too thick/thin.
A: Too thick? Add milk ½ tsp at a time. Too thin? Add sifted powdered sugar 1 tbsp at a time. Aim for “honey consistency.”
Nutritional Information (Per Pop-Tart)
Calories: ~320 | Fat: 16g | Carbs: 42g | Sugar: 20g | Protein: 3g
Note: These are treats—savored slowly! For lower sugar, reduce filling to 2 tsp per tart.
There you have it, friend! These homemade Brown Sugar Cinnamon Pop-Tarts are more than just a breakfast treat—they’re a nostalgic journey wrapped in flaky pastry and molten cinnamon goodness. Whether you’re savoring them with a cup of coffee or serving them up for brunch, they’re sure to impress. The beauty of this recipe is in its versatility—make them ahead, swap in your favorite fillings, or even bake from frozen when cravings strike. So, roll up your sleeves and create some homemade magic in the kitchen. Your future self will thank you (and so will your taste buds). Happy baking!