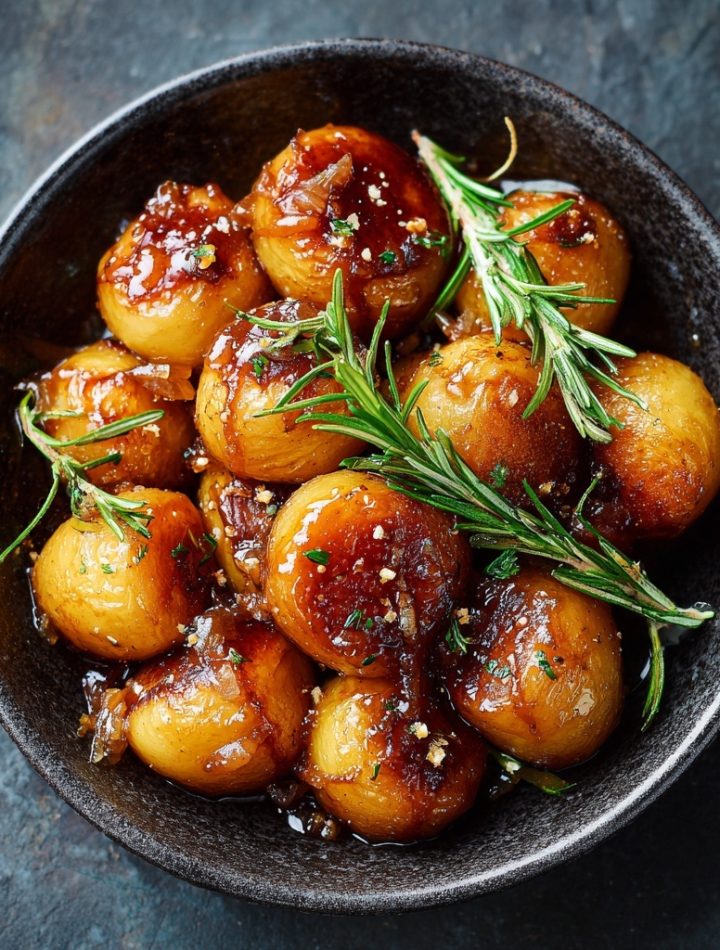
Forget Everything You Knew About Potatoes: Caramelised Magic is Here!
Hey there, flavor friend! Isla here, from my cozy kitchen to yours. Let’s be real for a second: the humble potato is the undisputed champion of comfort food. We mash them, we roast them, we fry them into golden perfection. But today? Today, we’re giving this everyday hero a glittering, glossy, show-stopping makeover. We’re talking about Nordic Caramelised Potatoes.
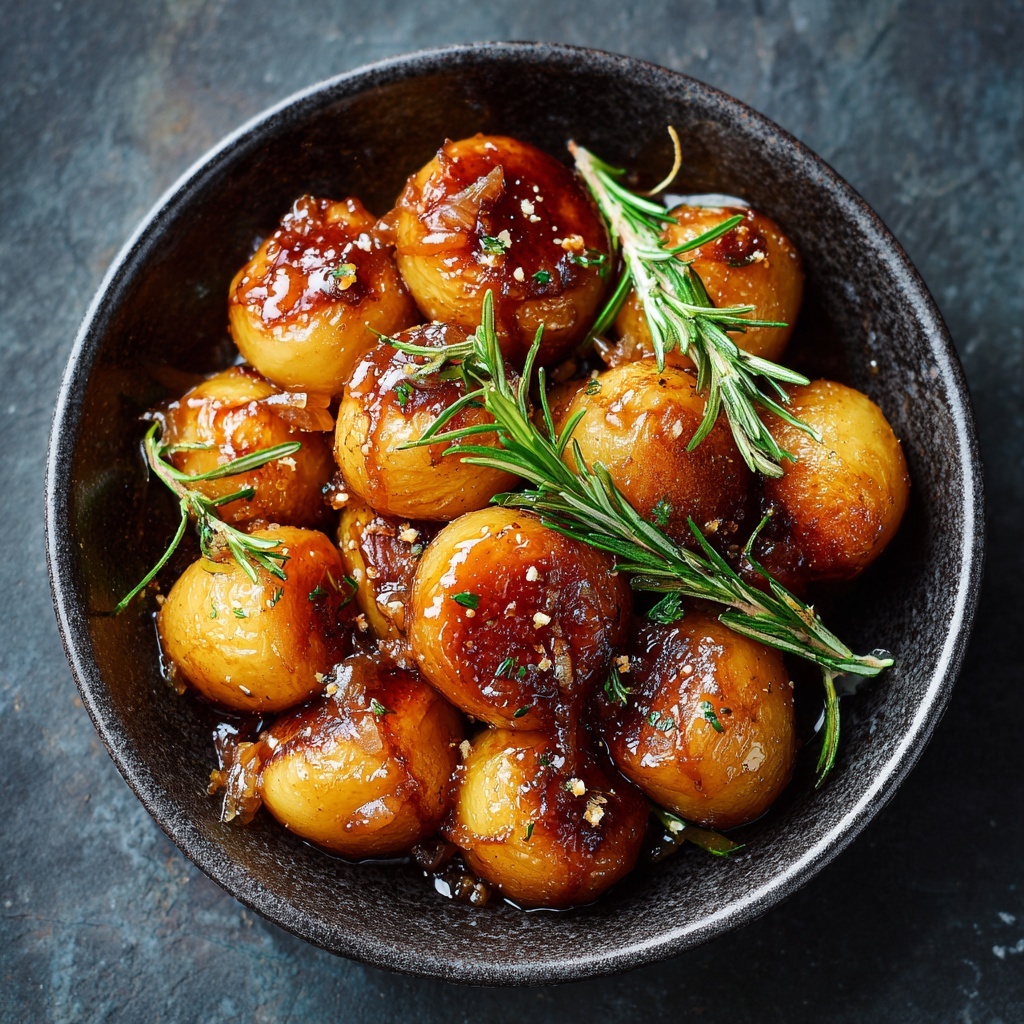
If you’ve never experienced these, your world is about to be rocked. Imagine this: tender, creamy potatoes, each one lovingly rolled in a buttery, golden caramel until they’re shimmering like little edible jewels. The result is a side dish that’s a perfect, beautiful contradiction—savory and sweet, simple yet sophisticated, rustic but utterly elegant. They’re the kind of thing that makes a simple roast chicken or a weeknight pork chop sit up straight and feel like a celebratory feast. This isn’t just a recipe; it’s a little jar of kitchen magic, and I am so excited to share it with you. So, tie on your favorite apron, and let’s create some together!
Print
Caramelised Potatoes
- Total Time: 25 mins
- Yield: 4 servings 1x
Description
This Nordic-inspired side dish is a sweet and savory twist that brings warmth and richness to your plate. Perfect alongside roast lamb or pork, these glossy, golden potatoes are a special-occasion favorite that turns an everyday meal into a memorable feast. Give your roast a little magic with this simple caramel glaze.
Ingredients
1 kg cooked potatoes (preferably small and peeled)
50 g butter or margarine
50 g sugar
Instructions
Use fully cooked and cooled potatoes—boiled the day before is ideal for texture.
In a large non-stick pan, melt the butter over medium heat.
Stir in the sugar and let it slowly melt and caramelize. Keep a close eye on it to avoid burning.
Add the potatoes to the pan and gently roll them in the caramel, coating them evenly.
Cook for 10–15 minutes, turning occasionally until they are golden and glossy.
Serve warm as a standout side to your roast.
- Prep Time: 10 mins
- Cook Time: 15 mins
- Category: Dinner
Nutrition
- Calories: 210
- Sugar: 10 g
- Fiber: 2 g
A Taste of a Danish Christmas (In My Very Non-Danish Kitchen)
My first bite of a caramelised potato was a complete and happy accident. I was visiting a friend’s family for a holiday party—one of those wonderfully chaotic, warm, house-full-of-people gatherings. The table was a glorious feast, but my eyes kept drifting to a bowl of these tiny, glistening, mahogany-hued potatoes. They looked like they’d been dusted with edible fairy dust.
I asked my friend’s Danish grandmother, Inge, what they were. Her eyes twinkled as she handed me a fork. “Brunede kartofler,” she said, in a voice that felt like a hug. “The best part of Christmas.” I took a bite, and my taste buds did a little happy dance I like to call the “Flavor Wave.” The sweet, buttery crust gave way to the soft, savory heart of the potato. It was a flavor combination I didn’t know I was missing. I spent the next ten minutes glued to Inge’s side in the kitchen, watching her gently roll the potatoes in the pan, her movements slow and practiced. She wasn’t just cooking; she was weaving a tradition. I left that party not just with a full belly, but with a recipe scribbled on a napkin and a mission to bring that same magical, cozy feeling to my own table, no special occasion required.
Gathering Your Golden Ingredients
One of the things I absolutely love about this recipe is its stunning simplicity. You only need three core ingredients to create pure magic. Let’s break them down, because each one plays a starring role.
- 1 kg (about 2.2 lbs) Cooked Potatoes – The foundation! I highly recommend using small, waxy potatoes like baby Yukon Golds, fingerlings, or small red potatoes. Their creamy, firm texture holds its shape beautifully and their thinner skins are less intrusive. Chef’s Insight: The secret weapon? Cooking and completely cooling them the day before. This firms them up, so they don’t fall apart when you’re rolling them in that hot caramel. It’s a game-changer for the perfect texture!
- 50 g (about 1/4 cup) Sugar – This is what creates that gorgeous, glossy shell. Plain white granulated sugar is perfect here—it melts evenly and gives us a clean, classic caramel flavor. Don’t be tempted to use brown sugar; its molasses content will burn more easily and muddy the beautiful golden color we’re after.
- 50 g (about 3.5 tbsp) Butter – Our rich, flavor-carrying co-star. Unsalted butter is my go-to, as it lets us control the salt level. The butter works with the sugar to create a smooth, liquid caramel that clings to every nook and cranny of our potatoes. Substitution Tip: For a dairy-free version, a high-quality plant-based margarine works wonderfully. Just avoid spreads with a high water content.
- A Pinch of Fine Sea Salt – (Not listed in the original, but trust me!) A tiny pinch added to the caramel works wonders to balance and heighten the sweetness, making the overall flavor pop even more.
Let’s Make Some Magic: The Step-by-Step Guide
Okay, team, this is where the fun begins! It’s not a difficult process, but it does require your attention. Caramel waits for no one, so let’s be present and embrace the sizzle and the shimmer. You’ve got this!
- Prep Your Potatoes: If you haven’t already, make sure your cooked potatoes are peeled and are at room temperature. If they’re a bit large, you can gently cut them in half to create a flat surface—this actually helps them get a beautiful color and makes them easier to turn. Chef’s Hack: Give them a very light pat with a paper towel to ensure they’re perfectly dry. Any excess moisture can cause the caramel to seize up or become gritty.
- Melt & Mingle (Butter & Sugar): Place a large, heavy-bottomed, non-stick skillet over medium heat. Add your butter and let it melt until it’s just starting to foam. Now, sprinkle the sugar evenly over the melted butter. Do not stir yet! Let the sugar and butter hang out and get to know each other for a minute. You’ll see the sugar start to dissolve at the edges. Little Chef Commentary: This is the moment of meditation. Watch the mixture closely. We’re looking for a light, bubbly, golden liquid, not a dark amber. It should smell nutty and sweet, not burnt.
- The Gentle Roll (Adding the Potatoes): Once your caramel is a lovely pale gold, it’s showtime! Carefully add your potatoes to the pan. I like to use a silicone spatula or wooden spoon to gently roll them around, ensuring each one gets a luxurious coat of the caramel. You’ll hear a satisfying sizzle—that’s the sound of flavor being made! Pro Tip: Don’t aggressively stir or toss them. We’re going for a gentle, rolling motion to coat them without breaking them apart.
- The Golden Glaze (Cooking to Perfection): Continue to cook the potatoes for 10-15 minutes, turning them occasionally. You’ll notice the caramel slowly darkening to a deep, rich, golden-brown and clinging tightly to the potatoes, creating that signature glossy shell. Chef’s Hack: If the caramel seems to be darkening too quickly in one spot, reduce the heat slightly. We want a slow and steady caramelization, not a race to the finish line!
- The Final Touch (Season & Serve): Once your potatoes are evenly coated and gleaming, turn off the heat. Sprinkle that tiny pinch of sea salt over the top and give the pan one last gentle roll to distribute it. This is the moment you’ll want to do your happy dance—your sauce (and your potatoes) have turned out just right!
Plating Your Golden Gems
Presentation is part of the fun! I love serving these directly from the warm skillet at the table for a rustic, family-style vibe. For a more elegant touch, transfer them to a warm serving platter and spoon any extra caramel from the pan right over the top. Scatter with a little fresh, finely chopped parsley or thyme for a pop of color that hints at the savory goodness inside. They are the absolute perfect partner for roast meats like lamb, pork, or a juicy chicken, but don’t overlook them next to a pile of simple greens—they’re the star that makes the whole plate shine.
Ride Your Own Flavor Wave: Fun Variations!
Once you’ve mastered the classic, the world is your caramel-covered oyster! Here are a few of my favorite twists:
- Herb-Infused: Add a few sprigs of fresh thyme or rosemary to the caramel as it melts for an aromatic, savory undertone.
- Spicy Sweet: For a subtle kick, add a pinch of cayenne pepper or a few cracks of black pepper to the sugar and butter.
- Maple & Bacon: Swap half the sugar for pure maple syrup and garnish the finished dish with crispy, crumbled bacon. Trust me on this one.
- Vegan Delight: Use plant-based margarine and serve with a sprinkle of flaky sea salt. It’s just as divine.
- Orange Zest Zing: Finely grate the zest of half an orange into the caramel at the very end for a bright, citrusy note that cuts through the richness.
Isla’s Chef Notes & Kitchen Confessions
This recipe has evolved in my kitchen more times than I can count. My first attempt was… a learning experience. Let’s just say I learned the hard way that high heat is the enemy of caramel! I ended up with a pan of bitter, blackened sugar and very sad, pale potatoes. It was a classic “hangry kitchen moment.” But that’s the beauty of cooking—every “mistake” is just a lesson in disguise.
Now, I see making these potatoes as a form of kitchen therapy. The slow, gentle roll, the mesmerizing change in color, the incredible smell that fills the house… it’s my happy place. I’ve made them for fancy dinner parties, casual weeknight wins, and even just for myself as the ultimate self-care side dish. Don’t save them for a special occasion; they are the occasion.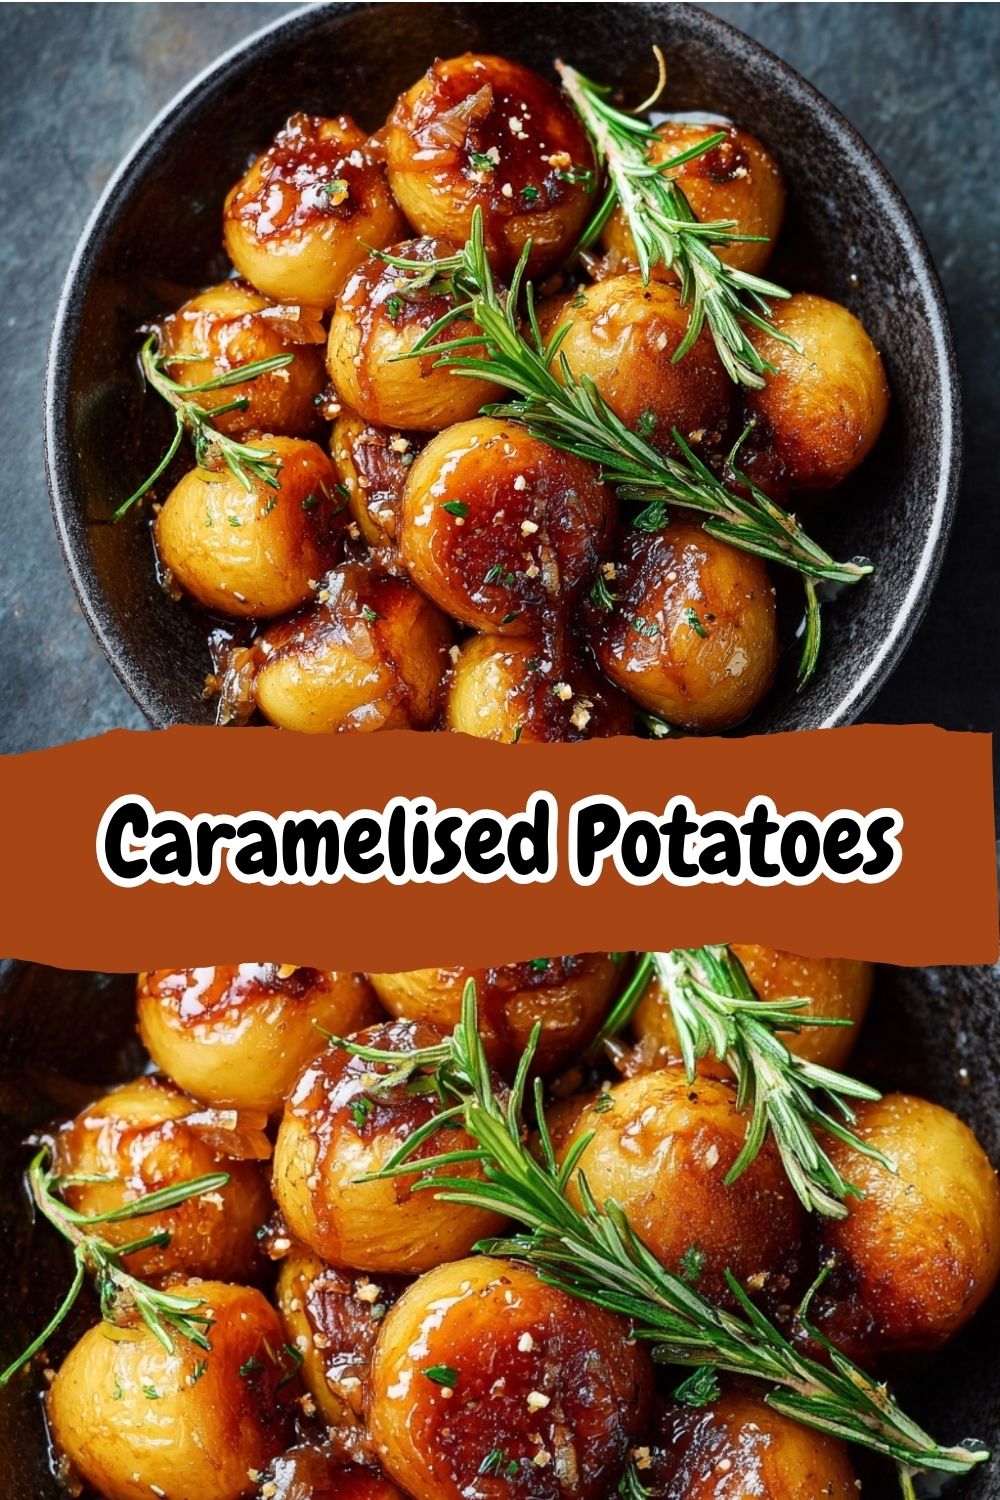
Your Caramelised Potato Questions, Answered!
I’ve gotten so many DMs about this recipe over the years, so let’s tackle the most common questions head-on!
Q: My caramel turned gritty and crystallized. What did I do wrong?
A: Ah, the dreaded sugar sand! This usually happens for one of two reasons: 1) The potatoes weren’t completely dry, introducing moisture that causes the sugar to crystalize. Or 2) You stirred the sugar and butter together too vigorously before the sugar had fully dissolved. The key is a gentle hand and dry potatoes!
Q: Can I make these ahead of time?
A: You can absolutely cook and peel the potatoes a day or two ahead—in fact, I recommend it! However, I don’t recommend caramelizing them more than an hour or so before serving. They are truly best fresh from the pan. You can keep them warm in a low oven for a short while, but the glaze can soften over time.
Q: My caramel is too dark and smells burnt. Can I save it?
A> Once caramel has burnt, there’s no saving it—it will be unpleasantly bitter. Your best bet is to carefully pour it out (into a heat-proof jar to cool, NOT down the drain!), wipe the pan clean, and start over. It happens to the best of us! Just lower the heat on your second attempt.
Q: Can I use frozen or canned potatoes?
A> I wouldn’t recommend it. They have a much higher water content and will almost certainly become mushy and waterlog your beautiful caramel. Starting with freshly boiled, firm, waxy potatoes is non-negotiable for the perfect texture.
A Quick Nutritional Glance
Please note: This is an approximate estimate based on the ingredients used and will vary with specific products and portion sizes.
Per Serving (approx.): Calories: 210 | Fat: 7g | Carbohydrates: 33g | Sugars: 10g | Fiber: 2g | Protein: 2g