
The Cozy, No-Fuss Old-Fashioned Chili You’ll Make on Repeat
Hey there, friend! Isla here, from my cozy kitchen to yours. Can you smell it? That rich, savory, slightly spicy aroma that seems to hug every corner of your home? That’s the magic of a simmering pot of old-fashioned chili. This isn’t just a meal; it’s a warm blanket on a chilly day, the star of the show on game day, and the ultimate answer to the “what’s for dinner?” question that somehow feels both incredibly impressive and wonderfully simple.
I’m a firm believer that the best recipes are the ones that become part of your story. They’re the ones you scribble notes on, the ones you argue with your cousins about (beans or no beans, anyone?), and the ones that make your kitchen smell like a place where everyone wants to gather. This classic chili recipe is exactly that. It’s packed with hearty ground meat, tender beans, and a blend of spices that creates a deep, complex flavor you’d swear took all day. But here’s our little secret: it’s gloriously unfussy.
So, tie on your favorite apron, grab your biggest, comfiest pot, and let’s dive in. We’re about to create a pot of pure comfort that’s bold, satisfying, and guaranteed to have everyone asking for seconds. Let’s make some memories, one delicious bite at a time.
Print
Old-Fashioned Chili Recipe
- Total Time: 1 hour 30 minutes
- Yield: 6 servings
Description
This chili is the kind that fills your kitchen with warmth and your bowl with bold, comforting flavor. Packed with ground meat, beans, and a rich blend of spices, it’s perfect for cozy nights, game days, or feeding a hungry crowd. A true classic with just the right kick.
Instructions
In a large pot or Dutch oven, brown the ground meat over medium heat. Drain excess fat.
Add onion and green peppers. Cook for 5–7 minutes until softened.
Stir in the diced tomatoes, tomato sauce, tomato paste, and water.
Add all the beans and seasonings (including baking soda). Stir until well combined.
Bring to a gentle boil, then reduce heat and let simmer uncovered for 45 minutes to 1 hour, stirring occasionally.
Taste and adjust seasoning if needed. Serve hot with toppings like cheese, sour cream, or green onions.
- Prep Time: 15 mins
- Cook Time: 1 hour 15 minutes
Nutrition
- Calories: 350
- Carbohydrates: 30g
- Protein: 28g
A Pot of Chili and a Side of Nostalgia
My love for this dish runs deep, right back to the windy, salt-kissed evenings of my coastal childhood. My dad, a man of few words but immense culinary intuition, was the Chili Master of our house. Every first truly cold weekend of autumn, he’d commandeer the kitchen. The ritual was always the same. I’d be his official “spice taster,” standing on a step-stool while he’d let me smell each jar before he poured—the earthy cumin, the smoky paprika, the fiery cayenne that made me giggle and pretend to breathe fire.
The best part was the “simmer watch.” He’d lift the lid every so often, letting that incredible steam billow out, and give the pot a slow, deliberate stir. “You have to let the flavors get to know each other, Isla,” he’d say in his low rumble. “You can’t rush a good conversation.” We’d sit there, just watching the pot bubble gently, talking about school, or fish, or nothing at all. That pot of chili was more than dinner; it was an hour of undivided attention, a lesson in patience, and the warm, beating heart of our home. It’s that exact feeling of connection and comfort I hope this recipe brings to your table.
Your Flavor Lineup: The Ingredients
Gathering your ingredients is the first step to chili success! Here’s everything you’ll need, plus a few of my favorite chef-y insights and swaps to make this recipe your own.
- 2 lb ground beef or turkey: I use 80/20 beef for the best flavor and juiciness, but lean beef or ground turkey works beautifully for a lighter option. For a next-level texture, try a mix of ground beef and spicy Italian sausage!
- 2 small green bell peppers, diced: They add a sweet, slightly bitter backbone and a wonderful texture. No green? Red, yellow, or orange bells are a colorful and slightly sweeter swap.
- 1 small yellow onion, chopped: The humble onion is the flavor foundation of so many great dishes, and chili is no exception. Its sweetness balances the spices perfectly.
- 2 (15 oz) cans diced tomatoes: These bring bright, tangy acidity and body. Don’t drain them! That liquid is part of the magic. Fire-roasted diced tomatoes are a fantastic upgrade for a smoky undertone.
- 1 (15 oz) can tomato sauce & 6 oz tomato paste: This dynamic duo creates our rich, thick base. The paste is a flavor powerhouse—cooking it for a minute or two with the veggies and meat deepens its sweetness and removes any “tinny” taste.
- 15 oz water: Just use the empty tomato sauce can to measure! This gets us to the perfect, spoon-coating consistency.
- 2 (15 oz) cans kidney beans, drained and rinsed: Classic chili beans! Rinsing them removes the excess sodium and that starchy canning liquid. Feel free to mix in pinto beans or black beans for a fun twist.
- The Spice Squadron: This is where your personality shines through!
- 3 tbsp chili powder: The main event! This blend of ground chiles and other spices gives chili its signature flavor.
- 2 tbsp garlic powder & 2 tbsp onion powder: These provide a consistent, mellow flavor that permeates the entire pot.
- 3 tbsp ground cumin: My absolute favorite. It’s earthy, warm, and absolutely essential for that authentic chili taste.
- 1 tbsp paprika: Adds a sweet pepper note and gorgeous red color. Smoked paprika is a game-changer here.
- 1 tsp chipotle powder & ½ tsp cayenne pepper: The heat crew! Chipotle brings smoke and a slow burn, while cayenne delivers a quicker kick. Adjust to your comfort zone!
- ½ tbsp salt & 1 tsp white pepper: Salt makes all the other flavors pop. White pepper has a sharper, different heat than black pepper that I love in chili.
- 1 tsp baking soda: I know, it sounds wild! This is my grandma’s secret weapon. A tiny bit of baking soda helps neutralize the acidity from the tomatoes, resulting in a smoother, richer, and less sharp flavor. You won’t taste it, I promise—you’ll just taste a more balanced, incredible chili.
Let’s Get Cooking: Your Step-by-Step Guide
Ready to create some magic? Follow these steps for a foolproof pot of chili, packed with my favorite kitchen hacks along the way.
- Brown the Meat: Grab your largest pot or Dutch oven—I love my enameled cast iron for this—and place it over medium heat. Crumble in your ground beef or turkey. Cook it until it’s nicely browned, breaking it up with your spoon as you go. Chef’s Tip: Don’t rush this step! Getting a good, caramelized sear on the meat builds a ton of foundational flavor. Once it’s browned, carefully drain off the excess fat. I like to leave a tablespoon or two behind for cooking the veggies.
- Sauté the Aromatics: Now, toss in your chopped onion and diced bell peppers. Give everything a good stir to coat the veggies in those delicious meaty juices. Let them cook for 5-7 minutes, until the onions turn translucent and the peppers have softened. You’ll hear a gentle sizzle and smell the most incredible aroma—this is the sound of flavor building!
- Wake Up the Tomato Paste: Push the meat and veggie mixture to the sides of the pot, creating a little clear space in the center. Plop your tomato paste right into that spot. Let it cook for a full minute, stirring just the paste itself. This “toasts” the paste, caramelizing its sugars and deepening its flavor dramatically. It’s a tiny step with a huge payoff!
- Combine the Pot: It’s time for the grand assembly! Pour in the diced tomatoes (with their juice), the tomato sauce, and the can of water. Now, add all the drained beans and every single one of those wonderful spices, including our secret weapon, the baking soda. Give it a massive, thorough stir, making sure you’ve scraped up any tasty bits from the bottom of the pot.
- The Simmer (The Most Important Step!): Bring your chili up to a gentle boil. You’ll see big, lazy bubbles breaking the surface. Now, reduce the heat to low, give it one more stir, and let it simmer uncovered for 45 minutes to 1 hour. Stir it occasionally to prevent sticking. Chef’s Tip: This is non-negotiable, friends! This simmering time is when the magic happens. The liquid reduces and thickens, the raw edge of the spices mellows and melds, and all the ingredients become one big, happy family. Don’t rush it!
- Taste and Triumph: After your simmer time is up, grab a spoon and taste your creation. This is your moment! Does it need another pinch of salt? A dash more cayenne? Adjust the seasoning to your liking. You are the master of your chili universe.
Let’s Dish It Up! Serving Suggestions
Now for the fun part—the toppings bar! I’m a firm believer that the toppings are what turn a great bowl of chili into an unforgettable experience. Set up a little station and let everyone build their own perfect bowl. My go-to lineup includes a big bowl of shredded sharp cheddar cheese, a dollop of cool sour cream (or Greek yogurt), a handful of fresh sliced green onions, and a pile of crunchy tortilla chips or Fritos for dipping and scooping. For a fresh finish, a little chopped cilantro or a squeeze of lime juice is absolutely divine.
Ride Your Own Flavor Wave: Recipe Variations
This recipe is a fantastic canvas for your creativity! Here are a few of my favorite twists:
- Smoky Mezcal Twist: Replace the water with strong brewed coffee and add a tablespoon of smoked paprika. It adds an incredible, deep, smoky complexity.
- Pumpkin Black Bean Chili: For a fall vibe, swap the kidney beans for black beans and stir in a cup of pure pumpkin puree with the tomatoes. It makes the chili so luxuriously creamy.
- White Chicken Chili: Go bean-free! Use ground chicken or turkey, replace the tomatoes with 2 cups of chicken broth, and use a blend of cumin, oregano, and a touch of coriander. Stir in a can of diced green chiles for a kick.
- Three-Bean Vegetarian Delight: Skip the meat and sauté an extra bell pepper and a diced zucchini. Use a mix of kidney, pinto, and black beans. You’ll never miss the meat!
Isla’s Chef Notes & Kitchen Confessions
This recipe has been a living, evolving thing in my kitchen for years. The version you see here is the one I’ve landed on after countless batches, a few happy accidents, and one infamous incident where I mistook the cayenne for paprika (we ate a lot of yogurt that night!). The baking soda trick was my grandma’s, and it’s the single best tip I’ve ever inherited.
I also firmly believe that chili is almost always better the next day. The flavors have more time to cozy up to each other in the fridge. So, if you have the willpower, make it a day ahead! And a funny story: I once brought this to a potluck in a slow cooker, and a very sweet, very serious man spent ten minutes trying to guess my “exotic secret ingredient.” He was stunned when I revealed it was just a pinch of baking soda. Sometimes, the simplest tricks are the most magical.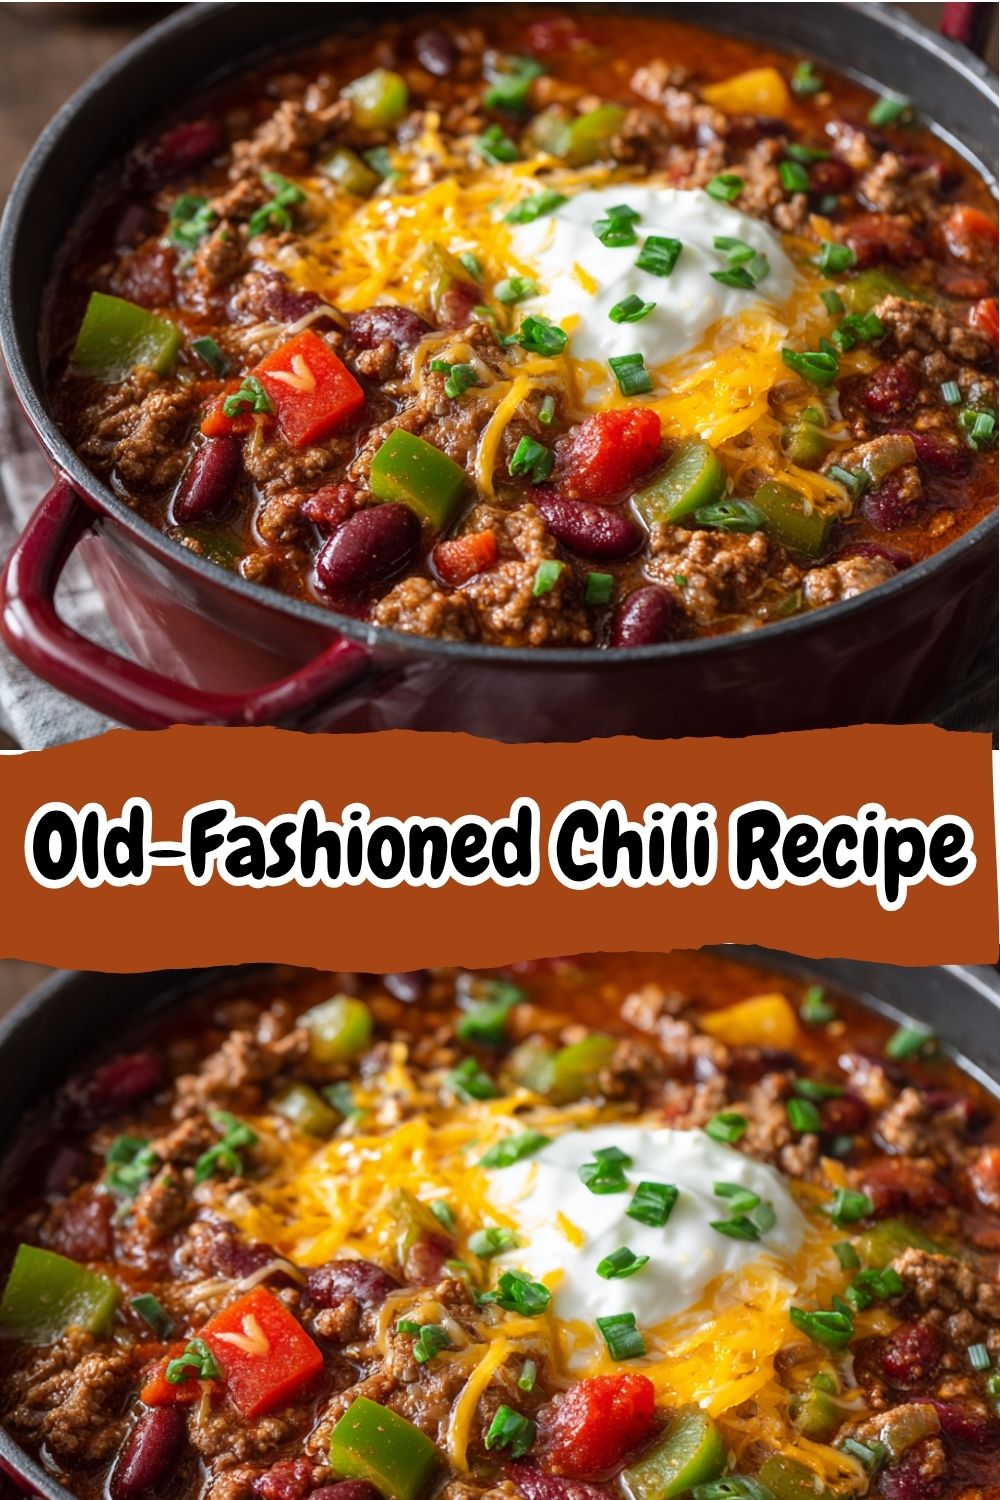
Your Chili Questions, Answered!
I’ve gotten a lot of questions about this recipe over the years! Here are the most common ones to help you out.
Q: My chili is too thin! How can I thicken it up?
A: No worries, this is an easy fix! My favorite method is to make a quick slurry. Mix 1 tablespoon of cornstarch with 2 tablespoons of cold water in a small bowl until it’s smooth. Stir this into your simmering chili, and let it cook for another 5-10 minutes. It will thicken up beautifully. Alternatively, you can just let it simmer uncovered for another 15-20 minutes to reduce further.
Q: I accidentally made it too spicy. Help!
A: We’ve all been there! The best way to tame the heat is to add a bit of sweetness or dairy. Stir in a tablespoon of brown sugar, a squeeze of ketchup, or a big dollop of sour cream right into the pot. For a quick fix without adding other flavors, add a can of drained, rinsed beans or even a can of diced potatoes—they’ll help absorb some of the heat.
Q: Can I make this in a slow cooker or Instant Pot?
A> Absolutely! For the Slow Cooker: Brown the meat and sauté the veggies in a skillet first (this step is key for flavor!), then transfer everything to your crockpot. Cook on LOW for 6-8 hours or HIGH for 3-4 hours. For the Instant Pot: Use the Sauté function for steps 1-3. Add the remaining ingredients, secure the lid, and cook on HIGH pressure for 15 minutes. Let the pressure release naturally for 10 minutes before doing a quick release.
Q: How long will leftovers last?
A> Stored in an airtight container in the fridge, your chili will be happily delicious for 3-4 days. It also freezes like a dream for up to 3 months. Let it cool completely, then portion it into freezer-safe bags or containers for easy future meals!
Nutritional Information*
Prep Time: 15 minutes | Cook Time: 1 hour | Total Time: 1 hour 15 minutes | Serves: 6-8
*Please note: This is an approximate estimate based on the ingredients used and can vary significantly with substitutions and toppings.
- Calories: ~350
- Protein: 28g
- Carbohydrates: 30g
- Fat: 14g