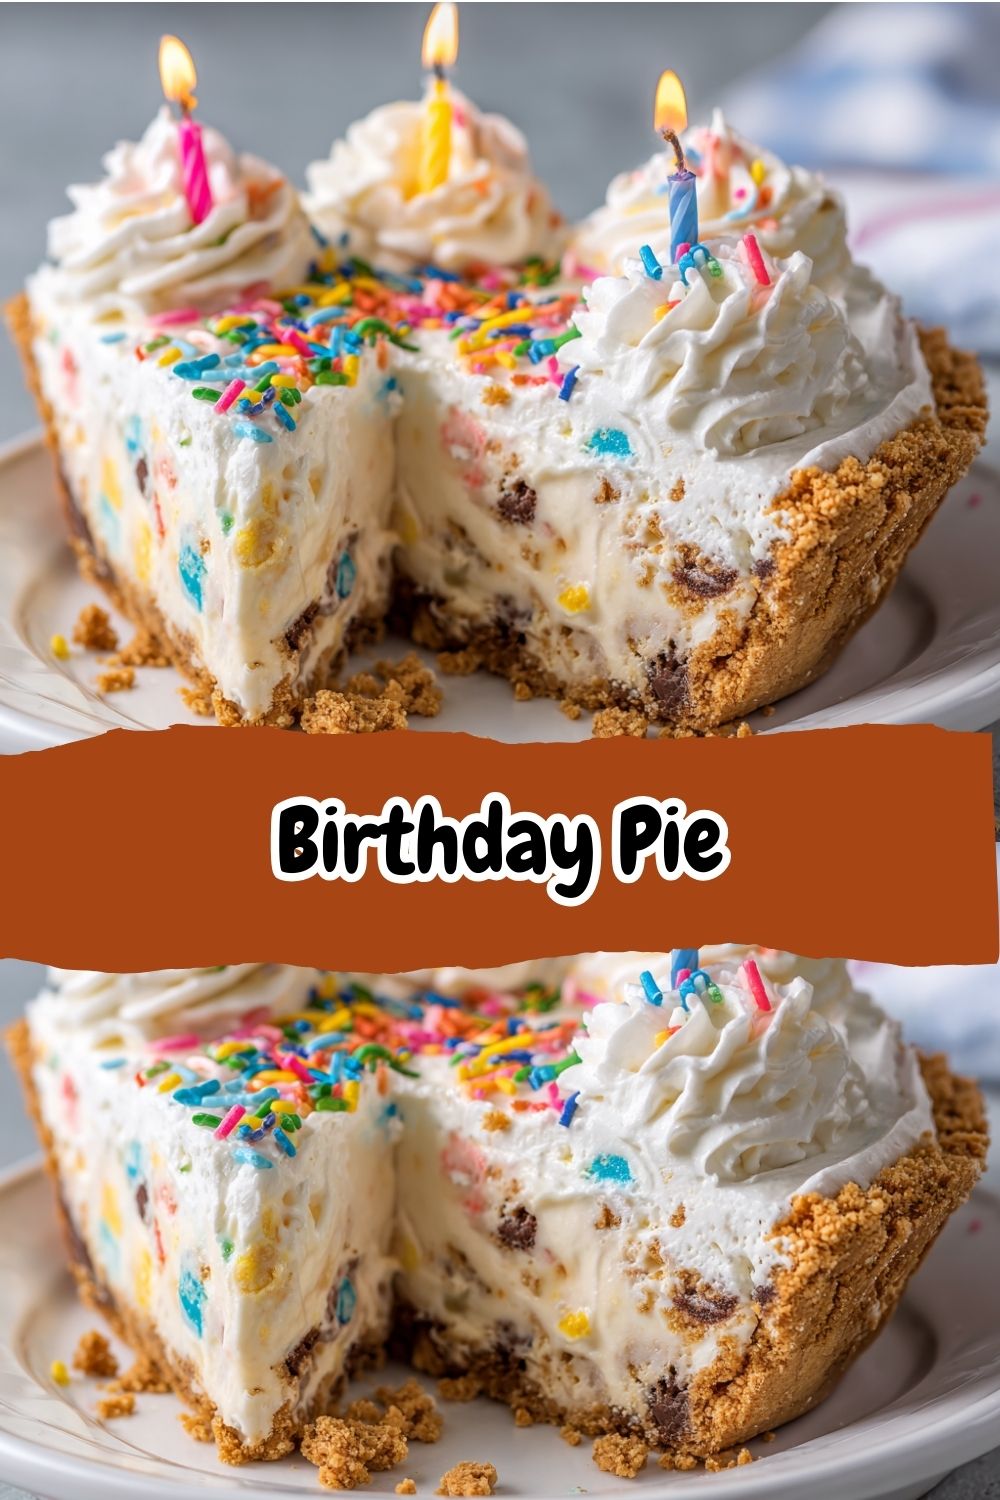
 Birthday Pie: The No-Bake Party Dessert That Steals the Show
Hey there, friend! Isla here from BiteTide. Let’s be real: sometimes, you need a dessert that feels like a full-blown celebration in every single bite. A dessert that’s fun, un-fussy, and guaranteed to make everyone at the table do a little happy dance. But, and this is a big but, you also don’t have the time or energy for a complicated, three-day baking project. I see you, and I’ve got you. That’s exactly why I’m so excited to share my ultimate No-Bake Birthday Pie with you today.
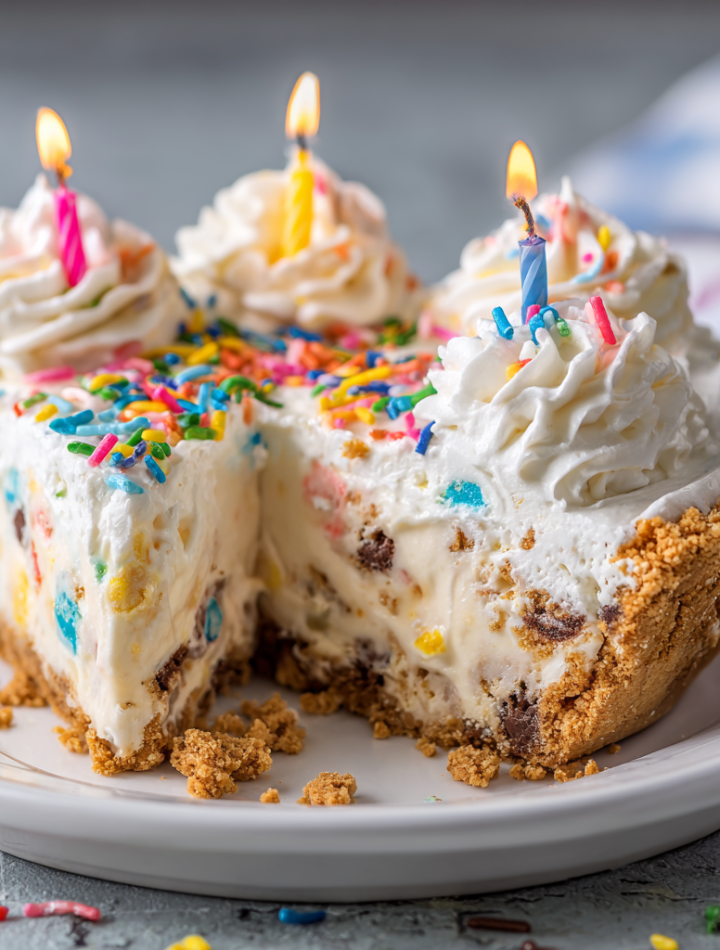
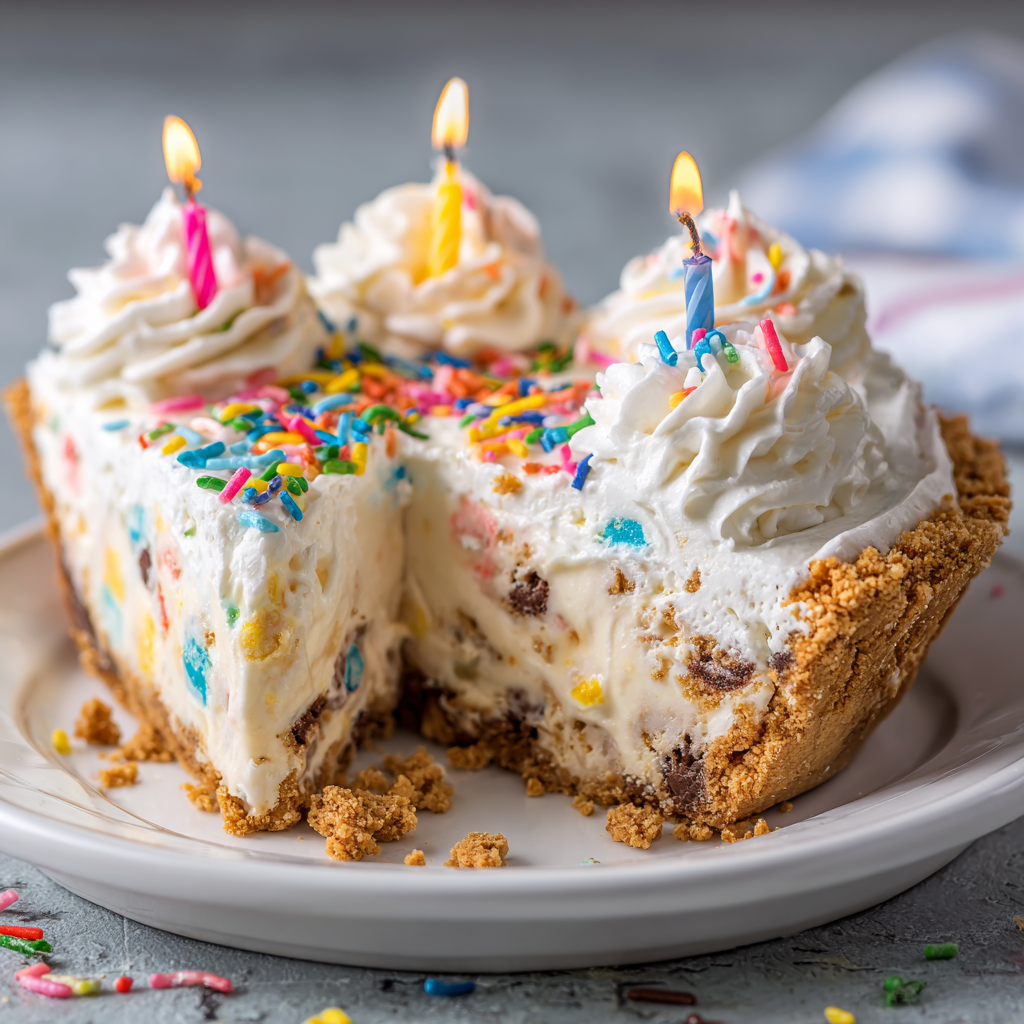
Imagine the best parts of a classic birthday cake—the funfetti sprinkles, the creamy, dreamy frosting, that pure joy factor—but transformed into a luscious, sliceable pie. Now, imagine you don’t even have to turn on your oven. Sounds like a dream, right? This is that dream, come true. We’re taking all that nostalgic flavor and packing it into a glorious, no-fuss pie that chills to perfection while you do, well, anything else!
And because one pie is never enough when friends and family are involved (and because leftovers are a beautiful thing), we’re making a double batch that fills two pie crusts. One for the party, and one for… you know… “quality control.” This recipe is my go-to for birthdays, potlucks, or any day that needs a splash of extra sweetness. It’s the hero of the dessert table, and I can’t wait for you to make it your own. So, grab your favorite mixing bowl, and let’s create some magic!
Print
Birthday Pie
- Total Time: 8 hours 10 minutes
- Yield: 16 (two pies) 1x
Description
This Birthday Pie is a no-bake, party-perfect dessert that blends the nostalgic flavors of birthday cake and creamy pie into one dreamy slice. In this double batch version, we’re adding playful twists like cookie crust, extra layers, and surprise textures to make it even more celebration-worthy!
Ingredients
16 oz cream cheese, softened
1 tsp pure vanilla extract
½ tsp almond extract
2 (3.4 oz) boxes instant vanilla pudding mix
14 oz marshmallow fluff
1 cup rainbow confetti sprinkles, divided (⅔ cup for filling, ⅓ cup for garnish)
8 cups whipped topping, thawed (2 full 8 oz containers)
2 (9-inch) graham cracker pie crusts (or try one chocolate cookie crust and one classic for variety)
Optional Fun Twists:
Add ½ cup crushed golden Oreos or birthday cake cookies to the filling for texture
Use a chocolate or cookie crust instead of graham cracker
Swirl in raspberry jam or strawberry puree between layers for a fruity pop
Mix in 1–2 drops of food coloring to the filling (pastel pink, blue, or yellow) for a fun surprise when sliced
Instructions
In a large bowl, beat cream cheese until smooth.
Add vanilla, almond extract, and pudding mix. Beat until well combined.
Mix in marshmallow fluff until smooth and fluffy.
Fold in thawed whipped topping and ⅔ cup rainbow sprinkles (and cookie crumbles, if using).
Divide mixture evenly into the two pie crusts. Smooth the tops with a spatula.
Garnish with extra whipped topping and the remaining sprinkles.
Chill at least 8 hours, or overnight, until fully set.
Slice, serve cold, and enjoy the party on a plate!
- Prep Time: 10 mins
- Category: Dessert
Nutrition
- Calories: 320
- Sugar: 26g
- Fat: 18g
- Carbohydrates: 34g
- Protein: 3g
A Birthday Tradition is Born
This recipe has a special place in my heart because it was born from a little bit of kitchen chaos and a whole lot of love. A few years ago, my best friend’s birthday landed on one of those scorching summer days where the very idea of heating up the oven felt like a punishable offense. I’d promised her a spectacular dessert, but my plan for a layered cake was melting faster than my resolve.
I stood in front of the fridge, staring at ingredients, having a full-on “what on earth can I make?” moment. I had cream cheese, cool whip, and a box of instant pudding my grandma always swore by. Then I saw it: a rogue container of rainbow sprinkles left over from a cupcake adventure. It was like a lightbulb went off. I thought, “What if I mix all the birthday cake flavors into a no-bake pie?”
I threw everything together, crossed my fingers, and let it chill. The result? Pure magic. The pie was an instant hit—so creamy, so fun, and so refreshingly cool. My friend said it was the best birthday “cake” she’d ever had. That happy accident became a requested tradition, and now, I’m sharing it with you. It’s a reminder that the best recipes often come from a little improvisation and a desire to make someone smile.
Gather Your Birthday Pie Ingredients
Here’s everything you’ll need to create this spectacular double-batch dessert. The beauty of this recipe is its flexibility, so I’ve included my favorite chef insights and substitution tips for each ingredient. Don’t be afraid to play around!
- 16 oz Cream Cheese, softened: This is the rich, tangy backbone of our filling. Pro-Tip: Take the time to let it get truly soft at room temperature. This is the #1 secret to a silky-smooth filling with no lumpy bits! If you’re in a pinch, you can gently soften it in the microwave for 15-20 seconds, but room temp is best.
- 1 tsp Pure Vanilla Extract: The king of baking flavors. Using a good quality pure vanilla makes a world of difference compared to imitation, adding a warm, deep aroma.
- ½ tsp Almond Extract: This is my secret weapon! It gives that unmistakable “birthday cake” or “bakery-style” flavor profile. A little goes a long way, trust me.
- 2 (3.4 oz) boxes Instant Vanilla Pudding Mix: This is our thickening agent and a huge flavor booster. It has to be instant pudding, not cook-and-serve. The instant kind sets without heat, which is crucial for our no-bake method.
- 14 oz Marshmallow Fluff: This wonder ingredient adds an incredible lightness and a sweet, nostalgic marshmallow flavor that makes the filling uniquely fluffy and delicious.
- 1 cup Rainbow Confetti Sprinkles, divided: The star of the show! We’ll use ⅔ cup in the filling and save ⅓ cup for a gorgeous garnish. Chef’s Insight: For the best color, use the long, tube-like “jimmies” rather than nonpareils (the little balls). Jimmies hold their color and won’t bleed as much into the filling.
- 8 cups Whipped Topping, thawed (two 8 oz containers): This makes our filling light as air. I use the common brand like Cool Whip® for consistency, but you can absolutely use an equal amount of freshly whipped heavy cream sweetened with a little powdered sugar.
- 2 (9-inch) Graham Cracker Pie Crusts: The easy, delicious foundation. I love using one classic and one chocolate cookie crust for a fun variety! Pre-made crusts are a lifesaver, but you could also make your own if you’re feeling fancy.
How to Make Your No-Bake Birthday Pie: A Step-by-Step Guide
Ready to whip up some joy? This process is simple, but a few key tips will ensure your pie is absolutely perfect. Let’s walk through it together!
- Beat the Cream Cheese Until Smooth. (This is the most important step!): In a large bowl, use an electric hand mixer or stand mixer fitted with the paddle attachment to beat the softened cream cheese. Start on low speed and gradually increase to medium-high. Beat for a good 1-2 minutes until it’s completely smooth, creamy, and free of any lumps. Scrape down the sides of the bowl with a spatula to make sure everything is incorporated. Chef’s Hack: A smooth cream cheese base is non-negotiable. Lumps here will stay lumps throughout the entire process, so take your time!
- Incorporate the Flavors. Add the pure vanilla extract, almond extract, and both boxes of instant vanilla pudding mix to the smooth cream cheese. Beat on medium speed until everything is fully combined. The mixture will be very thick and almost pasty at this point—that’s exactly what we want! Don’t worry, it will lighten up significantly in the next steps.
- Welcome the Fluff. Spoon in the entire jar of marshmallow fluff. I know it can be sticky business! A little tip: lightly spraying your spoon or spatula with cooking spray can make this process much easier. Beat the mixture again until the marshmallow fluff is fully incorporated and the filling is smooth and fluffy.
- Gently Fold in the Whipped Topping and Sprinkles. Now, it’s time to lighten everything up! Add the thawed whipped topping and ⅔ cup of your rainbow sprinkles. Here’s the key: switch to a spatula and fold gently. Do not use the mixer! We want to keep all that air in the whipped topping to maintain a light, mousse-like texture. Fold until no white streaks remain. Little Chef Story: I once got overzealous with the mixer here and ended up with a dense, sad filling. Folding is an act of love—be gentle!
- Divide and Conquer. Carefully spoon the glorious, fluffy filling into your two prepared pie crusts. Divide it as evenly as you can. Use your spatula to smooth the tops into beautiful, swoopy swirls—this is your canvas!
- Garnish and Chill. This is the hardest part: waiting! Garnish the tops with the remaining ⅓ cup of sprinkles. Now, gently cover the pies with plastic wrap and refrigerate them for at least 8 hours, or ideally overnight. This chill time is not a suggestion; it’s essential for the pudding mix to work its magic and for the pie to firm up enough to slice cleanly.
- Slice, Serve, and Celebrate! When you’re ready to party, take the pies out of the fridge, slice them with a sharp knife, and watch as everyone’s eyes light up. Serve it cold for the most refreshing, celebratory bite!
How to Serve Your Masterpiece
Presentation is part of the fun! For a real “wow” factor, I love adding a extra dollop of whipped topping to each slice right before serving. You can pipe little rosettes around the edge of the pie for a bakery-worthy look, or just keep it casual and rustic. Of course, no birthday dessert is complete without a candle—or a whole bunch of them! Stick them right in the center and make a wish. This pie is rich, so a smaller slice is often perfect, especially alongside a cup of coffee or a cold glass of milk.
Get Creative: 5 Fun Twists on Birthday Pie
The fun doesn’t stop here! This recipe is a fantastic base for all kinds of creativity. Here are a few of my favorite ways to mix it up:
- Cookie Crunch: Fold in ½ cup of crushed golden Oreos or birthday cake cookies along with the sprinkles for a delightful texture surprise.
- Fruity Swirl: Before adding the filling, spread a thin layer of raspberry jam or strawberry puree on the bottom of the pie crust. Then add the filling as usual for a fruity, colorful ribbon.
- Chocolate Lover’s Dream: Use chocolate pudding mix instead of vanilla and a chocolate cookie crust. Fold in mini chocolate chips instead of (or in addition to!) the sprinkles.
- Pretty in Pastel: Add 1-2 drops of food coloring (pink, blue, or yellow are gorgeous) to the filling after you add the whipped topping for a beautiful pastel hue inside.
- Gluten-Free/Dairy-Swap: Use a certified gluten-free cookie crust and ensure your pudding mix is gluten-free. For a dairy-free version, use dairy-free cream cheese and whipped topping.
Isla’s Chef Notes
This recipe has evolved so much since that first hot-summer-day experiment. I’ve learned that the almond extract was the missing link—it truly elevates it from “good” to “I need this recipe NOW!” I’ve also started making it a double batch every single time without exception. It freezes surprisingly well! Just wrap it tightly in plastic wrap and foil, and it will keep for up to a month. Thaw it in the fridge overnight before serving.
One of my favorite kitchen memories involving this pie was when my nephew “helped” me make it. He was in charge of the sprinkles, and let’s just say… we had a very, very sprinkle-heavy pie that day. But his proud smile was worth every single colorful speck. That’s the spirit of this recipe—it’s forgiving, fun, and made for making memories. Don’t stress about perfection. Embrace the mess and the joy!
Your Birthday Pie Questions, Answered!
I’ve gotten a lot of questions about this pie over the years, so I’ve compiled the most common ones here to help you succeed!
Q: My filling is runny. What happened?
A: The most common culprits are not beating the cream cheese until perfectly smooth, using a whipped topping that isn’t fully thawed (it can deflate if still frozen), or, most importantly, not chilling it long enough. The pudding mix needs a full 8 hours to set properly. If it’s still a bit soft, just pop it back in the fridge—patience is key!
Q: Can I make this into a single pie?
A: Absolutely! Just halve all the ingredients exactly. Use one pie crust and one box of pudding mix. The instructions remain the same. Easy peasy.
Q: My sprinkles bled color into the filling! How can I prevent that?
A> This is a common issue with certain types of sprinkles. To avoid it, use “jimmies” (the long, cylindrical sprinkles) which are coated in a shellac that prevents bleeding. Also, try folding them in at the very last second before you pour the filling into the crust, minimizing their contact time with the moist filling.
Q: I can’t find marshmallow fluff. What can I use instead?
A: You can substitute it with an equal amount of additional whipped topping, though you’ll lose a bit of that distinct marshmallow flavor. For a closer match, you could gently melt 10 oz of marshmallows with a tablespoon of water or milk in the microwave, let it cool completely, and then beat it into the cream cheese mixture.
Nutritional Information
Please note: This is an approximate calculation and can vary based on specific ingredients used.
Prep Time: 10 minutes | Chill Time: 8 hours | Total Time: 8 hours 10 minutes | Servings: 16 (two pies)
Per Slice (approximate): Calories: 320 | Sugar: 26g | Carbs: 34g | Fat: 18g | Protein: 3g
This No-Bake Birthday Pie is pure celebration in every slice—colorful, creamy, and full of that classic birthday cake flavor. With no oven required and a double batch that’s perfect for sharing, it’s the ultimate party dessert that’s as fun to make as it is to eat. Whether for birthdays, potlucks, or just because, this pie will always be a reason to celebrate!