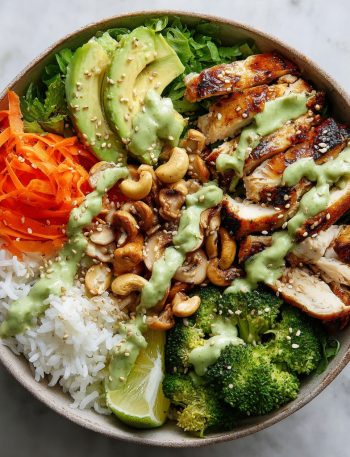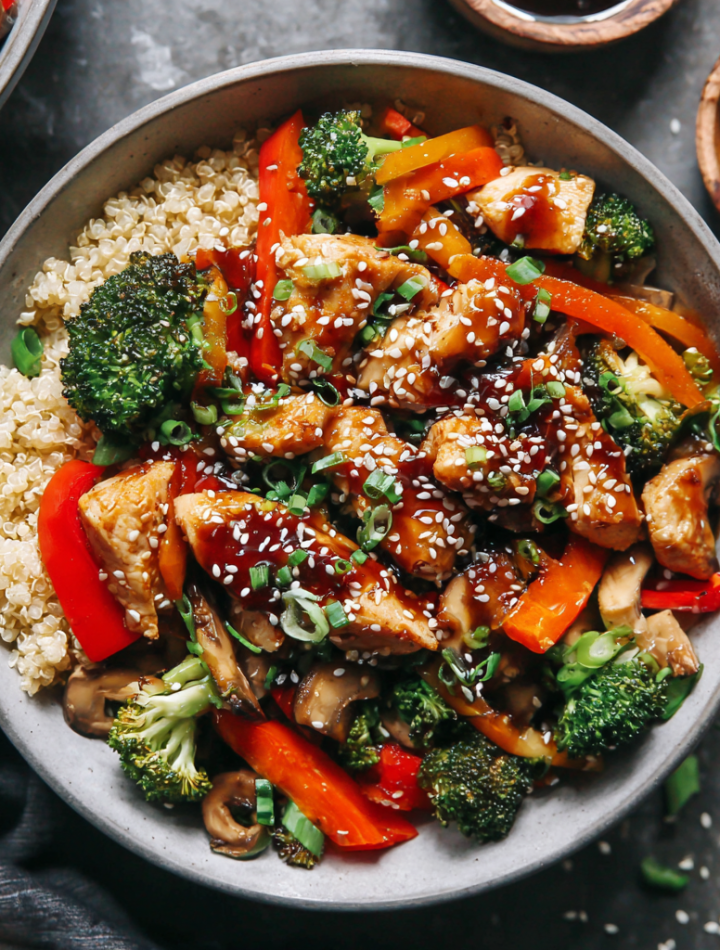
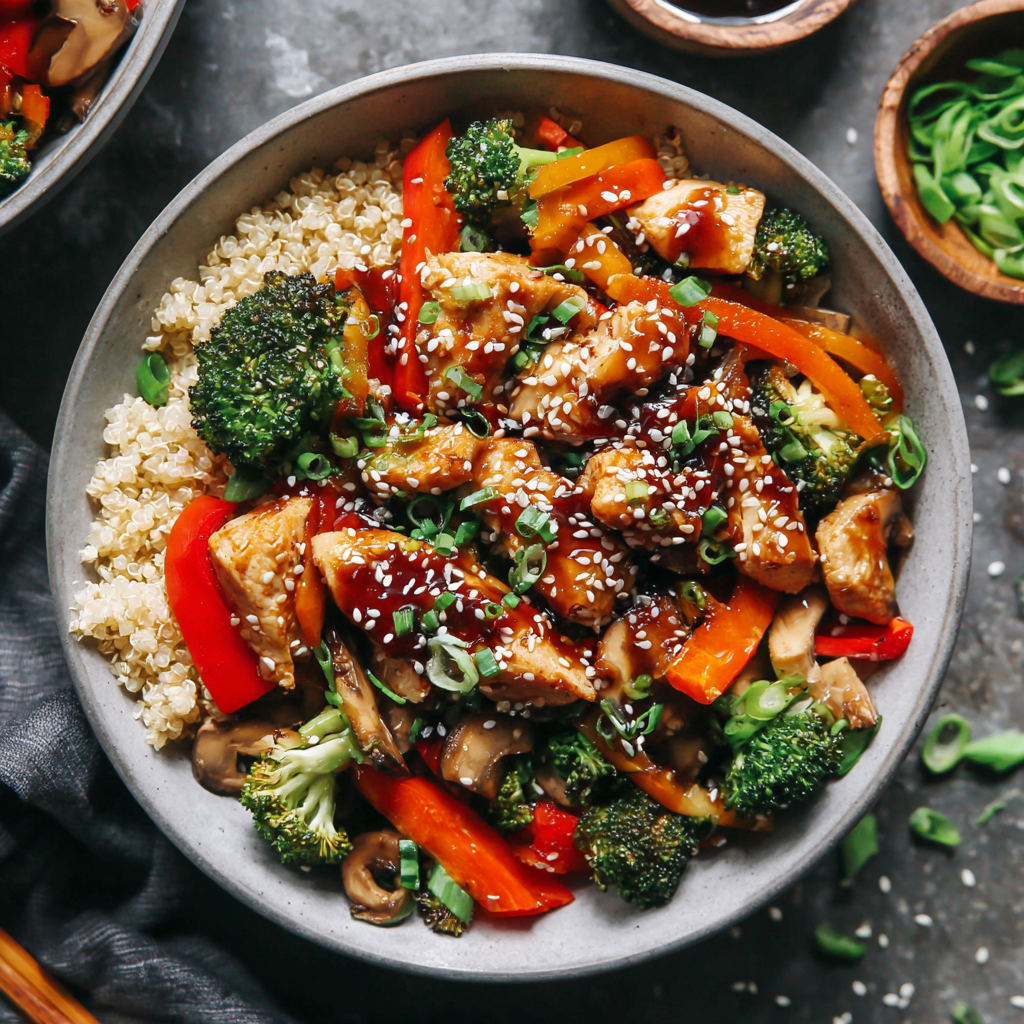
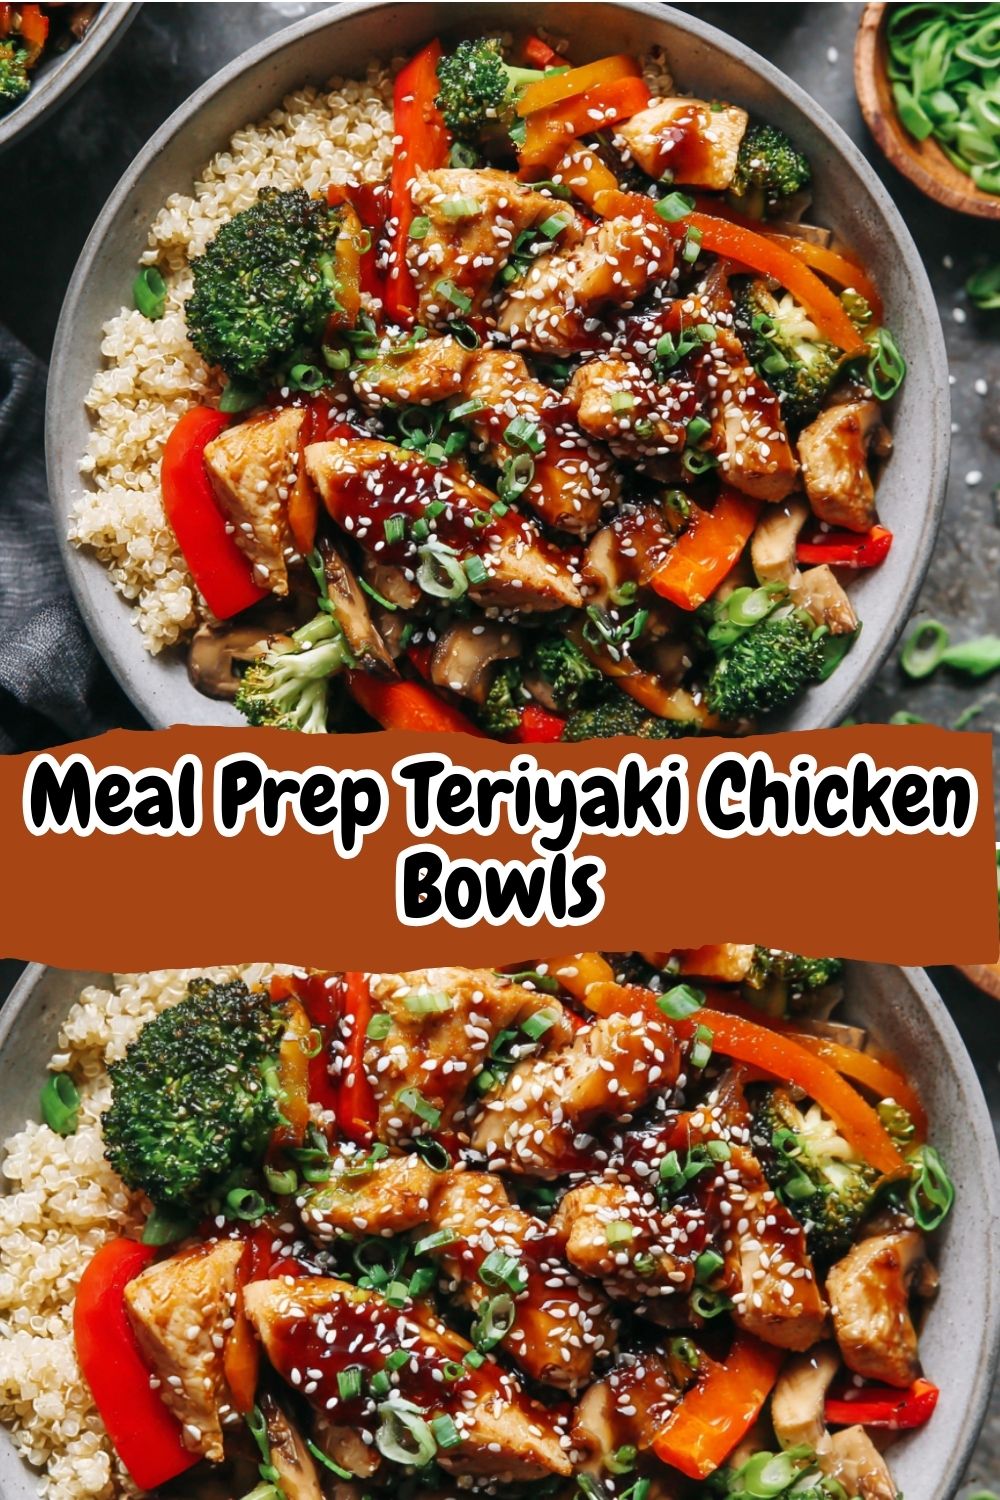
Your New Favorite Weekly Ritual: Healthy Meal Prep Teriyaki Chicken Bowls
Hey there, friend! Isla here from BiteTide. Let’s be real for a second: sometimes, the thought of meal prep can feel… well, a little blah. Visions of plain chicken, unseasoned broccoli, and a general sense of culinary boredom can make even the most well-intentioned among us want to just order takeout instead. I get it! I’ve been there more times than I’d like to admit, staring into the fridge on a Sunday night, my motivation having completely left the building.
But what if I told you that meal prep could be the absolute opposite of boring? What if it could be the most exciting, flavor-packed part of your week? That’s exactly what these Healthy Teriyaki Chicken Bowls are all about. We’re talking tender, sesame-seared chicken drenched in a homemade teriyaki sauce that’s naturally sweetened and gluten-free, piled high over fluffy brown rice and a rainbow of crisp-tender veggies. It’s a clean, satisfying, and downright delicious way to fuel your busy days. This isn’t just meal prep; it’s a little act of self-love that your future, hangry self will thank you for. So, grab your favorite chopping board and let’s turn that kitchen chaos into a flavor victory!
Print
Meal Prep Teriyaki Chicken Bowls
- Total Time: 40 minutes
Description
These meal prep teriyaki chicken bowls are a clean, satisfying way to fuel your week. Tender sesame-seared chicken, colorful stir-fry veggies, and a naturally sweetened homemade teriyaki sauce come together over brown rice or quinoa. It’s a simple, balanced bowl that checks every box—high in protein, full of flavor, and ready to grab-and-go.
Ingredients
1.5 lbs chicken breast, diced
1.5 tbsp sesame oil, divided
4 cups frozen stir-fry vegetables
2 cups cooked brown rice or quinoa
1 tbsp sesame seeds (for garnish)
Homemade Teriyaki Sauce (Yields ~1 cup):
2 garlic cloves, minced
2 tbsp fresh ginger, grated
1.5 tbsp raw honey
⅓ cup coconut aminos (or low-sodium soy sauce)
½ cup chicken or vegetable broth
½ tbsp gluten-free flour (or arrowroot for paleo)
Optional twists:
Add sliced scallions or chopped cilantro for a fresh finish
Top with crushed peanuts or cashews for extra texture
Use cauliflower rice for a lower-carb option
Instructions
Add sliced scallions or chopped cilantro for a fresh finish
Top with crushed peanuts or cashews for extra texture
Use cauliflower rice for a lower-carb option
- Prep Time: 15 minutes
- Cook Time: 25 minutes
- Category: Dinner, Main Course
Nutrition
- Calories: 450–500
- Fat: 22g
- Carbohydrates: 30g
- Protein: 35g
The Sauce That Started It All
This recipe, for me, is a big, warm hug from my past. I grew up in a tiny coastal town where my dad was the undisputed king of the grill. His specialty? Teriyaki-glazed salmon he’d caught himself that morning. The smell of that sauce—a tangy, sweet, and salty concoction he’d whip up from memory—would drift through our entire yard, pulling neighbors to our fence like hungry seagulls. I was his official taste-tester, a job I took very seriously. My tiny fingers would dip into the simmering pot, and I’d declare it needed “more sticky” (honey) or “more zip” (ginger).
While I’ve swapped his soy sauce for coconut aminos and refined his technique a bit, the soul of that sauce is still his. Every time I make this teriyaki, I’m right back on that sun-bleached deck, watching him flip fish, laughing as he pretended to forget the recipe just so I could “help” him remember. It’s a taste of home, of simplicity, and of pure joy. I like to think he’d get a kick out of knowing his messy, wonderful kitchen legacy is now helping busy folks like you make their weeks a whole lot brighter (and tastier!).
Gather Your Flavor Crew
Here’s everything you’ll need to make these glorious bowls happen. Don’t stress if you’re missing something—I’ve packed this list with all my favorite swaps and chef-y insights to make it work for you!
- 1.5 lbs chicken breast, diced: I like breast for its lean protein, but chicken thighs are a fantastic swap for even more juiciness and flavor. Just adjust the cooking time by a minute or two.
- 1.5 tbsp sesame oil, divided: This is our flavor powerhouse! We use it to sear the chicken and sauté the veggies. Its nutty aroma is non-negotiable for that authentic taste. Chef’s Tip: Keep an eye on it—sesame oil can burn quickly!
- 4 cups frozen stir-fry vegetables: The ultimate weeknight hack! I always keep a bag of the classic mix (broccoli, carrots, snap peas, water chestnuts) in my freezer. It’s a no-chopping, no-fuss shortcut to a colorful, nutrient-packed bowl. Feel free to use fresh if you prefer!
- 2 cups cooked brown rice or quinoa: The hearty base. I love brown rice for its chewy texture and fiber, but quinoa amps up the protein. Cauliflower rice is a brilliant low-carb option that soaks up the sauce beautifully.
- 1 tbsp sesame seeds (for garnish): A little sprinkle for that perfect finish and a tiny crunch.
For the Homemade Teriyaki Sauce (Yields ~1 cup):
- 2 garlic cloves, minced: Fresh is best here! That pungent, aromatic kick is the foundation of our sauce.
- 2 tbsp fresh ginger, grated: The “zip” my dad always talked about! It adds a warm, spicy freshness that powdered ginger just can’t replicate.
- 1.5 tbsp raw honey: Our natural sweetener. It gives the sauce that classic glossy, sticky texture. Maple syrup works perfectly for a vegan version.
- ⅓ cup coconut aminos: This is my go-to gluten-free, slightly-less-salty alternative to soy sauce. It’s made from coconut sap and is pure magic. If you don’t need it to be GF, low-sodium soy sauce or tamari works great.
- ½ cup chicken or vegetable broth: This thins our sauce to the perfect pourable consistency and adds a layer of savory depth.
- ½ tbsp gluten-free flour (or arrowroot for paleo): Our thickening agent! A tiny bit is all you need to create a luxuriously glossy sauce that clings to every piece of chicken. Cornstarch works too if that’s what you have.
Let’s Build Those Bowls! (Step-by-Step)
Okay, team! Let’s fire up the stove and create some magic. This whole process is a quick, 30-minute dance. I’ll walk you through every step.
- Make the Sauce (The Star of the Show!): Grab a small saucepan. Add your minced garlic, grated ginger, honey, coconut aminos, broth, and gluten-free flour. Now, here’s a major chef hack: whisk everything together cold before you turn on the heat. This prevents the flour from clumping up into little lumps. Once it’s smooth, place the saucepan over medium heat. Bring it to a simmer, whisking occasionally. You’ll see it start to bubble and slowly thicken up into a gorgeous, glossy glaze. This should take about 5-7 minutes. Once thickened, remove it from the heat and set it aside. Give it a quick taste—is it heaven? Yes, yes it is.
- Cook the Chicken (Get That Golden Sear!): While the sauce is doing its thing, let’s cook the chicken. Pat your diced chicken breast completely dry with a paper towel—this is the #1 secret to getting a beautiful golden sear instead of a steamy, pale poach. Heat 1 tablespoon of that glorious sesame oil in a large skillet over medium-high heat. Once the oil is shimmering (but not smoking!), add the chicken in a single layer. Don’t crowd the pan! You might need to do this in two batches. Season lightly with a pinch of salt. Let it cook undisturbed for 3-4 minutes to get a good sear on one side before stirring. Sauté until the chicken is cooked through and no longer pink, about 8-10 minutes total.
- Combine Chicken & Sauce (The Magic Moment!): Once the chicken is cooked, reduce the heat to low. Pour about half of your homemade teriyaki sauce over the chicken. Gently stir to coat every single piece. Let it bubble together for just another minute so the chicken soaks up all that flavor. Listen to that sizzle! That’s the sound of success.
- Cook the Veggies (The Colorful Crunch!): In a separate pan, heat the remaining ½ tablespoon of sesame oil over medium heat. Add your frozen stir-fry veggies. No need to thaw! Sauté them, stirring occasionally, until they are heated through, tender-crisp, and vibrant. This usually takes about 5-7 minutes. We want a bit of crunch left—they’ll soften a tiny bit more when we reheat our meal prep bowls later.
- Assemble Your Masterpieces (The Grand Finale!): Now for the fun part! Grab your meal prep containers. Start with a base of fluffy brown rice or quinoa. Then, layer on a generous portion of your saucy teriyaki chicken. Next, pile on those colorful veggies. Drizzle the top with a little extra reserved teriyaki sauce (trust me, you’ll want it) and finish with a sprinkle of sesame seeds. Seal them up, and you’ve just prepped a week of wins!
How to Serve & Savor
When you’re ready to eat, just reheat your bowl in the microwave for 2-3 minutes, giving it a stir halfway through. I love to give mine a fresh finish right before digging in—a sprinkle of sliced scallions or chopped cilantro brightens everything up instantly. For an extra layer of fun, add a handful of crushed peanuts or cashews for a seriously satisfying crunch. Eat it straight from the container at your desk or plate it up pretty at home—it’s delicious no matter what!
Ride Your Own Flavor Wave: Fun Variations!
This recipe is a perfect canvas for your cravings! Here are a few of my favorite ways to mix it up:
- Pineapple Twist: Add ½ cup of diced fresh or canned pineapple (in juice, not syrup!) to the skillet with the chicken right before you add the sauce. It caramelizes slightly and adds a wonderful tropical sweetness.
- Spicy Sriracha Kick: Love heat? Whisk 1-2 tablespoons of sriracha or a pinch of red pepper flakes into your teriyaki sauce while it’s simmering.
- Vegan/Vegetarian Power Bowl: Swap the chicken for a block of extra-firm tofu (pressed and cubed) and use vegetable broth. Sauté the tofu just like the chicken until golden and crispy!
- “Clean Out the Fridge” Version: Use any veggies you have! Thinly sliced bell peppers, onions, mushrooms, zucchini, or shredded carrots all work beautifully. Just adjust the sauté time based on how crunchy you like them.
Isla’s Chef Notes & Kitchen Stories
This recipe has evolved so much from my dad’s original! I’ve made it in a dozen different kitchens—in a tiny New York apartment with roommates hovering, in my first home where the smoke detector was a little too enthusiastic, and now in my own cozy, chaos-friendly BiteTide test kitchen. The biggest lesson? Always, always have your ingredients measured and ready (your mise en place) before you start. That sauce thickens quickly, and the chicken cooks fast, so having everything within arm’s reach is a game-changer. Also, this sauce is now a staple in my fridge. I make a double batch almost every weekend—it’s incredible on salmon, as a dip for spring rolls, or even drizzled over roasted broccoli. Don’t be surprised if you catch me doing a little happy dance when I pull these bowls out of the fridge on a Wednesday. Some wins are just worth celebrating!
Your Questions, Answered!
Q: My sauce didn’t thicken! What did I do wrong?
A: No worries, this is a common hiccup! It likely just needs a little more time to simmer and reduce. If after 7-8 minutes it’s still thin, make a “slurry”: mix ½ teaspoon more of your gluten-free flour with a tablespoon of cold water in a small bowl until smooth. Whisk this into your simmering sauce and it should thicken up within a minute.
Q: Can I freeze these meal prep bowls?
A: You can, but with a caveat! The texture of the veggies might become a little soft upon thawing and reheating. For best results, I recommend freezing just the cooked teriyaki chicken and sauce. Then, cook fresh rice and veggies the day you plan to eat it. Thaw the chicken overnight in the fridge and reheat.
Q: Is there a way to make this Whole30 compliant?
A: Absolutely! Omit the honey from the sauce. The coconut aminos provide enough natural sweetness for a savory, compliant version. You could also add a date or two to the sauce while simmering for a hint of sweetness, then remove them before storing (always check official Whole30 guidelines for compliance).
Q: My chicken is tough. How can I prevent that?
A> The two most common culprits are overcooking and not slicing against the grain. First, make sure you’re dicing your chicken breast into even-sized pieces so they cook at the same rate. Second, as soon as the chicken is cooked through (no pink inside, internal temp of 165°F), take it off the heat and add the sauce. Letting it sit in the hot pan with the sauce will carryover cook it perfectly without drying it out.
Nutritional Information*
*This is an estimate per bowl (1 of 4), calculated using brown rice and including all the sauce. Values can vary based on specific ingredients and brands used.
- Calories: ~400 kcal
- Protein: 35g
- Carbohydrates: 30g
- Fat: 15g
- Fiber: 4g
- Sugar: 10g
And there you have it! A week of healthy, delicious, and utterly unstoppable meals is waiting for you. I truly hope this recipe becomes a trusted friend in your weekly routine. If you make it (and I really hope you do!), tag me on Instagram @BiteTide—I love seeing your creations! Now go forth and conquer your week, one flavorful bite at a time.
With love and a well-seasoned skillet,
Isla 💛