Bite-Sized Tiramisu Cups: Your New Go-To Party Dessert!
Hey there, friend! Isla here, waving at you from my flour-dusted kitchen. Is there anything better than a dessert that feels incredibly fancy but is secretly a breeze to throw together? I’m talking about those show-stopping treats that have your guests thinking you slaved away for hours, when in reality, you were probably binge-watching your favorite show while they chilled in the fridge. If you nodded along to that, then you and I are already on the same wavelength—and you are absolutely going to love these Bite-Sized Tiramisu Cups.
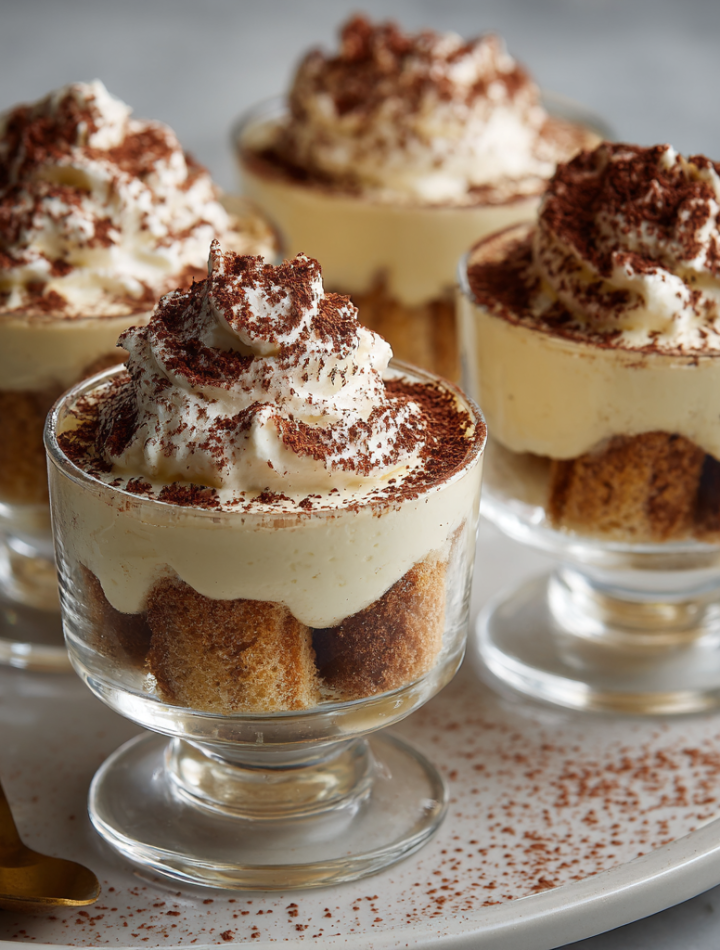
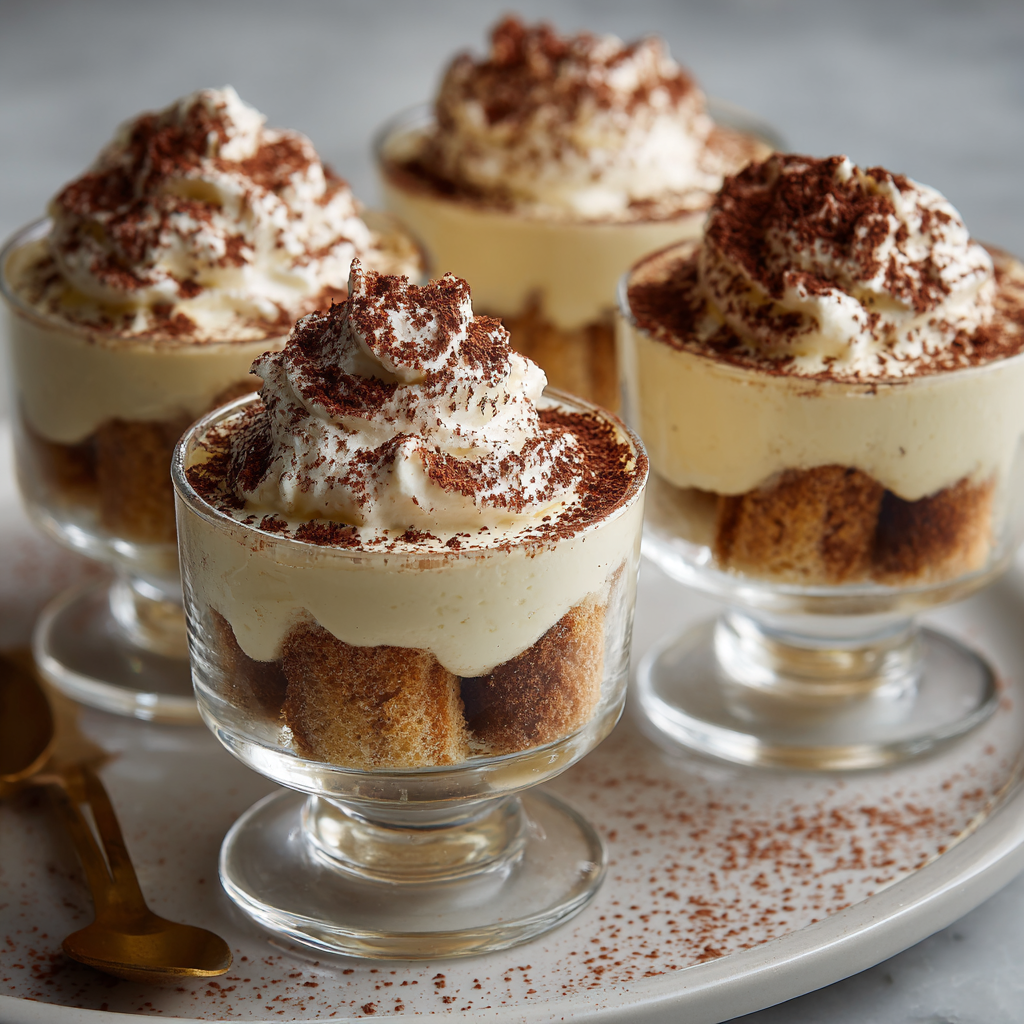
We’re taking all the dreamy, coffee-kissed, creamy goodness of a classic Italian tiramisu and shrinking it down into perfect, personal portions. No messy slicing, no fighting over who got the bigger piece—just elegant little cups of joy, ready to be devoured. They’re no-bake, make-ahead magic, which honestly makes them the ultimate party hero. Whether you’re hosting a dinner party, need a treat for a potluck, or just deserve a little midweek pick-me-up (you absolutely do!), these mini tiramisu cups are your answer.
So, tie on your favorite apron, put on some fun music, and let’s create some dessert magic together. I promise it’s going to be fun, fuss-free, and so, so delicious. Let’s ride this flavor wave!
A Sweet Slice of Memory
This recipe always takes me right back to my nonna’s tiny, sun-drenched kitchen. She wasn’t Italian, but oh, did she have a love affair with Italian desserts. I remember one sweltering summer afternoon, she decided to teach me how to make her version of tiramisu. It was a glorious disaster. Egg whites ended up on the ceiling, cocoa powder dusted every surface (including the cat), and we definitely “sampled” the mascarpone mixture a few too many times.
But when we finally assembled it in her big, chipped ceramic dish and let it set, the wait felt like forever. That first bite, though? Pure magic. It was rich, cool, and felt impossibly sophisticated. She’d wink and say, “Isla, darling, the best memories are always seasoned with a little mess and a lot of love.” These mini cups are my tribute to her—and to that belief. They capture all that fancy flavor but in a less intimidating, way-more-fun package. Every time I make them, I think of her, and I hope they help you create some sweet memories of your own.
Print
Bite-Sized Tiramisu Cups
- Total Time: 2 hrs 20 min
- Yield: 12 mini cups 1x
Description
Classic tiramisu, but make it mini. These elegant, no-bake cups layer creamy mascarpone, espresso-soaked ladyfingers, and a dusting of cocoa—all in a perfect two-bite size. They’re rich, indulgent, and effortlessly chic. Ideal for dinner parties or anytime you need a little pick-me-up.
Ingredients
12 ladyfinger cookies (cut into bite-sized pieces)
1 cup brewed espresso or strong coffee, cooled
2 tbsp coffee liqueur (optional)
1 cup heavy cream
8 oz mascarpone cheese
1/4 cup powdered sugar
1/2 tsp vanilla extract
Unsweetened cocoa powder, for dusting
Mini dessert cups or shot glasses (12–15)
Instructions
Brew coffee and mix with liqueur (if using). Set aside.
In a chilled bowl, whip heavy cream to soft peaks.
In a separate bowl, beat mascarpone, powdered sugar, and vanilla until smooth. Fold in whipped cream gently.
Dip ladyfinger pieces quickly into coffee mixture. Don’t soak.
Layer dipped ladyfingers and mascarpone cream into each mini cup—starting and ending with cream.
Chill for at least 2 hours, or overnight.
Dust with cocoa powder just before serving.
- Prep Time: 20 min
- Category: Dessert
Nutrition
- Calories: 130
- Fat: 9g
- Carbohydrates: 10g
- Protein: 2g
Gathering Your Flavor Arsenal
Part of the beauty of this recipe is its simplicity. You only need a handful of high-quality ingredients to create something truly spectacular. Here’s what you’ll need:
- 12 ladyfinger cookies (Savoiardi): These light, crisp cookies are the traditional base for tiramisu. They soak up the coffee like a dream without turning to complete mush. Chef’s Insight: If you can’t find them, a soft sponge cake or even pound cake cut into small cubes will work in a pinch!
- 1 cup brewed espresso or strong coffee, cooled: This is the heart of the dish! Use a good, strong brew—instant espresso powder dissolved in hot water works great here. The stronger the coffee, the more authentic the flavor. Pro Tip: If you’re making these for kids, you can use strongly brewed decaf coffee.
- 2 tbsp coffee liqueur (optional): This adds a wonderful depth of flavor. Kahlúa is my go-to, but any coffee liqueur or even a dash of dark rum or amaretto would be delicious. Substitution Tip: For an alcohol-free version, simply omit it! The flavor will still be amazing.
- 1 cup heavy cream (or heavy whipping cream): We’re whipping this into soft, billowy peaks to lighten up our mascarpone filling. Make sure it’s cold, cold, cold for the best whip!
- 8 oz mascarpone cheese: The star of the show! This rich, slightly sweet Italian cream cheese is what gives tiramisu its iconic creamy texture. Chef’s Note: Let it sit at room temperature for about 15 minutes before using—it will blend much more smoothly and prevent lumps.
- 1/4 cup powdered sugar: This sweetens our filling beautifully without any grittiness. You can adjust this to your taste—add a little more if you like it sweeter!
- 1/2 tsp vanilla extract: A little splash of vanilla adds a warm, comforting note that complements the coffee and chocolate perfectly.
- Unsweetened cocoa powder, for dusting: The classic finishing touch! A fine dusting of dark cocoa right before serving gives that beautiful bitter-chocolate contrast. I use a small fine-mesh sieve for a super even, professional-looking dusting.
- Mini dessert cups or shot glasses (12–15): The fun part! I love using clear glasses so you can see all the beautiful layers. You can find packs of these online or at any party supply store.
Let’s Build Some Delicious Layers!
Okay, team! Let’s get assembling. This is the fun, no-stress part. I’ve got plenty of little hacks for you along the way to ensure tiramisu success.
Step 1: The Coffee Dip
First, brew your espresso or strong coffee and let it cool completely to room temperature. This is crucial! If it’s too hot, it will melt our creamy filling later. Once cool, stir in the coffee liqueur if you’re using it. Pour this mixture into a shallow bowl or dish—a pie plate works perfectly. This gives you a wide surface area for dipping. Chef’s Hack: Add a teaspoon of that powdered sugar to your coffee mixture and stir to dissolve. It just takes the edge off the bitterness and is my little nonna-approved secret.
Step 2: The Cloud-Like Cream
Grab a medium mixing bowl and your cold heavy cream. Using a hand mixer or a stand mixer with the whisk attachment, whip the cream on medium-high speed until it forms soft peaks. You’ll know it’s ready when the beaters leave trails in the cream and the peaks gently flop over when you lift the beaters. Be careful not to overwhip into stiff peaks—we want it pillowy, not buttery! Set this aside.
Step 3: The Creamy Dream Base
In a separate, larger bowl, combine the room-temperature mascarpone, powdered sugar, and vanilla extract. Beat this on low speed first (to avoid a powdered sugar cloud explosion!), then increase to medium until it’s completely smooth and silky. No lumps allowed! If you do have a few stubborn lumps, you can press the mixture through a sieve—but starting with room-temp mascarpone should prevent this.
Step 4: Gentle Folding is Key
This is the most important step for a light, airy filling! Add about one-third of your whipped cream to the mascarpone mixture. Use a rubber spatula to fold it in. This means you’re cutting through the center of the bowl, sliding along the bottom, and folding the mixture over on itself. Rotate the bowl as you go. This gentle motion keeps all that air we whipped into the cream intact. Once that first addition is incorporated, gently fold in the rest of the whipped cream until you have a uniform, beautifully light mixture. Chef’s Pep Talk: Don’t rush this! Folding is an act of love.
Step 5: The Dip & Layer Dance
Now for the assembly line! Take your ladyfingers and break or cut them into pieces that will fit nicely into your mini cups. Working with one piece at a time, quickly dip it into the coffee mixture. I mean quick—just a one-second dip on each side is all you need. You want them moistened, not saturated and falling apart. If they get too soggy, they’ll make the dessert watery. Place a few coffee-kissed pieces into the bottom of each cup.
Step 6: Build Your Masterpiece
Now, spoon or pipe a layer of the mascarpone cream over the ladyfingers. Repeat the process: another layer of quickly-dipped ladyfingers, followed by another glorious layer of cream. I like to finish with the cream layer on top to create a beautiful blank canvas for our cocoa dusting. Pop a lid or some plastic wrap over your cups and chill them in the refrigerator for at least 2 hours, but ideally overnight. This waiting period is non-negotiable—it lets the flavors meld together and the cookies soften into cake-like perfection.
Step 7: The Grand Finale
Right before you’re ready to serve, give each cup a generous dusting of unsweetened cocoa powder. This is where they go from looking good to looking utterly professional. And that’s it! You’ve just created a dessert masterpiece.
How to Serve These Little Beauties
Presentation is part of the fun! I love arranging these mini cups on a beautiful platter or a rustic wooden board. For a dinner party, you can place one at each setting for a sweet surprise. Add a little extra flair by placing a few coffee beans on the side of the platter or a tiny mint leaf on top of each cup alongside the cocoa. Serve them with small spoons or espresso spoons, and watch them disappear. They’re the perfect elegant ending to any meal!
Ride Your Own Flavor Wave!
The best thing about cooking is making a recipe your own. Here are a few fun twists to try:
- White Chocolate Raspberry: Fold some melted and cooled white chocolate into the mascarpone mixture. Use Chambord instead of coffee liqueur and layer with fresh raspberries.
- Mexican Mocha: Add a pinch of cinnamon and a tiny pinch of cayenne pepper to the coffee mixture for a warm, spicy kick.
- Lemon Berry: For a non-coffee version, dip the ladyfingers in a mixture of lemon juice and simple syrup. Layer with the classic cream and fresh blueberries or strawberries.
- Nutella Swirl: Who doesn’t love Nutella? Swirl a spoonful into each cream layer for a hazelnut-chocolate explosion.
- Dairy-Free Delight: Use chilled coconut cream instead of heavy cream and a dairy-free mascarpone alternative. It works like a charm!

Isla’s Chef Notes & Kitchen Confessions
This recipe has evolved so much since that first messy day in nonna’s kitchen. I used to make the traditional version with raw eggs, but I wanted to create a simpler, worry-free version that everyone could enjoy without a second thought. This no-egg, whipped cream version is foolproof and just as decadent.
One of my favorite kitchen stories involves these cups. I once brought them to a potluck and a friend, who claimed to hate coffee, ate three of them before I could tell her what was in them. She was horrified for a second, then immediately asked for the recipe! It just goes to show that the magic of tiramisu can convert anyone. The key is balance—not too boozy, not too sweet, just a perfect harmony of flavors. Don’t be afraid to taste as you go and adjust to your liking. That’s how you make it yours!
Your Tiramisu Questions, Answered!
Q: Can I make this ahead of time?
A: Absolutely! In fact, I highly recommend it. These cups need at least 2 hours to set, but they are even better the next day. The flavors have so much time to get to know each other and become best friends. You can assemble them up to 24 hours in advance. Just wait to dust them with cocoa powder until right before serving, as the cocoa can get blotchy and absorb moisture if left too long.
Q: My mascarpone mixture is lumpy! What do I do?
A: No panic! This usually happens if the mascarpone was too cold. You can try to whisk it vigorously by hand or with a mixer to smooth it out. If that doesn’t work, press the entire mixture through a fine-mesh sieve. It’s a little extra step, but it will save your filling and make it perfectly silky. Remember for next time: let that mascarpone sit on the counter for 15 minutes before you start!
Q: My ladyfingers got too soggy and my cups are watery. Help!
A: The most common tiramisu hiccup! The dip needs to be a quick in-and-out operation—literally one second per side. The ladyfinger should feel moist but still hold its shape. If you’ve already assembled and there’s liquid at the bottom of the cups, you can carefully tip each cup to drain the excess liquid. They’ll still taste great, promise!
Q: How long will these keep in the fridge?
A: They’ll stay delicious for about 2-3 days. After that, the cookies can start to break down a bit too much and the cream might weep a little. They’ve never lasted that long in my house, though!
Nutritional Information (Per Cup)
~130 calories | 9g fat | 10g carbs | 2g protein
Please note: This is an estimate provided for informational purposes only. Actual values will vary based on specific ingredients used and any substitutions.
There you have it! Your complete guide to making the most adorable, impressive, and downright delicious Bite-Sized Tiramisu Cups. I hope you have as much fun making them as I do. If you try them, I’d love to hear about it! Tag me on Instagram @BiteTide so I can see your beautiful creations. Now go forth and conquer that dessert table!
With love and a full spoon,
Isla 💛