
Winter Blizzard Cookies: Your New Favorite Snow Day Project
Hey there, friend! Isla here from BiteTide. Is there anything cozier than being tucked inside on a crisp winter day, watching the world outside turn into a swirl of white, while the warm, buttery scent of cookies fills your kitchen? It’s pure magic. And I’ve got just the recipe to make that magic happen in your own home.
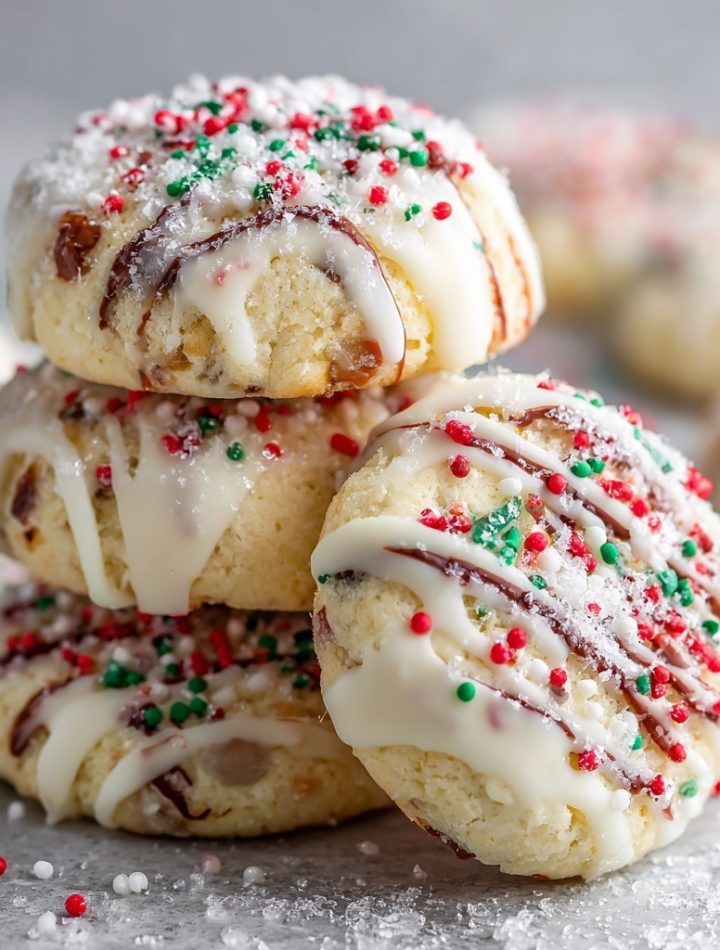
Let me introduce you to my Winter Blizzard Cookies. Imagine the most tender, melt-in-your-mouth shortbread cookie you’ve ever tasted. Now, picture it packed with finely chopped, toasty nuts, dipped in a swoosh of creamy white chocolate, and finished with a joyful flurry of festive sprinkles. They’re like little edible snow globes—a perfect bite of celebration and comfort.
I call them “blizzard” cookies because they come together in a flurry of activity (the fun kind!) and leave behind a beautiful, delicious storm of happiness. The best part? They are deceptively simple. No fancy mixer skills or hard-to-find ingredients required. This is the kind of recipe that invites you to put on your favorite playlist, pour yourself a mug of something warm, and get lost in the simple joy of baking. So, tie on your apron, and let’s make some memories together. These cookies are about to become your go-to for holiday parties, cookie swaps, or just a sweet treat to make a regular Tuesday feel special.
Print
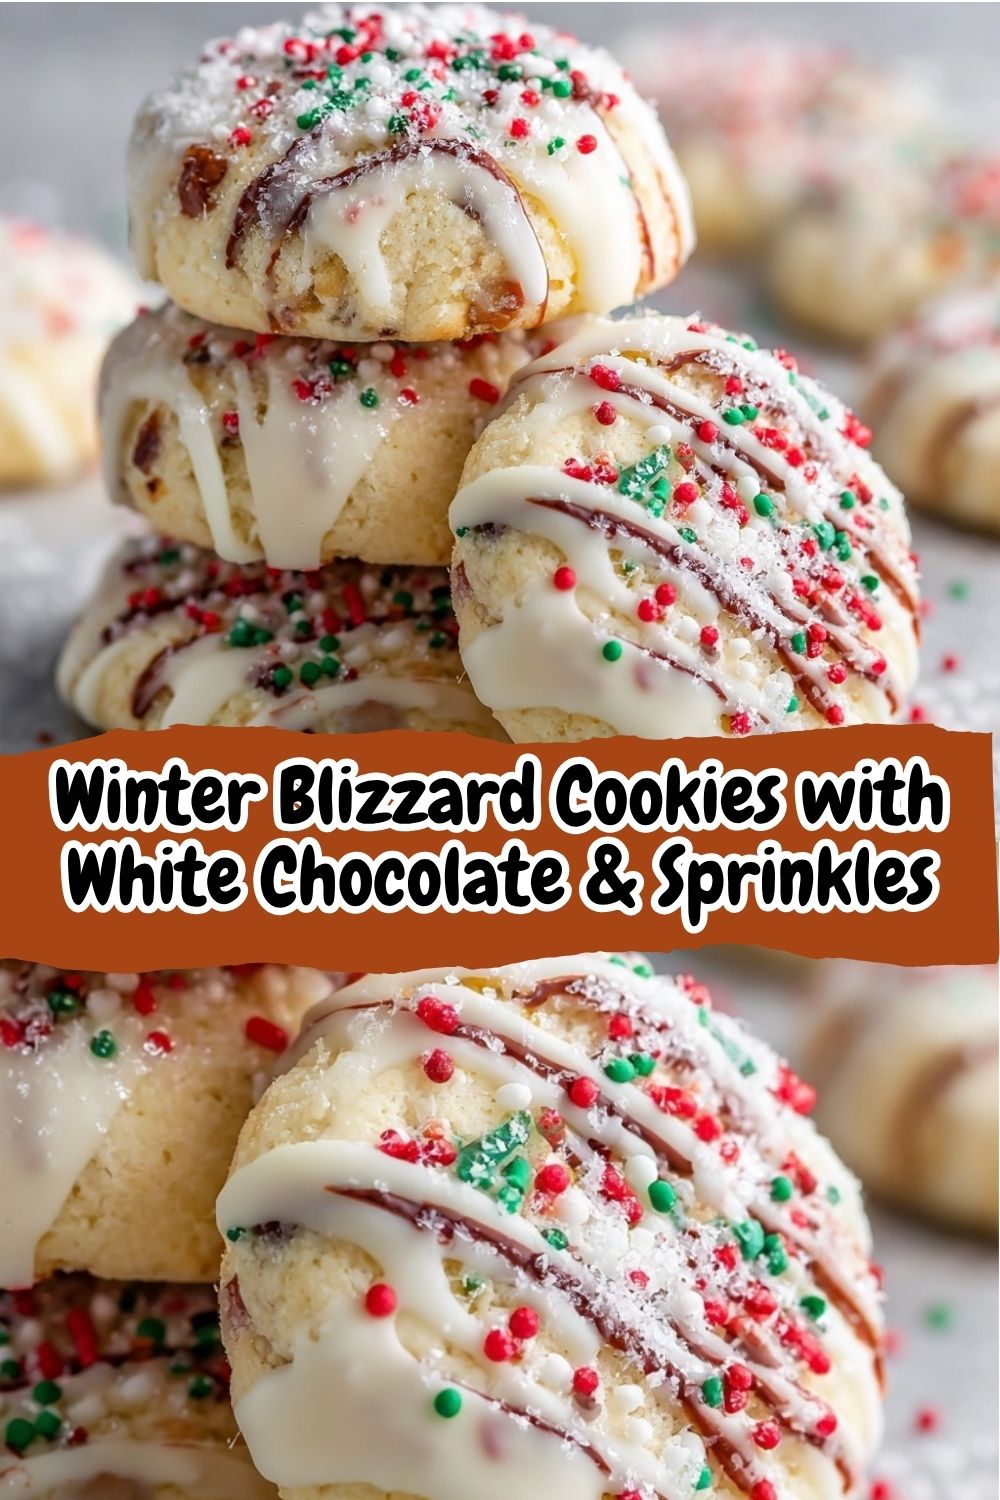
Winter Blizzard Cookies with White Chocolate & Sprinkles : Festive, Buttery & Nutty
- Total Time: 32 minutes
- Yield: About 72 cookies 1x
Description
Winter Blizzard Cookies are soft, buttery shortbread-style cookies studded with finely chopped nuts and dipped in creamy white chocolate. Finished with a flurry of festive sprinkles or sparkling sanding sugar, they’re the perfect blend of cozy and celebratory.
Ingredients
2 cups unsalted butter, softened
2 cups powdered sugar
2 teaspoons vanilla extract
4 cups all-purpose flour
2 cups finely chopped pecans or walnuts
½ teaspoon salt
For Decoration:
3 cups white chocolate chips (or white chocolate bars, chopped)
½ cup holiday sprinkles, sanding sugar, or crushed peppermint
Optional twists:
Add 1 teaspoon orange zest to the dough for a citrus note
Mix 1 teaspoon almond extract into the batter for a deeper flavor
Drizzle with dark chocolate instead of dipping for contrast
Add a dash of cinnamon to the flour for a warm winter spice
Instructions
Preheat oven to 350°F (175°C). Line baking sheets with parchment paper.
In a large bowl, cream together butter and powdered sugar until fluffy.
Add vanilla, then mix in flour, salt, and chopped nuts until dough comes together.
Scoop dough into 1-inch balls and place on baking sheet about 1 inch apart. Flatten slightly with your fingers or the bottom of a glass.
Bake for 12–14 minutes, until edges are lightly golden. Let cool completely.
Melt white chocolate chips in a double boiler or microwave in 30-second bursts, stirring until smooth.
Dip half of each cookie into melted white chocolate, then sprinkle immediately with decorations of choice.
Let set on parchment until chocolate firms up.
- Prep Time: 18 minutes
- Cook Time: 15 mins
- Category: Dessert
Nutrition
- Calories: 150
- Sugar: 7 g
- Protein: 2 g
The Snowed-In Secret: A Recipe Born from Cozy Chaos
This recipe has a special place in my heart because it was born from a classic “snowed-in” scenario. Picture this: I was about twelve, and a surprise blizzard had blanketed our little coastal town. The power flickered, school was canceled, and my grandma, who was visiting, declared it a “mandatory baking day.” We were down to what felt like the bare essentials in the pantry: a mountain of butter, flour, sugar, and a big bag of pecans from a neighbor’s tree.
My grandma, Elara, was a kitchen wizard. She never measured anything, just went by feel. “The dough will tell you when it’s ready, Isla,” she’d say, pressing a lump into my flour-dusted hands. That day, we created a simple nutty shortbread. We didn’t have any fancy chocolate for dipping, so we just ate them warm, laughing as we watched the snow pile up against the kitchen window. Years later, during another stormy afternoon, I found myself craving that exact cookie. I dug out my scribbled notes from that day, and in a wave of inspiration, I dipped them in white chocolate and covered them in sprinkles. It was like honoring that childhood memory but giving it a full-blown, grown-up, celebratory makeover. Now, every time I make them, I think of her and that cozy, snow-filled kitchen.
Gathering Your Blizzard Cookie Crew
This is where the fun begins! The ingredient list is straightforward, but each one plays a starring role. Here’s everything you’ll need to make about 6 dozen little bites of joy.
For the Cookie Dough:
- 2 cups (4 sticks) unsalted butter, softened – This is the heart of the cookie, giving it that incredible shortbread texture. Using unsalted lets you control the salt level. Chef’s Insight: Your butter is perfectly softened when you can press a finger into it and leave a clear indentation without it melting. This is key for a fluffy creamed base!
- 2 cups powdered sugar – Powdered sugar creates a finer, more tender crumb than granulated sugar would. It’s the secret to that melt-in-your-mouth quality.
- 2 teaspoons vanilla extract – The warm, aromatic backbone of flavor. For a real treat, try using vanilla bean paste—you’ll see those beautiful little specks throughout the dough!
- 4 cups all-purpose flour – The trusty structure-builder. Make sure to fluff it up in the bag before scooping and leveling it off in your measuring cup for accuracy.
- 2 cups finely chopped pecans or walnuts – I’m team pecans all the way for their buttery, rich flavor, but walnuts bring a wonderful earthy note. Substitution Tip: Not a nut fan? Swap them out for an equal amount of rolled oats (toasted, if you have time!) for a similar texture.
- ½ teaspoon salt – Don’t skip this! Salt is the flavor superhero that makes all the other ingredients—especially the butter and white chocolate—pop and taste more like themselves.
For the Magical White Chocolate Dip:
- 3 cups white chocolate chips (or chopped bars) – I highly, highly recommend using a high-quality chocolate bar for melting if you can. It has a lower chance of seizing and delivers a smoother, creamier finish. Chef’s Hack: If you only have chips, add a tiny teaspoon of coconut oil when melting to help it stay silky.
- ½ cup holiday sprinkles, sanding sugar, or crushed peppermint – This is where you get to be an artist! Use whatever makes you happy. The crunchy sanding sugar gives a true “blizzard” effect, while colorful sprinkles are just pure joy.
Let’s Bake! Your Step-by-Step Guide to Cookie Bliss
Ready to create some magic? Follow these steps, and you’ll have a kitchen full of heavenly aromas and a counter full of gorgeous cookies in no time. I’ve packed this section with all my favorite little hacks to make the process smooth and fun.
- Preheat and Prep. Fire up your oven to 350°F (175°C). This gives it plenty of time to reach the perfect, even temperature. Line your baking sheets with parchment paper. Chef’s Tip: Parchment paper is a non-negotiable for me here. It prevents browning on the bottom and makes cleanup an absolute dream. No scrubbing required!
- Cream the Butter and Sugar. In a large bowl, beat the softened butter and powdered sugar together. Now, don’t rush this! We’re not just mixing; we’re “creaming.” Beat it on medium-high speed for a good 2-3 minutes until it becomes pale, fluffy, and wonderfully smooth. This step incorporates air, which is what gives our cookies that light, tender texture instead of being dense. You should barely feel any graininess from the sugar when you rub a bit between your fingers.
- Bring in the Vanilla. Add your 2 teaspoons of vanilla extract and mix until it’s fully incorporated. Your kitchen should already be smelling amazing.
- Combine the Dry Ingredients. In a separate bowl, whisk together your flour, salt, and finely chopped nuts. Chef’s Hack: Whisking the nuts with the flour helps coat them, which stops them from sinking to the bottom of the cookie during baking. It’s a little trick for perfect distribution in every single bite!
- Bring the Dough Together. Gradually add the dry ingredients to the wet butter mixture, mixing on low speed just until the flour disappears and a soft dough forms. It might be a bit crumbly at first, but it will come together as you mix. Important Note: Stop mixing the second no more dry flour is visible. Over-mixing at this stage can lead to tough cookies, and we want tender, tender, tender!
- Scoop and Shape. Use a small cookie scoop or a tablespoon to portion the dough into 1-inch balls. Place them about an inch apart on your prepared baking sheets. Gently flatten each ball slightly with your fingers, the bottom of a glass, or the palm of your hand. This gives them that perfect, classic shortbread shape and ensures even baking.
- Bake to Golden Perfection. Slide those trays into your preheated oven and bake for 12-14 minutes. You’re looking for the very edges to just barely start turning a light golden brown. The tops should still look fairly pale. Chef’s Insight: They will continue to firm up as they cool. Over-baking is the enemy of a soft shortbread, so when in doubt, take them out a minute early!
- The All-Important Cool Down. Let the cookies cool on the baking sheet for 5 minutes before transferring them to a wire rack to cool completely. I know it’s tempting, but you must let them cool all the way before dipping. If the cookies are even slightly warm, the white chocolate will melt into a messy puddle. Patience is a virtue that pays off in a beautiful chocolate coating!
- Melt the White Chocolate. You can use a double boiler or the microwave. For the microwave, place the white chocolate in a microwave-safe bowl and heat in 30-second bursts, stirring vigorously between each burst, until it’s smooth and fluid. Chef’s Pro Tip: The white chocolate can be finicky. Make sure your bowl and utensils are completely dry, as even a drop of water can cause it to “seize” and become grainy.
- Dip and Decorate! Now for the fun part! Hold a cooled cookie by its edge and dip one half into the melted white chocolate. Let the excess drip off, then place it back on the parchment-lined sheet. Immediately, while the chocolate is still wet, shower it with your sprinkles or sanding sugar. This is your moment to shine—go for that blizzard effect!
- Let the Magic Set. Allow the chocolate to set completely. You can leave them at room temperature if it’s not too humid, or pop the tray in the fridge for 10-15 minutes to speed things up. And then… it’s time to taste your masterpiece!
Sharing the Joy: How to Serve These Winter Gems
These cookies are stars all on their own, but presentation is part of the fun! Pile them high on a rustic wooden board or a beautiful vintage platter. The contrast of the white chocolate and colorful sprinkles against a dark slate board is just stunning. For gifting, tuck them into cellophane bags tied with a ribbon, or stack them in a festive tin between layers of parchment paper. They pair beautifully with a hot cup of coffee, a glass of cold milk, or even a sweet dessert wine. Honestly, they bring the party wherever they go!
Ride Your Own Flavor Wave: Fun Recipe Twists
One of my favorite things about this recipe is how adaptable it is. Feel free to get creative and make it your own!
- Citrus Sunshine: Add the zest of one large orange (about 1 teaspoon) to the butter and sugar when creaming. The bright, sunny citrus cuts through the richness beautifully.
- Cozy Almond Twist: Replace the vanilla extract with 1 teaspoon of almond extract for a deeper, more complex flavor that feels incredibly warm and cozy.
- Double Chocolate Blizzard: Drizzle with melted dark chocolate instead of dipping in white for a stunning and delicious contrast. A little sea salt flake on top of the dark chocolate is next-level.
- Spiced Winter Wonderland: Whisk ½ to 1 teaspoon of ground cinnamon or a pinch of nutmeg into the flour mixture for a warm, spiced undertone that screams “winter.”
- Cranberry Bliss: Fold in ½ cup of dried cranberries, chopped small, along with the nuts for a pop of tartness and chewy texture.
From My Kitchen to Yours: A Few Parting Thoughts
This recipe has truly evolved over the years. The first time I made them for a holiday party, I was so nervous. I accidentally used salted butter AND added the salt, and you know what? They were still a massive hit. It just proved my point that good food doesn’t have to be perfect. It just has to be made with joy.
I also have a funny confession: I am incapable of making these cookies without getting sprinkles absolutely everywhere. My dog once had blue jimmies on his nose for an entire afternoon. It’s part of the charm! These cookies have seen me through breakups, celebrated new jobs, and been the centerpiece of countless Friendsgiving dinners. They’re more than a recipe; they’re a little edible hug. I hope they become a tradition in your home, too, and that you have as much fun making them as I do.
Your Cookie Questions, Answered!
I’ve gotten so many wonderful questions about these cookies over the years. Here are the answers to the most common ones to ensure your baking success!
Q: My dough is really crumbly and won’t hold together when I try to form balls. What did I do wrong?
A: Don’t worry, this is a common one! It usually means your flour was measured a little heavy-handed, or your butter could have been a bit too firm. The fix is easy: just add a tablespoon of very cold water or milk at a time to the dough and mix until it just comes together. It should feel like Play-Doh and hold its shape when squeezed.
Q: Why did my white chocolate get thick, clumpy, and grainy when I melted it?
A> Ah, you’ve experienced “seized” chocolate! This happens when even a tiny bit of moisture (like steam or a drop of water) gets into the chocolate. To prevent it, always ensure your bowl and utensils are bone dry. If it happens, you can sometimes save it by stirring in a teaspoon of solid vegetable shortening (like Crisco) or coconut oil until it smooths out again.
Q: Can I make the dough ahead of time and bake it later?
A: Absolutely! This dough is perfect for getting a head start. Form the dough into a log, wrap it tightly in plastic wrap, and it will keep in the fridge for up to 3 days. You can also freeze it for up to 3 months. When you’re ready, just slice and bake! No need to thaw, though you may need to add a minute or two to the baking time.
Q: My family has a nut allergy. What’s the best substitute?
A> No problem at all! Simply omit the nuts entirely. The cookies will still be deliciously buttery and shortbread-like. For a bit of textural interest, you could replace them with an equal amount of toasted rolled oats, or even some crushed pretzel pieces for a sweet-and-salty twist!
Nutritional Information*
*This is an approximate estimate calculated using a nutrition calculator.
Per Cookie: Calories: 150 | Fat: 10g | Saturated Fat: 5g | Carbohydrates: 14g | Sugar: 7g | Protein: 2g | Sodium: 30mg