Your New Thanksgiving Showstopper: The Unforgettable Piecaken
Hey there, friend! Isla here from BiteTide. Can we talk about the biggest, happiest, most delicious problem that hits us every single Thanksgiving? It’s the dessert table dilemma. You know the one. You’re standing there, plate in hand, staring down a lineup of absolute classics. The rich, gooey pecan pie winks at you. The smooth, spiced pumpkin pie whispers your name. And that moist, fragrant spice cake is practically doing a little dance. How on earth are you supposed to choose just one? Your heart wants a slice of everything, but your stomach (and maybe your Aunt Carol’s judgy eyes) says you have to pick a lane.
Well, I’m a firm believer that when life gives you too many amazing dessert options, you don’t choose—you combine. You create something legendary. You make a Piecaken.
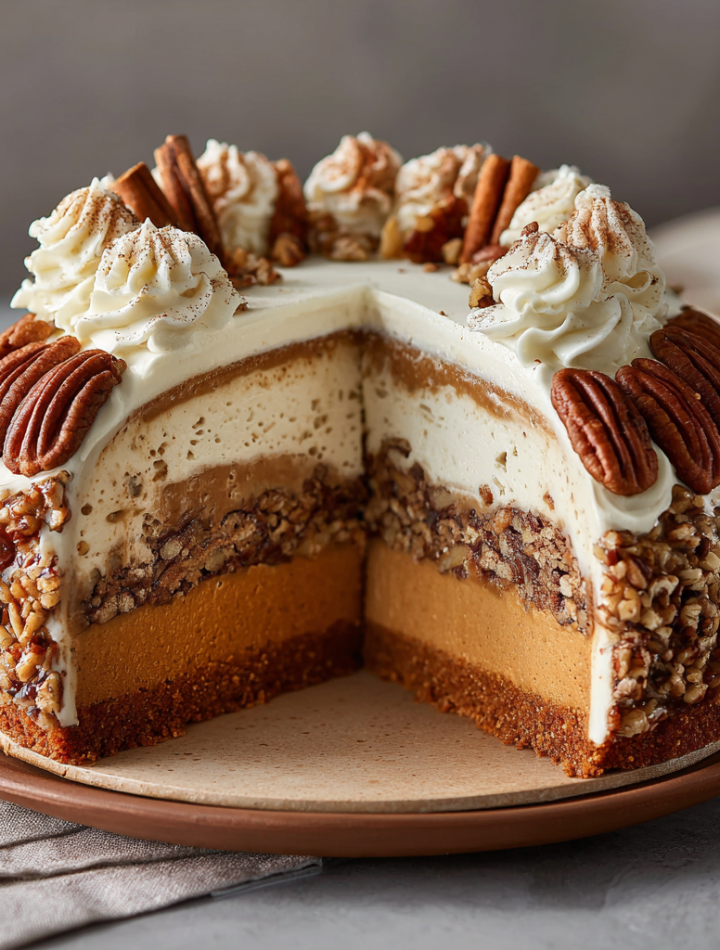
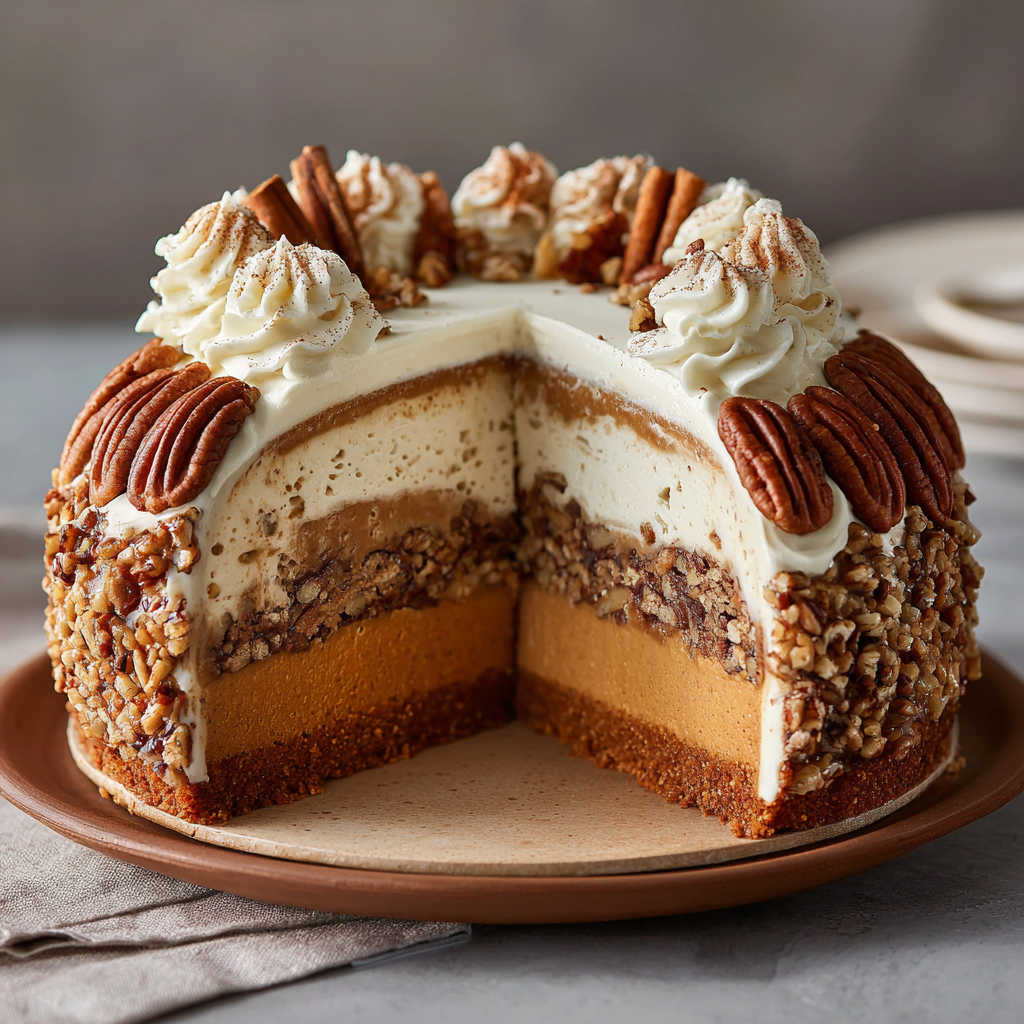
If you haven’t met this glorious dessert mashup yet, prepare to have your mind (and your taste buds) completely blown. A Piecaken is exactly what it sounds like: pie baked into a cake, creating one epic, multi-layered masterpiece. Our Thanksgiving version is a love letter to the holiday classics. We start with a buttery, nutty pecan pie base, stack a velvety pumpkin pie right on top, and crown it all with two fluffy, warmly-spiced cake layers. The whole glorious tower gets slathered in a cinnamon-kissed cream cheese frosting that’s so good, you might just find yourself eating it with a spoon.
I know it sounds like a project, but I promise you, it’s designed for real-life heroics. We’re using smart shortcuts (hello, pre-baked pies!) and my favorite no-fuss hacks to make this showstopper totally achievable. This is the dessert that will have your guests snapping pictures before they even take a bite. It’s the conversation piece of the feast, the ultimate grand finale. So, are you ready to ride this flavor wave and create a Thanksgiving memory that’s as sweet as it is unforgettable? Let’s get baking!
The Kitchen Chaos That Started It All
This recipe takes me right back to my grandma’s kitchen, which was always bursting with noise, love, and the most incredible smells. One particularly chaotic Thanksgiving, my dad—who fancies himself a dessert innovator—decided we needed a “trifecta of flavor” instead of three separate pies. With a mischievous grin, he started stacking a still-warm apple pie onto a cherry pie, attempting to “glue” them together with whipped cream. It was a delicious, wobbly, beautiful mess that collapsed spectacularly when we tried to slice it. We all laughed until we cried, eating our deconstructed dessert out of bowls.
That moment of joyful, imperfect creation always stuck with me. It wasn’t about a flawless presentation; it was about the pure fun of bringing favorite flavors together. When I first heard about the Piecaken trend years later, I knew I had to create a version that captured that same spirit of celebration and a little bit of daring. My Thanksgiving Piecaken is a tribute to that memory—a structurally sound, absolutely stunning version of my dad’s wild idea. It proves that the most memorable dishes often come from a place of joy and a willingness to try something new, even if it seems a little crazy at first.
Print
Thanksgiving Piecaken
- Total Time: About 3 hours
- Yield: 12–14 slices 1x
Description
Torn between pecan pie, pumpkin pie, and spice cake this Thanksgiving? Why choose. This Piecaken brings together all the classics into one stunning layered dessert. With rich pecan pie on the bottom, creamy pumpkin pie in the middle, and fluffy spice cake on top—frosted with a cinnamon cream cheese dream—this is the kind of dessert that turns heads and gets talked about long after dinner is over.
Ingredients
Pecan Pie Layer
1 pre-baked 9-inch pecan pie
Pumpkin Pie Layer
1 pre-baked 9-inch pumpkin pie
Spice Cake Layers
1 box spice cake mix (or homemade equivalent)
Eggs, oil, and water as per box instructions
Frosting
2 cups cream cheese, softened
1 cup unsalted butter, softened
4 cups powdered sugar
2 teaspoons cinnamon
1 teaspoon vanilla extract
Pinch of salt
Instructions
Bake Cake Layers
Prepare the spice cake mix and bake two 9-inch round layers. Let them cool completely.
Layer the Piecaken
Place the pecan pie (still in its crust) on a cake board. Add a layer of frosting, then gently place the pumpkin pie on top. Spread more frosting over the pumpkin pie.
Add Cake Layers
Stack one spice cake layer, add frosting, then top with the second spice cake layer.
Frost the Whole Cake
Cover the entire cake with a generous layer of cinnamon cream cheese frosting. Smooth or swirl as desired.
Decorate
Garnish with caramelized apples or a dusting of cinnamon. Refrigerate for 1–2 hours to set.
Serve
Slice with a sharp knife for clean layers and serve at room temperature.
- Prep Time: 45 minutes
- Category: Dessert
Nutrition
- Calories: 720
- Fat: 38g
- Saturated Fat: 17g
- Carbohydrates: 88g
- Fiber: 2g
- Protein: 5g
Gathering Your Piecaken Dream Team
Here’s everything you’ll need to build your dessert masterpiece. I’ve included my favorite chef insights and substitutions because I believe in making recipes work for you and your pantry!
For the Pie Layers
- 1 pre-baked 9-inch pecan pie: Store-bought or homemade is totally fine! The key is that it’s fully cooled. This forms our rich, sturdy base. Chef’s Insight: A pecan pie with a good, crisp crust will hold up best under the weight.
- 1 pre-baked 9-inch pumpkin pie: Again, cool it completely. This is our creamy middle layer. Substitution Tip: If you’re not a pumpkin fan, a sweet potato pie works beautifully here.
For the Spice Cake Layers
- 1 box spice cake mix (plus ingredients listed on box): This is our brilliant shortcut! The warm spices in the cake complement the pies perfectly. Chef’s Hack: Look for a “moist” or “pudding in the mix” variety for an extra-tender crumb.
- Eggs, Oil, and Water: As per your cake mix instructions. Pro-Tip: For a richer flavor, substitute the water with whole milk and use melted butter instead of oil.
For the Cinnamon Cream Cheese Frosting
- 2 cups (16 oz) cream cheese, softened: Full-fat cream cheese gives the frosting structure and a tangy flavor that cuts the sweetness. Key Step: Let it sit on the counter for at least an hour. Softened cream cheese whips up light and fluffy, while cold cream cheese can lead to lumpy frosting.
- 1 cup (2 sticks) unsalted butter, softened: Unsalted lets you control the salt level. Like the cream cheese, softening is non-negotiable for a smooth, spreadable frosting.
- 4 cups powdered sugar: Sift it! This is my #1 tip for avoiding a gritty frosting. It takes 30 seconds and makes a world of difference.
- 2 teaspoons ground cinnamon: This warm spice is the star of the frosting, tying all the layers together.
- 1 teaspoon pure vanilla extract: The flavor backbone. Always use pure vanilla for the best taste.
- Pinch of salt: This is the secret weapon! A tiny pinch enhances all the other flavors and balances the sweetness.
For the Optional Garnish
- Caramelized apples or cinnamon sticks: This adds a gorgeous, professional-looking finish. Easy Hack: A simple dusting of cinnamon or a drizzle of caramel sauce works wonders, too!
Building Your Piecaken Masterpiece, Step-by-Step
Okay, let’s build this beauty! I’ll walk you through each step with all my favorite kitchen-tested tips to ensure your Piecaken is not only delicious but also a total rock star of stability.
Step 1: Bake and Cool Your Cake Layers
Preheat your oven according to the spice cake mix directions. Grease and flour two 9-inch round cake pans. I like to add a round of parchment paper to the bottom for absolute guarantee of a clean release. Prepare the cake batter as directed, then divide it evenly between the two pans. Bake until a toothpick inserted into the center comes out clean. Chef’s Crucial Tip: Let the cakes cool in the pans for about 10 minutes, then turn them out onto a wire rack to cool completely. I mean it—completely cool! Warm cake will melt your frosting and make the whole structure unstable. This is the perfect time to run to the store if you need a pre-baked pie!
Step 2: Prepare Your Frosting
In a large bowl, beat the softened butter and cream cheese together with an electric mixer on medium-high speed for 2-3 minutes. You want it to be light, pale, and super fluffy. Scrape down the sides of the bowl. Gradually add the sifted powdered sugar, about one cup at a time, beating on low speed at first to avoid a sugar cloud, then increasing to medium. Once all the sugar is incorporated, add the cinnamon, vanilla, and pinch of salt. Beat for another minute until everything is smooth and dreamy. Give it a taste—you’re the boss! Want more cinnamon? Add it! Little Chef Hack: If your kitchen is warm, pop the frosting into the fridge for 15-20 minutes to firm up slightly before assembling. This makes it easier to work with.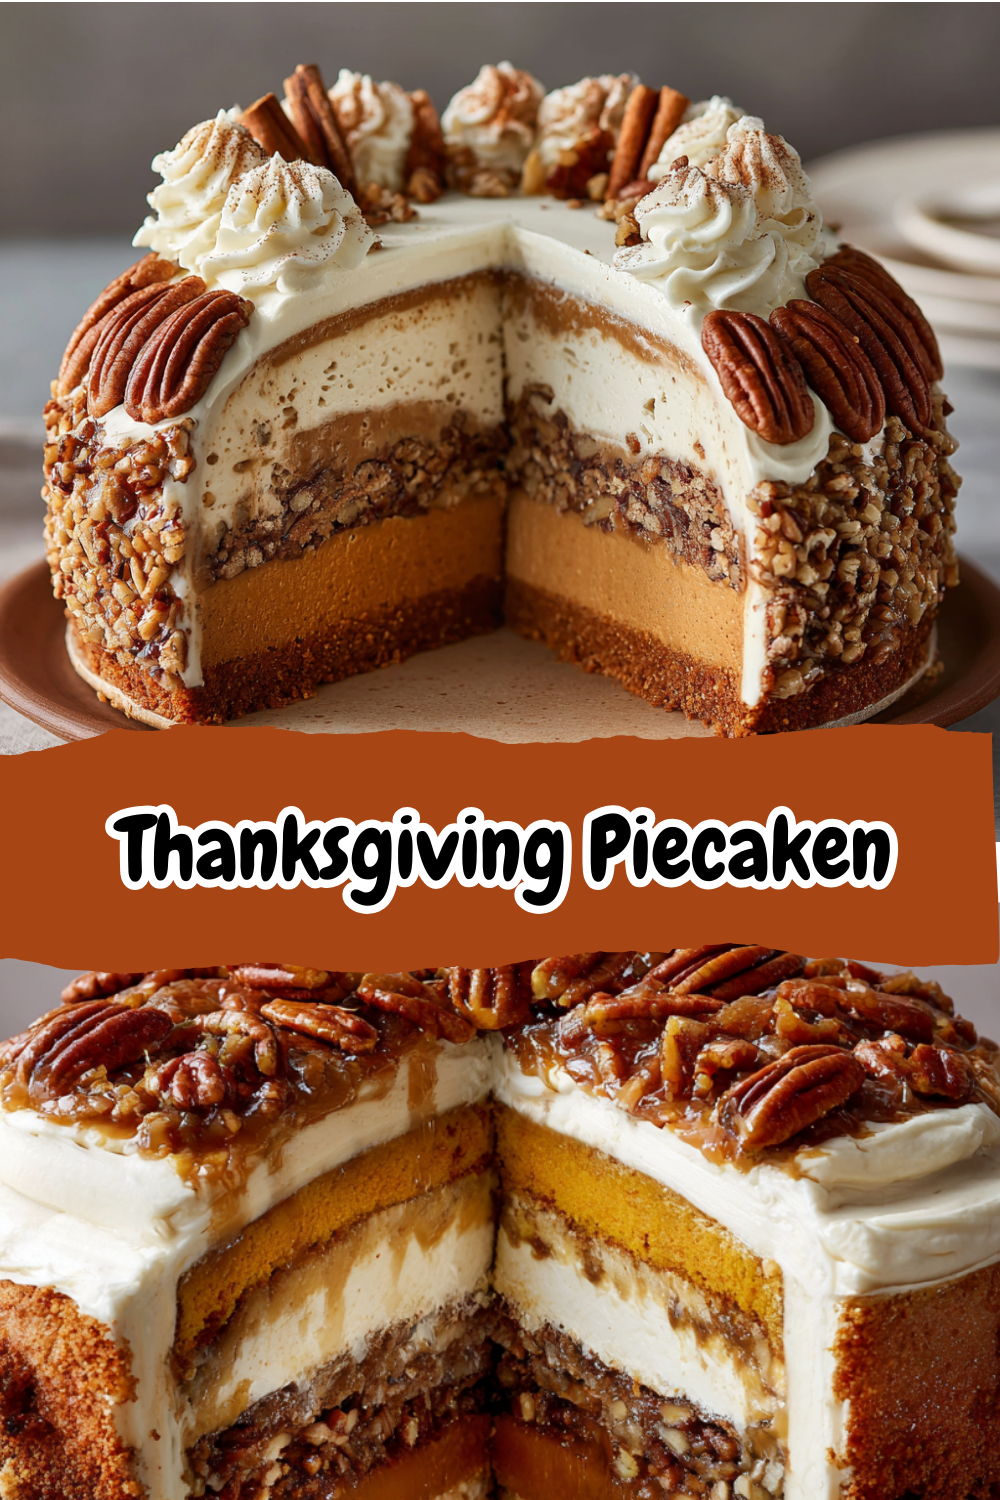
Step 3: The Grand Assembly – Layer by Layer
Place your fully cooled pecan pie (still in its tin) on a cake stand or a sturdy cake board. If the pie has a high, domed center, you can use a serrated knife to gently level it off—this gives the next layer a stable foundation. Spread a thin, even layer of frosting over the top of the pecan pie. This acts like delicious mortar! Now, carefully place your cooled pumpkin pie directly on top of the frosted pecan pie. Press down gently. Spread another layer of frosting over the top of the pumpkin pie.
Time for the cake! Take your first completely cooled spice cake layer and place it gently on top of the pumpkin pie. Spread a layer of frosting over this cake. Now, top it with the second spice cake layer. You’ve done it! You’ve built the tower. Take a moment to admire your work.
Step 4: The “Crumb Coat” and Final Frost
For a super clean, professional look, we’ll do a quick crumb coat. Spread a very thin layer of frosting over the entire outside of the Piecaken. This doesn’t have to be pretty; it’s just to trap any loose cake crumbs. Pop the whole thing into the refrigerator for about 20-30 minutes to let this layer set. Once firm, take it out and apply the final, generous, beautiful layer of frosting. Use an offset spatula or a butter knife to smooth it out or create fun, rustic swirls—your choice!
Step 5: Decorate and Set
This is where you make it your own! Arrange your caramelized apples artfully on top, press in a few cinnamon sticks, or simply dust with a little extra cinnamon. Once decorated, refrigerate the Piecaken for at least 1-2 hours, or even overnight. This chilling time is essential! It allows the frosting to set and the whole dessert to firm up, making slicing infinitely easier.
Step 6: The Grand Finale – Serving
When you’re ready to serve, use a long, sharp knife. I run my knife under hot water, wipe it dry, and then make a clean cut. The warm knife glides through the layers like a dream. Wipe the knife clean between slices for picture-perfect servings. Let the slices sit at room temperature for 10-15 minutes before eating to allow the flavors to truly sing.
How to Serve This Showstopper
Presentation is part of the fun! Place your finished Piecaken on a beautiful cake stand as the centerpiece of your dessert table. When slicing, use that hot knife trick for clean, stunning layers that showcase the pecan, pumpkin, and cake. I love serving each slice on a simple white plate with a tiny sprinkle of cinnamon on the rim for a chef-y touch. A little dollop of freshly whipped cream or a drizzle of warm caramel sauce on the side never hurts, but honestly, this dessert is so magnificent it needs absolutely nothing else. Pour the coffee, gather your guests, and get ready for the applause!
Get Creative! Piecaken Variations
The beauty of the Piecaken is its versatility. Don’t be afraid to mix and match based on your family’s favorites!
- Chocolate Lovers: Swap the pecan pie for a fudgy chocolate silk pie and use a devil’s food cake instead of spice cake. Frost with a chocolate cream cheese frosting.
- Apple Crisp Fantasy: Use an apple pie as the base and a vanilla or caramel cake on top. Frost with a brown sugar cinnamon buttercream.
- Berry Blast: Try a cherry or blueberry pie on the bottom with a classic white or lemon cake. A vanilla cream cheese frosting would be perfect here.
- Gluten-Free Friendly: Use your favorite gluten-free pie crusts and a gluten-free spice cake mix. Most cream cheese and butter are naturally gluten-free, but always check labels.
- Lighter Option: Use reduced-fat cream cheese and a light butter spread for the frosting. The cake mix can also be prepared with diet soda instead of oil/eggs for a lower-calorie base.
Isla’s Final Thoughts & Kitchen Confessions
I’ve made this Piecaken more times than I can count, and it has evolved from a “will this work?” experiment to my signature Thanksgiving dessert. The first time I made it, I was so nervous about it collapsing that I practically held my breath the entire dinner. But when my friend’s husband took a bite, closed his eyes, and said, “This is the best thing I’ve ever eaten,” I knew it was a keeper.
My biggest lesson? Embrace the imperfections! Maybe your frosting isn’t perfectly smooth, or a little bit of cake crumb got into the final coat. Who cares? That’s the sign of a real, homemade, made-with-love dessert. The flavors are what truly matter, and this combination is a guaranteed win. This Piecaken embodies the BiteTide spirit: it’s fun, it’s flavorful, and it’s designed to bring people joy without stressing you out. You’ve got this!
Piecaken FAQs & Troubleshooting
Let’s tackle some common questions head-on so you feel confident as can be!
Q: Can I make any parts ahead of time?
A: Absolutely! This is a great make-ahead dessert. You can bake the pies and the cake layers up to two days in advance. Let them cool completely, wrap them tightly in plastic wrap, and store them in the fridge. The frosting can also be made ahead and stored in an airtight container in the fridge for up to 3 days. Let it come to room temperature and re-whip it briefly before using. You can fully assemble the Piecaken the day before and let it set in the fridge overnight.
Q: My Piecaken seems wobbly! Is it going to collapse?
A: Don’t panic! The wobble usually comes from the pies being too warm or the frosting being too soft. The chilling time in the fridge is your best friend here. It firms everything up. Also, ensure your cake layers are completely cool before assembling. If you’re still worried, you can insert a few wooden skewers or drinking straws down through the center of the assembled Piecaken before frosting to act as a support system. Just remember to remove them before slicing!
Q: Can I use frozen pies?
A: You can, but they must be fully thawed and preferably baked according to their package directions first. A frozen or even partially frozen pie will create condensation and make the whole structure soggy. For the best texture and stability, fully baked and fully cooled pies are the way to go.
Q: My frosting is too runny. How can I fix it?
A: A runny frosting is usually caused by the butter or cream cheese being too warm. Pop the whole bowl of frosting into the refrigerator for 20-30 minutes to firm up, then re-whip it. If it’s still too soft, you can add a little more sifted powdered sugar, a tablespoon at a time, until it reaches a spreadable consistency.
Nutritional Information*
*This is an approximate estimate based on the ingredients used and may vary depending on specific brands and substitutions.
Servings: 12-14 slices | Prep Time: 45 minutes | Chill Time: 2 hours | Total Time: About 3 hours
Approximate Nutrition Per Slice (based on 14 slices):
Calories: 720 | Fat: 38g | Saturated Fat: 17g | Carbohydrates: 88g | Sugar: 61g | Protein: 6g | Fiber: 2g | Sodium: 460mg
This Piecaken is more than just dessert—it’s an experience, a centerpiece, and a conversation starter all in one. From the flaky pies to the moist cake layers and luscious frosting, every bite is a celebration of holiday indulgence. Whether you’re making it for the first time or adding it to your annual tradition, remember: the joy is in the process (and the taste!). Serve it proudly, embrace the imperfections, and watch it disappear slice by slice.