 Salt & Pepper Roasted Chicken Breasts: Your New Weeknight Hero
Hey friends! Isla here from BiteTide. Let me paint you a picture I know all too well: it’s 6 PM, the day has completely gotten away from you, and the dreaded “what’s for dinner?” question is hanging in the air. You’re staring into the fridge, willing inspiration to strike, but all you see are a few chicken breasts, some basics in the pantry, and your own tired reflection. I’ve been there more times than I can count, and that exact moment is why this recipe exists.
In our quest for exciting, blog-worthy meals, we sometimes forget the absolute magic of a few perfect, high-quality ingredients treated with respect. This Salt & Pepper Roasted Chicken Breast recipe is my love letter to back-to-basics cooking that actually tastes incredible. It’s the culinary equivalent of your favorite cozy sweater—reliable, comforting, and always just right.
We’re not just throwing chicken in an oven. We’re on a mission to unlock maximum juiciness, create a gorgeous golden exterior, and coax out a deep, savory flavor that makes you pause and say, “Wow, I made this?” With just salt, pepper, oil, and a few insider tricks, you’ll have a protein powerhouse that can anchor a dozen different meals throughout your week. So, let’s ditch the stress, embrace the simple, and make something truly delicious. Your future self, rummaging for a quick lunch tomorrow, will thank you profusely. Ready to ride this flavor wave? Let’s get cooking!
The Humble Chicken Breast That Started It All
This recipe takes me right back to my dad’s tiny, perpetually messy kitchen in our coastal town. My dad wasn’t a “chef,” but he was a master of necessity cooking. He worked long hours on the docks, and dinner had to be hearty, quick, and satisfying. His version of this was a couple of bone-in, skin-on chicken pieces seasoned with what he called “the holy duo”—a hefty palmful of coarse sea salt and cracked black pepper from an old grinder.
The smell that filled our kitchen was the official signal that Dad was home. It was simple, savoury, and deeply comforting. He’d always let me turn the pepper grinder, my small hands struggling with the mechanism, and he’d say, “More, Isla! Flavor is free!” That lesson stuck with me: don’t be shy. That simple chicken, often served with just a wedge of lemon and whatever veggies we had, taught me that confidence in a few good ingredients beats a complicated recipe every single time. This is my streamlined, weeknight-friendly homage to that memory—and to all the parents everywhere making magic happen at the end of a long day.
Print
Salt & Pepper Roasted Chicken Breasts : Simple, Juicy & Perfect Every Time
- Total Time: 30 mins
- Yield: 4 servings 1x
Description
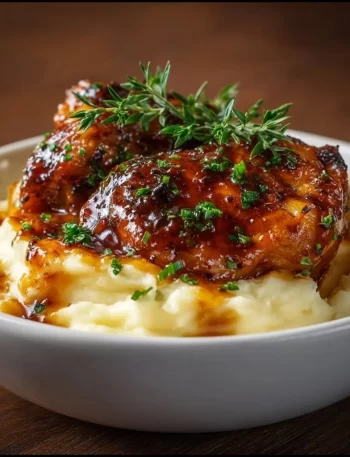
Sometimes simple is best—these Salt & Pepper Roasted Chicken Breasts prove it. Perfectly seasoned and oven-roasted until golden and juicy, this no-fuss recipe is a go-to for meal prep, quick dinners, or effortless protein to add to salads, sandwiches, and more. Just salt, pepper, and good technique bring out the best in this kitchen classic.
Ingredients
4 boneless, skinless chicken breasts
1 tbsp olive oil
1 tsp kosher salt
½ tsp freshly ground black pepper
Optional: garlic powder, fresh herbs, or lemon slices for added aroma
Instructions
Preheat oven to 425°F (220°C).
Pat chicken dry with paper towels for better browning.
Rub with olive oil, then season both sides with salt and pepper (and any optional add-ons).
Place on baking sheet or in a cast iron skillet.
Roast for 20–25 minutes, depending on thickness, until internal temp hits 165°F.
Rest 5 minutes before slicing to retain juices.
- Prep Time: 5 mins
- Cook Time: 25 mins
- Category: Dinner
Gathering Your Flavor Arsenal
Here’s the beautiful shortlist. The quality of these few ingredients really shines here, so use the best you have on hand!
- 4 boneless, skinless chicken breasts (about 1.5 to 2 lbs total): This is our star! Look for breasts that are relatively uniform in size so they cook evenly. Chef’s Insight: If yours are gigantic or oddly shaped, don’t panic! We’ll tackle that in the steps with a simple “butterfly or pound” hack.
- 1 tablespoon olive oil: A good glug of extra virgin olive oil is my go-to for its flavor and ability to help the seasoning stick and promote browning. Sub Tip: Avocado oil, melted ghee, or even a neutral oil like grapeseed will work perfectly.
- 1 teaspoon kosher salt: This is non-negotiable for flavor and texture. I specify kosher salt (like Diamond Crystal) because its flakes are less dense than table salt, making it harder to over-salt by accident. Chef’s Insight: If you only have fine table salt, use about 3/4 teaspoon to start. Salt is what draws out the natural savory goodness of the chicken.
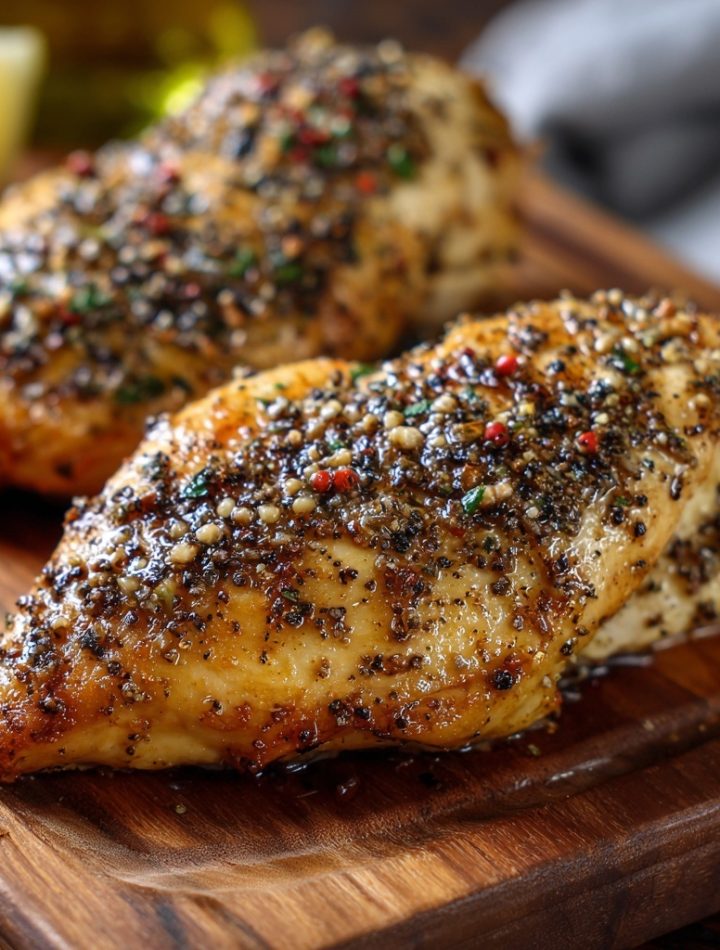
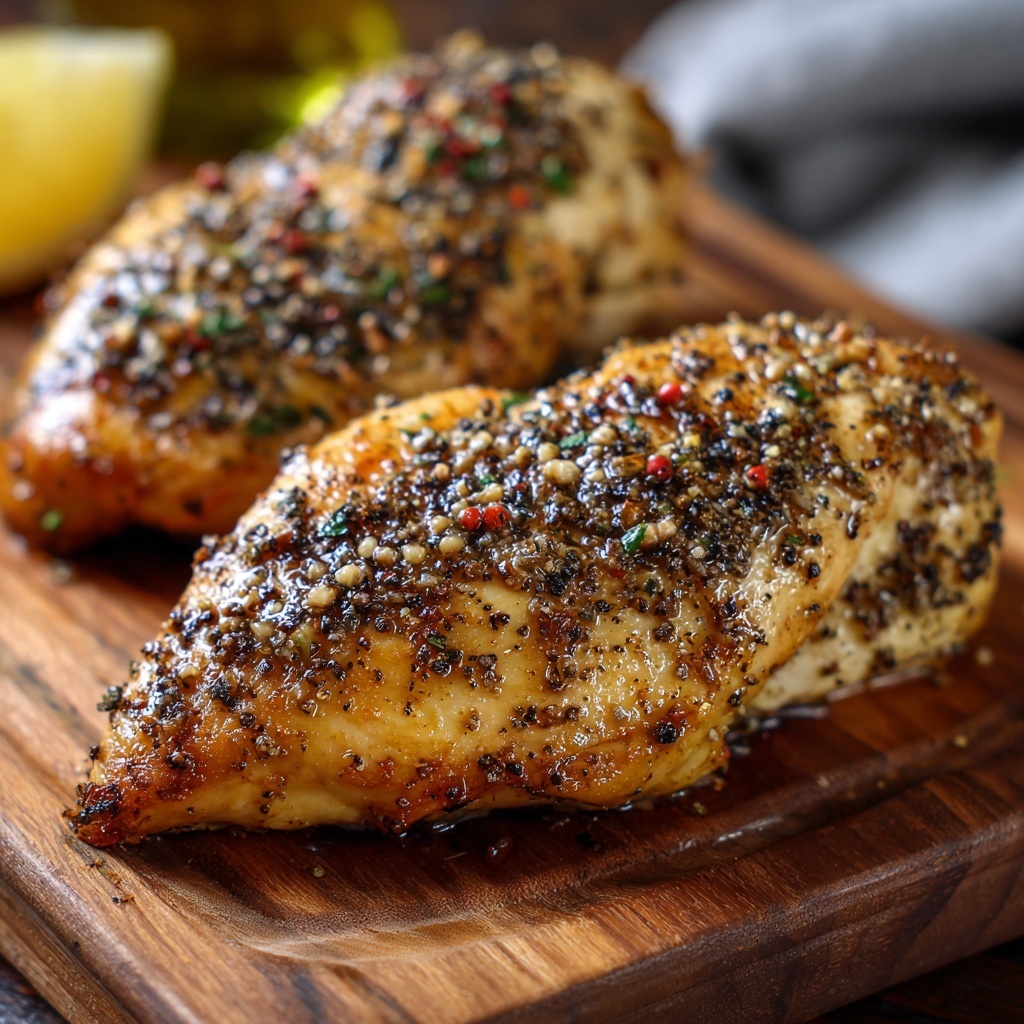
- 1/2 teaspoon freshly ground black pepper: Please, for the love of crispy, golden crusts, grind your pepper fresh! The pre-ground powder lacks the vibrant, pungent aroma and flavor. This is our “pepper” in salt & pepper, so let it shine.
- Optional Aromatics: This is your playground! A light sprinkle of garlic powder, smoked paprika, or dried herbs (thyme, rosemary) on the oiled chicken adds a subtle background note. A few fresh lemon slices or sprigs of thyme tucked underneath or on top during roasting infuse a beautiful, gentle fragrance.
Let’s Make Some Magic: Step-by-Step
Follow these steps, and you’ll achieve chicken breast perfection. I’m chatting you through each one with all my favorite hacks!
Step 1: Preheat & Prep Your Pan. Crank that oven to 425°F (220°C). This high heat is our secret weapon for a gorgeous, quick roast without drying out the middle. While it heats, grab a rimmed baking sheet or, my personal favorite, a well-seasoned cast iron skillet. Lining the sheet with parchment paper makes cleanup a dream, but for maximum browning, placing the chicken directly on the metal or in the skillet is best. No need to grease it yet.
Step 2: The Critical Dry Brine. Take your chicken breasts and pat them intensely dry with paper towels. I’m talking Sahara-desert dry. This is the #1 most important step for getting a golden crust, not a steamy, pale exterior. Moisture is the enemy of browning! Once dry, place them on a plate or cutting board.
Step 3: The Size Equalizer (Your Juiciness Guarantee). Look at your chicken. Are they all different thicknesses? Is one end super thick and the other thin? We need to fix that for even cooking. You have two easy options: 1) Butterfly: Place your hand on top of a breast and carefully slice it horizontally, almost all the way through, then open it like a book. 2) Pound: Place the breast between two sheets of plastic wrap or in a zip-top bag and gently pound the thicker end with a rolling pin, meat mallet, or even a heavy skillet until it’s a relatively even 3/4-inch to 1-inch thickness throughout. This simple act prevents the thin end from turning into jerky while the thick end cooks!
Step 4: Season with Confidence. Drizzle and rub the olive oil all over both sides of each breast. This creates a glue for our seasoning. Now, sprinkle both sides evenly with the kosher salt and fresh black pepper. Don’t just dust it—make it rain! Get good coverage. If using any optional dried spices, add them now. Feel the chicken, get your hands in there. This is where the connection happens!
Step 5: Roast to Perfection. Place your seasoned breasts on the prepared pan, leaving a little space between them for air circulation. If using lemon slices or fresh herbs, tuck them around (not smothering) the chicken. Slide the pan into the hot oven. Now, set a timer for 18 minutes. Do not open the oven door! Let the hot air work its magic.
Step 6: The Trusty Thermometer Test. After 18 minutes, carefully open the oven and insert an instant-read thermometer into the thickest part of the largest breast. We’re aiming for 160-162°F (71-72°C). Why not 165°F? Because the temperature will continue to rise as it rests (carryover cooking), taking it to a perfect, juicy 165°F. If it’s not there yet, give it 2-3 more minutes and check again. Total time usually lands between 20-25 minutes.
Step 7: The Mandatory Rest. This is non-negotiable! Transfer the chicken to a clean plate or cutting board and walk away for 5 full minutes. I cover it loosely with foil if I’m impatient. This allows the frantic, hot juices to redistribute throughout the meat. If you slice it immediately, all those precious juices will run out onto the board, leaving you with dry chicken. Trust me, wait!
How to Serve Your Masterpiece
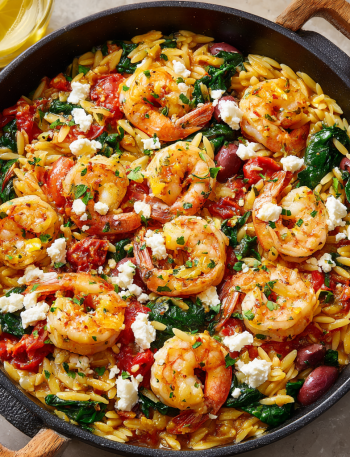
After its beauty rest, you can slice it against the grain into beautiful medallions for fanning over a vibrant salad or a bowl of creamy polenta. Shred it with two forks for tacos, sandwiches, or soup toppers. Or, serve each breast whole alongside some crispy roasted potatoes and a simple green veggie for a classic plate. It’s the ultimate utility player! I love drizzling any pan juices that collected during resting right back over the top for an extra hit of flavor.
Ride the Flavor Wave: 5 Easy Twists
- Lemon-Herb: Add the zest of one lemon to the salt & pepper mix. Scatter fresh thyme or rosemary sprigs on the pan before roasting.
- Smoky Paprika: Add 1 tsp smoked paprika and 1/2 tsp garlic powder to the seasoning blend for a deep, almost BBQ-like aroma.
- Everything Bagel: After oiling, coat the chicken in a generous layer of Everything Bagel Seasoning. It’s a crunchy, savory dream!
- Spicy Chili-Lime: Swap black pepper for 1 tsp chili powder (or chipotle powder for smoke). Add the zest of one lime and serve with fresh lime wedges.
- Dairy-Free “Parmesan” Crust: Mix 1/4 cup nutritional yeast with 1/2 tsp garlic powder. After oiling, press the chicken into the mixture to create a cheesy, flavorful crust.
Isla’s Kitchen Notes
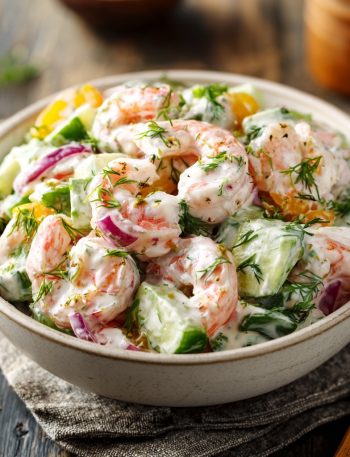
This recipe has evolved from my dad’s basic version into my ultimate weeknight security blanket. The biggest game-changer for me was learning to pound the chicken to an even thickness—it solved the “dry ends” problem forever! I also used to be terrified of undercooking chicken, so I’d blast it until it was 180°F (cue: sawdust). Investing in a simple digital meat thermometer gave me the confidence to pull it out at the perfect moment. Now, I always have a batch of this in my fridge for quick lunches. My favorite hack? Slicing it cold over a big Greek salad with lots of feta and olives. The texture is fantastic, and it makes me feel like I have my life together, even on the most chaotic days. Remember, friends, good cooking isn’t about perfection; it’s about the joy you fuel. Now go make your kitchen smell amazing!
Your Questions, Answered!
Q: My chicken always turns out dry. What am I doing wrong?
A: The most common culprits are: 1) Not pounding to even thickness (so the thin parts overcook), 2) Skipping the rest step (so the juices escape), and 3) Overcooking. A thermometer is your best friend! Also, remember that boneless, skinless breasts are lean. Cooking them to the exact correct temperature (160-162°F before resting) is crucial for juiciness.
Q: Can I use chicken thighs instead?
A: Absolutely! Bone-in, skin-on thighs are incredibly forgiving and flavorful. You may need to add 5-10 minutes to the cooking time. Check for an internal temperature of 175°F near the bone for fall-apart tenderness.
Q: How long does the cooked chicken last in the fridge?
A: Once cooled, store it in an airtight container for 3-4 days. It’s a meal prep superstar! It reheats well gently in the microwave with a splash of broth or water, or you can use it cold in salads and wraps.
Q: The bottom of my chicken isn’t browning. Help!
A: This usually means there’s too much moisture. Ensure you patted the chicken very dry. Also, make sure you’re using a preheated oven and a dark-colored metal pan or cast iron skillet, which absorbs and radiates heat better than a light-colored sheet pan. Avoid glass or ceramic baking dishes for this high-heat roast if browning is your goal.
Nutritional Information*
*Estimated per serving (1 chicken breast), based on ingredients listed.
Calories: ~220 | Protein: 38g | Carbohydrates: 0g | Fat: 7g | Saturated Fat: 1g | Cholesterol: 115mg | Sodium: ~300mg
This simple, juicy Salt & Pepper Roasted Chicken Breast is proof that you don’t need a long ingredient list to create something truly delicious and satisfying. It’s a foundation for countless meals and a technique you’ll come back to again and again. Now, I’d love to hear from you! Did you try a fun variation? Tag me @BiteTide on socials so I can see your creations. Happy cooking!
– Isla 💛