Your New Favorite Dessert Bar is Here: Rocky Road Fudge Bars
Hey there, friend! Isla here, from BiteTide. Let’s be real for a second: sometimes, you need a dessert that feels like a giant, comforting hug. A treat that’s so ridiculously good, it makes you do a little happy dance right there in the kitchen. A dessert that looks like you spent all day on it, but secretly came together in about ten minutes. Sound like magic? Well, pull up a chair and grab your favorite mixing bowl, because I’m about to introduce you to your new baking best friend: my No-Bake Rocky Road Fudge Bars.
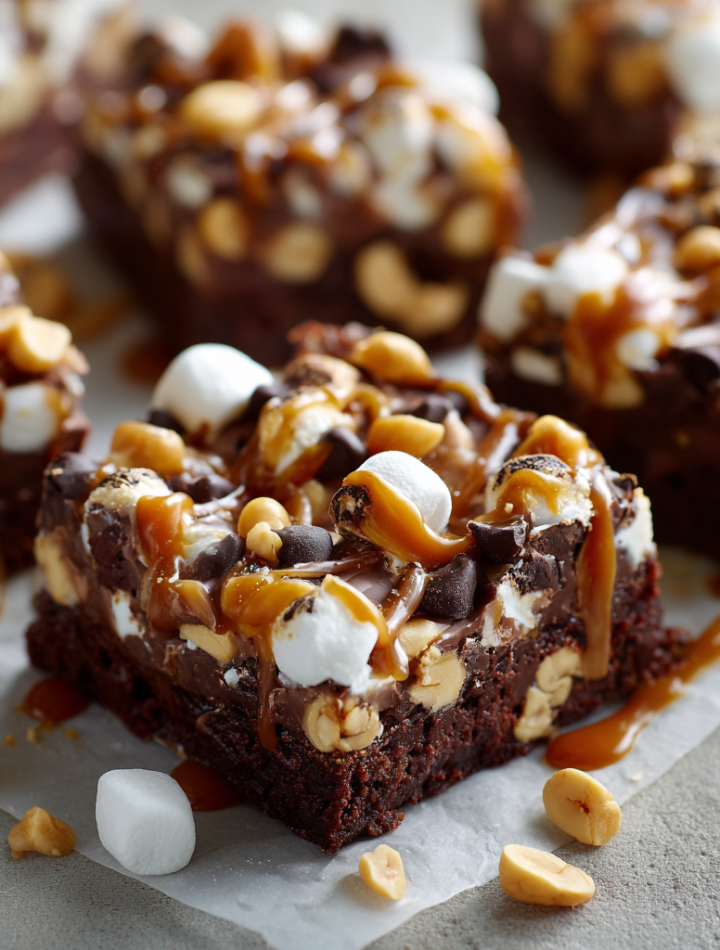
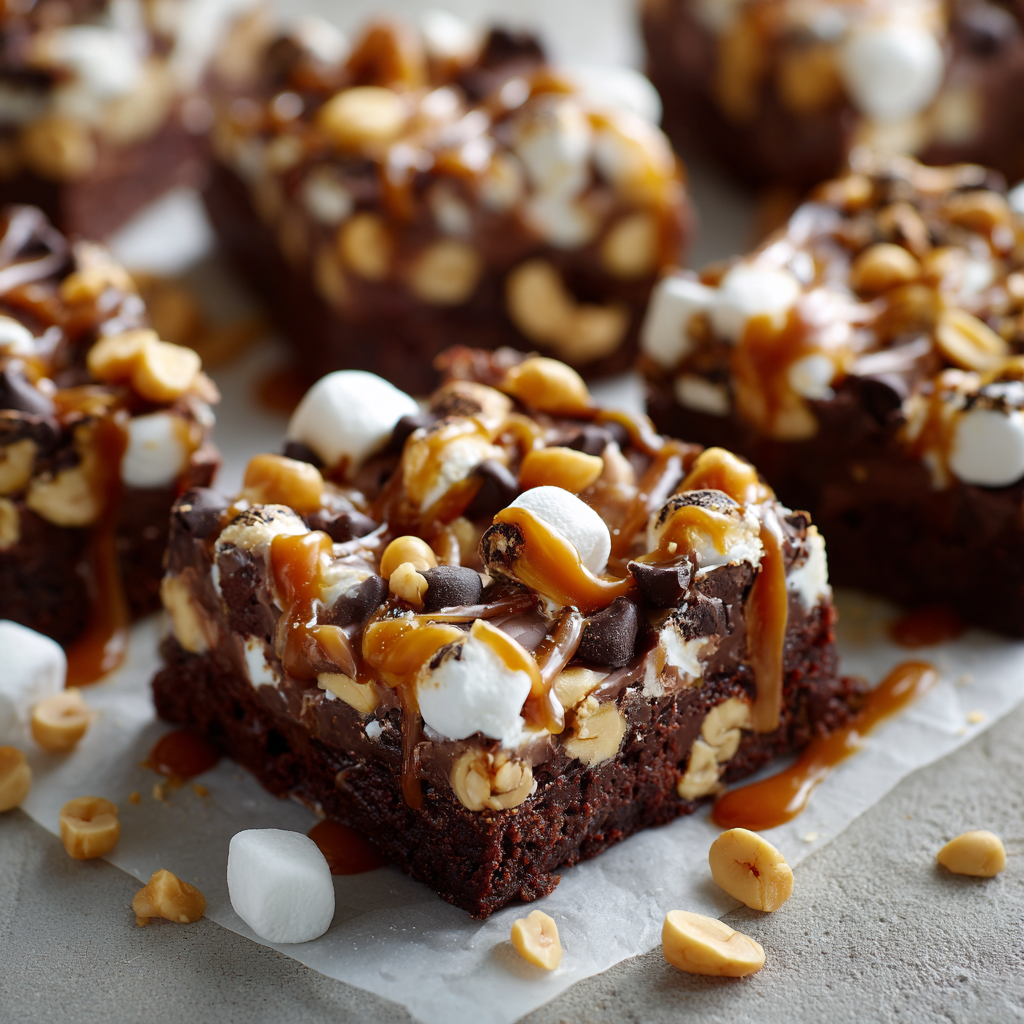
Imagine this: a base of luxuriously rich, smooth chocolate fudge that’s so decadent it practically melts on your tongue. Now, fold in fluffy mini marshmallows that stay wonderfully soft and chewy, and a generous handful of salty, crunchy peanuts for that perfect textural contrast. And because we believe that more is more when it comes to dessert, we’re finishing it all off with a generous swirl of gooey caramel sauce. It’s the iconic flavor combination of rocky road ice cream, transformed into an incredibly easy, sliceable, shareable (or not-so-shareable) bar. This is the dessert you’ll make for potlucks, bake sales, late-night cravings, and everything in between. It’s a total crowd-pleaser, and I am so excited to ride this flavor wave with you. Let’s get cooking!
A Sweet Slice of Memory
This recipe always takes me right back to my grandma’s sunny kitchen. She wasn’t a fancy baker—her specialties were simple, heartfelt, and always involved chocolate. Every summer, when the weather was too hot to turn on the oven, she’d whip up her famous “fridge fudge.” My job, as her official (and very messy) sous-chef, was to stir the chocolate chips and condensed milk until they formed a glossy, dark river. But the best part was always the add-ins. She’d let me choose: sometimes it was crushed-up crackers for a mock-“s’more,” other times it was raisins and nuts. But our hands-down favorite was the Rocky Road version.
She’d let me pour in the entire bag of marshmallows and I’d watch in awe as they’d start to ever-so-slightly melt at the edges from the warm fudge, creating these incredible pockets of sweet goo. We’d press the mixture into her old, slightly warped tin pan, and the wait for it to chill in the fridge felt like an eternity. That first bite, always stolen while she wasn’t looking, was pure magic. It tasted like love, laughter, and the simple joy of creating something delicious together. This recipe is my homage to her—a no-fuss, fun, and fantastically flavorful treat that’s all about making your own sweet memories.
Print
Rocky Road Fudge Bars
- Total Time: 2 hours 10 minutes
Description
This indulgent treat is everything you love about rocky road—rich chocolate, gooey marshmallows, crunchy peanuts, and a sweet drizzle of caramel—all packed into easy-to-slice bars. It’s the perfect combination of chewy, crunchy, and creamy, making every bite a little adventure. A crowd favorite for any dessert table or holiday spread.
Ingredients
3 cups semi-sweet chocolate chips
1 can (14 oz) sweetened condensed milk
2 cups mini marshmallows
1 cup salted peanuts
½ cup caramel sauce (store-bought or homemade)
1 teaspoon vanilla extract
Instructions
Line an 8×8-inch or 9×9-inch pan with parchment paper.
In a saucepan over low heat, melt chocolate chips and sweetened condensed milk, stirring until smooth.
Remove from heat and stir in vanilla.
Fold in marshmallows and peanuts.
Pour the mixture into the prepared pan and spread evenly.
Drizzle caramel sauce over the top and lightly swirl with a knife or toothpick.
Chill in the refrigerator for at least 2 hours until firm.
Slice into bars and serve.
- Prep Time: 10 minutes
- Cook Time: 2 hours
- Category: Dessert
Nutrition
- Calories: 210
- Sugar: 23g
- Sodium: 70mg
- Fat: 11g
- Saturated Fat: 5g
- Carbohydrates: 27g
- Protein: 3g
Gathering Your Flavor Crew
Here’s the beautiful part: you only need a handful of simple ingredients to create something truly spectacular. This is pantry raid magic at its finest! Let’s break it down.
- 3 cups semi-sweet chocolate chips: This is the star of the show, the deep, chocolatey foundation of our bars. I like semi-sweet for its perfect balance—it’s rich but not overly sweet, which lets the other flavors shine. Chef’s Insight: The quality of your chocolate matters here! A good brand like Ghirardelli or Guittard will give you a smoother, more professional melt and taste. For a darker, more intense bar, feel free to use dark chocolate chips.
- 1 can (14 oz) sweetened condensed milk: This is the magical glue that holds our fudge together and gives it that iconic creamy, smooth texture. It’s non-negotiable for this recipe—evaporated milk will not work! Make sure to shake the can before you open it.
- 2 cups mini marshmallows: The “rocky” in our road! Minis are key because they distribute evenly throughout the bars. Their pillowy softness and slight melt provide that classic chewy texture we’re after.
- 1 cup salted peanuts: This is our “road” and our secret flavor weapon. The salt from the peanuts cuts through the sweetness of the chocolate and caramel beautifully. Substitution Tip: Allergic to peanuts? No problem! Roasted almonds, pecans, or even walnuts would be delicious. For a nut-free version, try using pretzel pieces for that salty crunch.
- ½ cup caramel sauce: The gorgeous, gooey ribbon that takes these bars to an 11. I often use a good-quality store-bought sauce to save time (I won’t tell!), but if you’re feeling ambitious, my easy 10-minute homemade caramel is divine.
- 1 teaspoon vanilla extract: The flavor enhancer! A splash of good vanilla rounds out the chocolate flavor and adds a warm, aromatic depth. Always use pure vanilla extract if you have it.
Let’s Make Some Magic: Step-by-Step
Ready? This is seriously one of the easiest desserts you’ll ever make. Let’s walk through it together. I’ve got plenty of little hacks along the way to ensure your bars are absolutely perfect.
- Prep Your Pan: First things first, line an 8×8-inch or 9×9-inch square baking pan with parchment paper. Pro-Tip: Let the parchment paper overhang on two opposite sides. This creates “handles” that will allow you to lift the entire block of fudge out of the pan later for super clean, easy slicing. No more wrestling with it! Give the parchment a very light spritz with cooking spray to ensure nothing sticks.
- Melt the Chocolate Base: In a medium-sized saucepan, combine your chocolate chips and the entire can of sweetened condensed milk. Place it over LOW heat. I’m emphasizing low because we want this to be a gentle, slow melt. If the heat is too high, the chocolate can seize up (become grainy and clumpy), and we want it silky smooth. Stir constantly with a spatula until the chocolate is fully melted and the mixture is one homogenous, glorious, chocolatey pool. This should only take about 5-7 minutes.
- Off-Heat Flavor Boost: Once your chocolate mixture is smooth, remove the saucepan from the heat immediately. Stir in that teaspoon of vanilla extract. It might not seem like much, but trust me, it makes a world of difference.
- The Big Fold: Now for the fun part! Add in your 2 cups of mini marshmallows and 1 cup of salted peanuts. Here’s a Chef’s Hack: If you want your marshmallows to stay more distinct and less melted, let the chocolate mixture cool for about 5 minutes before folding them in. I personally love when they get a little melty, so I add them right away. Use a folding motion with your spatula to evenly distribute everything without deflating the marshmallows too much.
- Pan and Swirl: Pour the thick, chunky fudge mixture into your prepared pan. Use your spatula to spread it into an even layer, pushing it into all the corners. Now, take your caramel sauce and drizzle it artfully all over the top. Take a knife or a toothpick and gently swirl it through the top layer of the fudge and caramel. Don’t over-mix—beautiful marbled streaks are what we’re going for!
- The Patience Test: This is the hardest part. Pop the pan into the refrigerator to chill. You need to let it set for at least 2 hours, or until it’s completely firm. Time-Saving Tip: If you’re in a serious hurry, the freezer will speed this up significantly! Check it after 45-60 minutes. A well-set fudge will slice cleanly and hold its shape.
- Slice and Serve: Once rock solid, use your parchment paper handles to lift the entire fudge block onto a cutting board. Using a large, sharp knife, slice it into bars. For clean cuts, I like to wipe my knife blade clean between slices. Now, serve them up and get ready for the compliments to roll in!
How to Serve These Heavenly Bars
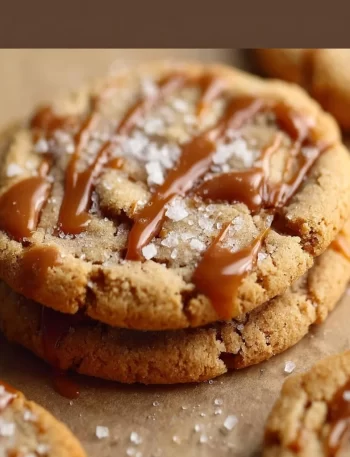
These bars are fantastic straight from the fridge—cool, firm, and satisfyingly rich. For the ultimate experience, let them sit at room temperature for about 5-10 minutes before serving; this allows the chocolate to soften just slightly and the flavors to really pop. I love serving them on a cute platter with a little extra drizzle of caramel and a tiny sprinkle of flaky sea salt on top for a gourmet touch. They pair perfectly with a cold glass of milk, a hot coffee, or even a scoop of vanilla ice cream on the side for the most decadent ice cream sandwich of your life.
Ride Your Own Flavor Wave: Fun Variations!
The beauty of this recipe is its versatility. Don’t be afraid to get creative and make it your own!
- Cookie Dough Twist: Fold in ½ cup of mini chocolate chips and ½ cup of undressed, heat-treated flour for a safe-to-eat cookie dough vibe.
- Tropical Escape: Swap the peanuts for 1 cup of macadamia nuts and use chopped dried pineapple or mango instead of (or in addition to!) the marshmallows. Drizzle with white chocolate instead of caramel.
- Salted Pretzel Crunch: Go nut-free by replacing the peanuts with 1 cup of broken-up salted pretzel pieces. The sweet and salty combo is incredible.
- Double Berry Blast: For a fun, fruity twist, use white chocolate chips as your base and fold in ½ cup of freeze-dried raspberries and ½ cup of freeze-dried strawberries along with the marshmallows.
- Mint Chocolate Chip: Use dark chocolate chips and add ½ teaspoon of peppermint extract (instead of vanilla) with the marshmallows and peanuts for a cool, refreshing bar.
Isla’s Chef Notes & Kitchen Stories
This recipe has been through so many iterations in my kitchen! I once, in a pre-coffee haze, tried to melt the chocolate in the microwave without the condensed milk. Let’s just say it resulted in a rock-hard chocolate brick that we now fondly refer to as “The Great Fudge Failure of 2018.” Lesson learned: the condensed milk is essential for that fudgy texture!
Over time, I’ve learned that letting the mixture cool just a bit before adding the marshmallows gives you more defined marshmallow pockets, which I adore. My grandma always added them right away for a more marbled effect, so it’s truly a matter of preference. This recipe is wonderfully forgiving. The biggest evolution was adding the caramel swirl on top—it adds another layer of flavor and makes them look so professional. These bars also freeze like a dream! Just slice them, layer them between parchment paper in an airtight container, and freeze for up to 3 months. A perfect emergency dessert on standby.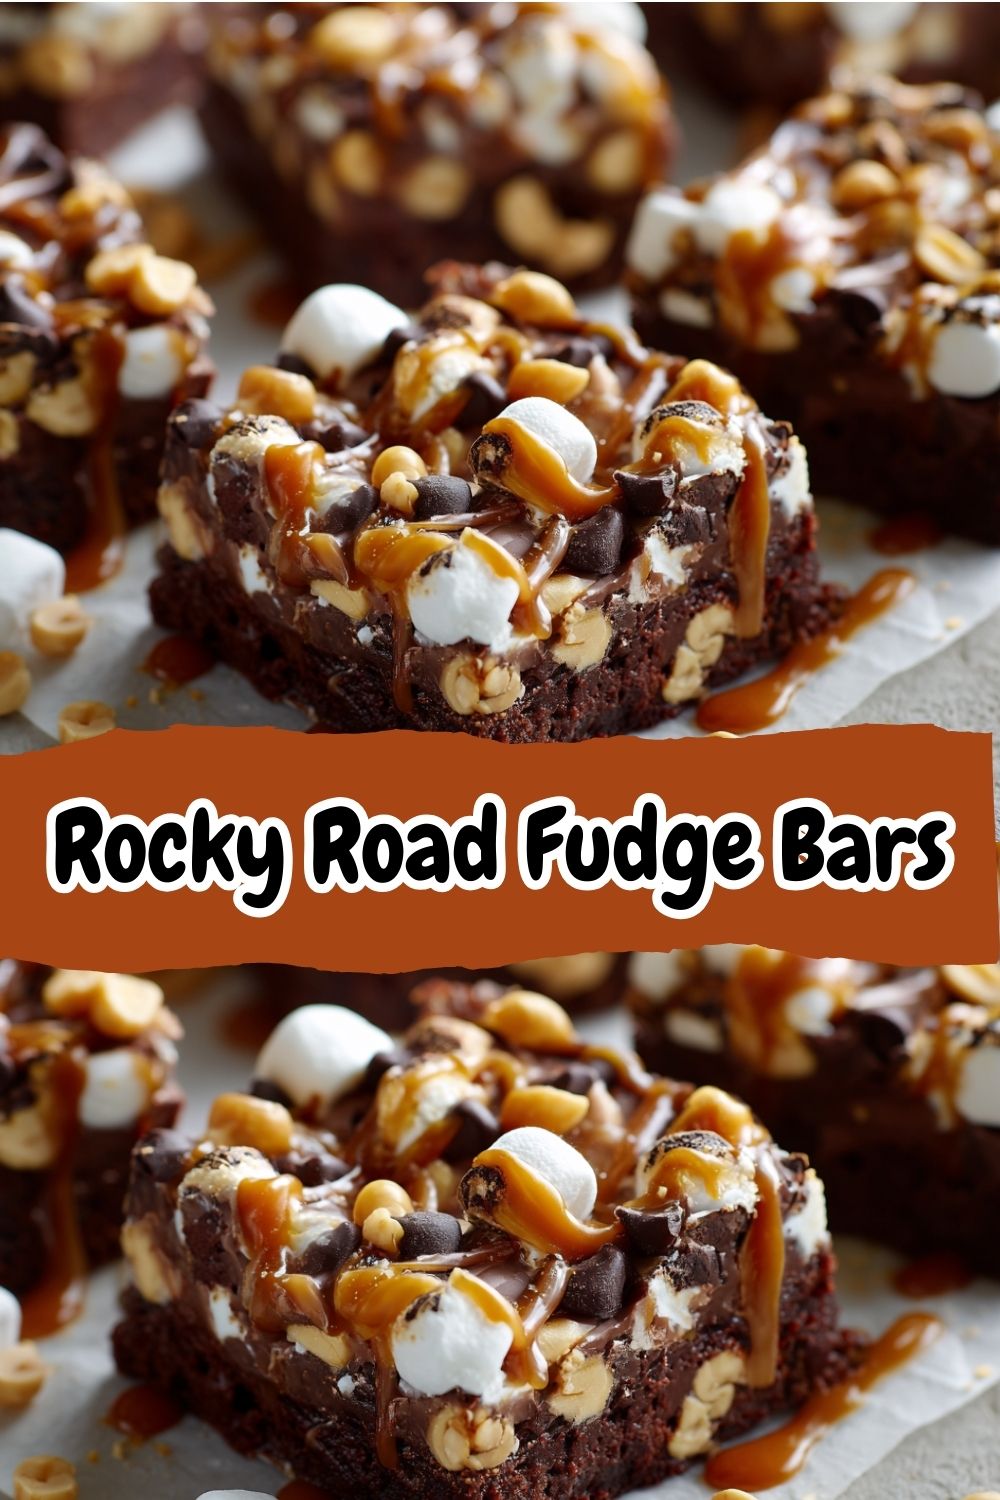
Your Questions, Answered!
Q: My chocolate seized and became grainy. What did I do wrong and can I fix it?
A: This almost always means the heat was too high! Chocolate is delicate. If it seizes, it’s tricky to fix for this specific recipe. Your best bet is to remove it from the heat immediately and try whisking in a tablespoon of very hot water or a bit more condensed milk to see if it smooths out. Prevention is key: always use low, low heat and stir constantly!
Q: Can I use marshmallow fluff instead of mini marshmallows?
A: I wouldn’t recommend it for folding into the mixture, as it will just blend in and you’ll lose the defined chewy texture. However, you could absolutely use it as a swirl on top instead of the caramel sauce! Just drop spoonfuls over the fudge and swirl with a knife.
Q: How should I store these, and how long do they last?
A> Because of the marshmallows and condensed milk, these bars must be stored in the refrigerator in an airtight container. They will stay perfect for up to a week. You can also freeze them for up to 3 months.
Q: My fudge is too soft to slice, even after chilling. Help!
A> This usually means it needed more time to set. Pop it back in the fridge (or into the freezer for a quick fix) for another hour. Also, double-check your measurements—using a larger pan (like a 9×13″) will result in a thinner, softer bar.
Nutritional Information*
Yield: 16 bars | Serving Size: 1 bar
Calories: 210 | Total Fat: 11g | Saturated Fat: 5g | Cholesterol: 5mg | Sodium: 70mg | Total Carbohydrates: 27g | Sugar: 23g | Protein: 3g
*Please note: Nutritional information is an estimate only and can vary based on ingredients and brands used.
These No-Bake Rocky Road Fudge Bars prove that you don’t need an oven to make something truly irresistible. With their rich chocolate base, gooey marshmallows, crunchy peanuts, and swirls of caramel, they’re the ultimate combination of textures and flavors. Perfect for sharing—or keeping all to yourself—this recipe is bound to become your go-to quick dessert.