
Peanut Butter Marble Brownies: Your New Favorite Recipe Is Here!
Hey there, friend! Isla here from BiteTide. Let me ask you a question: have you ever stood in front of your fridge, caught in that epic tug-of-war between a deep, dark chocolate craving and a creamy, salty peanut butter yearning? You don’t have to choose. In fact, I firmly believe that the universe brought chocolate and peanut butter together for a reason, and these Peanut Butter Marble Brownies are the delicious, fudgy, swirly proof.
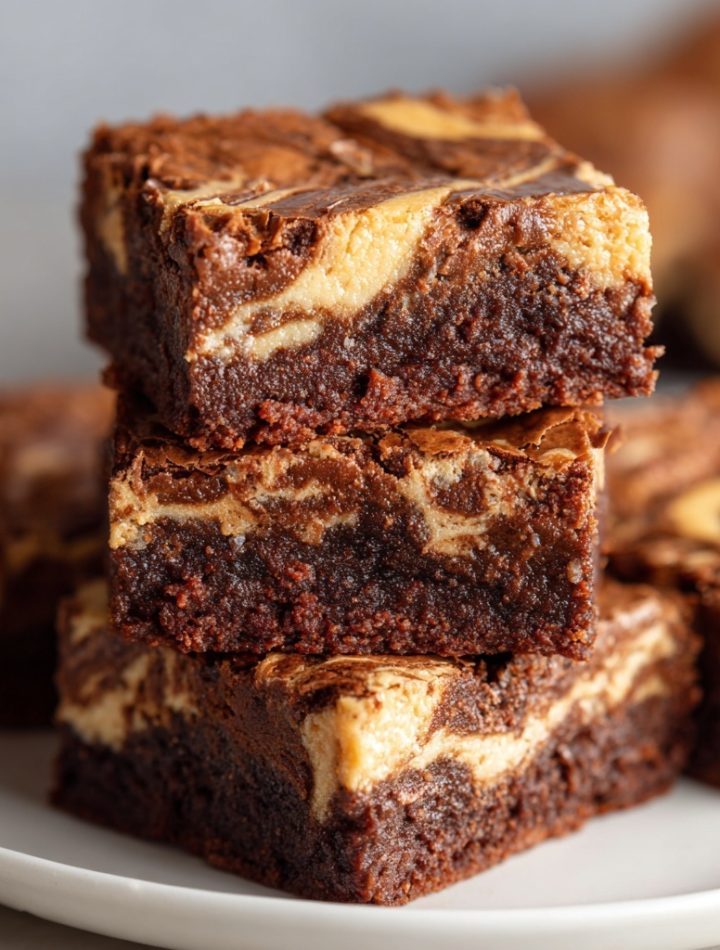
We’re not just making brownies today. We’re creating a masterpiece. A dense, intensely chocolatey base that’s so moist it practically melts on your tongue, swirled with a sweet, salty, creamy peanut butter ripple that bakes into the most incredible tender layer. The contrast is everything—a party in your mouth where everyone’s invited. And the best part? This is a one-bowl (okay, maybe two bowls), no-fuss situation. You don’t need any fancy equipment or a pastry degree. All you need is a spatula, a pan, and a serious appetite for greatness. So, tie on your apron, and let’s make some magic happen. These are the brownies that will make you a legend in your own kitchen.
The Brownie That Started It All
This recipe takes me right back to my grandma’s linoleum-floored kitchen, with its perpetually flour-dusted counters and the sweet, warm smell of something always baking in the oven. Grandma Eleanor was a wizard with a wooden spoon and a bag of chocolate chips. Her classic brownie recipe was the stuff of family legend—crackly on top, fudgy in the middle, and always, always fought over by my cousins and me.
One rainy Sunday, during our usual brownie-baking session, I had a brilliant (or so my 10-year-old self thought) idea. I grabbed the jar of peanut butter she kept for my sandwiches and declared I was going to “improve” the recipe. Grandma, bless her, didn’t bat an eye. She just handed me a butter knife and said, “Let’s see what you’ve got, kiddo.” What followed was less of a elegant swirl and more of a peanut butter plop-and-smear situation. But when that pan came out of the oven, something magical had happened. The peanut butter had sunk and swirled, creating pockets of salty-sweet bliss that cut through the rich chocolate. We sat at her little kitchen table, eating warm brownies straight from the pan, and she gave me a wink. “Isla,” she said, “you might be onto something.” Every time I make this recipe, I think of her, and that fearless, joyful approach to cooking that I try to bring to BiteTide every single day.
Print
Peanut Butter Marble Brownies : Fudgy, Swirled, and Totally Irresistible
- Total Time: ~50 minutes
- Yield: 16 brownies 1x
Description
Meet your new favorite brownie recipe—rich, fudgy chocolate brownies marbled with a creamy peanut butter swirl. These brownies bring the best of both worlds into one decadent bite. Perfect for gatherings, dessert trays, or anytime you need that chocolate–peanut butter fix. Easy to make, stunning to serve, and impossible to resist.
Ingredients
Brownie Batter:
1 cup (226g) unsalted butter, melted
2 cups (400g) granulated sugar
4 large eggs
2 teaspoons vanilla extract
2/3 cup (65g) unsweetened cocoa powder
1 cup (125g) all-purpose flour
1/2 teaspoon salt
1/2 teaspoon baking powder
Peanut Butter Swirl:
1 cup (260g) creamy peanut butter (not natural/oily)
1/3 cup (40g) confectioners’ sugar
1 teaspoon vanilla extract
3–4 tablespoons whole milk or heavy cream
Instructions
Preheat oven to 350°F (175°C). Line a 9×9-inch pan with parchment paper.
Make Brownie Batter:
2. In a large bowl, whisk melted butter and sugar until well combined.
3. Add eggs and vanilla; whisk vigorously for 1–2 minutes until smooth and slightly thickened.
4. Sift in cocoa powder, flour, salt, and baking powder. Fold gently with a spatula until just combined.
Make Peanut Butter Swirl:
5. In a separate bowl, mix peanut butter, confectioners’ sugar, and vanilla. Add milk 1 tbsp at a time until smooth and pourable.
Assemble:
6. Spread two-thirds of the brownie batter into the pan.
7. Spoon all of the peanut butter mixture evenly on top.
8. Drop remaining brownie batter in dollops over the peanut butter layer.
9. Swirl gently with a knife or skewer.
Bake:
10. Bake for 30–35 minutes, or until the edges are set and a toothpick comes out with moist crumbs.
11. Cool completely in the pan on a wire rack. For clean slices, chill for 1 hour before cutting.
- Prep Time: 15 mins
- Cook Time: 30 mins
- Category: Dessert
Nutrition
- Calories: 320
- Sodium: 120mg
- Fat: 20g
- Cholesterol: 70mg
Gather Your Ingredients
This is where the fun begins! Let’s break down what you’ll need. I’ve included some of my favorite chef insights and substitution hacks so you can bake with confidence, no matter what’s in your pantry.
For the Fudgy Brownie Batter:
- 1 cup (226g) unsalted butter, melted – This is the secret to that dense, fudgy texture and rich flavor. Using unsalted lets you control the salt level. If you only have salted, just reduce the added salt in the recipe by 1/4 teaspoon.
- 2 cups (400g) granulated sugar – Sweetness is key, but sugar also helps create that beautiful, shiny, crackly top we all love.
- 4 large eggs – They bind everything together and add structure. Make sure they’re at room temperature for a smoother, more voluminous batter!
- 2 teaspoons vanilla extract – The flavor booster. It enhances the chocolate and adds a warm, comforting aroma.
- 2/3 cup (65g) unsweetened cocoa powder – Use a good-quality cocoa powder here; it’s the primary chocolate flavor. I prefer Dutch-processed for a deeper, less acidic taste, but natural works perfectly fine, too!
- 1 cup (125g) all-purpose flour – The foundation. Be sure to measure it correctly by spooning it into the cup and leveling it off. Too much flour = cakey brownies.
- 1/2 teaspoon salt – Don’t skip this! Salt makes all the flavors pop and balances the sweetness beautifully.
- 1/2 teaspoon baking powder – This gives our brownies just a tiny bit of lift, so they aren’t *too* dense.
For the Dreamy Peanut Butter Swirl:
- 1 cup (260g) creamy peanut butter – This is crucial: use a standard, shelf-stable peanut butter like Jif or Skippy, not the natural kind you have to stir. The natural, oily kind will separate and make a greasy mess. We need the emulsified stuff for a smooth, stable swirl.
- 1/3 cup (40g) confectioners’ sugar – This sweetens the swirl and also helps thicken it, so it doesn’t completely disappear into the brownie batter.
- 1 teaspoon vanilla extract – A little extra vanilla in the swirl adds another layer of flavor.
- 3–4 tablespoons whole milk or heavy cream – This is our magic wand. It thins the peanut butter mixture just enough to make it “pourable” and easy to swirl. Start with 3 tablespoons and add the fourth if it still seems too thick.
Let’s Make These Swirly Wonders: Step-by-Step
Ready? Let’s do this. I’ll walk you through each step with my favorite no-stress tips. You’ve got this!
- Prep Your Pan and Preheat the Oven. First things first, preheat your oven to 350°F (175°C). Now, grab your 9×9-inch pan. My best hack for perfect, easy-to-remove brownies? Lining the pan with parchment paper, leaving a little overhang on two opposite sides. This creates “slings” that let you lift the entire block of brownies out in one clean move. Give the parchment a quick light spray with cooking spray for absolute non-stick insurance.
- Whisk the Wet Ingredients. In a large bowl, pour in your melted butter and granulated sugar. Whisk them together for a good minute until they’re well combined. Now, crack in those four room-temperature eggs and add the two teaspoons of vanilla. Here’s a pro-tip: whisk this mixture vigorously for a full 1-2 minutes. You’re not just mixing; you’re aerating the eggs and sugar, which is what helps create that gorgeous, shiny, paper-thin crust on top of your brownies. You’ll see the mixture become pale, smooth, and slightly thickened.
- Gently Fold in the Dry Ingredients. Time to bring it all together. Place a sieve over your bowl and sift in the cocoa powder, flour, salt, and baking powder. Sifting is not just for fussy bakers! It breaks up any lumps in the cocoa and flour and incorporates everything evenly. Now, put the whisk away and grab a spatula. Gently fold the dry ingredients into the wet until you just see the last traces of flour disappear. Do not overmix! Overmixing develops gluten and leads to tough, cakey brownies. A few streaks are better than a tough brownie.
- Create the Peanut Butter Swirl. In a separate, medium bowl, combine the peanut butter, confectioners’ sugar, and vanilla. Stir it together—it will be thick! Now, add the milk, one tablespoon at a time, stirring after each addition. You’re aiming for a smooth, thick but pourable consistency, like a runny cake frosting. If you can drizzle it off the spatula in a ribbon, you’re golden.
- Assemble the Marble Magic. This is the artistic part! Scoop about two-thirds of your brownie batter into your prepared pan and spread it into an even layer. Now, spoon the peanut butter mixture evenly over the top. Don’t spread it—just dollop it all over. Finally, take the remaining third of the brownie batter and drop it in small dollops over the peanut butter layer. It won’t cover everything, and that’s the point!
- Swirl It Up! Take a knife or a wooden skewer and gently drag it through the layers in a zig-zag, figure-eight, or swirling pattern. Go for 4-5 passes, but don’t overdo it! You want beautiful, distinct marbling, not a homogenous mud-colored batter. The secret is to be bold but brief.
- Bake to Perfection. Slide the pan into your preheated oven and bake for 30-35 minutes. You’re looking for the edges to look set and pulled away from the pan slightly, and the center should still have a very slight jiggle. The most reliable test? A toothpick inserted into a *chocolatey* part (not a pure peanut butter swirl) should come out with a few moist crumbs attached, not wet batter. If it’s clean, you’ve overbaked! Remember, brownies continue to cook as they cool.
- The Most Important Step: Let Them Cool! I know, the wait is torture. But you must let the brownies cool completely in the pan on a wire rack. This allows them to set up for that perfect fudgy texture. For the absolute cleanest, most professional cuts, I highly recommend popping the cooled pan into the refrigerator for at least an hour. Chilling firms everything up and makes slicing a dream.
How to Serve These Beauties
Once they’re cooled and sliced, the world is your oyster! I love serving these on a simple wooden board for a casual get-together—they look gorgeous all on their own. For the ultimate indulgence, warm a square in the microwave for 15 seconds and serve it à la mode with a big scoop of vanilla bean ice cream. The contrast of warm brownie, cool ice cream, and the melty peanut butter swirl is a religious experience. A little drizzle of salted caramel or a dusting of flaky sea salt on top never hurt anybody, either!
Get Creative: Recipe Variations
Feel like mixing it up? This recipe is a fantastic canvas for your creativity!
- Nutty Buddy: Swap the peanut butter for almond butter or cashew butter and fold 1/2 cup of chopped toasted nuts into the brownie batter.
- Cookie Core: Roughly chop 5-6 Reese’s Peanut Butter Cups and fold them into the brownie batter along with the flour for a double peanut butter punch.
- Salty-Sweet Crunch: Sprinkle the top with a handful of pretzel pieces right before baking for an incredible texture contrast.
- For the Nut-Free Crew: Use SunButter (sunflower seed butter) for the swirl! It creates a similar look and a delicious, slightly seedier flavor that pairs amazingly with chocolate.
- Espresso Boost: Add 1-2 teaspoons of instant espresso powder to the dry ingredients. It won’t make your brownies taste like coffee, it will just make the chocolate flavor deeper and richer.
Isla’s Chef’s Notes & Kitchen Confessions
This recipe has been my go-to for years, and it’s evolved with me. I’ve learned that a splash of bourbon in the brownie batter instead of the vanilla is a fun, grown-up twist. I’ve also had my fair share of kitchen fails—like the time I used natural peanut butter and ended up with a pan of greasy, separated sadness. We learn from our mistakes so you don’t have to!
The biggest lesson? Trust the process. Don’t overbake them. The allure of these brownies is in their fudgy, almost-gooey heart. And please, for the love of all that is good, let them cool. I know it’s hard, but it’s the final, non-negotiable step to brownie nirvana. Now, go forth and bake! And when you do, tag me on Instagram @BiteTide—I love seeing your creations and doing a virtual happy dance with you.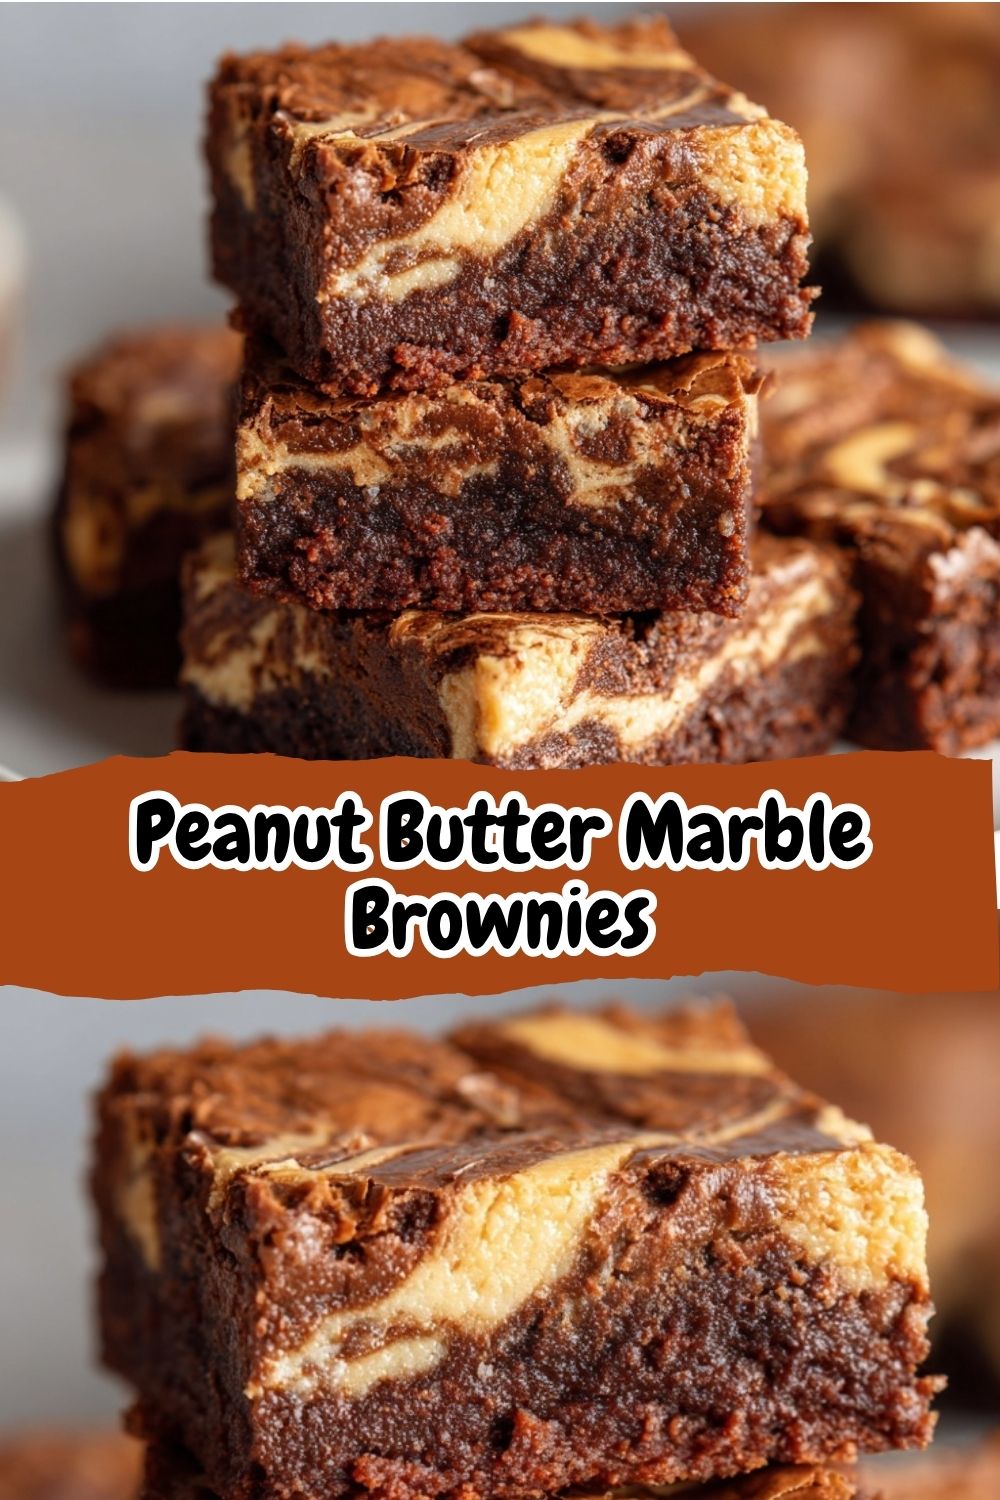
Your Brownie Questions, Answered!
I’ve gotten a lot of questions about this recipe over the years. Here are the answers to the most common ones!
Q: My peanut butter swirl sank/disappeared! What happened?
A: This usually means your peanut butter mixture was a bit too thin, or you over-swirled. Make sure you’re using the thicker, non-natural peanut butter and that you only add enough milk to make it pourable, not runny. When swirling, just a few graceful passes with the knife will do the trick. We’re aiming for ribbons, not a full-on mix-in.
Q: Can I make these brownies gluten-free?
A> Absolutely! I’ve had great success using a 1:1 gluten-free all-purpose flour blend (like Bob’s Red Mill or King Arthur). The texture is virtually identical. Just be sure your other ingredients, like the baking powder, are certified GF.
Q: Why are my brownies cakey and not fudgy?
A> A few things can cause this: 1) You overmixed the batter after adding the flour. 2) You overbaked them. Remember, a few crumbs on the toothpick is your goal. 3) You might have measured the flour incorrectly, packing too much into the cup. Try the spoon-and-level method next time!
Q: How should I store these, and can I freeze them?
A> Store them in an airtight container at room temperature for up to 4 days. They also freeze like a dream! Wrap individual squares in plastic wrap and then place them in a freezer bag. They’ll keep for up to 3 months. Thaw at room temperature or pop one straight from the freezer into the microwave for a warm treat.
Nutritional Information (Approximate, per serving)
Please note: This is an estimate based on the ingredients used and may vary with substitutions.
- Calories: ~320
- Total Fat: 20g
- Saturated Fat: 9g
- Cholesterol: 70mg
- Sodium: 120mg
- Carbohydrates: 30g
- Sugars: 22g
- Protein: 6g