
Parmesan Crusted Brussels Sprouts: Your New Favorite Side Dish Just Got a Major Upgrade
Hey there, flavor friend! Let’s talk about a little green vegetable that often gets a bad rap. You know the one. For decades, Brussels sprouts were the mushy, bitter villains of the dinner plate, usually boiled into submission and served with a side of childhood trauma. But I’m here to tell you that those days are over. The Brussels sprouts renaissance is here, and it’s crispy, cheesy, and downright magical.
If you think you don’t like Brussels sprouts, I’m about to change your mind. If you already love them, prepare to have your socks knocked off. Today, we’re making Parmesan Crusted Brussels Sprouts. This isn’t just a recipe; it’s a transformation. We’re taking these humble little cabbages and turning them into golden, savory, crackly-edged bites of pure joy. The kind of side dish that people fight over, the one that steals the spotlight from the main course, and the snack you’ll find yourself sneaking straight from the baking sheet.
This recipe is the epitome of what I stand for at BiteTide: maximum flavor with minimal fuss. We’re using simple, real ingredients and one brilliant chef hack—pressing the sprouts into a cheesy crust—to create something that feels gourmet but is incredibly easy. So, preheat your oven, grab your favorite baking sheet, and let’s make some kitchen magic happen. Get ready to fall in love with a vegetable all over again.
The Sprout That Stole My Heart
My love affair with Brussels sprouts started, of all places, at a chaotic Thanksgiving potluck in my tiny first apartment. I was fresh out of college, and my culinary skills were… let’s call them ‘enthusiastic but unrefined.’ I was tasked with bringing a vegetable side dish, and in a moment of bravery (or panic), I grabbed a bag of sprouts from the store. My grandma’s voice echoed in my head: “Isla, honey, always roast your veggies. It brings out their sweetness.”
I tossed them with oil, salt, and pepper, and threw them in the oven. But then I had a ‘what if’ moment. I saw a container of Parmesan cheese in the fridge—the good, freshly grated kind—and I thought, “What if I just… press them into it?” I sprinkled the cheese onto the pan, placed each sprout cut-side down, and crossed my fingers. Twenty minutes later, the kitchen smelled like a fancy Italian restaurant, and I pulled out a tray of the most gorgeous, crispy, golden-green gems. They were the first dish to disappear at the potluck. That was the moment I truly understood the power of a simple, bold twist. It’s a lesson in kitchen courage I’ve carried with me ever since.
Print
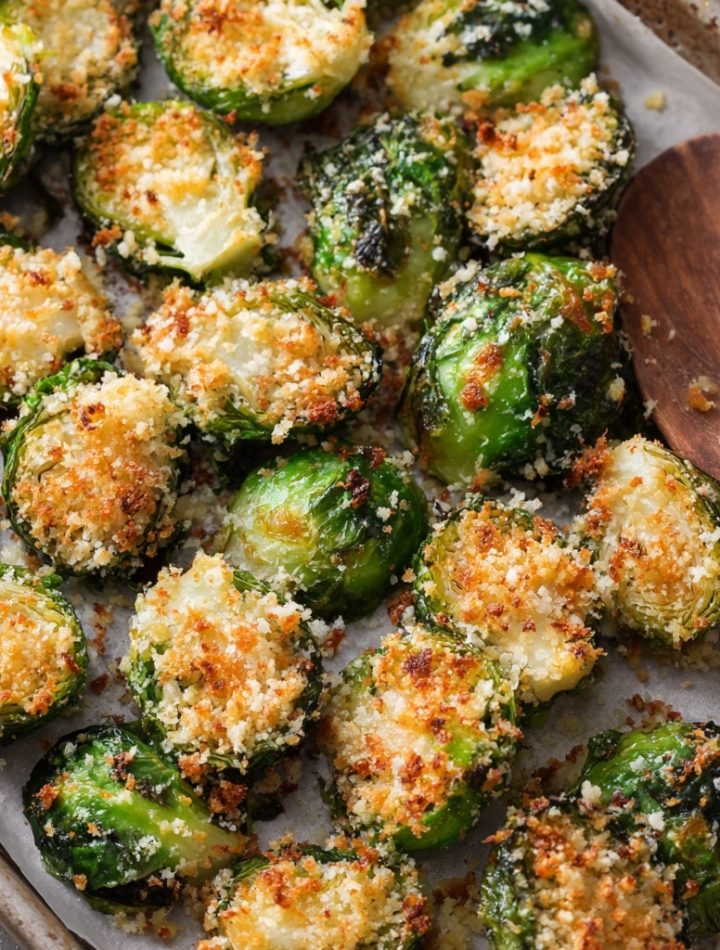
Parmesan Crusted Brussels Sprouts
- Total Time: 35 minutes
Description
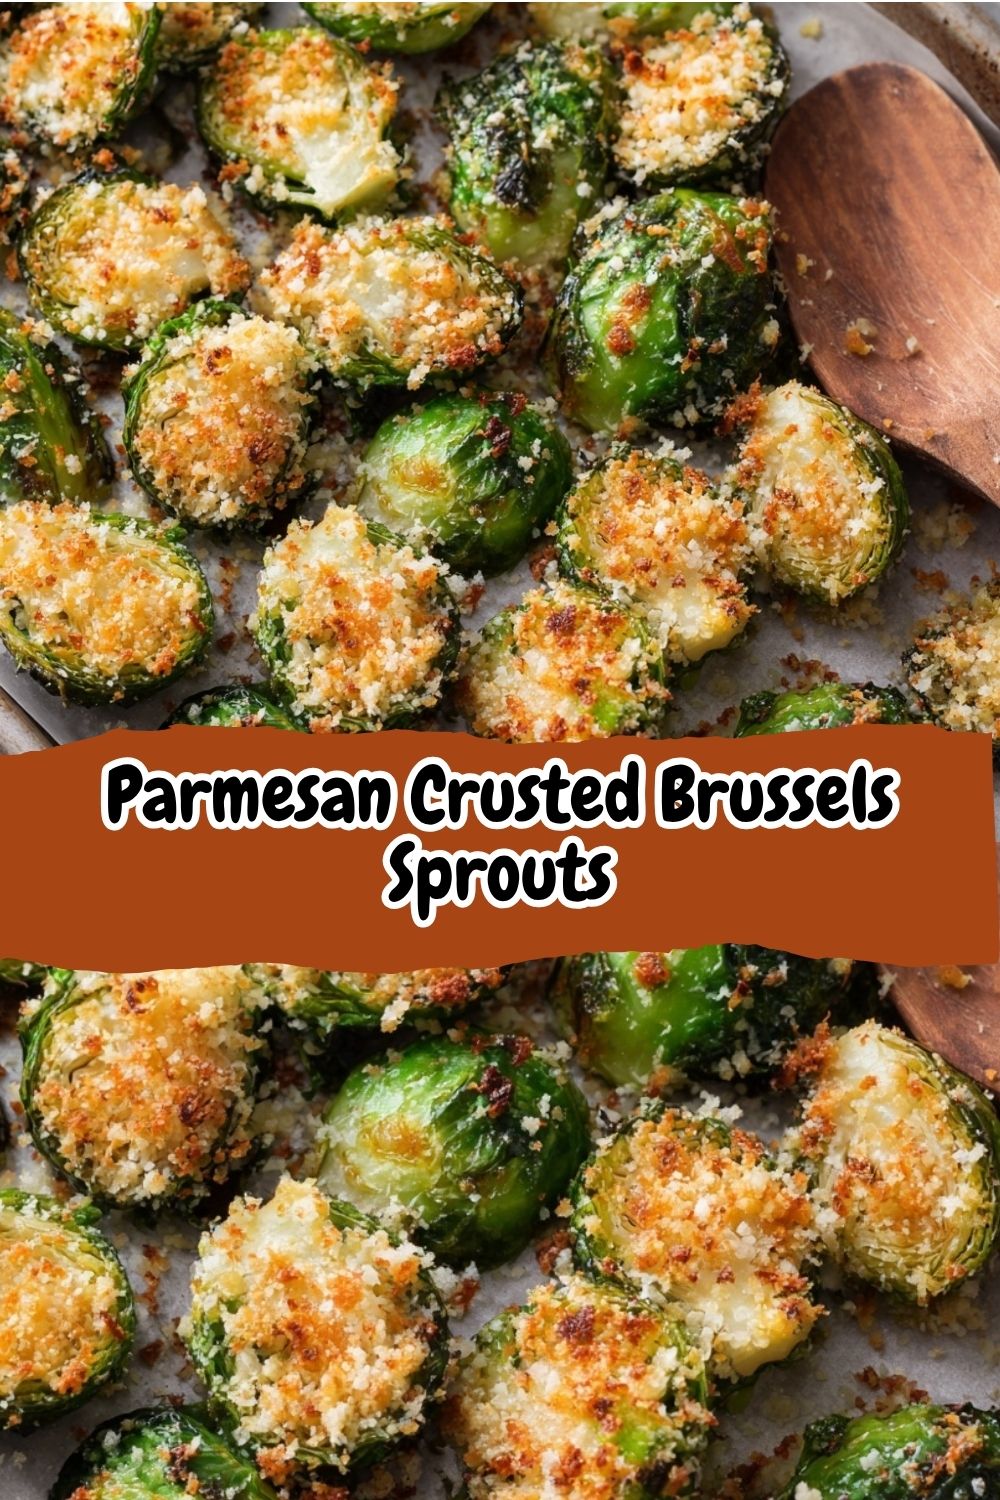
Crispy, golden, and packed with cheesy goodness, these are a side dish that steals the spotlight. Roasted until caramelized and finished with a savory parmesan crunch, they’re everything you want in a veggie—simple, bold, and hard to stop eating.
Ingredients
1 lb Brussels sprouts, trimmed and halved
2 tablespoons olive oil
1/2 cup grated Parmesan cheese
1/2 teaspoon garlic powder
Salt and freshly ground black pepper, to taste
Optional: pinch of crushed red pepper flakes for heat
Instructions
Preheat oven to 425°F (220°C). Line a baking sheet with parchment paper or lightly greased foil.
In a large bowl, toss Brussels sprouts with olive oil, garlic powder, salt, and pepper.
On the baking sheet, sprinkle the Parmesan cheese in small mounds, spacing them out.
Press each Brussels sprout half, cut-side down, onto a cheese mound to stick.
Roast for 20–25 minutes, or until the cheese is golden and crispy and the sprouts are tender.
Let cool for a few minutes before removing with a spatula to keep the cheesy crust intact.
Serve warm with an extra sprinkle of Parmesan or a drizzle of balsamic glaze.
- Prep Time: 10 minutes
- Cook Time: 25 minutes
- Category: Dinner
Nutrition
- Calories: 110
- Carbohydrates: 6g
- Protein: 5g
Gather Your Flavor Squad
One of the best things about this recipe is the short and sweet ingredient list. Every single one plays a crucial role in creating that perfect, craveable bite. Here’s what you’ll need:
- 1 lb Brussels Sprouts, trimmed and halved: Look for firm, bright green sprouts that are similar in size so they cook evenly. Trimming is just slicing off the dry end, and halving them gives us that beautiful flat surface for maximum crispiness.
- 2 tablespoons Olive Oil: This is our crisp-enabler! A good, neutral olive oil coats every nook and cranny, helping the sprouts caramelize and the cheese get golden. Avocado oil works wonderfully here too.
- 1/2 cup grated Parmesan Cheese – This is key! For the love of all that is crispy, please use freshly grated Parmesan from a block. The pre-shredded stuff in a bag contains anti-caking agents that prevent it from melting into a seamless, lacy crust. Trust me on this—the extra minute of grating is a game-changer.
- 1/2 teaspoon Garlic Powder: We’re using powder instead of fresh garlic for a reason! Fresh garlic would burn in the high heat of the oven, becoming bitter. Garlic powder gives us that warm, savory flavor without any risk.
- Salt and Freshly Ground Black Pepper, to taste: Don’t be shy! Seasoning at the oil-tossing stage is essential for building flavor from the inside out.
- Optional: A pinch of Crushed Red Pepper Flakes: My little chef’s secret for a subtle kick. It doesn’t make them spicy, just… interesting. It wakes up all the other flavors beautifully.
Let’s Build Some Crispy Magic: Your Step-by-Step Guide
Ready to create the crunch? Follow these steps, and you’ll be a Brussels sprouts hero in no time. I’ve packed this section with all my favorite chef hacks to ensure your success.
- Preheat and Prep. Fire up your oven to a hot 425°F (220°C). This high heat is non-negotiable—it’s what gives us that incredible caramelization on the sprouts and a crispy, not greasy, cheese crust. While it’s heating, line a standard baking sheet with parchment paper or lightly greased foil. This is your insurance policy against sticking and makes cleanup a dream.
- The Toss. In a large bowl, combine your halved Brussels sprouts, olive oil, garlic powder, salt, pepper, and red pepper flakes (if using). Now, get in there with your hands! Toss everything together until every single sprout is glistening and evenly coated. Using your hands is the best way to ensure no flavor is left behind in the bowl.
- The Cheese Mound Hack. This is the star move! Take your freshly grated Parmesan and sprinkle it onto the prepared baking sheet in small, thin mounds. You’re aiming for little piles that are roughly the size of the flat, cut side of your sprouts. Space them out because each one will become a single, glorious cheese crisp. Don’t just dump and spread the cheese—this mound method is what creates that perfect, individualized crust.
- The Press. Here’s where the transformation happens. Take each oiled Brussels sprout half and firmly press the cut side down onto a Parmesan mound. Give it a little wiggle to really embed it into the cheese. You want to feel like you’re making a cheesy foundation for your sprout. This step requires a tiny bit of patience, but I promise, it’s 100% worth it.
- Roast to Perfection. Slide that beautiful tray into your preheated oven and let the heat work its magic. Roast for 20-25 minutes. You’re looking for deeply browned, caramelized edges on the sprouts and a solid, golden-brown crust on the cheese. Don’t open the oven door too early! You’ll let out the precious heat that’s creating the crisp.
- The Cool Down. This might be the hardest step: patience! Once they’re out of the oven, let the sprouts cool on the pan for at least 5 minutes. This allows the cheese crust to firm up and set. If you try to move them immediately, the cheese might stick. After they’ve rested, use a thin spatula to gently lift each one, preserving that gorgeous, crispy skirt.
How to Serve These Golden Gems
Presentation is part of the fun! I love serving these piled high on a warm platter. The contrast between the deep green tops and the golden, lacy cheese bottoms is just stunning. For a final flourish, give them an extra sprinkle of flaky sea salt and maybe a light drizzle of balsamic glaze. The sweet-tangy pop of the glaze against the salty, savory Parmesan is a match made in heaven. They’re the ultimate sidekick for a juicy roast chicken, a perfect holiday ham, or a weeknight pasta. Or, be like me and just eat them straight from the pan with your fingers—no judgment here!
Ride the Flavor Wave: 5 Fun Twists
Once you’ve mastered the basic recipe, the world is your oyster (or your Brussels sprout!). Here are a few of my favorite ways to mix it up:
- ‘Everything Bagel’ Style: Mix half Parmesan and half Everything Bagel seasoning into your cheese mounds for an insane savory flavor.
- Bacon & Blue Cheese: Before roasting, sprinkle with cooked, crumbled bacon. After roasting, finish with a crumble of tangy blue cheese.
- Lemon Zest & Herb: Right after they come out of the oven, zest a fresh lemon over the top and add a sprinkle of chopped fresh parsley or chives.
- Spicy Sriracha Honey: Whisk together a tablespoon each of sriracha and honey. Drizzle over the sprouts after baking for a sweet-heat situation.
- Vegan Delight: Use a high-quality vegan Parmesan alternative (the kind that melts well) and ensure your oil is plant-based. It works like a charm!
Isla’s Chef Notes & Kitchen Confessions
This recipe has been a staple in my kitchen for years, and it’s evolved in the best ways. I’ve learned that the smaller, tighter sprouts are often sweeter and more tender. If you can only find large ones, don’t panic! Just cut them into quarters instead of halves to ensure they cook through.
I also have a funny kitchen confession: I once, in a pre-coffee haze, accidentally used cinnamon instead of garlic powder. It was… an experience. Not a recommended one! Now I always, always smell my spices before adding them. Learn from my sleepy mistakes, friends.
The biggest lesson? Don’t crowd the pan! If your baking sheet is too small, use two. Giving the sprouts and cheese mounds plenty of space is the secret to getting them crispy instead of steaming them. This recipe is a testament to the fact that the simplest techniques, done with a little intention, can create something truly spectacular.
FAQs & Troubleshooting: Your Questions, Answered!
I’ve made these dozens of times and have answered tons of your questions over on Instagram. Here are the most common ones to help you nail it every single time.
Q: My cheese burned before my sprouts were tender. What happened?
A: Ah, the classic oven dilemma! This usually means your oven is running hot, or your sprouts were on the larger side. Next time, try lowering your oven temp to 400°F (200°C) and extending the cooking time. You can also place the rack in the middle of the oven, not the top, to prevent the cheese from getting too much direct heat.
Q: The cheese didn’t stick to my sprouts! Help!
A> No worries! This typically happens for two reasons. First, make sure you’re pressing the sprouts down firmly and giving them that little wiggle. Second, and this is a big one, ensure your sprouts are thoroughly dried after washing. Any extra water will create steam and prevent the cheese from adhering. Pat them completely dry with a kitchen towel before tossing with oil.
Q: Can I make these ahead of time?
A> You can prep the components ahead! Trim and halve the sprouts, and keep them in an airtight container in the fridge. You can even make the cheese mounds on a parchment-lined sheet and keep the whole tray in the fridge for a few hours before baking. I don’t recommend reheating them after they’re cooked, as they lose their incredible crispiness. They are truly best enjoyed fresh from the oven.
Q: Are these still good if I have to use pre-shredded Parmesan?
A> I’ll be honest, the crust won’t be as seamlessly lacy and crisp, but they will still be delicious! The flavor will be there. If it’s all you have, go for it. But I highly, highly recommend treating yourself to a block of Parmigiano-Reggiano next time—you’ll taste and see the difference.
Quick Nutrition & Prep Details
Let’s be real, we’re here for the flavor, but it’s nice to know the good stuff, too! This dish is a fantastic way to enjoy a veggie packed with fiber and vitamins.
- Prep Time: 10 minutes
- Cook Time: 25 minutes
- Total Time: 35 minutes
- Serves: 4 (as a side)
Approximate Nutrition per Serving: Calories: 110 | Protein: 5g | Carbs: 6g | Fat: 8g | Fiber: 3g
There you have it! Your new go-to, show-stopping, vegetable side dish. I’m so excited for you to try it. When you do, please tag me on Instagram @BiteTide so I can see your beautiful creations! Now go forth and get crispy.
With love and a sprinkle of Parmesan,
Isla 💛