Your New Favorite Holiday Dessert: Mini Christmas Trifles!
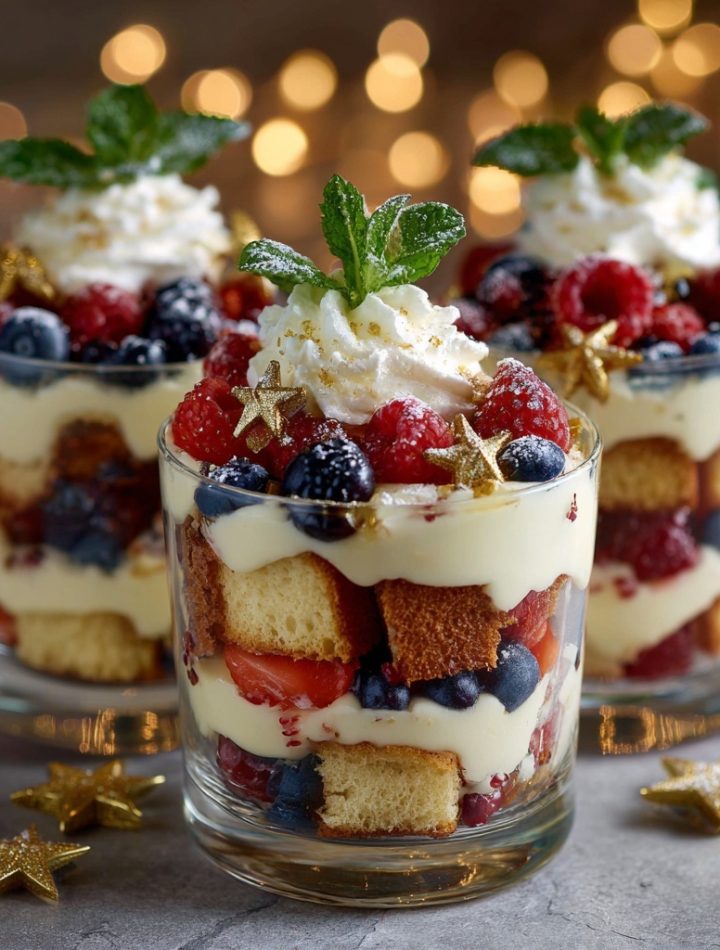
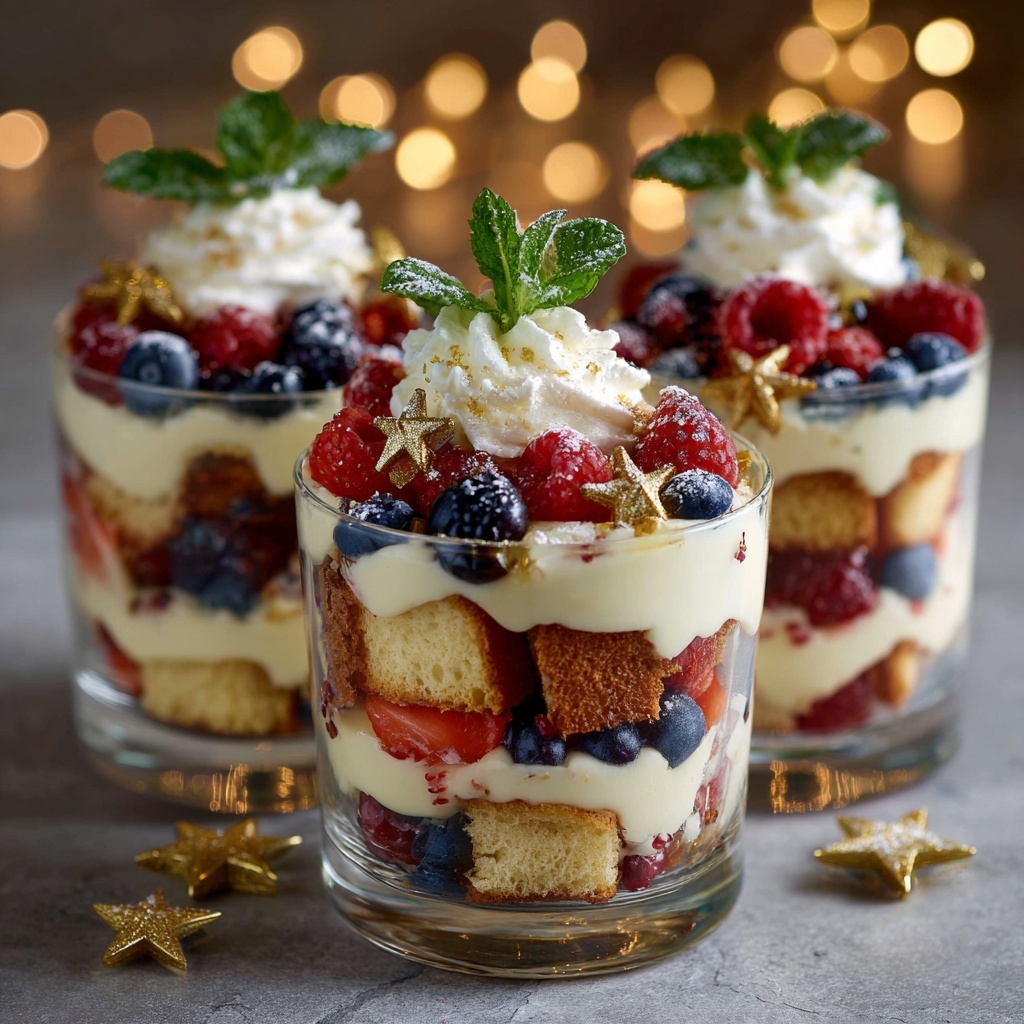
Hey there, friend! Isla here from BiteTide, coming at you with a dessert that’s about to become the star of your holiday table. Picture this: it’s the middle of your festive party, the room is buzzing with laughter, and you glide out of the kitchen holding a tray of pure, unadulterated joy. I’m talking about these stunning Mini Christmas Trifles. Each one is a perfect little parfait glass filled with layers of soft sponge cake, lush, creamy custard, bursts of fresh berries, and a cloud of whipped cream on top. They’re like edible Christmas ornaments you can hold in your hand!
Now, I know what you might be thinking. “Trifle? Isn’t that a complicated, fussy British dessert?” I’m here to tell you—absolutely not! This is the BiteTide way, remember? Fun, flavorful, and never fussy. The magic of these mini trifles is that they are incredibly easy to assemble, completely make-ahead friendly (a lifesaver during the hectic holidays!), and they look like you spent hours on them. They’re the ultimate “wow” factor with minimal effort. Whether you’re hosting a big family dinner, a cozy Friendsmas, or just want to treat yourself to something spectacular, these individual desserts are the answer. So, grab your favorite cocktail glasses or mason jars, and let’s create some edible magic together!
A Trifle Tradition: My Grandma’s “Pudding”
This recipe takes me right back to my childhood kitchen, with its checkered floor and the always-slightly-sticky table. My grandma, a formidable woman who believed dessert was its own food group, made a version of this trifle every single Christmas Eve. She didn’t call it a trifle, though. To her, it was simply “The Pudding,” said with a capital P. It was served in one giant, cut-glass bowl that only saw the light of day once a year.
The best part was that she always let me and my cousins be her “sous-chefs.” Our job was the most important one: layering. She’d have all the components lined up on the counter—the golden cake she’d baked that morning, the rich custard cooling on the stovetop, the berries we’d painstakingly sorted. With tiny, serious faces, we’d take turns carefully spooning each layer, arguing over who got to add the final mountain of whipped cream. It wasn’t just about the dessert; it was about the togetherness, the shared anticipation, and the immense pride we felt when that magnificent bowl was placed in the center of the table. These mini trifles are my way of capturing that same magic, but in a personal, modern package. It’s a little bite of my favorite Christmas memory, and I’m so excited to share it with you.
Print
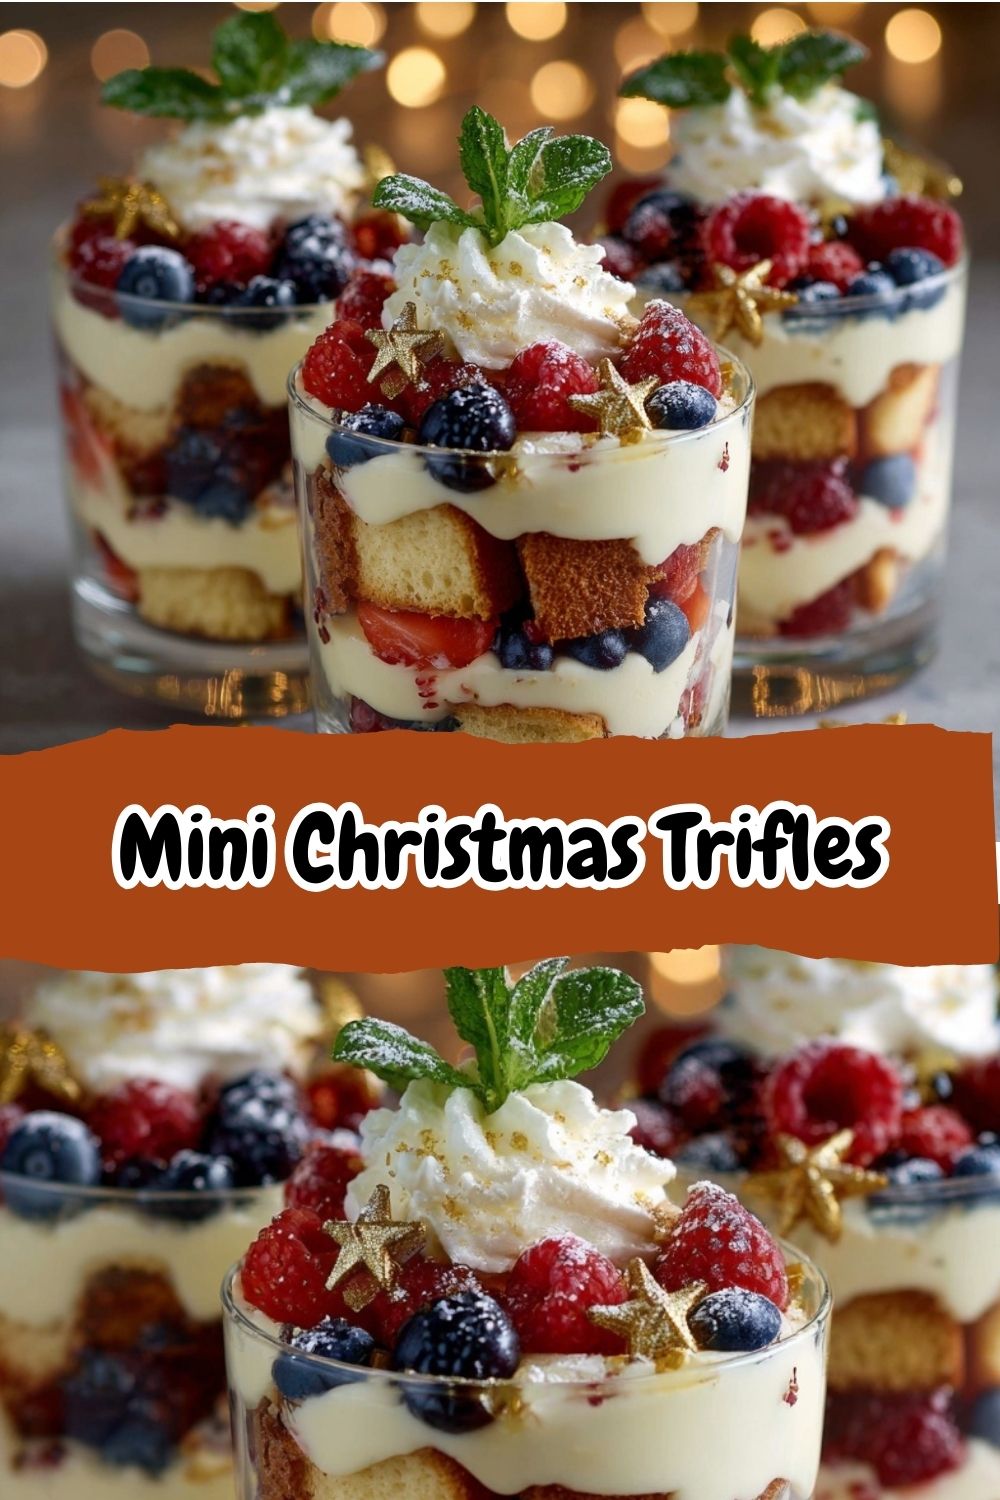
Mini Christmas Trifles
- Total Time: 20 minutes
- Yield: 6–8 mini trifles 1x
Description
These Mini Christmas Trifles are as beautiful as they are delicious. With layers of sponge cake, creamy custard, fresh berries, and fluffy whipped cream, each glass is like a festive celebration you can hold in your hand. They’re perfect for holiday parties or family gatherings — easy to assemble, make-ahead friendly, and guaranteed to wow your guests.
Ingredients
1 prepared sponge cake (store-bought or homemade)
2 cups custard or vanilla pudding
2 cups mixed berries (raspberries, blueberries, strawberries)
2 cups whipped cream
Fresh mint leaves (for garnish)
Gold star sprinkles or edible decorations (optional, for a festive touch)
Instructions
Prepare the base: Cut sponge cake into small cubes and place a layer at the bottom of each glass.
Add custard: Spoon a layer of custard or vanilla pudding over the cake.
Berry layer: Add a handful of fresh berries.
Repeat layers: Continue layering cake, custard, and berries until the glasses are filled.
Top it off: Pipe whipped cream on top. Garnish with extra berries, mint leaves, and sprinkles or edible stars.
Chill: Refrigerate for at least 1 hour before serving to let the flavors blend.
- Prep Time: 20 minutes
- Category: dessert
Nutrition
- Calories: 250
- Fat: 12g
- Carbohydrates: 30g
- Protein: 4g
Gathering Your Trifle Troops: The Ingredients
Here’s the beautiful part: the ingredient list is simple and flexible. This isn’t a chemistry experiment; it’s a celebration of layers! Here’s what you’ll need, along with my chef-y insights to make it your own.
- 1 prepared sponge cake (store-bought or homemade): This is your foundation. A classic sponge cake is perfect because it’s light and soaks up the custard beautifully without turning to mush. Chef’s Insight: No time to bake? Absolutely no shame! A high-quality store-bought pound cake or angel food cake works wonderfully. For a fun twist, try a lemon or almond-flavored loaf!
- 2 cups custard or vanilla pudding: This is the lush, creamy heart of the trifle. Substitution Tip: While homemade custard is divine, using a good-quality vanilla pudding mix or even ready-made refrigerated pudding is a fantastic shortcut. For a richer flavor, fold a cup of whipped cream into your cooled pudding to make it extra light and airy.
- 2 cups mixed berries (raspberries, blueberries, strawberries): This is where the festive color and fresh flavor come alive! Chef’s Insight: Fresh is gorgeous, but frozen berries are your secret weapon! Just thaw and drain them well to avoid a pink, soupy trifle. In the winter, frozen berries are often more flavorful and budget-friendly. A mix of raspberries and blueberries gives you those classic red and blue Christmas colors.
- 2 cups whipped cream: The fluffy, dreamy crown! Chef’s Hack: Please, for the love of all that is fluffy, make your own! It’s just heavy whipping cream, a little sugar, and a splash of vanilla extract whipped to stiff peaks. It takes 3 minutes and tastes a million times better than the stuff from a can. Your future self will thank you.
- Fresh mint leaves & gold star sprinkles: The final flourish! Substitution Tip: The garnishes are where you can really personalize. No mint? Use a little grated dark chocolate or a dusting of cocoa powder. Pomegranate arils look like gorgeous red jewels. Edible gold dust? Go for it! This is your holiday masterpiece.
Building Your Edible Masterpiece: Step-by-Step
Okay, the fun part! Let’s build these beauties. I’ll walk you through each step with my favorite tips to ensure trifle success.
- Prep Your Station & Cake: First, get out 6-8 clear glasses or jars. I love using stemless wine glasses or even cute mason jars—seeing the layers is half the fun! Now, take your sponge cake and cut it into 1-inch cubes. Don’t worry about perfection; rustic cubes are part of the charm. Chef’s Hack: If your cake is a day old, even better! It will hold its structure beautifully. If it’s very fresh, you can lightly toast the cubes in the oven for 5 minutes to dry them out slightly, which prevents sogginess.
- The Foundation Layer: Place a generous layer of cake cubes at the bottom of each glass. Gently press them down just a bit. This is your delicious sponge that will soak up all the custardy goodness. Little Tip: If you’re feeling fancy, you can lightly drizzle the cake layer with a tiny bit of sherry, Grand Marnier, or even simple syrup for an extra flavor boost. (Keep it non-alcoholic for the kids, of course!).
- The Creamy Dream Layer: Next, spoon a smooth layer of your custard or pudding over the cake. Aim to cover the cake completely for that beautiful striped effect when you look through the glass. Chef’s Insight: Want super clean layers? Use a piping bag for the custard and whipped cream! It gives you ultimate control and looks incredibly professional. No piping bag? A zip-top bag with the corner snipped off works perfectly.
- The Berry Burst: Now for the color! Scatter a handful of your mixed berries over the custard. I like to press a few against the side of the glass for a gorgeous, “stained-glass” effect. Pro Tip: If using strawberries, slice them thinly. This makes them easier to eat and layer neatly.
- Repeat the Magic: Keep going! Add another layer of cake, another layer of custard, and another layer of berries. How many layers you do depends on the size of your glass, but 2-3 sets of layers is usually perfect. Leave about an inch of space at the top for the grand finale!
- The Grand Finale – Whipped Cream Crown: This is the best part. Pipe or spoon a glorious cloud of whipped cream on top. Go for peaks and swirls—the more dramatic, the better! Chef’s Hack: To get really stable whipped cream, chill your bowl and beaters in the freezer for 10 minutes before you start whipping.
- Garnish and Chill: Now, make it festive! Garnish with a final berry or two, a sprig of fresh mint, and a sprinkle of those gold stars. Then, and this is crucial, cover them loosely with plastic wrap and refrigerate for at least 1 hour. This rest time allows the cake to soften and the flavors to meld into pure holiday harmony.
How to Serve Your Mini Christmas Trifles
When it’s time to serve, the beauty of these individual desserts truly shines. Simply pull them out of the fridge, maybe give the glass a quick wipe to remove any smudges, and place them directly on a festive napkin or small plate. I love serving them with a long-handled spoon so everyone can dive right down to the bottom to get a bit of every layer in one perfect bite. Arrange them on a beautiful tray or a cake stand to create a stunning centerpiece for your dessert table. Watch your guests’ faces light up when they realize they get their own personal, gorgeous dessert!
Ride the Flavor Wave: Creative Twists
The fun doesn’t stop here! This recipe is a fantastic template. Let your creativity run wild with these variations:
- Chocolate Orange Bliss: Swap the sponge cake for chocolate cake cubes. Add a layer of orange curd along with the custard, and use mandarin orange segments instead of berries. Garnish with chocolate shavings.
- Tropical Christmas: Going for a warm-weather holiday? Use cubed vanilla cake, coconut custard, and a mix of mango, pineapple, and kiwi. Top with toasted coconut flakes.
- Lemon Berry Sparkle: Use lemon pound cake and lemon curd mixed into the custard. The bright, zingy lemon pairs perfectly with the sweet berries.
- Gingerbread Spice: For the ultimate Christmas flavor, use crumbled gingerbread loaf or soft gingerbread cookies. A spiced custard (add a pinch of cinnamon and nutmeg) would be incredible here.
- Boozy Adult Version: For a grown-up twist, drizzle the cake layers with a little Chambord (for a berry kick) or Baileys Irish Cream.
Isla’s Chef Notes: A Trifle Evolution
This recipe has been a fun one to play with over the years. The first time I made it for a holiday potluck, I was so nervous about the layers holding up that I assembled them in the kitchen at the party—much to the amusement of my friends who watched me meticulously pipe cream while sipping wine. I’ve learned to embrace the “rustic” look; sometimes the layers smoosh together a bit, and you know what? It tastes even more delicious that way!
One of my favorite happy accidents was the year I ran out of custard and had to mix what was left with some Greek yogurt. The result was a tangier, lighter filling that was a huge hit. Don’t be afraid to make it your own! The best part of cooking is putting your own stamp on a recipe. This trifle is forgiving, flexible, and full of love. And if your whipped cream doesn’t hold a perfect peak? Just call it “rustic-chic” and serve it with a smile. No one will care, I promise.
Your Trifle Questions, Answered!
I’ve gotten a lot of questions about this recipe over the years, so here are answers to the most common ones!
Q: Can I make these mini trifles ahead of time?
A: You absolutely can! They are the ultimate make-ahead dessert. You can assemble them completely (without the final garnish) up to 24 hours in advance. Keep them covered tightly in the fridge. Add the fresh mint and sprinkles right before serving so they look their best.
Q: My cake layer got really soggy. What happened?
A: The cake is meant to soften, but if it’s unpleasantly mushy, a few things could be at play. First, if you used a very delicate, fresh cake, it might be too soft. A slightly sturdier cake (or a day-old cake) works better. Second, if you’re using frozen berries, make sure they are thoroughly drained of any liquid. Finally, if you’re adding a liquid like alcohol or syrup, just a light drizzle is enough!
Q: My custard layer is too runny and is mixing with the other layers. How can I fix this?
A: This usually happens if the custard or pudding hasn’t been chilled enough. It needs to be completely cold and set before you start layering. If you’re in a pinch, you can add a teaspoon of cornstarch to your pudding while it’s cooking to help it thicken more. For already-made runny custard, just embrace it! It will still taste amazing, I promise.
Q: Can I make a large trifle instead of individual ones?
A: Of course! This recipe translates beautifully to one large trifle bowl. Just scale up the ingredients a bit to fill your dish. The layering process is exactly the same. A big trifle makes a spectacular centerpiece!
Nutritional Information*
*Please note: This is an approximate estimate based on the specific ingredients used and can vary greatly depending on substitutions (like using low-fat custard or less sugar).
Per serving (1 mini trifle, approx.): 250 calories | 12g fat | 30g carbohydrates | 4g protein