 The Ultimate Mini Chicken Breast Sliders: Your New Go-To Party Hero
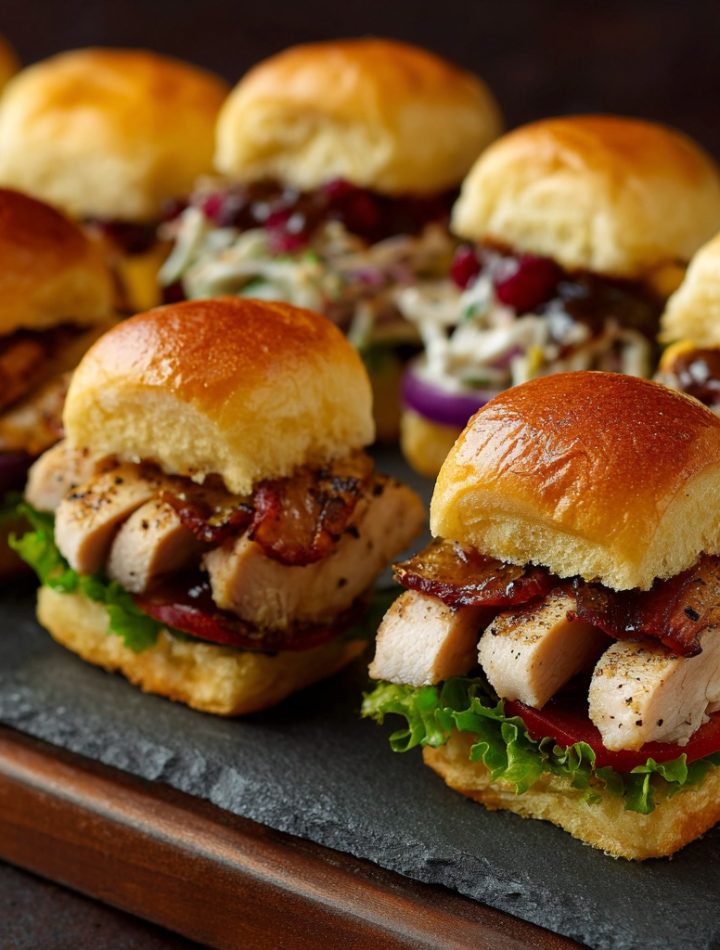
Picture this: a platter of golden, juicy chicken nestled in pillowy soft buns, stacked high with all the crispy, creamy, tangy toppings your heart desires, and a glorious drizzle of sauce just begging to be licked off your finger. That, my friends, is the magic of the Mini Chicken Breast Slider. These aren’t just tiny sandwiches; they’re a total vibe. They’re the star of the game day spread, the life of the casual dinner party, the secret weapon for a fun family Friday night, and honestly? They make a darn good “treat yourself” lunch for one.
I’m a firm believer that the best food is often the simplest food, made with intention and a big scoop of love. These sliders are the perfect example. We’re taking humble chicken breasts, giving them a flavor makeover with a few trusty spices, and cooking them just right so every bite is impossibly moist. The beauty is in the build-your-own adventure. Want classic deli vibes? Go for mayo, lettuce, and tomato. Feeling bold? Swipe on some smoky chipotle aioli and pile high with pepper jack. These little flavor vessels are your canvas.
So, grab your favorite skillet and let’s get stacking! I promise this is one of those recipes that looks like you fussed for hours but secretly comes together in less than 30 minutes. Get ready for the compliments to roll in—and for that happy dance when you take your first perfect, saucy, stackable bite.
Print
Mini Chicken Breast Sliders : Juicy, Stackable, and Sauce-Ready
- Total Time: 20 minutes
- Yield: 8 sliders 1x
- Diet: Halal
Description
Mini Chicken Breast Sliders are juicy, stackable sandwiches perfect for parties, snacks, or quick meals. These bite-sized sliders feature tender chicken breast, toasted buns, and your favorite sauces or toppings for endless customization and bold flavor in every bite.
Ingredients
- 2 boneless, skinless chicken breasts (cut into slider-sized pieces or pounded thin)
- 1 tbsp olive oil
- 1/2 tsp garlic powder
- 1/2 tsp smoked paprika
- Salt and black pepper to taste
- 8 mini slider buns
- 2 tbsp mayonnaise or sauce of choice (e.g., BBQ, ranch, honey mustard)
- 4 lettuce leaves (torn to fit)
- 1 tomato (sliced)
- 4 slices cheese (cut in halves for sliders, optional)
- Pickles or onion slices (optional)
Instructions
- Preheat a skillet or grill pan over medium heat and drizzle with olive oil.
- Season chicken pieces with garlic powder, paprika, salt, and pepper.
- Cook chicken for 3–4 minutes per side until golden and cooked through (internal temp 165°F).
- While the chicken cooks, lightly toast the slider buns.
- Spread sauce of choice on the bottom half of each bun.
- Place a cooked chicken piece on each bun, then top with cheese, tomato, lettuce, and pickles if desired.
- Finish with the top bun and secure with toothpicks if serving for parties.
- Serve warm with extra sauce on the side.
- Prep Time: 10 minutes
- Cook Time: 10 minutes
- Category: Main Dish
- Method: Pan-Fried
- Cuisine: American
Nutrition
- Serving Size: 2 sliders
- Calories: 310
- Sugar: 4g
- Sodium: 420mg
- Fat: 14g
- Saturated Fat: 3g
- Unsaturated Fat: 10g
- Trans Fat: 0g
- Carbohydrates: 22g
- Fiber: 2g
- Protein: 25g
- Cholesterol: 65mg
My Coastal Picnic Epiphany
My love affair with sliders started not in a fancy restaurant, but on a windswept, slightly sandy blanket on the cliffs near my hometown. My dad, the king of impromptu picnics, would grill up whatever was in the fridge, slice it small, and pile it onto whatever bread we had. One particularly memorable evening, it was lemon-herb chicken pieces on split dinner rolls. They were messy, they were juicy, and we fought over the last one while watching the sunset.
That moment stuck with me—the pure joy of handheld, shareable, deeply flavorful food enjoyed with your favorite people in a no-fuss setting. When I started BiteTide, I knew I needed to create a slider recipe that captured that feeling. I’ve tweaked and tested it through countless gatherings: book clubs that turned into feasts, last-minute potlucks, and hungry after-school crowds. This version, with its perfectly seared, thinly sliced chicken breast, is my love letter to those chaotic, delicious, connection-filled moments. It’s the taste of my coastal roots, optimized for your real-life kitchen.
Gathering Your Flavor Crew
Here’s everything you need to make these juicy, craveable mini sliders. Don’t stress if you’re missing something—I’ve got swaps and chef secrets for you!
- 2 large boneless, skinless chicken breasts: The star! Look for plump, even-sized breasts. The magic trick? We’re going to slice them horizontally into thin cutlets. This ensures quick, even cooking and maximum surface area for our delicious seasoning. If you’re short on time, ask your butcher to do this for you, or use thin-cut chicken cutlets from the store.
- Salt and pepper, to taste: The foundation of flavor. Don’t be shy here—season generously. I use fine sea salt for even distribution and freshly cracked black pepper for that bright, aromatic kick.
- 1/2 teaspoon garlic powder: It gives a sweet, savory base note that clings to the chicken beautifully. No fresh garlic here to burn in the pan! Chef Insight: A tiny pinch of onion powder is a fantastic friend here too.
- 1/2 teaspoon smoked paprika: This is my not-so-secret weapon. It adds a subtle smokiness and a gorgeous ruddy color that makes the chicken look irresistible. For a milder flavor, use sweet paprika.
- 1 tablespoon olive oil or melted butter: For cooking. I love olive oil for its high smoke point and fruity note, but butter brings an incredible richness. Or, be a rebel and use a mix of both!
- 8 slider buns: The vehicle! Hawaiian sweet rolls are a crowd-pleasing favorite, but brioche, potato, or classic dinner rolls all work wonderfully. Pro Tip: Lightly toasting them in the oven or a dry pan prevents sogginess and adds a lovely textural contrast.
Optional Toppings & Sauces (The Fun Part!):
- The Crisp Brigade: Lettuce (butter or romaine), thinly sliced tomato, pickles (bread & butter or dill), razor-thin red onion rings.
- The Melt: Cheese slices (sharp cheddar, provolone, pepper jack, or Swiss). Add it right on the hot chicken in the pan or on the bun under the broiler for a perfect melt.
- The Sauce Bar: Mayo, BBQ sauce, ranch, chipotle aioli (mix mayo with adobo sauce!), honey mustard, or a spicy sriracha mayo. The world is your saucy oyster.
Let’s Get Cooking: Juicy Chicken, Step by Step
Follow these steps for slider perfection every single time. I’m chatting you through each one with all my favorite hacks!
- Prep Your Chicken: Place one chicken breast flat on your cutting board. Place your non-dominant hand flat on top to steady it. Using a sharp chef’s knife, carefully slice horizontally through the breast, as if you’re opening a book, to create two thin cutlets. Repeat with the second breast. You should end up with 4 thin pieces. Chef Hack: If the breasts are very thick, you can even slice them into three pieces. Consistency in thickness is key to even cooking!
- Season with Confidence: Pat the chicken cutlets completely dry with paper towels. This is CRUCIAL for getting a beautiful golden sear instead of a steam. Sprinkle both sides generously with salt and pepper, then evenly dust with the garlic powder and smoked paprika. Let them sit for 5 minutes at room temperature. This little rest allows the seasoning to “bloom” and adhere.
- Heat Your Pan: Place a large skillet (cast iron or stainless steel is ideal) over medium-high heat. Add the olive oil or butter and let it get hot. You’ll know it’s ready when the oil shimmers or a drop of water sizzles on contact.
- Sear to Perfection: Carefully add the chicken cutlets to the hot pan, laying them away from you to avoid oil splatters. Don’t overcrowd the pan—cook in batches if needed. Let them cook, undisturbed, for 3-4 minutes. You’re waiting for that gorgeous golden-brown crust to form. Peek at the edges! When they look browned, flip them. Big Tip: Use the “press and release” test. Gently press the center of a cutlet with your tongs or finger. If it feels firm and springs back, it’s done. If it feels soft and squishy, it needs another minute. Cook on the second side for 2-4 minutes, until cooked through. Transfer to a clean plate. (Internal temp should be 165°F).
- Toast Those Buns (Optional but Recommended): While the chicken rests (which keeps it juicy!), split your slider buns. You can toast them cut-side down in the now-empty (but still flavorful!) skillet for 30-60 seconds, or pop them on a sheet tray under the broiler for a minute. Watch them closely!
- The Grand Assembly: Now for the creative part! Start with your bottom bun. Add a swipe of sauce, then a piece of that glorious golden chicken. If using cheese, place it on the hot chicken so it starts to melt. Pile on your chosen crisp toppings, add another drizzle or swipe of sauce to the top bun, and crown your creation. Serve immediately while everything is warm and wonderful.
How to Serve & Wow Your Crew
Presentation is part of the fun! For a party, I love using a large wooden board or platter. Arrange the toasted slider buns in rows, pile the warm chicken in a bowl nearby, and put all the toppings and sauces in little bowls or ramekins (I call it a “slider bar”). Let everyone build their own dream stack—it’s interactive and guarantees happy eaters. For a family dinner, I pre-assemble a few different varieties (one BBQ, one classic, one spicy) and let people choose. Don’t forget a big stack of napkins and maybe some crispy potato wedges or a simple salad on the side.
Ride Your Own Flavor Wave: 5 Tasty Twists
Once you master the basic formula, the world of sliders is your playground! Here are some of my favorite riffs:
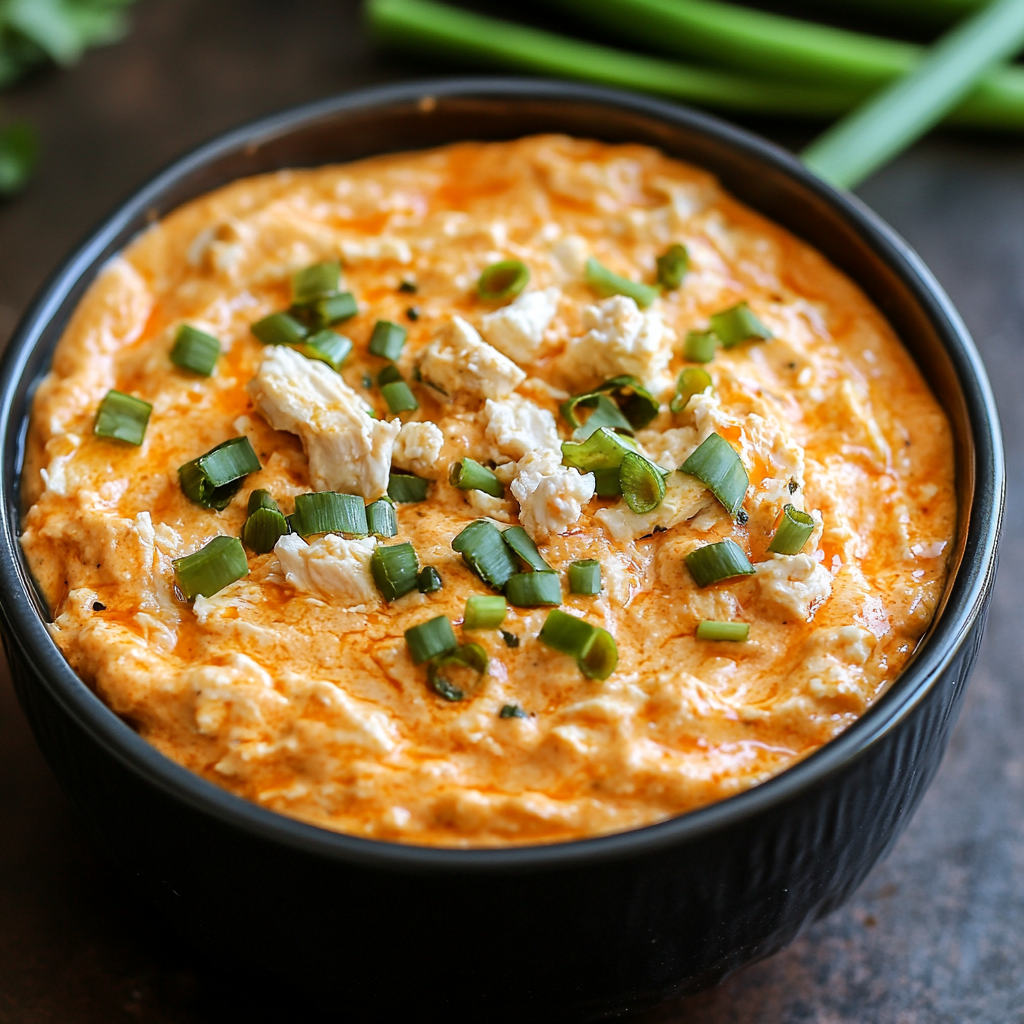
- Buffalo Blue Cheese: Toss the cooked chicken in a mix of melted butter and Frank’s RedHot. Serve on buns with crumbled blue cheese, a drizzle of ranch, and sliced celery.
- Mediterranean Magic: Season chicken with oregano, lemon zest, and garlic. Top with tzatziki sauce, chopped cucumber, tomato, and a sprinkle of feta cheese.
- Teriyaki Pineapple: Brush chicken with teriyaki glaze in the last minute of cooking. Top with a grilled pineapple ring and a sprinkle of sesame seeds.
- Pesto & Mozzarella: Spread basil pesto on the buns, add the chicken, and top with a slice of fresh mozzarella and a sun-dried tomato.
- For Our Veggie Friends: Swap the chicken for large, thick portobello mushroom caps (grilled or pan-seared) or breaded and baked eggplant slices. The seasoning and assembly method stays the same!
Isla’s Kitchen Notes & Stories
This recipe has evolved more than my music taste since high school (thankfully). The first time I made them, I used whole chicken breasts and they took forever to cook, drying out in the process. The horizontal slice was a game-changer sent from the weeknight dinner gods. I’ve also learned that letting the skillet get properly hot is non-negotiable for that restaurant-quality sear.
A funny story: I once made a triple batch for a neighborhood block party and ran out of slider buns. What did we do? We used toasted waffles. And you know what? They were a smash hit. The moral: don’t panic over perfection. Cooking is about adaptation and joy. These sliders are forgiving and flexible. They’ve seen me through chaotic evenings, happy celebrations, and everything in between. I hope they become a reliable, delicious staple in your home, too.
Your Slider Questions, Answered!
Q: My chicken always turns out dry. What am I doing wrong?
A: Two likely culprits! First, make sure you’re slicing the breasts thinly and evenly. A thick piece will require longer cooking time, leading to dryness. Second, avoid overcooking. Use the “press test” mentioned in the steps and pull the chicken at 165°F. Remember, it will continue to cook a bit while resting. Using a meat thermometer takes the guesswork out completely!
Q: Can I make these ahead of time for a party?
A: Absolutely! You can cook the chicken cutlets 1-2 hours ahead. Let them cool, store them covered in the fridge, and gently reheat them in a 300°F oven or in the microwave just until warm before assembling. Prep all your toppings and sauces ahead of time too. I recommend toasting the buns and assembling right before serving to avoid sogginess.
Q: The seasoning doesn’t seem to stick to my chicken. Help!
A: The secret is in the pat-dry! Moisture on the surface of the chicken creates steam and prevents the spices from adhering. Always, always pat your chicken thoroughly dry with paper towels before adding any seasoning. You’ll get a better sear and more flavorful coating.
Q: Can I bake these instead of pan-searing?
A: You can! For baking, place the seasoned cutlets on a parchment-lined baking sheet, drizzle with a bit of oil, and bake at 400°F (200°C) for 15-20 minutes, or until cooked through. You won’t get the same deep sear, but it’s a great hands-off method for larger batches.
Nutritional Information*
*This is an approximate estimate for one basic slider (chicken, bun, no added cheese or heavy sauces) and will vary based on your specific ingredients and toppings.
- Prep Time: 10 minutes
- Cook Time: 15 minutes
- Total Time: 25 minutes
- Servings: 8 sliders
Per Slider (approximate):
Calories: 210 | Protein: 18g | Fat: 9g | Carbohydrates: 14g | Fiber: 1g | Sugar: 2g