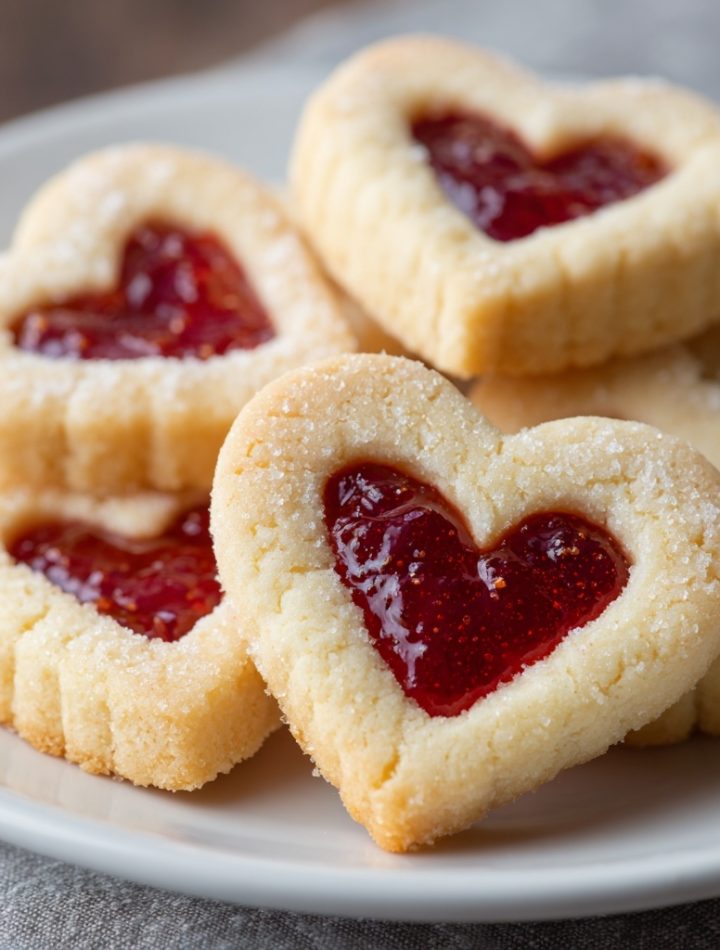
Heart-Shaped Jam-Filled Cookies (Strawberry or Raspberry)
Welcome to Your New Favorite Cookie
Hey there, friend! Isla here, from my cozy kitchen to yours. Have you ever stumbled upon a recipe that feels like a warm hug, tastes like a sweet memory, and looks like a tiny piece of art? That’s exactly what these Heart Jam Cookies are all about. Imagine this: a buttery, melt-in-your-mouth shortbread cookie, crisp around the edges and tender in the center, hugging a little pool of glistening, sweet-tart jam. They’re the kind of cookie that makes you pause, smile, and feel genuinely proud of what you just created.
I live for recipes that deliver a massive payoff without a massive effort, and these cookies are the poster child for that philosophy. They look like you spent all day in a fancy bakery, but the truth is, the dough is wonderfully simple and forgiving. Whether you’re whipping up a batch for a holiday cookie swap, a Valentine’s Day treat, a lovely addition to a tea party, or just because it’s Tuesday, these cookies bring a wave of pure, uncomplicated joy. So, tie on your favorite apron, put on some feel-good music, and let’s bake a batch of these gorgeous, gem-filled treats together. I promise, the hardest part is waiting for the dough to chill!
A Heart Full of Memories
Every time I make these cookies, the smell of buttery shortbread baking takes me right back to my Grandma Eleanor’s sun-drenched kitchen. She wasn’t a fancy baker, but she was a generous one. Her version of these cookies used a thimble to press the center indent, and she’d always let me be the one to carefully spoon in the vibrant red raspberry jam. She called them her “Jewels,” and to my wide, little-kid eyes, that’s exactly what they were. I remember standing on a wobbly stool, flour dusted on my nose, watching her work with a quiet, steady rhythm. She’d always sneak me the first one, still warm from the oven, and we’d share that silent, knowing look that only comes from sharing something truly delicious. It was in that kitchen I learned that the best recipes aren’t just about ingredients and steps; they’re about the love and the stories you bake into them. Now, every time I pull a tray of these heart-adorned cookies out of the oven, I feel like I’m carrying on a little piece of her legacy—one sweet, buttery bite at a time.
Print
Heart Jam Cookies : Buttery, Classic & Filled with Sweet Jam
- Total Time: 35 minutes
- Yield: ~20 cookies
Description
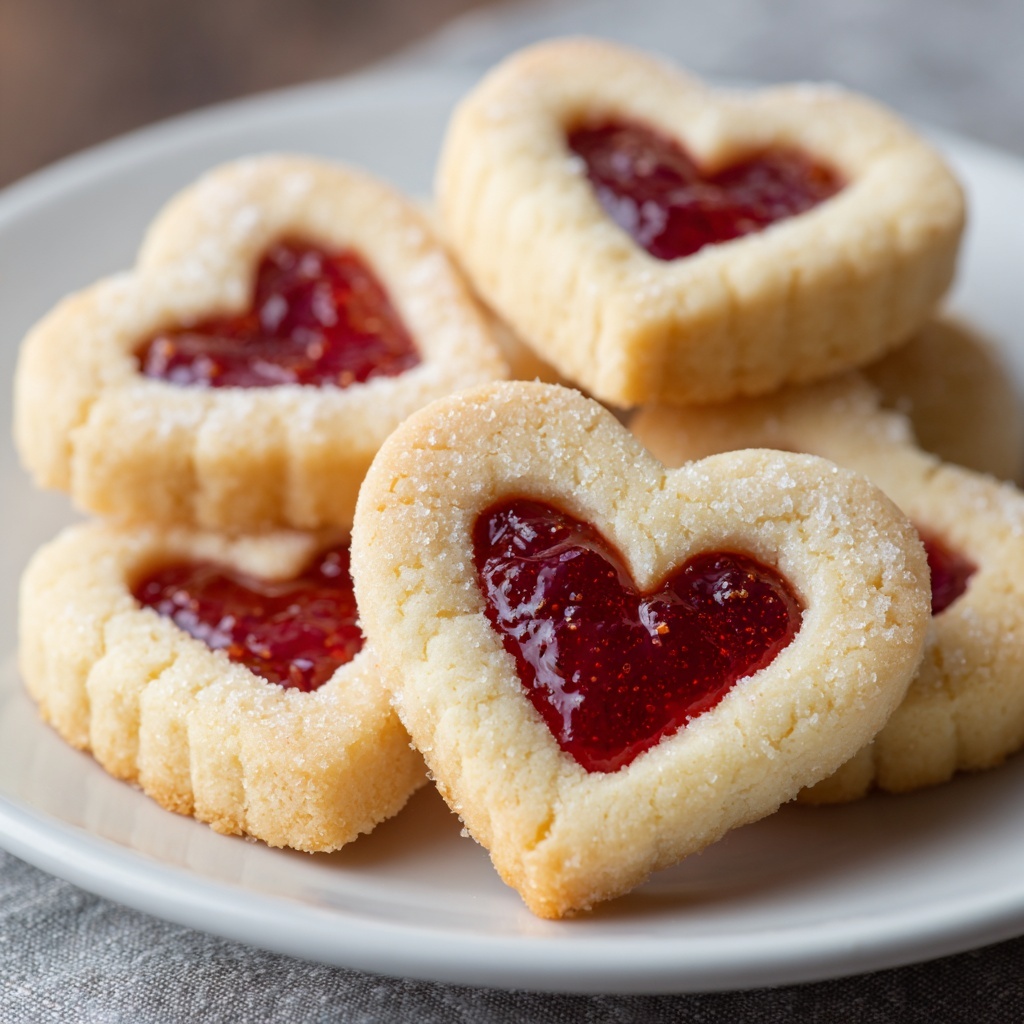
These heart jam cookies are delicate, buttery shortbread-style biscuits with a jewel-like center of strawberry or raspberry jam. Perfect for holidays, tea parties, or gifting, they’re as lovely to look at as they are to eat. The crisp edges, soft centers, and bright jam filling make them an irresistible treat.
Ingredients
Cookie Dough:
225g unsalted butter, softened
150g granulated sugar
1 large egg
1 tsp vanilla extract
315g all-purpose flour
½ tsp baking powder
Pinch of salt
Filling:
Strawberry or raspberry jam (seedless preferred)
Instructions
Cream Butter & Sugar:
Beat softened butter and sugar until pale and creamy.
Add Egg & Vanilla:
Mix in the egg and vanilla extract until smooth.
Combine Dry Ingredients:
Whisk together flour, baking powder, and salt. Gradually add to wet ingredients until a dough forms.
Chill Dough:
Wrap the dough in plastic wrap and chill for at least 1 hour.
Preheat Oven:
Preheat to 175°C (350°F) and line baking trays with parchment paper.
Shape the Cookies:
Roll out the dough to about ¼ inch thick. Cut into circles using a cookie cutter. On half of the circles, cut small heart shapes in the center.
Assemble & Fill:
Place solid circles on the baking sheet. Spoon a small amount of jam in the center, then top with the heart-cutout cookies. Press edges gently to seal if needed.
Bake:
Bake for 10–12 minutes or until lightly golden around the edges. Cool on a wire rack.
- Prep Time: 20 minutes
- Cook Time: 15 mins
- Category: Dessert
Nutrition
- Calories: 150
- Fat: 8g
- Carbohydrates: 18g
- Protein: 2g
Gathering Your Cookie Crew
Part of the magic of this recipe is its beautiful simplicity. You likely have most of these ingredients in your pantry right now! Here’s what you’ll need to create these little masterpieces.
For the Cookie Dough:
- 225g (1 cup) unsalted butter, softened: This is the star of the show, giving our cookies that rich, tender crumb. Chef’s Insight: “Softened” means it should give slightly when you press it, but your finger shouldn’t sink right through. If it’s too soft or melted, the cookies can spread too much. Pro tip: if you forget to take it out, you can quickly soften butter by grating it with a box grater!
- 150g (¾ cup) granulated sugar: Sweetens the deal and helps create a lovely, delicate texture when creamed with the butter.
- 1 large egg: Our binding agent, bringing the dough together and adding a touch of richness.
- 1 tsp vanilla extract: The classic flavor enhancer that makes everything taste more… well, like a cookie! Feel free to use vanilla bean paste for those gorgeous little specks.
- 315g (2 ½ cups) all-purpose flour: The structure of our cookie. I always fluff my flour with a spoon before measuring to avoid a dense, dry dough.
- ½ tsp baking powder: Our little leavening helper, giving the cookies just a hint of lift so they aren’t rock-hard.
- Pinch of salt: Don’t you dare skip this! Salt is the flavor superhero that balances the sweetness and makes the buttery taste pop.
For the Filling & Finishing:
- Strawberry or raspberry jam (seedless preferred): The “jewel” in our crown! I love the classic red against the golden cookie. Substitution Tip: Any thick jam or preserves will work wonders here. Apricot, blackberry, or even a tangy lemon curd would be divine! Just avoid anything too runny, or it might bubble over. If your jam is thin, simmer it in a pan for a few minutes to thicken it up.
Let’s Bake! Your Step-by-Step Guide
Ready to create some magic? Follow these steps, and you’ll have a tray of beautiful, bakery-worthy cookies in no time. I’ve sprinkled in my favorite kitchen hacks to make the process even smoother.
- Cream Butter & Sugar: In a large bowl, beat the softened butter and sugar together on medium-high speed for 2-3 minutes. We’re not just mixing here; we’re creaming. You’re looking for the mixture to become pale, fluffy, and wonderfully creamy. This step is crucial for giving our cookies that perfect light texture, so don’t rush it! Chef’s Hack: If you don’t have a stand mixer, a hand mixer works perfectly. Even a bowl and a sturdy wooden spoon will do—it’s a great arm workout!
- Add Egg & Vanilla: Scrape down the sides of the bowl with a spatula (a key step for even mixing!), then add the egg and vanilla extract. Mix on medium until everything is fully incorporated and smooth. The mixture might look a little curdled at first, but it will come together—promise!
- Combine Dry Ingredients: In a separate bowl, whisk together your flour, baking powder, and salt. This ensures our leavening is evenly distributed. Now, with your mixer on low, gradually add the dry ingredients to the wet ingredients. Mix just until the flour disappears and a soft dough forms. Chef’s Note: Overmixing at this stage can lead to tough cookies, so as soon as you don’t see any dry flour pockets, you’re done!
- Chill Dough: This is the non-negotiable, patience-testing step! Turn the dough out onto a piece of plastic wrap, shape it into a flat disc (this helps it chill faster and evenly), wrap it tightly, and pop it in the fridge for at least 1 hour, or up to 2 days. Why chill? It firms up the butter, which prevents your cookies from spreading into puddles in the oven. It also gives the flour time to hydrate, resulting in a more tender cookie.
- Preheat Oven & Prep: When you’re ready to bake, preheat your oven to 175°C (350°F). Line your baking sheets with parchment paper. Chef’s Hack: Parchment paper is a lifesaver for even baking and easy cleanup. No sticking, ever!
- Shape the Cookies: On a lightly floured surface, roll out your chilled dough to about ¼ inch thick. Using a round cookie cutter (about 2-3 inches in diameter), cut out as many circles as you can. Now, for half of those circles, use a smaller heart-shaped cutter to cut a window in the center. You’ll have solid circles (the bases) and circles with heart-shaped cutouts (the tops). Re-roll the scraps as needed.
- Assemble & Fill: Place the solid cookie circles on your prepared baking sheet. Spoon about ½ teaspoon of jam into the center of each one. Pro Tip: Less is more with the jam! If you overfill, it will bubble out and make a mess. Now, gently place a heart-cutout cookie on top of each jam-covered base. You can give the edges a very gentle press to seal them, but they’ll often seal themselves as they bake.
- Bake to Perfection: Bake for 10-12 minutes, or until the cookies are set and the edges are just barely starting to turn a light golden brown. The jam will be bubbly and glorious. Chef’s Insight: They might not look totally done, but they will continue to firm up as they cool. Overbaking is the enemy of a tender shortbread!
- Cool Completely: Let the cookies cool on the baking sheet for 5 minutes before carefully transferring them to a wire rack to cool completely. This is the final test of your willpower—wait until they are fully cool to bite in for that perfect texture.

Sharing the Love (and the Cookies!)
These cookies are a dream to serve. Pile them high on a vintage cake stand for a tea party, stack them in a cute mason jar for a heartfelt gift, or simply arrange them on a plate for a cozy night in. They pair beautifully with a cup of Earl Grey tea, a glass of cold milk, or a frothy cappuccino. I love dusting the tops with a little powdered sugar right before serving for an extra snowy, festive look. However you serve them, get ready for the “oohs” and “aahs”—they’re guaranteed!
Ride Your Own Flavor Wave!
The beauty of this recipe is its versatility. Don’t be afraid to get creative and make it your own! Here are a few of my favorite twists:
- Lemon & Thyme Delight: Add the zest of one lemon to the dough and use lemon curd as the filling. Garnish with a tiny fresh thyme leaf before baking for a sophisticated, herbal note.
- Chocolate Hazelnut Twist: Swap the jam for a small dollop of Nutella or your favorite chocolate-hazelnut spread. Pure decadence!
- Almond Apricot: Use ½ tsp almond extract instead of vanilla and fill the centers with thick apricot preserves. A sprinkle of sliced almonds on top before baking adds a lovely crunch.
- Gluten-Free & Great: Simply swap the all-purpose flour for a 1:1 gluten-free baking blend. I’ve had fantastic results with this swap!
- Spiced Fig: Add a pinch of cinnamon and cardamom to the dough and use a rich fig jam for a cozy, autumnal flavor.
Isla’s Kitchen Confidential
This recipe has been a living, evolving thing in my kitchen. The first time I made them, I was so impatient I skipped the chill time. Let’s just say I ended up with “Heart Jam Puddles” instead of cookies! They still tasted amazing, but it was a great lesson in why that rest in the fridge is so important. Over the years, I’ve learned that using a metal cookie cutter dipped in flour gives you the cleanest cuts, and that keeping a small bowl of flour nearby for dusting your fingers and the rolling pin is a game-changer for preventing sticky situations. I’ve also found that this dough freezes like a dream. You can make the dough discs, wrap them well, and freeze them for up to 3 months. Just thaw in the fridge overnight and you’re ready for a spontaneous baking session. It’s my little secret for always having a homemade treat on hand for surprise guests… or surprise cravings!
Your Questions, Answered!
I’ve made these cookies more times than I can count, and I’ve heard all your brilliant questions. Here are the answers to the most common ones.
My cookies spread too much! What happened?
This is almost always a butter temperature issue. If your butter was too soft or melted, or if your dough wasn’t chilled long enough, the cookies will spread. Make sure your butter is just softened, and don’t skip that crucial fridge time. Also, ensure your oven is fully preheated before the trays go in.
My jam bubbled out and made a sticky mess. How can I prevent this?
This usually means you’ve been a little too generous with the jam (a happy problem to have!). Remember, just ½ a teaspoon is plenty. Also, using a thicker jam or preserves, rather than a jelly, helps immensely. If your jam is runny, cook it down in a saucepan for a few minutes to thicken it before using.
Can I make these cookies ahead of time?
Absolutely! You have a few options. 1) The dough can be made and kept in the fridge for up to 2 days. 2) You can assemble the unbaked cookies on a tray, freeze them solid, then transfer to a freezer bag. Bake straight from frozen, adding 1-2 minutes to the baking time. 3) The fully baked and cooled cookies store beautifully in an airtight container at room temperature for up to 5 days.
My dough is too crumbly and won’t hold together when I roll it.
This can happen if you measured your flour by scooping directly from the bag (which packs it down) or if the dough is too cold. Let it sit on the counter for 5-10 minutes to become slightly more pliable. If it’s still crumbly, you can work in a teaspoon of cold water at a time until it just comes together.
A Little Bite of Sweetness (Nutritional Info)
While we’re all about flavor first, I know it’s helpful to have a guide! Here’s the approximate nutritional information per cookie (based on a batch of 20, using strawberry jam). Remember, these are estimates and can vary based on your specific ingredients.
- Calories: 150
- Fat: 8g
- Carbohydrates: 18g
- Sugar: 8g
- Protein: 2g
Prep Time: 20 minutes (+1 hour chill) | Bake Time: 12 minutes | Total Time: ~1 hour 45 minutes | Servings: ~20 cookies