 Forget Everything You Thought You Knew About Baking Bread
Let’s be real for a second. When you hear “homemade yeast bread,” what’s the first thing that comes to mind? A cloud of flour, a sore arm from kneading, complicated steps, and that lingering fear that the yeast is judging you? I totally get it. For years, I put bread baking in the “someday, when I have a full day to dedicate to it” category, right next to “learn calligraphy” and “organize the digital photo album from 2012.”
But what if I told you that the most jaw-droppingly beautiful, crusty, chewy, artisan-style loaf you’ve ever dreamed of requires about 5 minutes of your active time, zero kneading, and not a single fancy bread-making tool? It sounds like kitchen wizardry, but I promise, it’s pure, delicious science.
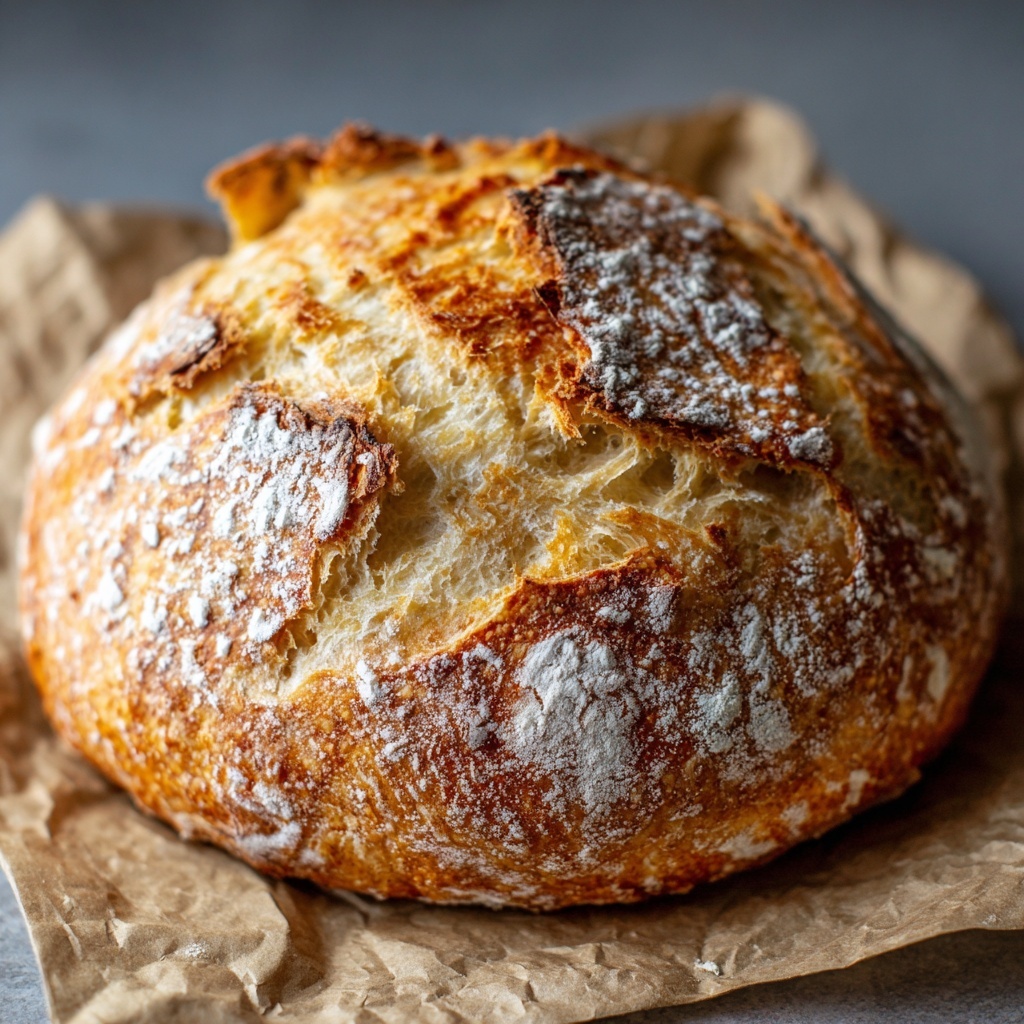
This No-Knead Crusty Artisan Bread is my absolute gateway recipe. It’s the one I teach every friend who claims they “can’t” bake bread. It’s the recipe that, once you master it, will make you feel like a total kitchen superhero. We’re talking a crackling, golden crust that sings when you tap it, a soft, holey interior perfect for sopping up soup or cradling a generous swipe of salted butter, and a flavor that tastes like it came from a tiny Parisian boulangerie. All from your own oven, with more “waiting” than “working.” If you’ve ever wanted to fill your home with the incomparable smell of baking bread and the even better feeling of slicing into a loaf you made yourself, your moment is now. Grab your biggest bowl, and let’s turn the myth of difficult bread on its head.
The Loaf That Changed My Mind
My bread breakthrough didn’t happen in a fancy culinary school. It happened in a tiny, too-hot apartment kitchen, with a roommates’ movie marathon happening in the next room. I was craving the dense, sourdough-adjacent bread from a favorite café, but my budget (and schedule) said “nope.” Scrolling through food blogs in frustration, I found a version of this no-knead method. It seemed too simple, almost like a prank. Four ingredients? One bowl? No kneading? I was suspicious, but the craving won.
I remember mixing the shaggy, sticky dough at 10 PM, covering the bowl with a tea towel my grandma had sewn, and tucking it into a corner. The next morning, the smell wasn’t of yeast, but of something deeper, beer-like and promising. I was mesmerized by the bubbly, alive-looking dough. Baking it in my chipped, second-hand Dutch oven felt like a act of faith. When I lifted the lid after 30 minutes, I actually gasped. A perfect, blooming, golden loaf had appeared where there was once just goop. That first slice, still warm, with melting butter? It was a revelation. It wasn’t just bread; it was confidence, baked. It was the moment I realized that the most magical kitchen creations often come from the simplest methods and a little bit of trust. That loaf, imperfect and glorious, is why I believe anyone can bake bread.
Print
Easiest Yeast Bread : No Knead, Crusty, and Artisan-Style
- Total Time: ~13 hours (mostly hands-off)
- Yield: 1 loaf 1x
Description
This is the easiest yeast bread you’ll ever make—no kneading, no fancy tools, and no stress. Just mix, rise, and bake for a golden, crusty loaf with a chewy interior that rivals any bakery. Perfect for toast, dipping, or sandwiches, this artisan-style bread is your new go-to homemade staple.
Ingredients
3 cups all-purpose flour
1½ tsp salt
½ tsp instant or active dry yeast
1½ cups warm water
Instructions
In a large bowl, mix flour, salt, and yeast. Add warm water and stir until a shaggy dough forms.
Cover bowl with plastic wrap or a towel. Let rest at room temperature for 8–12 hours (overnight works best).
When ready to bake, preheat oven to 230°C (450°F) with a Dutch oven inside.
Turn dough out onto a floured surface. Shape roughly into a ball and let it rest while oven heats.
Carefully place dough into the hot Dutch oven (use parchment for easy lifting). Cover and bake for 30 minutes.
Remove lid and bake uncovered for another 10–15 minutes until deep golden and crusty.
- Prep Time: 5 mins
- Cook Time: 40–45 minutes
- Category: Breakfast
Your Short & Mighty Ingredient List
See? I told you it was simple. The magic is in the method, not a laundry list of items. Here’s what you need and why each one matters:
- 3 cups (360g) all-purpose flour: The workhorse! I use regular, unbleached all-purpose flour for a great balance of structure and tender crumb. No bread flour needed. Chef’s Insight: For a slightly more rustic texture and nutty flavor, you can swap out 1 cup of the all-purpose for whole wheat or rye flour. Just don’t go fully whole grain on your first try, as it changes the hydration needs.
- 1½ teaspoons salt: This is your flavor agent. Don’t be shy! Salt regulates the yeast and strengthens the gluten network. Without it, your bread will taste flat and the texture can be weak. I use fine sea salt.
- ½ teaspoon instant or active dry yeast: Yes, only HALF a teaspoon! This tiny amount works slowly over the long rise, developing incredible flavor. Substitution Tip: Instant and active dry yeast are interchangeable here. If using active dry, you don’t even need to proof it first—just mix it right in with the dry ingredients.
- 1½ cups (350ml) warm water: The key to bringing it all together. “Warm” means just that—like pleasant bath water, about 105-115°F (40-46°C). Too hot and you’ll kill the yeast; too cold and it’ll just take longer. Chef’s Hack: When in doubt, err on the side of slightly cooler. Time is on your side with this recipe.
Let’s Make Some (Easy) Magic: Step-by-Step
Here’s where the fun begins. Read through once, then just go for it. It’s incredibly forgiving.
- The Mix-Up: In a large bowl (I mean large—the dough will double!), whisk together the flour, salt, and yeast. Pour in the warm water. Using a sturdy wooden spoon or just your hands, mix until you have a shaggy, sticky, and somewhat ugly dough. No dry flour patches should remain, but it will NOT look smooth or kneaded. That’s perfect. Chef’s Commentary: This is the only “work” you’ll do. Embrace the mess! If it feels too dry and won’t come together, add a tablespoon more water. If it’s a soupy batter, add a tablespoon more flour. Climate affects flour!
- The Long, Lazy Rise: Cover the bowl tightly with plastic wrap, a damp tea towel, or even a silicone lid. Let it sit at room temperature, out of direct drafts, for 8 to 12 hours. Overnight is classic and easiest. Chef’s Tip: I often mix mine after dinner and bake it the next morning for lunch. You’re looking for the dough to double in size, look bubbly on top, and have a slightly domed surface. If your kitchen is chilly, it might take the full 12 hours. No stress.
- Heat it Up: When your dough is ready and puffy, place your Dutch oven (with its lid on) into your cold oven. Preheat the oven to 450°F (230°C). Let the Dutch oven heat for a full 30 minutes as the oven comes to temperature. This is CRUCIAL for that explosive oven spring and crispy crust. Little Hack: No Dutch oven? A heavy, oven-safe pot with a tight-fitting lid works. A deep ceramic baking dish covered tightly with foil can work in a pinch, though the crust won’t be *quite* as perfect.
- Shape (Don’t Knead!): While the oven heats, turn your risen dough out onto a *well*-floured surface. It will be loose, sticky, and full of bubbles—handle it gently! With floured hands, fold the edges of the dough into the center 4-8 times, just to create a rough ball shape. Place the dough seam-side down on a piece of parchment paper. Let it rest for 20-30 minutes while the oven finishes preheating. Chef’s Insight: This “shaping” isn’t about creating tension like traditional bread. We’re just gently coaxing it into a loaf shape without degassing all those beautiful bubbles.
- Bake Covered – The Steam Secret: Carefully remove the SCORCHING HOT Dutch oven from your oven. Using the parchment paper as a sling, lift your dough ball and lower it into the pot. Put the lid back on. This traps steam from the dough, creating the humid environment needed for that crispy, crackly crust. Bake covered for 30 minutes.
- Bake Uncovered – The Golden Glory: After 30 minutes, remove the lid. You’ll see a pale, puffed loaf. Now, let it bake uncovered for another 10-15 minutes until it’s a deep, glorious, golden brown. It should sound hollow when tapped on the bottom. Don’t Rush This: This final blast of dry heat sets the crust and color. Go for gold!
- The (Hardest) Final Step – Cool! Transfer the loaf to a wire cooling rack. I know, I know. The smell is intoxicating. But you MUST let it cool for at least 45 minutes before slicing. The interior is still cooking from residual heat. Slicing too soon leads to a gummy crumb. Pro Tip: I set a timer and distract myself with cleaning up. It’s worth the wait!
How to Serve Your Masterpiece
Once cooled, this bread is your canvas! For the ultimate experience, slice it thick with a serrated bread knife. Serve it simply with high-quality salted butter that melts into the warm, airy pores. It’s sublime for dipping into olive oil and balsamic vinegar, or a hearty stew. The next day, it makes the world’s best toast or crunchy croutons. For sandwiches, its sturdy crust holds up to juicy fillings without getting soggy. Honestly, just tear it with your hands and enjoy—it’s that good.
Ride Your Own Flavor Wave: Fun Variations
- Everything Bagel Bliss: After shaping, brush the loaf with water and generously sprinkle with an “Everything Bagel” seasoning mix before baking.
- Rosemary & Sea Salt: Add 1 tablespoon of finely chopped fresh rosemary to the dry ingredients. Before the final bake, sprinkle with flaky sea salt.
- Garlic & Herb: Fold ½ cup of shredded cheese (like cheddar or gruyere) and 2 minced garlic cloves into the dough during the shaping step.
- Olive & Sun-Dried Tomato: Mix in ½ cup of chopped Kalamata olives and ¼ cup of chopped oil-packed sun-dried tomatoes (pat them dry first) with the water.
- Whole Grain Boost: Substitute 1 cup of the all-purpose flour with whole wheat or spelt flour for a heartier, nuttier loaf.
Isla’s Chef Notes & Kitchen Confessions
This recipe has become my kitchen security blanket. I’ve made it during chaotic weeknights (just mix and forget!), for last-minute guests (who are always impressed), and even as edible gifts. Over time, I’ve learned it’s virtually foolproof. Once, I forgot about the dough and let it rise for almost 18 hours on a cool day. It was *more* sour and flavorful, not ruined! Another time, I added too much water and ended up with a dough so sticky I had to literally pour it into the Dutch oven. It baked into a wild, craggy, delicious focaccia-like loaf. The point is, this method wants to work for you. It has built-in forgiveness. My biggest evolution? I stopped being afraid of the sticky dough. That wetness is what creates the beautiful, open holes inside. So trust the process, embrace the bubbles, and get ready for your new favorite kitchen superpower.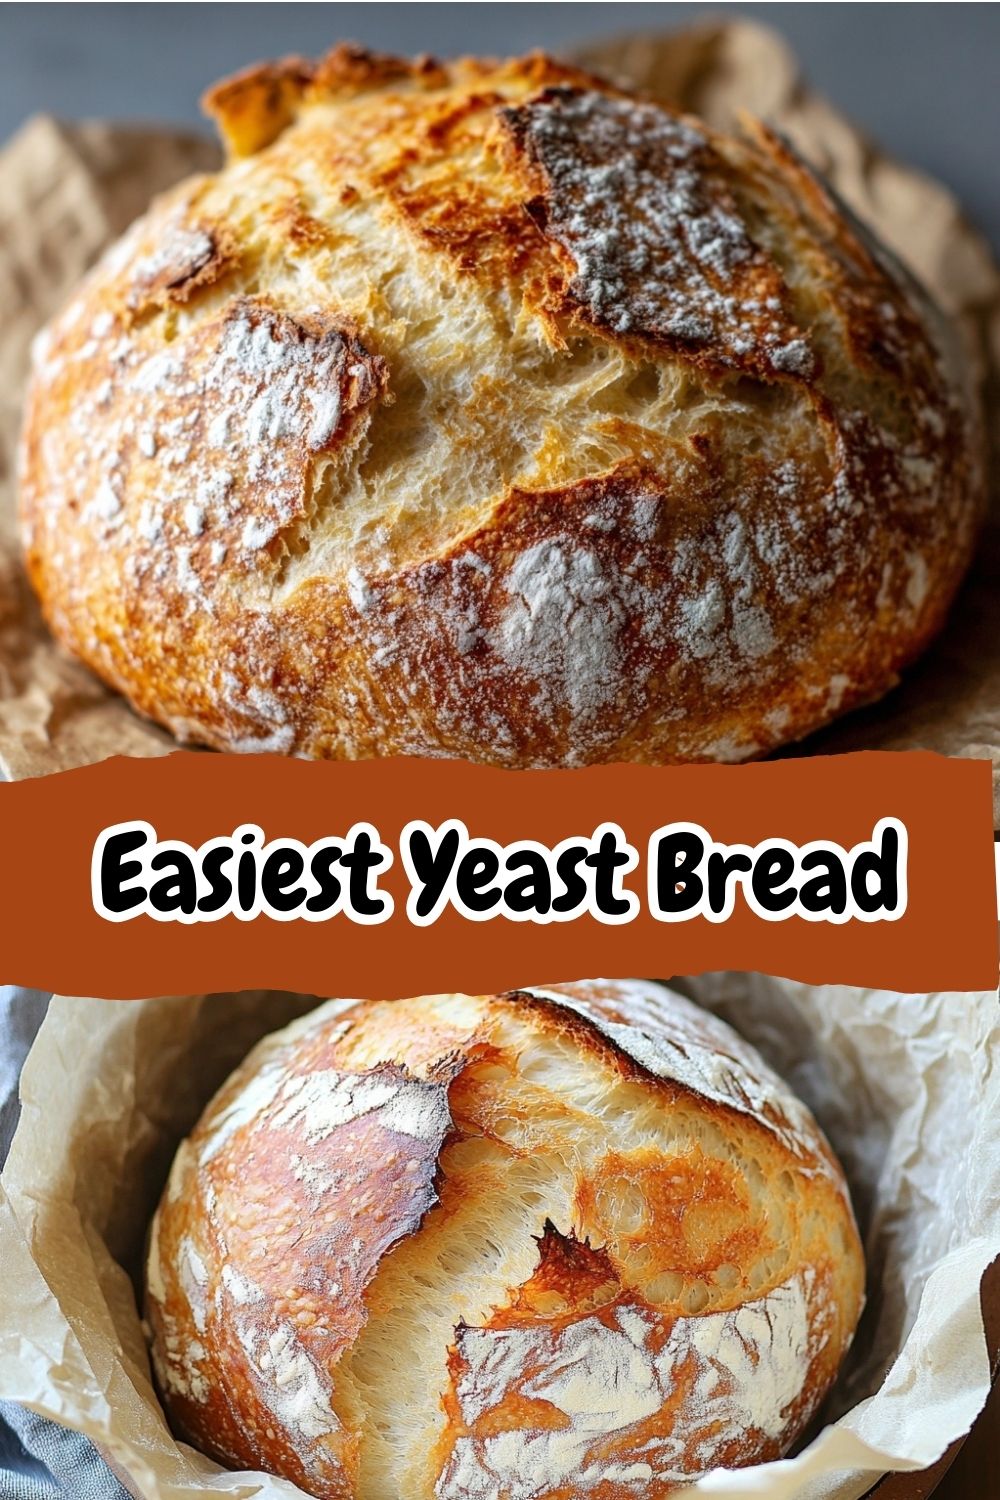
Your Bread Questions, Answered
Q: My dough didn’t rise much overnight. What happened?
A: The most common culprits are old yeast or a kitchen that was too cold. Yeast is a living thing! Make sure yours is fresh. If your kitchen is below 68°F (20°C), the rise will be slower—just give it more time, up to 18 hours. You can also let it rise in a slightly warm (not hot) oven with the light on.
Q: Can I speed up the rise?
A> You can, but you’ll sacrifice flavor. Using a full packet of yeast (2 ¼ tsp) and letting it rise for 2-4 hours will give you a loaf, but it won’t have the same complex, developed taste. The long, slow rise is the secret ingredient!
Q: I don’t have a Dutch oven. What can I use?
A: Any heavy, oven-safe pot with a tight-fitting lid is great (cast iron, enameled cast iron, ceramic). In a pinch, bake on a preheated pizza stone or baking sheet with a metal bowl overturned on top to trap steam. The crust may be slightly less crisp on the bottom, but it’ll still be wonderful.
Q: My bread is very dense. Where did I go wrong?
A> Density usually comes from over-handling the dough after the rise (knocking out all the bubbles), using too much flour during shaping, or—most likely—slicing it while it was still hot. The crumb needs that cooling time to set. Be gentle and patient!
Nutritional Information*
*This is an approximate estimate per slice (based on 12 slices per loaf).
- Calories: 120
- Protein: 3g
- Carbohydrates: 24g
- Fat: 0.5g
- Fiber: 1g
- Sugar: 0g
- Sodium: 290mg