That Magical Moment When Chocolate Saves the Day
Hey there, friend! Isla here from BiteTide, your partner in crime for all things deliciously uncomplicated. Raise your hand if you’ve ever been hit by a chocolate craving so intense it feels like a tidal wave? 🙋♀️ Yeah, me too. That’s exactly why I’m SO pumped to share this little miracle with you today: my Creamy Guilt-Free Fudge. Picture this – velvety chocolate that melts on your tongue, that rich cocoa hug we all crave, but without that heavy “uh-oh I ate the whole pan” feeling. It’s the unicorn of desserts!
I get it. Life’s busy. Between work, family, and just… *existing*, sometimes you need a sweet win that doesn’t demand hours or a mountain of butter. This fudge? It’s your secret weapon. Five minutes of active time, friends. FIVE. You probably spend longer scrolling memes! It’s shockingly simple, incredibly satisfying, and made with ingredients that won’t make you groan. Think of it as your edible happy place – a little square of pure joy you can keep stashed in the fridge for emergencies (or Tuesday afternoons, no judgment!). So grab your favorite mixing spoon, put on that apron (or don’t, rebels welcome!), and let’s dive into chocolate bliss that feels as good as it tastes. Ready to ride this flavor wave?
Grandma’s Apron & A Chocolate Revelation
This fudge actually has its roots in a slightly chaotic, wonderfully sticky memory. Picture tiny me, maybe eight years old, standing on a wobbly stool in my Grandma Mae’s kitchen – a place that always smelled like cinnamon and possibility. Her apron, practically a tent on me, was dusted with flour, and she was teaching me her legendary “Triple Threat Truffles” (butter, sugar, more butter!). We were melting chocolate over a double boiler, me stirring with intense, serious focus… until I got distracted by a blue jay outside. Sploosh! Half the chocolate cascade hit the floor. Grandma just laughed that warm, rumbly laugh of hers, wiped my chocolate-smeared cheek, and said, “Sugar, sometimes simple is sweeter. Let’s start over, but easier.”
She scrapped the complicated recipe. Instead, she grabbed a can of sweetened condensed milk, some chocolate chips, and a pinch of salt from her little seashell-shaped dish. Ten minutes later, we were eating the creamiest, most magical fudge straight from the pan with spoons. No fancy tempering, no stress. Just pure, unadulterated chocolate joy. That moment – the laughter, the simplicity, the *shared* indulgence – is baked into every batch of this guilt-free fudge I make now. It’s my edible hug from Grandma Mae, proving that the best treats are often the easiest and made with heart (and maybe a little mess!).
Your Fudge Toolkit: Simple Stars, Big Flavor
See? I told you it was simple! This dreamy fudge only needs four trusty ingredients. But each one plays a crucial role in our guilt-free magic. Let’s break it down:
- 1½ cups Semi-Sweet Chocolate Chips: The rockstar! I use semi-sweet because it gives that deep chocolate hit without being cloyingly sweet. Chef’s Insight: Quality matters here! Look for chips with cocoa butter high on the ingredient list (avoid “chocolatey” coatings). Sub Tip: Dark chocolate chips (60-70%) work fabulously for a more intense bite! Vegan? Ensure they’re dairy-free.
- ⅔ cup Low-Fat Sweetened Condensed Milk: The secret to creamy magic without rivers of heavy cream! It provides sweetness, structure, and that irresistible melt-in-your-mouth texture. Chef’s Insight: Low-fat works perfectly here and lightens the calorie load significantly. Sub Tip: For vegan fudge, use full-fat coconut milk (chilled, scoop the solid cream off the top) mixed with 1/4 cup powdered sugar or maple syrup – whisk until thick!
- ¾ tsp Pure Vanilla Extract: The flavor enhancer! It rounds out the chocolate, adding a warm, complex note. Chef’s Insight: Pure extract, not imitation, makes a subtle but noticeable difference. Think of it as chocolate’s best friend.
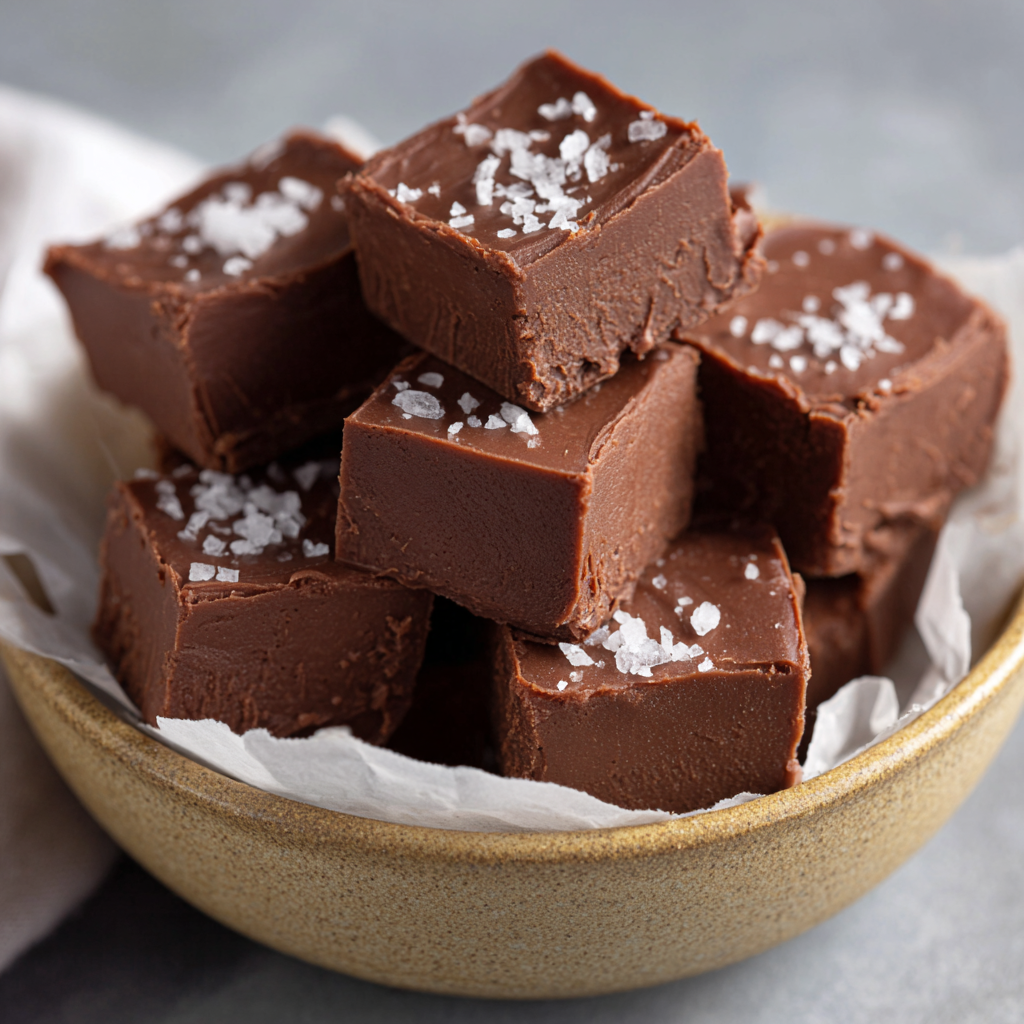
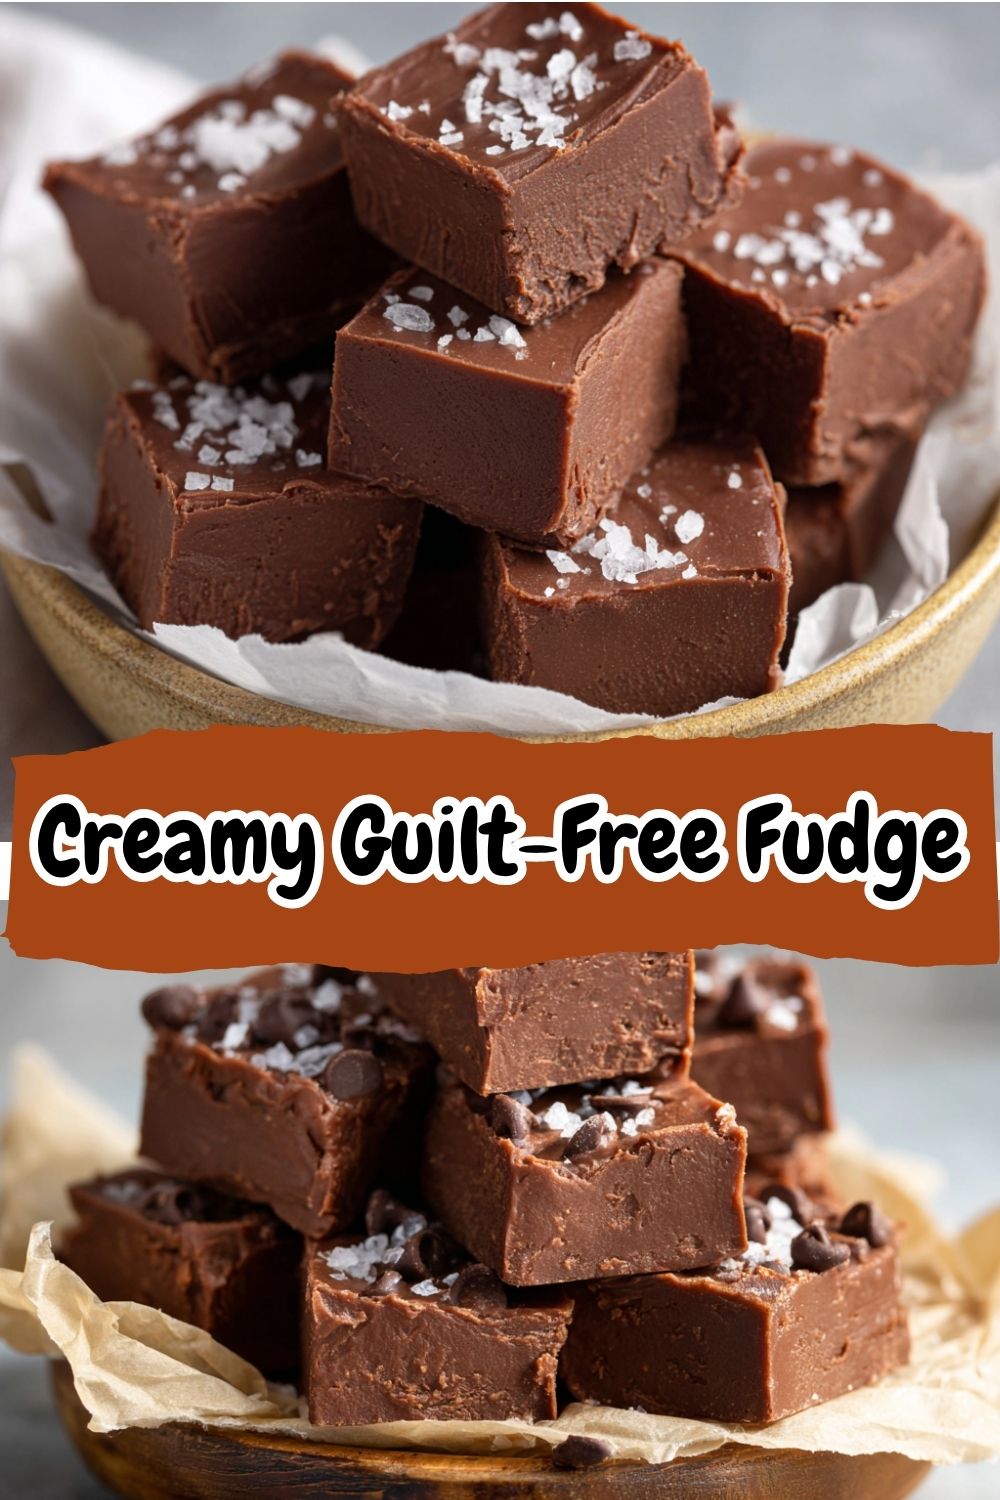
- Generous Pinch of Fine Sea Salt: The game-changer! Salt doesn’t make it salty; it makes the chocolate flavor *pop* and balances the sweetness. Chef’s Insight: Don’t skip this! Use flaky sea salt on top after pouring for an extra gourmet touch.Print

Creamy Guilt-Free Fudge
- Total Time: 5 minutes
- Yield: 16 1x
Description
This fudge is the kind of treat that makes you smile with every bite—rich, creamy, and indulgent without the guilt. I made it on a whim one evening, and it’s been a go-to ever since for quick, feel-good desserts. Perfect for sharing (or not!), this fudge is easy to love and even easier to make.
Ingredients
Scale1½ cups semi-sweet chocolate chips
⅔ cup low-fat sweetened condensed milk
¾ tsp vanilla extract
Pinch of salt
Instructions
Line a small baking dish or loaf pan with parchment paper.
In a saucepan over low heat, combine chocolate chips and sweetened condensed milk. Stir until smooth and melted.
Remove from heat and stir in vanilla and salt.
Pour mixture into prepared pan, smoothing the top.
Chill in the fridge for at least 2 hours or until firm.
Slice into squares and serve.
- Prep Time: 5 minutes
- Category: dessert
Nutrition
- Calories: 100
- Sugar: 10g
- Sodium: 15mg
- Fat: 5g
- Carbohydrates: 12g
- Protein: 1g
Let’s Make Magic: Creamy Fudge in a Flash!
Okay, team! Time to transform these simple ingredients into pure chocolate bliss. This is where the “5-minute active time” promise comes true. Let’s do this step-by-step, with my favorite little hacks sprinkled in:
- Prep Your Pan Like a Pro: “Line a small baking dish (about 6×6 inches) or a loaf pan with parchment paper, leaving some overhang on two sides.” Why? This creates little “handles” so you can lift the whole slab of fudge out later for super clean cuts! No wrestling with the pan. Spritz the pan lightly with cooking spray first to help the parchment stick.
- Melt & Mingle (Low and Slow!): “In a medium saucepan, combine the chocolate chips and sweetened condensed milk.” HACK ALERT! Put the saucepan on the burner FIRST, then add the ingredients. This prevents scorching. “Place over LOW heat.” This is CRUCIAL! Chocolate is delicate. High heat = grainy, seized fudge. We want gentle, patient melting. “Stir constantly and patiently with a silicone spatula or wooden spoon until the mixture is completely smooth, glossy, and no lumps remain.” Chef’s Tip: If things feel stubborn, pull the pan off the heat for 30 seconds, keep stirring, then return to low heat. Takes about 3-5 minutes total.
- Flavor Finesse: “Remove the saucepan from the heat immediately once smooth.” Don’t linger! “Stir in the vanilla extract and that generous pinch of salt.” Stir vigorously for about 30 seconds. You’ll see the mixture get even glossier! The salt dissolves, and the vanilla aroma blooms. Divine!
- Pan & Smooth: “Pour the luscious chocolate mixture into your prepared pan.” Use the spatula to scrape every last bit – that’s gold! “Gently tap the pan on the counter a few times to release any air bubbles.” Then, “use the back of a spoon or an offset spatula to smooth the top into an even, beautiful layer.” Chef’s Aesthetic Tip: Run a knife in a slight swirl pattern on top before chilling for a pretty finish!
- The Chill Factor: “Place the pan in the refrigerator.” Uncovered is fine! “Chill for at least 2 hours, or until completely firm.” Patience Check-In: I know, waiting is hard! But this sets the texture. For ULTRA clean cuts? Chill overnight. The fudge firms up perfectly. Resist the urge to peek!
- Slice & Shine: “Use the parchment paper overhang to lift the fudge slab out of the pan and onto a cutting board.” See? Told you those handles were genius! “Using a large, sharp knife (wiping it clean with a hot, damp cloth between cuts for pristine squares), slice into 16 or 32 small squares.” Small squares = perfect portion control for that guilt-free vibe!
And voila! You just made incredibly creamy, decadent-tasting fudge with minimal effort. Cue the happy dance! 💃🕺
How to Serve Your Chocolate Masterpiece
This fudge is honestly glorious straight out of the fridge, all cool and firm. But let’s make it *shine*! For everyday joy, arrange the squares on a simple white plate – the dark chocolate looks stunning. Feeling fancy? Drizzle a tiny bit of melted white chocolate or sprinkle with flaky sea salt right before serving. For parties, stack them in little towers on a cake stand or pack them into cute mini muffin liners. They’re perfect with a cup of strong coffee for a mid-afternoon pick-me-up or as a sweet little “thank you” gift in a pretty box. Pro Tip: Let the squares sit at room temperature for about 5 minutes before serving for the absolute creamiest texture!
Ride Your Own Flavor Wave: Fudge Twists!
The beauty of this base recipe? It’s a blank canvas for your cravings! Here are some fun ways to mix it up:
- Nutty Crunch: Stir in 1/3 cup chopped toasted pecans, walnuts, or almonds right before pouring into the pan. Salty roasted peanuts are amazing too!
- Peanut Butter Swirl: Drop 3-4 spoonfuls of natural peanut butter (warmed slightly for easier swirling) onto the smoothed fudge in the pan. Use a knife to gently swirl it through the chocolate. Heaven!
- Minty Fresh: Swap the vanilla extract for 1/2 teaspoon pure peppermint extract. Stir in 1/4 cup crushed candy canes (optional) for a festive touch.
- Orange Zest Zing: Add 1 tablespoon finely grated orange zest to the melted chocolate mixture along with the vanilla. Bright and sophisticated!
- Vegan Dream: Use dairy-free semi-sweet chocolate chips and replace the condensed milk with the thick cream from a chilled can of full-fat coconut milk + 1/4 cup powdered sugar or maple syrup, whisked until thick. Works like a charm!
Isla’s Fudge Diaries: Notes from the Kitchen Trenches
Oh, this recipe! It’s evolved from that messy afternoon with Grandma Mae to my absolute go-to “I need chocolate NOW” lifesaver. I’ve made it in hotel rooms using the coffee maker hot plate (true story during a chaotic family reunion!), doubled it for bake sales (it always sells out first), and even snuck a batch into a friend’s hospital room (chocolate therapy is real!).
The biggest lesson? Embrace the simplicity! I used to overcomplicate it – adding espresso powder, different extracts, fancy toppings. But time and again, I came back to this pure, clean version. It’s the one my kids beg for, the one my husband “tests” an alarming number of squares from, and the one that consistently delivers that deep, satisfying chocolate hug without fuss. It’s proof that sometimes, less really is more… especially when “less” tastes this indulgent! One funny fail: I once tried using evaporated milk instead of condensed milk in a sleepy fog. Let’s just say it resulted in chocolate soup! Learn from my mistake – condensed milk is non-negotiable for that perfect fudge texture.
Fudge Fumbles? Let’s Fix ‘Em!
Even simple recipes can have hiccups. Don’t sweat it! Here are answers to common questions and how to avoid (or fix) potential pitfalls:
- Q: My fudge is grainy! What happened?
A: This usually means the chocolate got too hot and seized. Next time: LOW heat is key! Stir constantly. If it happens, try adding a teaspoon of very hot water or a tiny splash of flavorless oil (like coconut) and stir vigorously. It *might* come back, but prevention is best!
- Q: Can I use milk chocolate chips instead?
A: You can, but beware! Milk chocolate is sweeter and softer. Your fudge might be sweeter and less firm. Reduce the condensed milk slightly (start with 1/2 cup) or add a bit more salt to balance. Semi-sweet really is the sweet spot for flavor and texture.
- Q: Why won’t my fudge set firm?
A: Two likely culprits: 1) Not chilled long enough (be patient! 2 hours minimum, overnight is gold). 2) Accidental substitution of evaporated milk for sweetened condensed milk (they are NOT the same! Condensed milk is thick and sweet). Ensure you have the right ingredient!
- Q: How long does this fudge keep?
A: Stored airtight in the fridge, it stays dreamy for up to 2 weeks! You can also freeze it for up to 3 months. Thaw overnight in the fridge. Perfect for making ahead!
Nutritional Info (Approximate per Serving)
Based on 16 servings: Calories: 100 | Fat: 5g | Sugar: 10g | Carbs: 12g | Protein: 1g | Sodium: 15mg
Remember: This is a treat! Enjoy it mindfully as part of your balanced vibe. The “guilt-free” comes from using smarter ingredients and portion control, making indulgence feel achievable.