 The Ultimate Comfort Dessert: Your New Favorite Dutch Apple Pie
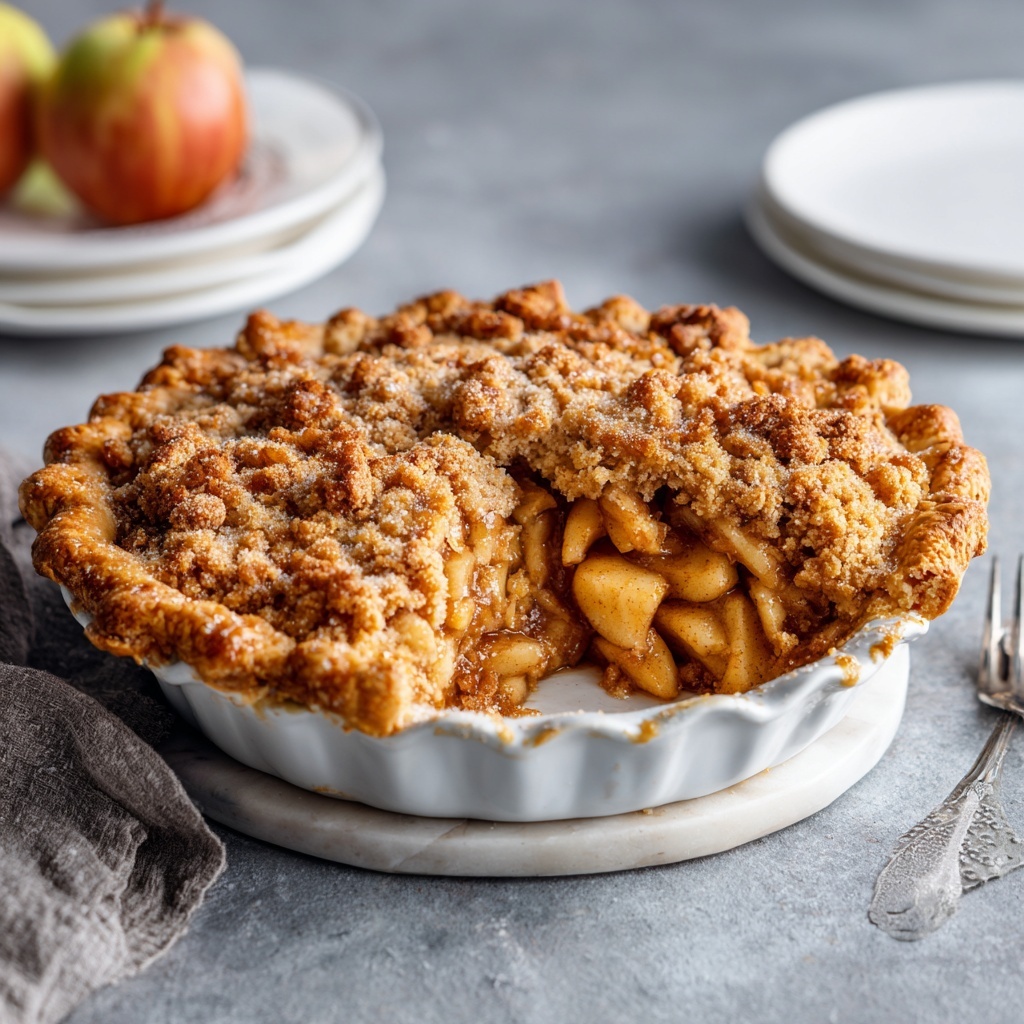
Close your eyes for a second. Imagine the smell of buttery pastry, cinnamon-kissed apples, and brown sugar caramelizing in a hot oven. That’s the magic of a Classic Dutch Apple Pie baking. It’s not just a dessert; it’s a warm hug, a golden-brown promise of sweetness, and the undisputed star of any table it graces. Unlike its double-crust cousin, this beauty is crowned with a glorious, crunchy, buttery crumb topping that’s impossible to resist. Every bite is a perfect textural symphony: the tender, spiced apples, the flaky, sturdy crust, and that irresistible sweet crumble that shatters deliciously with your fork.
Today, I’m so excited to walk you through my absolute favorite version. This is the pie I make when I need to impress without the stress, when I want my kitchen to smell like a fall fairy tale, or when I simply need a slice of cozy with my afternoon coffee. It looks like you spent all day on it, but I’ve got some clever chef hacks that make it wonderfully approachable. So, tie on your favorite apron, grab your mixing bowls, and let’s bake a memory together. This isn’t just a recipe; it’s your new secret weapon for pure, unadulterated joy.
Print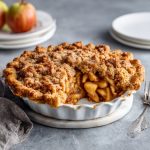
Classic Dutch Apple Pie : Cinnamon Apples with Buttery Crumb Topping
- Total Time: ~1 hour 15 minutes
- Yield: 8 slices 1x
Description
Dutch Apple Pie is pure comfort baked into a pie dish. Tender cinnamon-spiced apples sit inside a flaky crust and are topped with a golden, buttery crumb instead of a traditional lattice. It’s cozy, nostalgic, and fills the kitchen with the kind of aroma that makes everyone wander in asking when dessert is ready. Perfect for holidays, family dinners, or any time apples are calling.
Ingredients
Pie Crust
1 unbaked 9-inch pie crust (homemade or store-bought)
Apple Filling
6–7 apples (Granny Smith or Honeycrisp), peeled and sliced
¾ cup granulated sugar
¼ cup brown sugar
2 tbsp all-purpose flour
1 tsp ground cinnamon
¼ tsp nutmeg
1 tbsp lemon juice
1 tsp vanilla extract
Crumb Topping
¾ cup all-purpose flour
½ cup brown sugar
½ tsp cinnamon
½ cup unsalted butter, cold and cubed
Instructions
Preheat oven to 375°F (190°C). Place pie crust into a pie dish and set aside.
In a large bowl, toss apples with sugars, flour, cinnamon, nutmeg, lemon juice, and vanilla until evenly coated.
Pour apple mixture into the prepared crust, spreading evenly.
In another bowl, combine flour, brown sugar, and cinnamon. Cut in cold butter until crumbly.
Sprinkle crumb topping generously over the apples.
Bake for 45–55 minutes, until the topping is golden and the filling is bubbly.
Cool at least 1 hour before slicing for best texture.
- Prep Time: 25 minutes
- Cook Time: 50 minutes
- Category: Dessert
My Granddad’s Orchard and the Pie That Started It All
My love affair with this pie began long before I owned a proper pie dish. It started in my granddad’s small, rambling orchard, where the Honeycrisp apples hung so low we kids could reach them. Every October, we’d have a “pie day.” The rule was simple: you pick, you peel, you get a slice. The kitchen would be chaos—a mountain of apple peels coiled like red and green ribbons, flour dusting every surface, and the constant, comforting *snick-snick* of my grandma’s apple corer.
But the best part was always the topping. While my grandma focused on the filling, my granddad was the undisputed crumb master. He’d let me use my tiny hands to “cut” the cold butter into the flour and sugar, teaching me to stop when it looked like “pebbly beach sand.” He’d always sneak a pinch of raw crumb mixture for me to taste, a sweet, buttery secret between us. That pie wasn’t just about the ingredients; it was about the laughter, the sticky fingers, and the proud feeling of sharing something we made together. Every time I make this crumb topping now, I’m right back in that sunny kitchen, and I hope this recipe creates those same warm, fuzzy feelings for you.
Gathering Your Flavor Crew: Ingredients & Insights
Here’s everything you’ll need to create this masterpiece. Don’t stress about perfection—cooking is about playing! I’ve included my favorite tips and swaps so you can make this pie your own.
- 1 unbaked 9-inch pie crust (homemade or store-bought): Let’s be real, life happens! A high-quality store-bought crust is a fantastic shortcut. If you’re going homemade, my pro tip is to use vodka instead of some of the water in your recipe—it creates flakier layers because the alcohol inhibits gluten development. No one will taste it, I promise!
- 6–7 apples (Granny Smith or Honeycrisp), peeled and sliced: This is the heart of the pie! I use a mix—Granny Smith for their tartness and structure, and Honeycrisp for their honey-sweetness and juicy tenderness. Chef Insight: No need for a fancy corer-peeler. Just peel, quarter, cut out the core, and slice about ¼-inch thick. Consistent slices mean even baking!
- ¾ cup granulated sugar & ¼ cup brown sugar: White sugar sweetens cleanly, while brown sugar brings molasses-y depth and moisture. For a deeper flavor, swap all the white sugar for brown!
- 2 tbsp all-purpose flour: This is our thickening agent, crucial for a sliceable pie and not a soupy one. In a pinch, cornstarch or tapioca starch work too (use 1 tbsp cornstarch).
- 1 tsp ground cinnamon & ¼ tsp nutmeg: The dynamic duo of warmth. Freshly grated nutmeg is a game-changer if you have it—it’s brighter and more aromatic.
- 1 tbsp lemon juice & 1 tsp vanilla extract: The lemon brightens the apples and prevents browning; the vanilla adds a layer of cozy complexity. Don’t skip these “background singers”—they make the flavors pop!
- For the Crumb Topping: ¾ cup all-purpose flour, ½ cup brown sugar, ½ tsp cinnamon, ½ cup unsalted butter (cold and cubed): The star of the show! Cold butter is non-negotiable for perfect crumbs. I pop my cubed butter in the freezer for 10 minutes before starting. The mixture should look like uneven pebbles—some fine sand, some pea-sized lumps. Those lumps become delightful crunchy bits.
Let’s Bake! Your Foolproof Step-by-Step Guide
Follow these steps, and you’re guaranteed pie success. I’ve tucked little kitchen hacks and commentary in each one, just like if we were baking side-by-side.
- Preheat & Prep: Fire up your oven to 375°F (190°C). This ensures a hot, steady environment for baking. Place your pie crust into a 9-inch pie dish, gently pressing it in. If using store-bought, follow package directions for thawing. No need for fancy crimping yet—we’ll build our pie first! Chef Hack: I like to keep my pie plate on a baking sheet. It makes handling this full, potentially drippy pie much easier later on.
- Create the Apple Filling: In your largest bowl, toss the peeled and sliced apples with both sugars, flour, cinnamon, nutmeg, lemon juice, and vanilla. Get in there with your hands! Toss, toss, toss until every single apple slice is glistening and coated in the spicy-sweet mixture. Let it sit for 10 minutes. You’ll see a little syrup start to form at the bottom—that’s flavor gold, and it means your apples are ready.
- Fill the Crust: Pour the entire apple mixture, including every drop of that syrupy liquid, into your waiting pie crust. Use your hands to mound the apples slightly higher in the center. They will shrink as they bake, so this little dome ensures a flat, not sunken, top.
- Make the Magical Crumb Topping: In a medium bowl, whisk together the flour, brown sugar, and cinnamon for the topping. Add your very cold, cubed butter. Now, use a pastry cutter, two forks, or (my favorite clean-hands method) your fingertips to “cut” the butter into the dry ingredients. Work quickly so the butter doesn’t warm up. Stop when the mixture looks crumbly with bits ranging from fine sand to small peas. No two crumbs are alike, and that’s perfect!
- Top & Bake: Take handfuls of the crumb mixture and sprinkle it generously and evenly over the apples, covering them completely. Don’t pack it down—let it be loose and craggy. Place your pie (on its baking sheet!) into the preheated oven. Bake for 45-55 minutes. You’re looking for a deep golden-brown topping and visible, thick bubbles around the edges of the crust. If the crumbs brown too quickly, loosely tent the pie with aluminum foil.
- The Most Important Step: Cool! I know, the aroma is torture. But you must let the pie cool on a wire rack for at least 1 hour, ideally 2-3. This allows the filling to set properly. Slicing into a hot pie is a one-way ticket to Sloppy-Ville. Trust me, the wait is worth it for that perfect, clean slice.
Serving Your Masterpiece
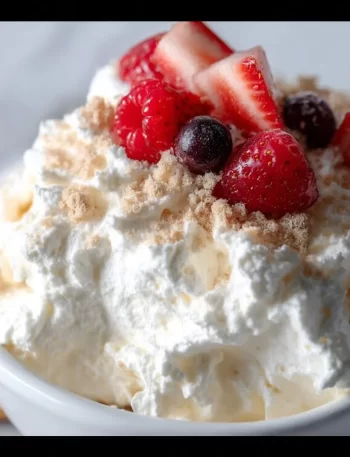
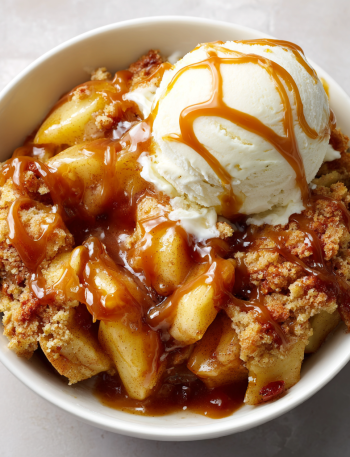
Presentation is part of the fun! Slice your cooled pie with a sharp, thin knife. For picture-perfect slices, wipe the knife clean between cuts. Serve each generous wedge on its own plate. Now, the accompaniments: a simple, cold scoop of vanilla bean ice cream melting over the warm pie is classic for a reason. For a grown-up twist, a drizzle of salted caramel sauce or a dollop of lightly sweetened whipped cream with a hint of bourbon is divine. Honestly, it’s spectacular all on its own with just a cup of strong coffee or tea.
Make It Your Own: Fun Flavor Twists
- Pear-Ginger Delight: Swap half the apples for ripe, firm Bosc pears. Add 1 tablespoon of finely minced crystallized ginger to the filling for a warm, spicy kick.
- Oatmeal Cookie Crumble: Add ½ cup of old-fashioned rolled oats and a pinch of cardamom to your crumb topping for a chewy, hearty texture.
- Bourbon Caramel: Stir 2 tablespoons of bourbon into the apple filling along with the vanilla. Drizzle the baked and cooled pie with store-bought or homemade salted caramel sauce.
- Gluten-Free & Vegan: Use a GF pie crust and a 1:1 GF flour blend in both filling and topping. For vegan, use a plant-based butter stick (cold!) in the crumb and a vegan pie crust.
- Savory-Sweet Cheddar Crust: Grate ½ cup of sharp cheddar cheese into your pie dough before rolling it out. The salty, tangy cheese pairs amazingly with the sweet apples.

Isla’s Kitchen Notes
This recipe has been my faithful friend for years, and it’s evolved with me. The first time I made it alone in my first apartment, I was so nervous I forgot the flour in the filling. Let’s just say we ate “Dutch Apple Soup” with a spoon—still tasty, but not pie! Now, I keep the flour right on the counter so I don’t forget. I’ve also learned that using a mix of apples is my absolute secret for a complex, not-one-note filling. And about that crumb topping: if you have any extra, freeze it on a sheet pan and then bag it up. You’ve got instant crumble topping for yogurt, ice cream, or muffins ready in seconds! This pie is forgiving. It’s meant to be made with laughter, maybe a little mess, and a whole lot of love.
Your Questions, Answered!
Q: My bottom crust is soggy! What did I do wrong?
A: This is a common pie puzzle! A few tricks: 1) Make sure your oven is fully preheated. 2) Place your pie dish on a preheated baking sheet or pizza stone to blast heat at the bottom. 3) You can also brush the unbaked crust with a thin layer of beaten egg white and let it dry for 5 minutes before adding the filling—this creates a moisture barrier.
Q: Can I make this pie ahead of time?
A: Absolutely! You have options. 1) Assemble and refrigerate: Put the filled, topped pie in the fridge (unbaked) for up to 24 hours, then bake straight from the fridge, adding 5-10 minutes to the bake time. 2) Freeze unbaked: Wrap the assembled pie tightly and freeze for up to 3 months. Bake from frozen, adding 20-30 minutes, tenting with foil if the topping browns too fast. 3) Bake and keep: A fully baked pie keeps at room temp for 2 days or in the fridge for 4.
Q: My crumb topping melted together and isn’t crumbly!
A: This means your butter was too warm. Next time, ensure your butter is very cold, straight from the fridge or even the freezer for 10 minutes. Also, don’t over-mix once you add the butter—you want a shaggy, pebbly texture, not a cohesive dough.
Q: What other apples work well?
A: You want a mix of textures and flavors. Great baking apples include Braeburn (firm, tart-sweet), Jonagold (tender, aromatic), and Pink Lady (crisp, tart). Avoid Red Delicious—they get mushy.
Nutritional Information*
*Estimated per slice, based on 8 servings. For informational purposes only.
Calories: ~380 | Total Fat: 18g | Saturated Fat: 9g | Cholesterol: 30mg | Sodium: 150mg | Total Carbohydrates: 55g | Dietary Fiber: 3g | Sugars: 35g | Protein: 3g
This Dutch Apple Pie is everything a comforting dessert should be — warmly spiced apples, a crisp, buttery crumble, and a flaky crust that stays beautifully intact. With simple step-by-step tips and easy make-ahead options, it’s a dessert you can feel confident serving for holidays, family gatherings, or any time a cozy bake sounds right. Add a scoop of vanilla ice cream or a drizzle of caramel, and get ready for a pie that quickly becomes a tradition.