Your New Favorite Holiday Dessert is Here (And You Don’t Even Have to Turn on the Oven!)
Hey there, friend! Isla here. Can you feel it? That crisp, magical buzz in the air that only comes once a year? The twinkling lights, the cozy sweaters, and the undeniable urge to bake ALL the things. I absolutely live for the holiday baking season—the smell of gingerbread, the warmth of the oven, the joy of sharing a plate of cookies with loved ones. But let’s be real for a second: sometimes, the holiday chaos is real. Between shopping, decorating, and trying to remember where you stored the “good” wrapping paper, spending hours in the kitchen can feel like a tall order.
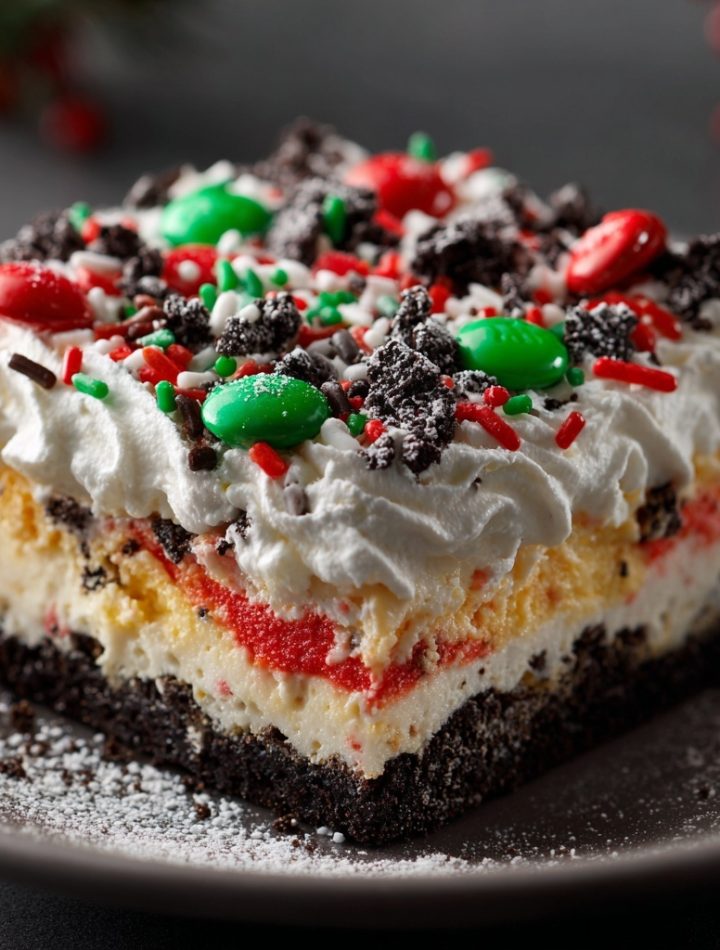
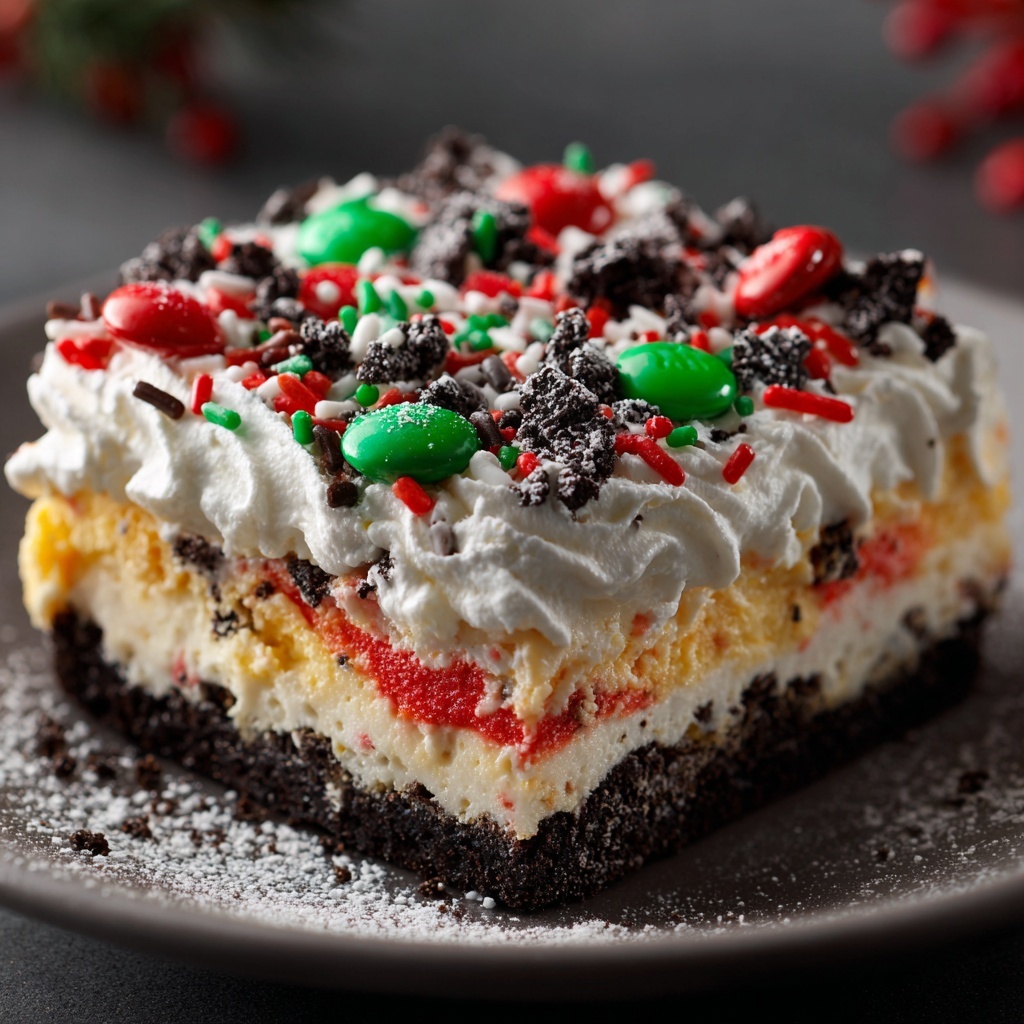
That’s exactly why I’m so obsessed with this recipe. Imagine all the cozy, festive vibes of a dozen different Christmas cookies, combined into one glorious, show-stopping, no-bake masterpiece. I’m talking about my Christmas Cookie Lasagna. It’s layers upon layers of chocolatey Oreo crust, a tangy-sweet cream cheese cloud, rich and creamy chocolate and vanilla pudding, and a final snowy blanket of whipped topping, all decked out with cheerful sprinkles and candies. It looks like you slaved away for hours, but the secret is… it’s incredibly simple to make!
This dessert is the ultimate crowd-pleaser. It’s cool, creamy, crunchy, and guaranteed to make both kids and adults light up. It’s the perfect make-ahead dessert, so you can whip it up the night before your party and simply pull it out of the fridge when you’re ready to dazzle your guests. So, put away your rolling pin, take a deep breath of that pine-scented air, and let’s make some no-bake holiday magic together. Trust me, this is one recipe that’s about to become a permanent part of your festive traditions!
A Messy Kitchen and a Happy Accident
This recipe always takes me right back to my grandma’s kitchen, which during the holidays, looked like a flour bomb had gone off in the best possible way. Every surface was covered with cookie sheets, bowls of frosting, and an army of sprinkles. One particularly hectic Christmas Eve, we were trying to make a layered trifle, but a well-meaning (and very excited) cousin accidentally bumped the table, sending our beautiful glass bowl crashing to the floor. We were left with all the components—crushed cookies, pudding, whipped cream—but no vessel.
In a moment of pure “holiday hustle” inspiration, my grandma grabbed a 9×13 pan, laughed, and said, “Well, we’ll just layer it all in here! Who needs a fancy bowl anyway?” We pressed the cookie crumbs into the bottom, slathered on the fillings, and topped it with every sprinkle we could find. What emerged from the fridge a few hours later was a messy, joyful, and utterly delicious creation that everyone devoured. It was a happy accident that taught me a valuable lesson: the best holiday memories (and desserts!) aren’t about perfection. They’re about joy, creativity, and sharing something made with love. This Christmas Cookie Lasagna is my official, perfected tribute to that wonderfully chaotic day.
Print
Christmas Cookie Lasagna
- Total Time: 25 minutes
- Yield: 12–15 squares 1x
Description
This festive no-bake dessert is a holiday showstopper layered with crushed Oreos, fluffy cream cheese, chocolate and vanilla pudding, and a snowy whipped topping. Topped with sprinkles and candy, it looks like Christmas magic in a pan. The best part? It’s easy, make-ahead, and guaranteed to be the hit of your dessert table.
Ingredients
Crust Layer
36 Oreo cookies, crushed into fine crumbs
1/2 cup unsalted butter, melted
Cream Cheese Layer
8 oz cream cheese, softened
1/4 cup granulated sugar
2 tbsp milk
1 tsp vanilla extract
1 1/2 cups whipped topping (Cool Whip or similar)
Pudding Layer
1 (3.4 oz) box instant vanilla pudding mix
1 (3.4 oz) box instant chocolate pudding mix
3 cups cold milk
Topping
1 1/2 cups whipped topping
Christmas sprinkles
Mini M&M’s or red and green candies
Instructions
Make the crust: Mix Oreo crumbs with melted butter. Press into a 9×13 dish. Chill.
Cream cheese layer: Beat cream cheese, sugar, milk, and vanilla until smooth. Fold in whipped topping. Spread over crust.
Pudding layer: Whisk vanilla and chocolate pudding mixes with cold milk until thickened. Spread over the cream cheese layer.
Top it off: Spread whipped topping evenly, then decorate with sprinkles and candies.
Chill: Refrigerate at least 4 hours or overnight before serving.
- Prep Time: 25 minutes
- Category: Dessert
Nutrition
- Calories: 320
- Fat: 20g
- Carbohydrates: 32g
Gathering Your Flavor Wave: What You’ll Need
Here’s your shopping list! The beauty of this dessert is that most of these ingredients are pantry staples or easy to find. I’ve included some of my favorite tips and swaps to make this recipe your own.
For the Crust Layer:
- 36 Oreo Cookies: You’ll crush these into fine crumbs. Don’t even think about scraping out the cream filling—that white stuff is pure flavor gold and helps bind the crust! A quick pulse in a food processor is fastest, but if you need some stress relief, tossing them in a zip-top bag and going to town with a rolling pin works perfectly.
- 1/2 Cup Unsalted Butter, Melted: This is the glue that holds our crunchy crust together. Using unsalted butter lets us control the saltiness. If you only have salted butter on hand, it’s totally fine—just know your crust will have a slight salty kick that pairs amazingly with the sweet layers.
For the Dreamy Cream Cheese Layer:
- 8 oz Cream Cheese, Softened: This is non-negotiable—softened cream cheese is key for a silky-smooth layer without any lumps! To soften quickly, take it out of the fridge an hour before, or (my chef hack!) place the sealed block on a plate and microwave for 10-15 seconds on LOW power. You want it soft, not melted.
- 1/4 Cup Granulated Sugar: Just enough to sweeten the tangy cream cheese.
- 2 Tbsp Milk: A splash to loosen up the mixture and make it spreadable.
- 1 Tsp Vanilla Extract: The warm, aromatic backbone of so many desserts. Use the real stuff if you can—it makes a world of difference!
- 1 1/2 Cups Whipped Topping (like Cool Whip), Thawed: This is what gives the cream cheese layer its incredible light, fluffy texture. Make sure it’s thawed so it folds in easily.
For the Incredible Pudding Layer:
- 1 (3.4 oz) Box Instant Vanilla Pudding Mix
- 1 (3.4 oz) Box Instant Chocolate Pudding Mix
- 3 Cups Cold Milk: I use whole milk for the richest, creamiest result, but 2% works great too. The key word here is COLD. Instant pudding sets best with cold liquid.
For the Festive Topping:
- 1 1/2 Cups Whipped Topping: For that beautiful, snowy finish.
- Christmas Sprinkles, Mini M&M’s, Crushed Candy Canes: This is where your personality shines! Go wild with red, green, and white sprinkles, mini chocolate chips, or even some shaved white chocolate. It’s your edible Christmas canvas!
Building Your Edible Masterpiece: Step-by-Step
Ready to layer up the magic? It’s so simple. Just follow these steps, and you’ll have a dessert that’s as fun to make as it is to eat.
Step 1: Create the Chocolatey Foundation
First, we’re making our Oreo crust. Grab your trusty 9×13-inch baking dish—no need to grease it! In a medium bowl, combine the finely crushed Oreo crumbs with the melted butter. You’re looking for a texture that resembles wet sand; when you pinch it, it should hold together. Pour the mixture into your dish and press it down firmly and evenly into one solid layer. I like to use the flat bottom of a measuring cup to really tamp it down—this prevents a crumbly crust later. Pop this into the refrigerator to set up while you work on the next layer. This quick chill helps the butter firm up, giving us a stable base.
Step 2: Whip Up the Fluffy Cloud Layer
Now for that tangy, creamy dream layer! In a large bowl, use an electric hand mixer (or a stand mixer with the paddle attachment) to beat the softened cream cheese until it’s completely smooth and lump-free. This is the most important step for this layer—no one wants chunks of cream cheese! Scrape down the sides of the bowl. Add in the sugar, milk, and vanilla extract, and beat again until everything is well combined and creamy. Now, here’s the trick: gently fold in the 1 1/2 cups of thawed whipped topping. “Folding” means using a spatula to cut down through the middle, scoop along the bottom, and fold it over on top. Be gentle! We want to keep all that airy fluffiness. Once it’s fully incorporated and no white streaks remain, pull your chilled crust from the fridge and spread this creamy mixture evenly over the top. Smooth it right to the edges. This layer acts as a delicious barrier between the crust and the pudding, keeping everything distinct.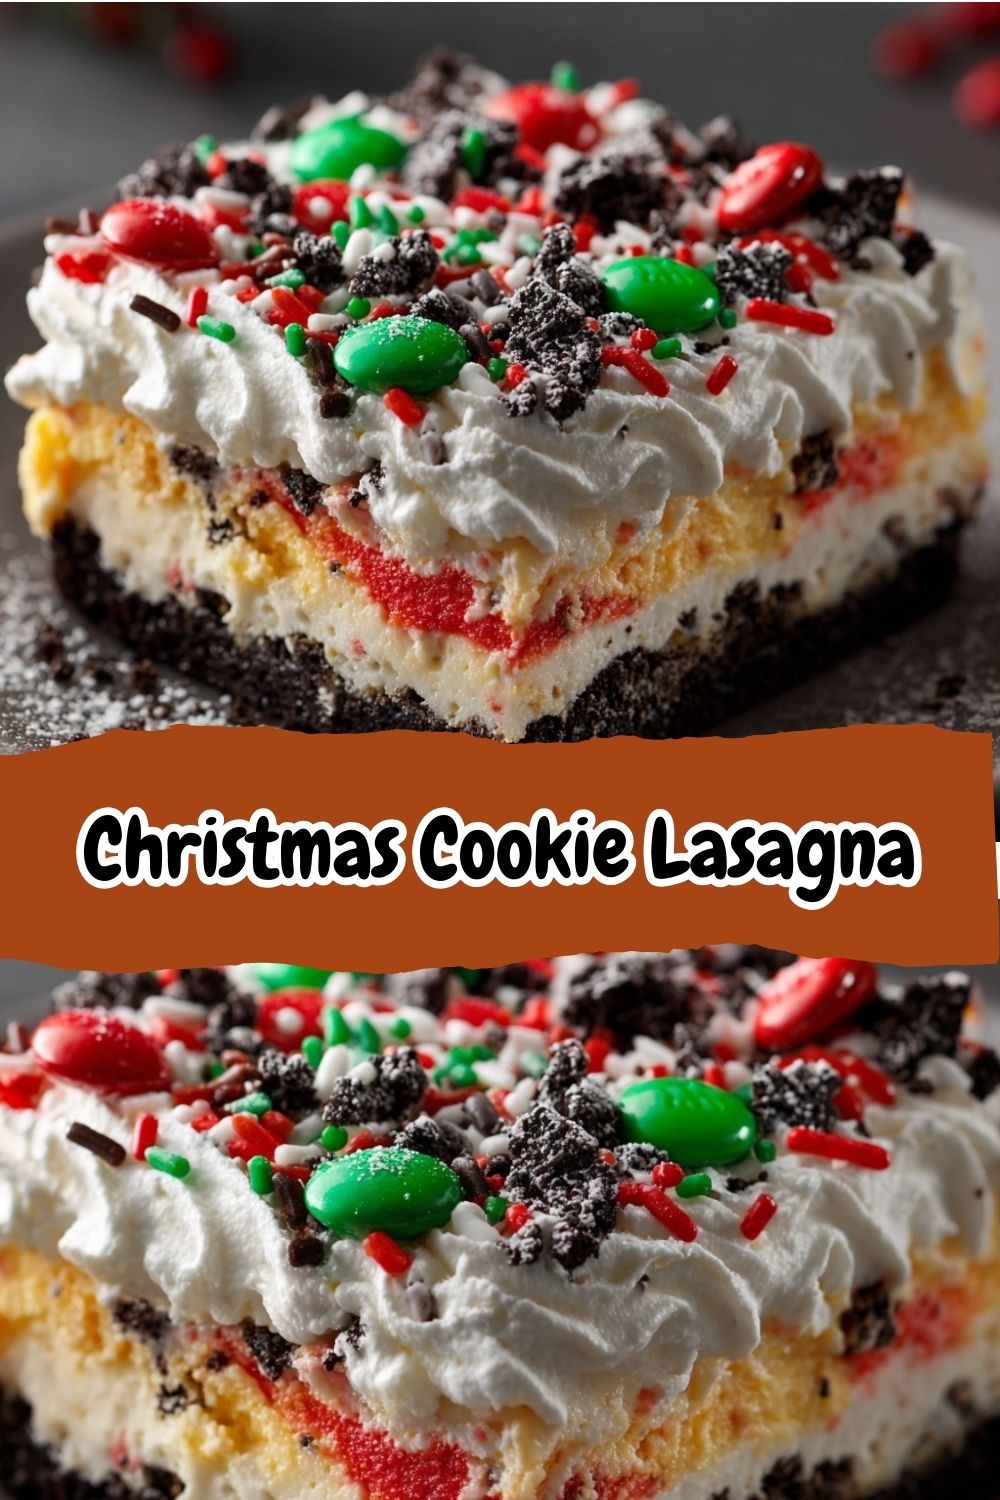
Step 3: The Double Pudding Delight
Time for the pudding! In another large bowl, whisk together both pudding mixes—vanilla and chocolate—with the 3 cups of cold milk. Whisk continuously for a full 2 minutes. It will start to thicken beautifully right before your eyes. Now, you have a choice: you can simply spread this combined pudding over the cream cheese layer for a marbled mocha effect, OR, for super distinct stripes, you can carefully spoon dollops of each pudding flavor side-by-side and then gently spread them together. I love the marbled look—it’s so pretty when you cut into it! However you do it, spread the pudding evenly over the cream cheese layer.
Step 4: The Grand Finale: Decorating!
We’re in the home stretch! Take your remaining 1 1/2 cups of whipped topping and spread it carefully over the pudding layer. I like to drop big dollops all over the surface first, then gently connect them with my spatula so I don’t disturb the pudding below. Now, for the best part: the decorations! Unleash your inner artist with the sprinkles, candies, and crushed candy canes. I like to add a border of red and green M&M’s around the edge and then get creative in the middle. This is a fantastic job for any little helpers in the kitchen!
Step 5: The Patience Game (The Hardest Part!)
I know, I know—you’ll want to dive in immediately. But trust me on this: the wait is essential. Cover the pan tightly with plastic wrap and refrigerate it for at least 4 hours, but ideally overnight. This chilling time allows the layers to set, the flavors to meld together perfectly, and the crust to become firm enough to slice cleanly. It’s the secret to that perfect, neat square when you serve it.
How to Serve Your Christmas Masterpiece
When it’s finally time to serve, use a sharp knife to cut the lasagna into clean squares. For picture-perfect slices, dip your knife in hot water and wipe it dry between each cut—this little hack gives you those gorgeous, clean layers in every piece. You can serve these squares right on a plate, or for a truly festive touch, place them on a little doily or a bed of mint leaves. A small sprig of fresh mint on the side adds a lovely pop of color. This dessert is rich, so a smaller square is often plenty, but I’ve never known anyone to turn down a second helping!
Ride Your Own Flavor Wave: Fun Variations!
The beauty of this recipe is how easily you can customize it. Here are a few of my favorite twists:
- Peppermint Bark Twist: Use mint Oreos for the crust, add 1/4 tsp of peppermint extract to the cream cheese layer, and top with crushed candy canes.
- Gingerbread Spice: Swap the Oreos for gingersnap cookies in the crust. Add a teaspoon of pumpkin pie spice to the vanilla pudding mix.
- Cookies & Cream Purist: Use chocolate pudding for both boxes in the pudding layer for an intense chocolate flavor.
- Nutty Delight: Fold 1/2 cup of finely chopped toasted pecans or walnuts into the cream cheese layer for a wonderful crunch.
- Lighter Option: Use reduced-fat cream cheese, sugar-free pudding mixes, and light whipped topping. It’s still delicious!
Isla’s Chef Notes & Kitchen Confessions
This recipe has been a staple at my holiday table for years, and it’s evolved in the best ways. The first time I made it, I was so impatient that I only chilled it for two hours. Let’s just say we had more of a “Christmas Cookie Soup” than a lasagna—delicious, but not exactly sliceable! I’ve learned that the overnight chill is non-negotiable for the perfect texture.
Another funny story: one year, my dog managed to sneak a whole corner of the lasagna off the counter while it was setting (don’t ask me how—he’s a crafty one). We had a lopsided dessert that Christmas, but it just added to the story. The point is, don’t stress! Even if your layers aren’t perfectly even or your sprinkles are a little lopsided, it’s going to taste incredible. This dessert is about joy, not perfection. I always make two now—one for the party, and one for my family to sneak bites from throughout the week. It’s that good.
Your Questions, Answered!
Here are answers to some common questions to ensure your lasagna turns out perfect every single time.
Q: Can I make this dessert ahead of time?
A: Absolutely! In fact, I highly recommend it. This is the ultimate make-ahead dessert. You can prepare it up to 24 hours in advance. Just keep it covered tightly in the refrigerator until you’re ready to serve.
Q: My pudding layer seems runny. What happened?
A: The most common culprit is not using cold milk. Instant pudding needs that cold temperature to activate the thickening agents. Also, make sure you’re whisking for the full 2 minutes. If it’s still a bit thin, don’t panic—the long chilling time will help it firm up significantly.
Q: Can I use homemade whipped cream instead of Cool Whip?
A: You can, but there’s a trade-off. Homemade whipped cream is delicious, but it doesn’t hold its structure as well over multiple days. Cool Whip and similar stabilized whipped toppings are designed to stay fluffy, making them ideal for make-ahead desserts like this. If you prefer homemade, whip 1.5 cups of heavy cream with 2-3 tablespoons of powdered sugar until stiff peaks form, and use it the same day for best results.
Q: My crust is too crumbly when I cut into it. How can I fix this next time?
A: This usually means the crust wasn’t pressed down firmly enough. Really use some muscle and the flat bottom of a cup to compact those buttery crumbs. Also, ensure you’re chilling the crust for at least 15-20 minutes before adding the next layer to let the butter solidify.
Nutritional Information*
*Please note: This is an approximate estimate based on the specific ingredients used and may vary with substitutions.
Per Serving (1 square, based on 15 servings): Calories: ~320 | Total Fat: 20g | Saturated Fat: 11g | Cholesterol: 35mg | Sodium: 280mg | Total Carbohydrates: 32g | Dietary Fiber: 1g | Sugars: 24g | Protein: 4g