Cheesy Beef & Noodle Bake: Your New Favorite Comfort Food Obsession
Hey there, friend! Isla here from BiteTide. Let’s be real for a second: some nights, you need a dinner that feels like a warm hug. A meal that’s unapologetically hearty, deeply satisfying, and makes the whole house smell incredible. But you also want a little *zing*, a little excitement to wake up your taste buds. If you’re nodding along, then you and I are on the exact same wavelength, and this Cheesy Beef & Noodle Bake is about to become your new kitchen bestie.
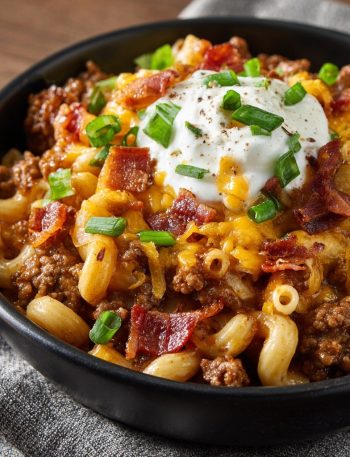
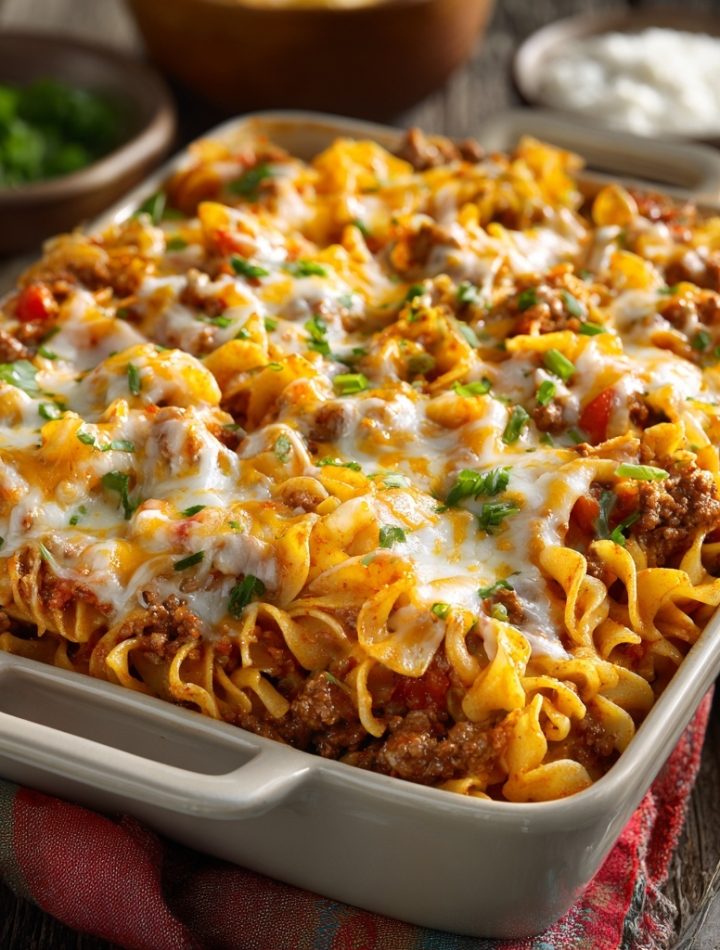
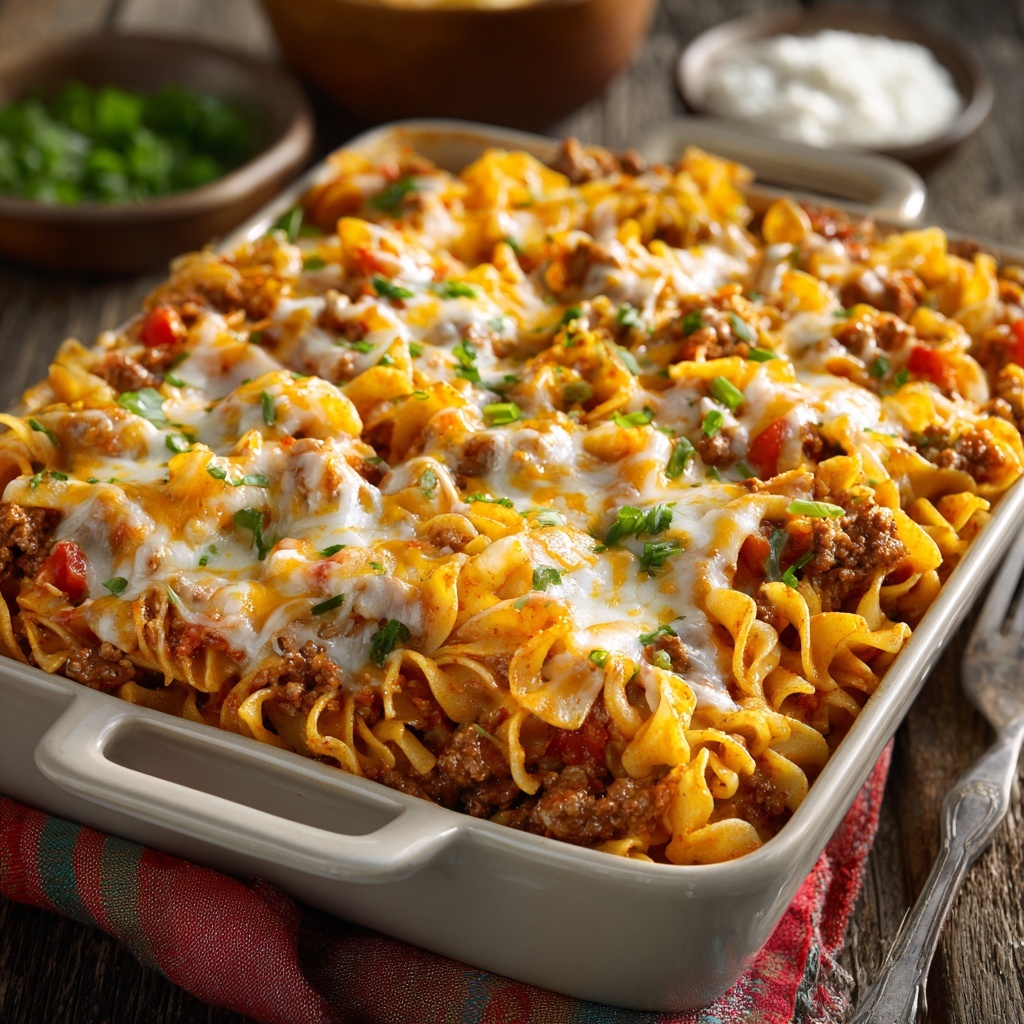
Imagine this: tender egg noodles swirled in a luxuriously creamy sauce, all nestled under a bold, slightly spicy beef and tomato filling, and smothered in a blanket of golden, bubbly Colby Jack cheese. This isn’t your average, bland casserole. Oh no. We’re taking things up a notch with a smoky hint of paprika and the fresh kick of green onions. It’s the ultimate mashup of comfort and creativity, and the best part? It’s seriously simple to make. This is one of those magical recipes that tastes like you spent all day in the kitchen, but it comes together in a flash—perfect for a busy weeknight, a potluck where you want to be the hero, or a cozy weekend feast.
So, tie on your favorite apron, crank up some good music, and let’s dive into this flavor wave together. I promise, this dish is about to bring all the good vibes to your table.
Print
Cheesy Beef & Noodle Bake : Spicy, Creamy & Packed with Flavor
- Total Time: ~50 minutes
- Yield: 10–12 1x
Description
This cheesy beef and noodle bake is a delicious mashup of comfort and spice — hearty noodles, bold beef-tomato filling, and a creamy, cheesy top layer that melts into every bite. A little smoky, a little spicy, and totally satisfying, it’s the perfect crowd-pleaser for dinner, potlucks, or a cozy night in.
Ingredients
2 tablespoons olive oil
2 pounds lean ground beef
1 onion, finely chopped
2 teaspoons salt
1 teaspoon black pepper
8 tablespoons tomato paste
6 cloves garlic, minced
2 teaspoons Italian seasoning
6 cans (10 oz each) diced tomatoes with chilies, drained
½ teaspoon celery salt
2 packages (12 oz each) egg noodles
2½ cups sour cream
8 ounces cream cheese, softened
2 tablespoons cornstarch
5 cups Colby Jack cheese, shredded
½ teaspoon smoked paprika (twist #1 for depth)
¼ cup chopped green onions (twist #2 for freshness)
Instructions
Preheat oven to 375°F (190°C). Lightly grease a large 9×13″ casserole dish or two medium pans.
Cook egg noodles according to package instructions. Drain and set aside.
In a large skillet, heat olive oil. Sauté onion until softened. Add garlic and cook 1 minute more.
Add ground beef, salt, pepper, and smoked paprika. Cook until browned.
Stir in tomato paste, Italian seasoning, celery salt, and diced tomatoes. Simmer for 10 minutes to thicken slightly.
In a separate bowl, mix sour cream, cream cheese, cornstarch, and green onions until smooth.
Combine noodles with the cream mixture.
Layer noodles in the baking dish, followed by the beef mixture. Top with shredded Colby Jack cheese.
Bake uncovered for 25–30 minutes until golden and bubbly. Let cool for 5–10 minutes before serving.
- Prep Time: 20 minutes
- Cook Time: 30 mins
- Category: Dinner
The Story Behind the Bake: A Tale of Two Kitchens
This recipe has a special place in my heart because it’s a beautiful collision of my past and present. I grew up in a tiny coastal town, and my grandma’s kitchen was the heart of our home. She had this legendary, no-recipe “Noodle Mess” she’d whip up for a crowd—a glorious, cheesy, ground beef situation that we’d all fight over. It was the definition of comfort.
Years later, living in my first apartment with three roommates, our Sunday tradition was “Family Dinner.” We were all broke, busy, and craving connection. One particularly blustery Sunday, I decided to recreate Grandma’s “Noodle Mess,” but we were out of half the ingredients. We had to get creative—adding a few cans of diced tomatoes with chilies for a kick, stirring in cream cheese for extra richness, and topping it with whatever cheese we had. The result was a bubbling, chaotic, and utterly delicious masterpiece that had us all scraping the pan clean. It was in that messy, laughter-filled kitchen that this Cheesy Beef & Noodle Bake was truly born. It’s a reminder that the best recipes aren’t about perfection; they’re about joy, improvisation, and sharing a fantastic meal with the people you love.
Gather Your Flavor Crew: Ingredients & Insights
Here’s your shopping list! Don’t be intimidated by the length—a lot of this is probably already in your pantry. I’ve included my favorite chef-y tips and swaps for each ingredient so you can make this dish your own.
- 2 tablespoons olive oil – Our cooking fat of choice for sautéing. It adds a lovely, mild fruitiness. You can easily swap this for avocado oil or even butter if you’re feeling decadent.
- 2 pounds lean ground beef – I like using 90/10 lean beef because it creates less grease to drain, but 80/20 works great too for extra flavor! For a lighter twist, ground turkey or chicken is a fantastic substitute.
- 1 onion, finely chopped – The humble onion is our flavor foundation. Chopping it finely means it’ll melt right into the sauce, adding sweetness and depth.
- 2 teaspoons salt & 1 teaspoon black pepper – The dynamic duo of seasoning! Don’t be shy here—seasoning in layers is the secret to a flavorful dish.
- 8 tablespoons tomato paste – This is our flavor bomb! It adds a deep, concentrated tomato richness. Pro tip: let it cook for a minute with the beef and onions to caramelize slightly—it unlocks a whole new level of flavor.
- 6 cloves garlic, minced – Because more garlic is always the answer. Fresh is best here for that sharp, aromatic punch.
- 2 teaspoons Italian seasoning – A convenient little herb blend that brings oregano, basil, marjoram, and thyme to the party.
- 6 cans (10 oz each) diced tomatoes with chilies (like Rotel), drained – This is our “twist” ingredient! It brings a tangy, slightly spicy kick that cuts through the richness. If you’re sensitive to heat, use one can of mild and one can of original, or just use plain diced tomatoes.
- ½ teaspoon celery salt – A little secret weapon! It adds a savory, almost herbal note that’s more complex than regular salt.
- 2 packages (12 oz each) egg noodles – The hearty, comforting base of our bake. Their ruffled edges are perfect for holding onto all that saucy goodness.
- 2½ cups sour cream & 8 ounces cream cheese, softened – The dream team for our creamy layer! The sour cream adds tang, while the cream cheese gives it an unbelievable richness. Make sure your cream cheese is at room temperature to avoid lumps.
- 2 tablespoons cornstarch – Our magic thickener! It ensures our creamy layer stays perfectly set and doesn’t get watery during baking.
- 5 cups Colby Jack cheese, shredded – I love Colby Jack for its perfect meltiness and mild flavor, but a sharp cheddar or a Monterey Jack would be delicious too. Always shred your own cheese if you can—the pre-shredded stuff has anti-caking agents that can make the sauce grainy.
- ½ teaspoon smoked paprika – (Twist #1 for depth!) This isn’t just for color. Smoked paprika adds a subtle, smoky sweetness that makes the beef filling taste like it’s been slow-cooked for hours.
- ¼ cup chopped green onions – (Twist #2 for freshness!) Don’t skip these! They get mixed into the creamy layer, adding little bursts of fresh, oniony flavor that brighten up the whole dish.
Let’s Get Cooking: Your Step-by-Step Guide
Okay, team! Let’s fire up the oven and get this show on the road. Follow these steps, and you’ll have a masterpiece in no time. I’ve sprinkled in my favorite kitchen hacks to make everything go smoothly.
- Preheat and Prep: Crank your oven to 375°F (190°C). Lightly grease your trusty 9×13-inch casserole dish (or two smaller ones if you’re meal prepping or making one to freeze!). This little bit of grease is your insurance policy for easy serving later. Chef’s Hack: If you’re using glass or ceramic, let the dish heat up with the oven for a few minutes before adding the bake—it helps the bottom get nice and crispy!
- Noodle Duty: Cook those egg noodles according to the package directions, but for heaven’s sake, salt your pasta water! It should taste like the sea. This is your one chance to season the noodles from the inside out. Drain them well and set them aside. Chef’s Hack: Drizzle a tiny bit of olive oil over the drained noodles and toss them to prevent sticking while they wait.
- Build the Flavor Base: In a large skillet (the bigger, the better!), heat your olive oil over medium heat. Toss in the chopped onion and sauté until it’s soft and translucent, about 5-7 minutes. Now, add the minced garlic and cook for just one more minute until it’s fragrant. Don’t let the garlic burn—it turns bitter!
- Brown the Beef: Add the ground beef to the skillet, breaking it up with your spoon. Now, sprinkle over the salt, pepper, and that all-important smoked paprika. Cook until the beef is nicely browned and no pink remains. If you’re using a higher-fat beef, now’s the time to drain off any excess grease.
- Create the Saucy Filling: This is where the magic happens! Stir in the tomato paste, Italian seasoning, celery salt, and the drained diced tomatoes with chilies. Let this all simmer together for about 10 minutes. You’ll see it thicken up slightly and the flavors will become one big, happy family. Take it off the heat.
- Whip Up the Creamy Layer: In a separate, medium-sized bowl, combine the sour cream, softened cream cheese, cornstarch, and those chopped green onions. Use a whisk or a hand mixer to beat it until it’s completely smooth and dreamy. The cornstarch will seem to disappear, and that’s exactly what you want.
- Combine Noodles and Cream: Now, add your drained egg noodles to the bowl with the creamy mixture. Use a big spatula to gently fold everything together until every single noodle is coated in that creamy, tangy goodness.
- Layer It Up! Time for the grand assembly! Spread the creamy noodle mixture evenly into the bottom of your prepared baking dish. Next, carefully spoon the beef and tomato filling over the noodles, spreading it into a nice, even layer. Finally, shower the top with all that glorious shredded Colby Jack cheese. Go on, be generous!
- Bake to Perfection: Pop the dish into your preheated oven, uncovered, for 25-30 minutes. You’re looking for a golden-brown, bubbly top and the edges to be happily simmering. Chef’s Hack: For an extra-golden top, switch your oven to broil for the last 1-2 minutes, but WATCH IT LIKE A HAWK so it doesn’t burn!
- The Most Important Step: Once it’s out of the oven, I need you to be strong. Let it rest for 5-10 minutes before you dive in. This allows the layers to set, making it easier to slice and serve, and it also saves everyone from burning the roofs of their mouths on molten-hot cheese. It’s worth the wait, I promise!
How to Serve This Masterpiece
This bake is a star all on its own, but a few simple sides can turn it into a full-blown feast! I love serving generous squares right out of the baking dish—that cheesy pull is part of the experience. For a pop of color and freshness, a simple arugula salad with a lemony vinaigrette is perfect. It cuts through the richness beautifully. Garlic bread is, of course, non-negotiable for mopping up every last bit of sauce. For a veggie boost, some roasted broccoli or green beans on the side are always a win. It’s a crowd-pleaser that looks as good as it tastes!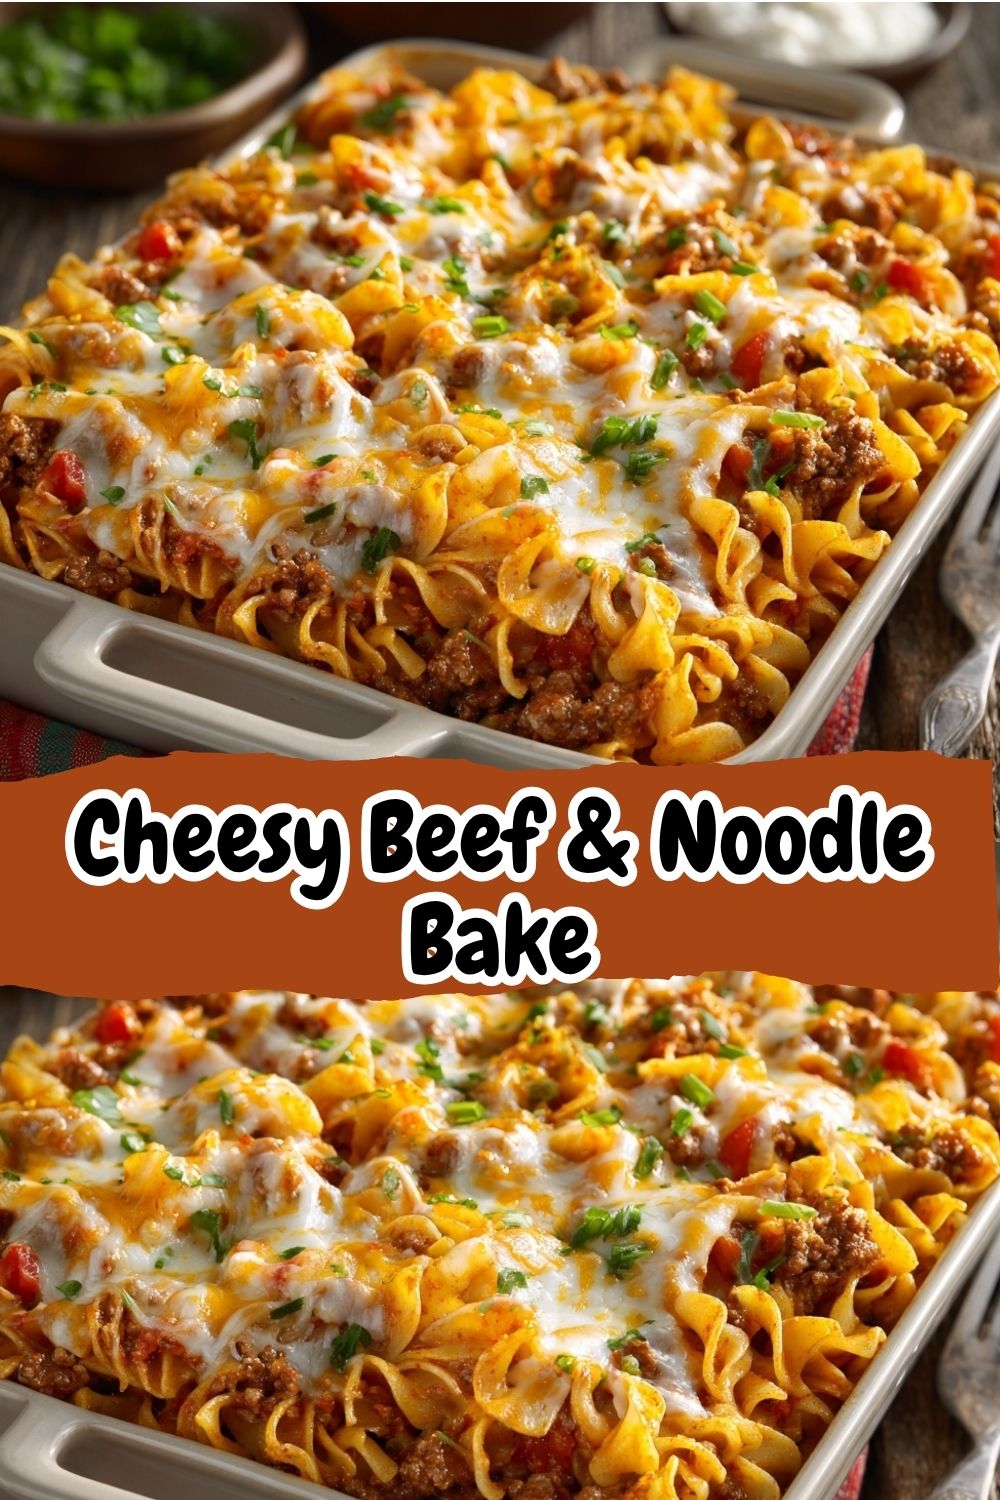
Ride Your Own Flavor Wave: Recipe Variations
Feel like mixing it up? This recipe is a fantastic canvas for your creativity!
- Spicy Fiesta: Swap the Colby Jack for Pepper Jack cheese and add a diced jalapeño to the beef mixture.
- “Taco Tuesday” Bake: Use a packet of taco seasoning instead of Italian seasoning and top with crushed tortilla chips before baking.
- Veggie-Packed Power: Stir a cup of frozen corn and a cup of thawed, drained frozen spinach into the beef mixture.
- Mushroom & Swiss: Use ground turkey, replace half the beef with sautéed mushrooms, and use Swiss or Gruyère cheese on top.
- Gluten-Free Goodness: Simply swap the egg noodles for your favorite gluten-free pasta! The rest of the recipe is naturally GF.
Isla’s Chef Notes & Kitchen Confessions
This recipe has evolved so much since that first messy apartment version! The addition of smoked paprika was a total happy accident—I knocked it into the pan and decided to just roll with it. Best. Mistake. Ever. I also started adding the cornstarch after one particularly saucy (read: slightly soupy) bake, and it solved the problem perfectly.
My biggest kitchen confession with this dish? I am physically incapable of not snacking on the creamy noodles straight out of the bowl. It’s a hazard of the job! This bake also freezes like a dream. Assemble it completely, but instead of baking, wrap it tightly and freeze. When a craving hits, bake it from frozen (adding about 20-30 extra minutes to the baking time). It’s my secret weapon for busy weeks and last-minute guests. It’s a recipe that’s meant to be loved and adapted, so make it your own!
Your Questions, Answered!
I’ve made this bake a zillion times, and I’ve answered a ton of questions from the BiteTide community along the way. Here are the most common ones!
Q: My bake turned out a bit watery. What happened?
A: The most common culprit is the diced tomatoes! Make sure you drain them really, really well. Squeezing them in a clean kitchen towel or using a fine-mesh strainer can help get out every last drop of liquid. The cornstarch in the creamy layer should handle the rest, but ensuring your tomatoes are drained is key.
Q: Can I make this ahead of time?
A: Absolutely! You can assemble the entire bake, cover it tightly, and refrigerate it for up to 24 hours before you need to bake it. When you’re ready, just pop it in the oven. You might need to add 5-10 minutes to the baking time since it’s going in cold.
Q: My cream cheese was lumpy when I mixed it. How do I avoid that?
A: This is a classic kitchen snag! The key is to make sure your cream cheese is truly softened at room temperature for at least an hour before you start. If you’re in a hurry, you can microwave it (without the foil wrapper!) for 15-20 seconds on low power. Using a hand mixer instead of a spoon also makes for a much smoother, lump-free blend.
Q: I don’t have a 9×13-inch pan. What can I use?
A: No problem! This recipe is very flexible. You can split it between two 8×8-inch or 9×9-inch square pans (bake one now, freeze one for later!). A large, deep oval baking dish or even a cast-iron skillet would work beautifully too. Just make sure whatever you use is deep enough to hold all those glorious layers.
Quick Bite: Prep & Nutrition Info
- Prep Time: 20 minutes
- Cook Time: 30 minutes
- Total Time: ~50 minutes
- Servings: 10-12
- Estimated per serving: ~480 calories, 28g fat, 35g carbs, 25g protein
- Storage: Refrigerate leftovers in an airtight container for up to 4 days, or freeze individual portions for up to 3 months.