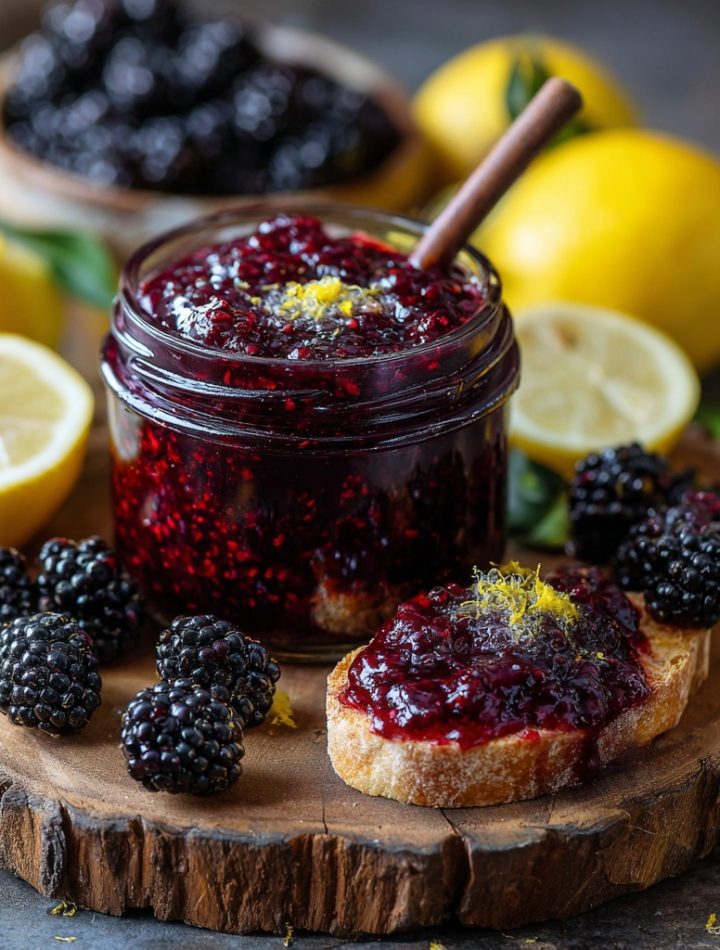
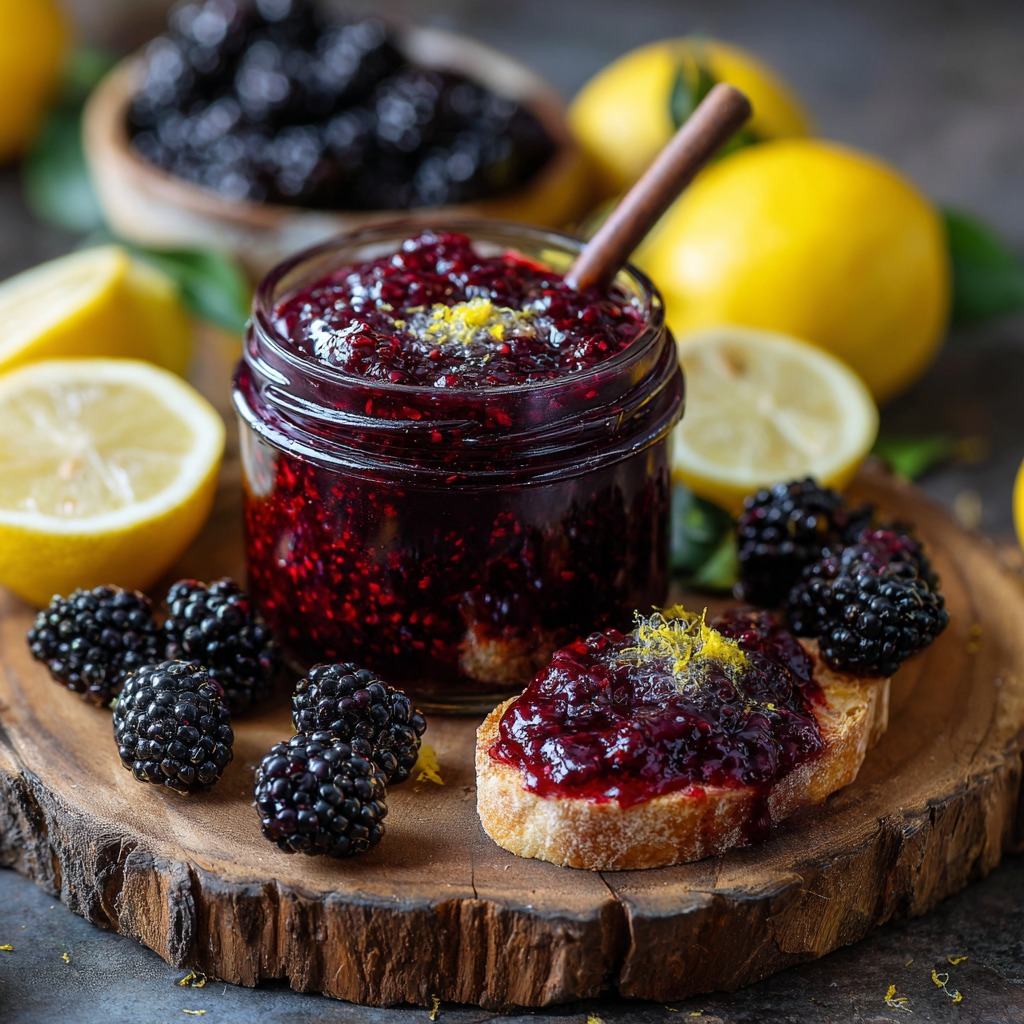
Sunshine in a Jar: Your New Favorite Blackberry Lemon Jam
Hey there, flavor friend! Isla here, welcoming you back to BiteTide. Have you ever stood in the grocery aisle, picked up a jar of jam, and thought… “I bet I could make this, and I bet it would taste a hundred times brighter?” Well, my friend, you are absolutely right. Today, we’re ditching the store-bought and diving headfirst into making the most vibrant, sun-kissed Homemade Blackberry Lemon Jam you’ve ever tasted.
This isn’t just any jam. This is a jar full of summer magic. It’s the perfect balance of sweet, plump blackberries and a zesty, sunny kick of lemon that wakes up your whole palate. Imagine it glistening on a warm buttermilk biscuit, swirled into your morning yogurt, or even spooned over vanilla ice cream for the easiest, most impressive dessert. The best part? It’s surprisingly simple. No fancy equipment or professional canning skills required for this small-batch wonder. We’re keeping it real, fun, and fuss-free—just like all good things should be. So, tie on your favorite apron, and let’s turn those beautiful berries into a preserve you’ll be proud to hoard, share, and savor.
A Bramble-Patch Memory
This recipe takes me right back to the overgrown lane behind my grandparents’ coastal house. Every late summer, my brother and I would be tasked with “berry duty.” Armed with old colanders and wearing our rattiest clothes (blackberry stains are no joke!), we’d venture into the bramble patch, competing to see who could find the fattest, darkest berries. We’d always eat more than we collected, our fingers and lips stained a happy purple.
The real magic happened back in Grandma’s kitchen. The air would grow thick and sweet as the berries simmered. She’d let me stir the big pot, warning me about the “lava bubbles.” That smell—of bubbling fruit and sugar with a sharp ribbon of lemon—was pure happiness. She’d pour the jam into jars, and the *ping* of the lids sealing was our victory song. Now, every time I make this jam, I’m not just preserving fruit; I’m bottling that sunshine, that laughter, and the simple joy of creating something wonderful from scratch. I hope this recipe becomes a little tradition in your kitchen, too, creating delicious memories one jar at a time.
Print
Homemade Blackberry Lemon Jam (Sweet, Tangy & Preservable)
- Total Time: 30 mins
- Yield: ~2 cups jam
Description
Bring the taste of summer to your table with this homemade blackberry lemon jam. With just a few ingredients, you’ll create a bright, sweet, and tangy spread perfect for toast, biscuits, or gifting. This easy, small-batch recipe is a timeless kitchen tradition—ready to be passed down.
Ingredients
4 cups fresh blackberries
2 cups granulated sugar
2 tbsp fresh lemon juice
1 tbsp lemon zest
Optional: 1 packet fruit pectin (for a firmer set)
Instructions
In a large saucepan, combine blackberries, sugar, lemon juice, and zest.
Bring to a boil over medium-high heat, stirring often to dissolve the sugar.
Reduce heat and simmer 15–20 minutes, mashing berries with a spoon or potato masher.
If using pectin, stir it in and boil for 1 more minute.
Test thickness: place a spoonful on a cold plate and chill briefly. If it gels, it’s ready.
Pour into sterilized jars and let cool. Refrigerate or process in a water bath for long-term storage.
- Prep Time: 10 mins
- Cook Time: 20 minutes
- Category: Breakfast
Nutrition
- Sugar: 11g
- Carbohydrates: 12g
- Fiber: 1g
Gathering Your Flavor Crew
See? I told you it was simple! Just a handful of star ingredients come together to create something extraordinary. Here’s your lineup:
- 4 cups fresh blackberries – The heart of the jam! Look for berries that are deeply colored, plump, and fragrant. Frozen work perfectly too—no need to thaw, just add them straight to the pot. This is a fantastic way to use up a bumper crop or a great sale.
- 2 cups granulated sugar – Our sweet preserver. Sugar does more than just sweeten; it’s crucial for the jam’s texture and shelf life. Don’t be tempted to drastically reduce it, or your jam may not set properly. For a slightly deeper flavor, you can swap up to 1/2 cup for light brown sugar.
- 2 tablespoons fresh lemon juice – The essential tang! Freshly squeezed is non-negotiable here. The acidity brightens the rich berry flavor and helps the natural pectin do its gelling thing. Bottled juice just doesn’t have the same vibrant punch.
- 1 tablespoon lemon zest – This is the secret flavor bomb! The zest holds the potent, aromatic oils of the lemon, giving the jam an incredible sunny fragrance and a hint of sophisticated bitterness that balances the sweetness beautifully.
- 1 packet (3 oz) liquid fruit pectin (optional) – Your insurance policy for a perfect set. I almost always use it! Blackberries can be variable in their natural pectin content. Adding a little ensures a spreadable, not runny, jam every single time. I prefer liquid pectin for ease.
Let’s Make Some Magic: Step-by-Step
Ready to see the transformation? Follow these steps, and you’ll be a jam wizard in no time. I’ve packed each one with my favorite tips and hacks!
- Prep Your Berries & Pot. Give your blackberries a gentle rinse in a colander and let them drain. Chef’s Tip: While they drain, grab your largest, heaviest-bottomed saucepan or Dutch oven. The wide surface area helps liquid evaporate faster for a good set, and the heavy bottom prevents scorching. This is your jam’s stage—give it a good one!
- The Big Simmer. Combine the blackberries, sugar, lemon juice, and zest in your pot. Stir it all together over medium heat until the sugar is completely dissolved and the mixture starts to look juicy. Chef’s Tip: Listen for the sound to change from a gritty stir to a smooth, liquidy swirl—that’s how you know the sugar is truly dissolved.
- Bring to a Rolling Boil. Crank the heat up to medium-high. Let the mixture come to a full, rolling boil—that means bubbles that can’t be stirred down. Stir it frequently to prevent any sticking. Let it boil hard for 1 full minute. Chef’s Hack: Have a bowl of cold water and a spoon ready for the next step!
- The Plate Test (Your Best Friend!). This is how the pros test for set without any fancy gadgets. Place a small ceramic plate in your freezer. After the minute boil, drop a tiny spoonful of the jam onto the frozen plate. Let it sit for 30 seconds, then push the edge with your finger. If it wrinkles and feels jam-like, it’s done! If it’s still runny, boil for another minute or two and test again. Chef’s Truth: The jam will thicken more as it cools, so a soft set on the plate is perfect.
- Adding Pectin (Optional but Recommended). If you’re using the liquid pectin for a firmer set, now’s the time! Take the pot off the heat. Stir in the entire packet of liquid pectin quickly and thoroughly. Return the pot to a boil for exactly 1 more minute, then remove from heat. You’ll see it thicken almost immediately.
- Jarring Up. Carefully pour or ladle your hot jam into clean, sterilized jars, leaving about 1/4 inch of space at the top (called “headspace”). Wipe the rims with a clean, damp cloth to ensure a good seal. Chef’s Note: To sterilize jars, simply simmer them in a pot of water for 10 minutes, or run them through a hot dishwasher cycle and use them while still hot.
- To Seal or Not to Seal? For immediate use, just let the jars cool to room temperature, pop the lids on, and store in the fridge for up to 3 weeks. For pantry storage (up to a year!), process the filled jars in a boiling water bath for 10 minutes. You’ll hear those magical *pings* as they seal!
How to Enjoy Your Jammy Masterpiece
Okay, the hard part is over (resisting eating it straight from the pot with a spoon). Now for the fun! This jam is a superstar. Of course, it’s divine slathered on toast, biscuits, or scones. But let’s get creative! Swirl a spoonful into plain Greek yogurt or oatmeal. Use it as a filling for thumbprint cookies or between cake layers. Glaze a roasted chicken or pork tenderloin during the last few minutes of cooking. Or my personal favorite: warm it slightly and drizzle it over a scoop of vanilla bean ice cream for the world’s easiest, most elegant dessert. Your options are endless!
Ride Your Own Flavor Wave: Fun Variations
Once you’ve mastered the classic, make it your own! Here are a few of my favorite twists:
- Herbal Elegance: Add 2-3 sprigs of fresh thyme or rosemary to the pot while simmering. Remove before jarring for a subtle, sophisticated flavor.
- Spiced Berry: Stir in 1/2 teaspoon of ground cinnamon or a pinch of freshly cracked black pepper with the sugar for a warm, complex kick.
- Boozy Berry: After removing from heat, stir in 1-2 tablespoons of Chambord (black raspberry liqueur), bourbon, or even a nice balsamic vinegar for grown-up depth.
- Lower-Sugar Swap: Use a brand of “no-sugar-needed” pectin and follow its specific instructions, swapping the sugar for honey, maple syrup, or a sugar alternative.
- Mixed Berry Bliss: Use 2 cups blackberries and 2 cups of raspberries or chopped strawberries for a gorgeous, multi-berry jam.
Isla’s Kitchen Notes & Stories
This recipe has been my go-to for years, and it’s evolved with plenty of kitchen comedy. The first time I made it, I was so excited I forgot the lemon juice entirely. Let’s just say it was *very* sweet and didn’t set at all—we called it “blackberry syrup” and poured it over pancakes! A happy accident, but a lesson learned: that acid is key.
Over time, I’ve learned to embrace the pectin. I used to be a “pure fruit and sugar only” purist, until one too many batches stayed stubbornly soupy. Using a little pectin isn’t cheating; it’s ensuring your hard work results in a perfect, spreadable jam every single time. It’s about guaranteeing joy, not stress! Finally, the smell of this jam cooking is my ultimate comfort scent. It fills the whole house and always draws someone into the kitchen, asking “Is it ready yet?” That’s the real goal: creating something that brings people together, one sticky, sweet spoonful at a time.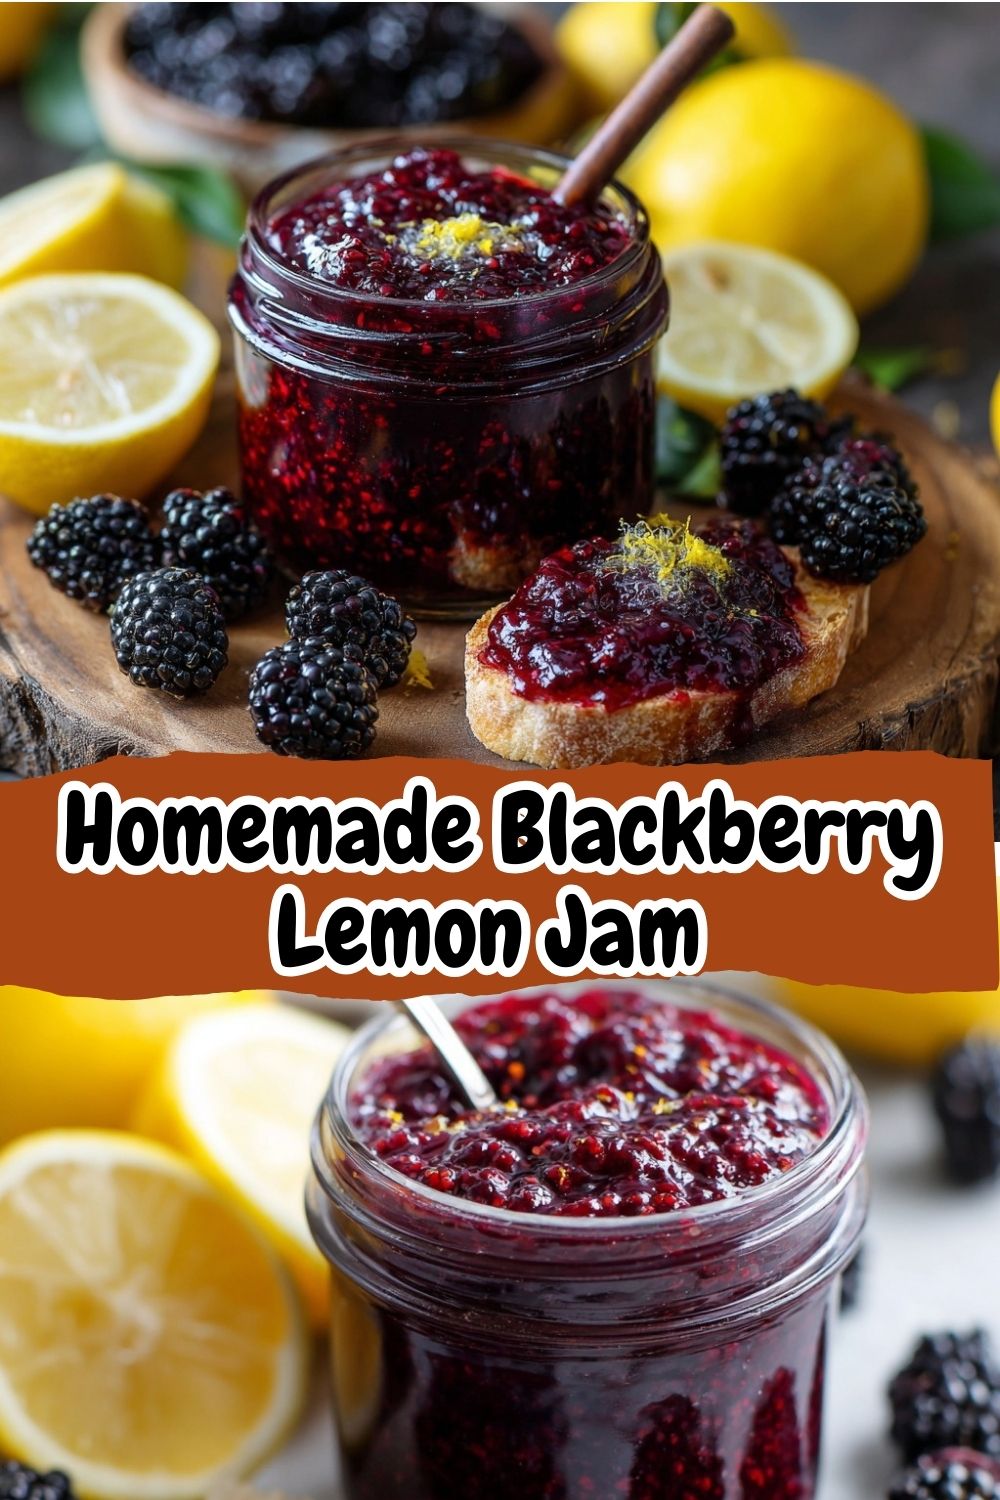
Jam Session FAQs: Your Questions, Answered
Q: My jam didn’t set! What happened and can I fix it?
A: Don’t panic! This is the #1 question. First, let it cool completely—it keeps thickening. If it’s still runny, you can re-cook it. Pour it back into the pot, add another tablespoon of lemon juice and/or 1-2 more teaspoons of pectin (whisk pectin with a little sugar first to prevent clumping). Bring back to a boil for 1-2 minutes and re-test. Otherwise, embrace it as a delicious berry syrup or sauce!
Q: Can I use frozen berries?
A: Absolutely! It’s a great option. Use them straight from the freezer—no need to thaw. Just add them to the pot and expect the initial cooking/sugar-dissolving phase to take a few minutes longer.
Q: How long does this jam last?
A: If refrigerated right after making (not processed), enjoy it within 3 weeks. If you’ve processed the jars in a water bath for 10 minutes and the lid is sealed (doesn’t pop when pressed), it’s shelf-stable for up to 1 year in a cool, dark place. Once opened, refrigerate and use within a month.
Q: Why is there foam on top of my jam while cooking? Should I skim it?
A> That foam is just air bubbles and fruit solids—it’s totally safe to eat but can look cloudy in the jar. For crystal-clear jam, skim it off with a spoon during the last minute of boiling. A tiny dab of butter (1/4 tsp) stirred in at the end can also help reduce foam.
Nutritional Information (Per Tablespoon)
Please note: This is an estimate for the standard recipe.
Calories: 45 | Total Carbohydrates: 12g | Dietary Fiber: 1g | Sugars: 11g | Protein: 0g | Fat: 0g