 Let’s Bring the Sizzle Home: Your New Favorite Takeout Fakeout
Hey there, flavor seeker! Isla here, and I’ve got a confession: I am utterly, completely, 100% powerless against the sizzle. You know the one. That glorious, aromatic cloud that hits you the second you walk into a Japanese steakhouse, followed by the mesmerizing clatter of spatulas and the promise of a piping-hot platter of hibachi. It’s pure magic. But let’s be real—between the price tag, the heavy feeling after, and the logistical nightmare of getting everyone out the door, it’s not exactly a weekly treat. That’s why I became a woman obsessed with recreating that magic right in my own kitchen.
Today, I’m handing you the golden ticket: my Healthy Hibachi Chicken with Fried Rice. This isn’t just a copycat recipe; it’s a better-than-takeout, high-protein, flavor-packed weeknight hero that comes together in about 30 minutes. We’re keeping all the craveable, savory-sweet notes and that iconic sear, but we’re ditching the pools of oil and sky-high sodium. We’re using smart swaps, lean protein, and loads of crisp-tender veggies. It’s the kind of meal that makes you feel like a kitchen rockstar, satisfies the whole family (hangry kids included!), and leaves you feeling energized, not weighed down. So, tie on your apron, crank up the heat, and let’s make some delicious, sizzling memories together. The show is about to start, and you’re the star chef!
The Night We Craved the Coast & Found It in Our Kitchen
This recipe was born on a cold, rainy Tuesday that felt endless. My husband, reminiscing about a beach vacation, sighed and said, “I wish we could have that amazing hibachi from that little place by the pier.” You know the feeling—a specific food memory that just *clings* to a moment in time. For us, it was the sound of the ocean, the smell of salt air, and the joyful chaos of a shared hibachi grill. Grocery delivery was hours away, and going out was off the table. Challenge accepted.
I raided the fridge and pantry: some chicken breasts, leftover brown rice, frozen peas, a lone carrot, and a few green onions looking a bit sad. With nothing to lose, I decided to improvise. I cranked the heat on my biggest skillet, chopped with abandon, and tried to channel the confident flair of those hibachi chefs. When I plated it up—the chicken beautifully seared, the rice just crispy enough—and took that first bite, we were instantly transported. It wasn’t *exactly* the same, but it was ours. It was cozy, healthier, and packed with the same joy. Now, it’s our go-to “instant vacation” meal. Every sizzle brings back a little bit of that seaside sunshine.
Print
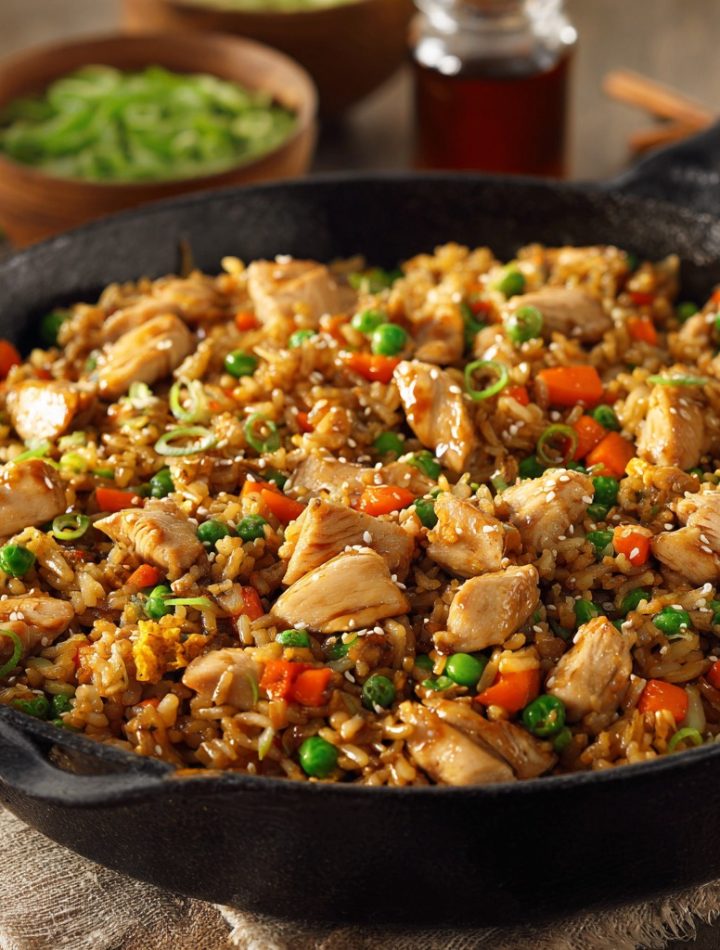
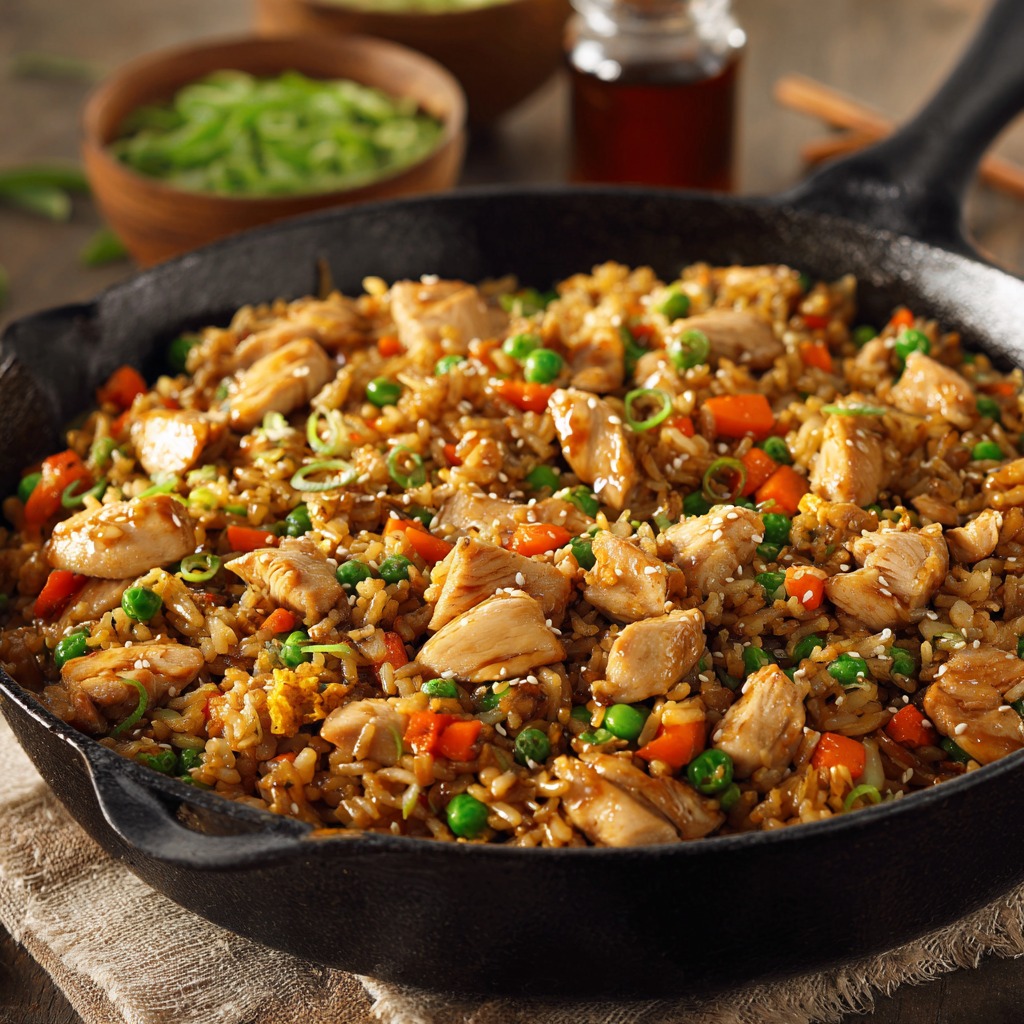
Healthy Hibachi Chicken with Fried Rice : High-Protein, Takeout-Style Dinner at Home
- Total Time: 30 mins
- Yield: 4 servings 1x
Description
This Healthy Hibachi Chicken with Fried Rice delivers all the sizzling flavor of your favorite takeout—without the extra oil or sodium. Made with lean protein, fiber-rich veggies, and day-old rice for the perfect texture, it’s a balanced meal that’s quick, satisfying, and family-approved. Whether you’re craving comfort or trying to eat cleaner, this one-pan dinner hits the spot.
Ingredients
For the Chicken:
1 lb boneless, skinless chicken breast or thighs, diced
1 tablespoon avocado oil or olive oil
2 teaspoons low-sodium soy sauce or coconut aminos
1 tablespoon minced garlic
Salt and pepper to taste
1 tablespoon butter (or ghee) for searing
For the Fried Rice:
3 cups cooked and chilled brown rice or cauliflower rice
2 eggs, beaten
1/2 cup frozen peas and carrots (or fresh)
1/4 cup chopped green onions
1 tablespoon sesame oil or avocado oil
1 tablespoon low-sodium soy sauce or coconut aminos
Optional: sprinkle of sesame seeds or chili flakes
Instructions
Sear the Chicken
Heat oil and butter in a large pan over medium-high. Add chicken, garlic, soy sauce, salt, and pepper. Cook until browned and fully cooked. Set aside.
Make the Fried Rice
In the same pan, heat oil. Sauté veggies for 2–3 minutes, push to one side, and scramble the eggs. Add rice and soy sauce, stirring everything together. Toss in green onions last.
Finish and Serve
Return chicken to the pan and mix well. Taste and adjust seasoning. Serve hot.
- Prep Time: 10 mins
- Cook Time: 20 minutes
- Category: Dinner
Nutrition
- Calories: 450
- Protein: 35g
Gathering Your Flavor Toolkit
Here’s everything you need to create this symphony of flavor. Don’t stress about having the *exact* thing—cooking is about creativity! I’ve included my favorite swaps and why each ingredient plays a starring role.
- 1 lb boneless, skinless chicken breast or thighs, diced: I’m Team Thigh all the way for hibachi! Thighs stay incredibly juicy and have more flavor, but breasts are fantastic for a leaner option. Chef’s Insight: Cut your chicken into uniform, bite-sized pieces so everything cooks evenly and gets that perfect sear.
- 1 tablespoon avocado oil or olive oil: We need an oil with a high smoke point for that high-heat cooking. Avocado oil is my MVP here. Sub Tip: Grapeseed or refined coconut oil work great too!
- 2 teaspoons low-sodium soy sauce or coconut aminos: This is our flavor base. Low-sodium lets us control the salt. Coconut aminos are a fantastic gluten-free, slightly sweeter alternative.
- 1 tablespoon minced garlic: Non-negotiable for that iconic aroma! Use fresh if you can—the pre-minced jar is a fine backup for busy nights.
- Salt and pepper to taste: Season as you go! Taste, taste, taste.
- 1 tablespoon butter (or ghee) for searing: This is the secret weapon for that rich, restaurant-quality flavor and beautiful golden color. Ghee is clarified butter that won’t burn as easily.
For the Fried Rice:
- 3 cups cooked and chilled brown rice or cauliflower rice: THIS IS THE FRIED RICE GOLDEN RULE. Day-old, chilled rice is drier, so it fries up perfectly instead of turning to mush. Swaps: White rice works, but I love the nutty flavor and fiber of brown. Cauliflower rice is a brilliant low-carb option—just be sure to squeeze out excess moisture.
- 2 eggs, beaten: For protein and that classic ribbon of egg throughout.
- 1/2 cup frozen peas and carrots (or fresh): The convenient, colorful classic! Frozen veggies are flash-frozen at peak freshness and save so much time. Fresh, finely diced carrots and peas are lovely if you have them.
- 1/4 cup chopped green onions: Freshness and color! We’ll use the white parts for cooking and the green tops for a vibrant garnish.
- 1 tablespoon sesame oil or avocado oil: Sesame oil adds an authentic, nutty finish. Use it at the end for maximum flavor. Use avocado oil if you’re just cooking.
- 1 tablespoon low-sodium soy sauce or coconut aminos: To season the rice itself.
- Optional: sprinkle of sesame seeds or chili flakes: The perfect finish for a little crunch or heat!
Let’s Get Cooking: Your Step-by-Step Showtime
Ready? This comes together fast, so have all your ingredients prepped and within arm’s reach. We’re going for high heat and quick movements—it’s the fun part!
- Prep is Power: Dice your chicken into even pieces. Chop your green onions, separating the white bottoms from the green tops. Beat your eggs in a small bowl. Measure out your rice and frozen veggies. Doing this first (your mise en place) makes the actual cooking process a stress-free breeze.
- Sear the Chicken – Get That Color! Heat 1 tablespoon of avocado oil in a large skillet, wok, or cast-iron pan over medium-high heat. Once the oil is shimmering (this is key!), add the tablespoon of butter or ghee. Let it melt, then immediately add the diced chicken in a single layer. Don’t crowd the pan! We want sear, not steam. Let it cook undisturbed for 2-3 minutes to get a gorgeous golden crust. Add the minced garlic, 2 teaspoons of soy sauce, and a pinch of salt and pepper. Now, toss and stir until the chicken is cooked through, about 4-5 more minutes. Chef’s Hack: Use tongs for easy flipping and tossing! Transfer the beautiful, seared chicken to a clean plate and tent with foil.
- Build the Fried Rice Base: In the same pan (all those delicious browned bits = FLAVOR!), add a touch more oil if it looks dry. Toss in the white parts of the green onions and the frozen peas and carrots. Sauté for 2-3 minutes until they’re bright and heated through.
- Scramble the Eggs: Push the veggie mixture to one side of the pan. Pour the beaten eggs into the empty space. Let them set for 15-20 seconds, then gently scramble them right there in the pan until just cooked through. Now, mix the scrambled eggs in with the veggies.
- The Main Event: Fried Rice! Add your cold rice to the pan, breaking up any clumps with your spatula. Drizzle the tablespoon of soy sauce over the rice. Here’s the technique: let the rice sit and press down for 30-45 seconds to get a little crispy, then toss and repeat. This gives you that perfect “fried” texture. Stir everything together until the rice is heated through and evenly coated.
- Finish and Bring It All Home: Return the cooked chicken (and any juices on the plate!) to the pan with the rice. Toss everything together to combine and reheat the chicken for a minute. Kill the heat. Now, drizzle that precious sesame oil over the top and toss once more. Taste it—does it need another tiny splash of soy sauce? A grind of pepper? Adjust to your liking.
Plating Your Masterpiece
Presentation is part of the fun! I love using shallow bowls for this. Scoop a generous portion of the fried rice, top with that glorious seared chicken, and sprinkle liberally with the reserved green onion tops. A final sprinkle of sesame seeds or a pinch of red chili flakes adds a professional, Instagram-worthy touch. For a true steakhouse vibe, serve with a simple side of sliced cucumber or a quick ginger salad. Don’t forget the extra soy sauce or coconut aminos on the table for your fellow diners to customize!
Ride Your Own Flavor Wave: Creative Twists
- Shrimp or Steak Hibachi: Swap the chicken for large shrimp (cook 1-2 min per side) or thinly sliced sirloin steak (sear quickly over high heat).
- Vegetarian Power Bowl: Double the eggs or add a can of rinsed chickpeas or cubed extra-firm tofu (pressed and pan-fried) for protein. Load up on extra veggies like broccoli, mushrooms, and zucchini.
- Spicy Yum Yum Style: Stir 2-3 tablespoons of light mayo or Greek yogurt with 1 tablespoon of sriracha and a squeeze of lime. Drizzle this “yum yum” sauce over your finished bowl.
- Pineapple Fried Rice: Add ½ cup of fresh diced pineapple with the veggies for a sweet and savory tropical twist.
- Ginger-Garlic Boost: Add 1 tablespoon of freshly grated ginger to the pan with the garlic for an extra layer of zing.

Isla’s Kitchen Notes
This recipe has evolved so much since that first rainy night! The biggest game-changer was embracing the power of cold rice. I used to try it with fresh, warm rice and wondered why it was always mushy. Lesson learned! Now, I intentionally cook extra rice the night before or use those handy pre-cooked packets of brown rice from the fridge section. Another funny fail? I once tried to be “healthy” and skipped the butter in the chicken sear. Big mistake. That tiny bit of butter (or ghee) is non-negotiable for flavor and color. It’s the difference between “good” and “OH WOW, this tastes like the restaurant!” Trust the process, and don’t be afraid of that high heat—it’s what creates the magic.
Your Questions, Answered!
Q: My rice is turning out soggy/mushy. What am I doing wrong?
A: This is almost always because the rice is too moist when you start. Ensure your cooked rice is thoroughly chilled (day-old is best). If using fresh rice, spread it on a baking sheet and let it cool in the fridge for 30 minutes. Also, make sure your pan is hot enough before adding it, and don’t stir constantly—let it sit to crisp up!
Q: Can I make this ahead of time?
A: Absolutely! You can prep the chicken and chop all the veggies ahead. The dish also reheats well the next day in a skillet over medium heat. The rice texture is best fresh, but leftovers are still delicious.
Q: What’s the best pan to use?
A: A large, heavy-bottomed skillet, cast-iron pan, or a wok is ideal. They hold and distribute high heat evenly, which is crucial for getting a good sear and preventing steaming.
Q: Is this recipe gluten-free?
A: Yes, easily! Just use certified gluten-free tamari or coconut aminos instead of traditional soy sauce. Double-check all your other labels to be safe.
Nutritional Info* (Approximate per serving)
- Calories: ~450
- Protein: ~35g
- Carbohydrates: ~40g
- Fiber: ~4g
- Net Carbs: ~36g (Significantly lower with cauliflower rice)
*These values are estimates calculated using chicken breast and brown rice. Actual numbers will vary based on specific ingredients, brands, and portion sizes.
There you have it, friend! Your path to healthy, sizzling, spectacular hibachi at home. I hope this recipe brings as much fun and flavor to your kitchen as it does to mine. If you make it (and I really hope you do!), tag me on social @BiteTide—I love seeing your creations! Now go on, grab that spatula, and make some noise. Happy cooking!
– Isla 💛