 Chocolate Cherry Pie: The Sweet-Tart Love Story Your Table Needs
Hey there, flavor friend! Isla here, from my cozy kitchen to yours. Have you ever had a craving so specific it feels like a mission? That was me last Tuesday, staring into the pantry, dreaming of something that was both deeply comforting and excitingly new. I wanted the cozy, flaky embrace of a perfect pie crust. I wanted the joyful, sunshiny pop of sweet-tart cherries. But I also wanted the deep, soul-satisfying richness of dark chocolate. Why choose? The answer, my friends, is this Chocolate Cherry Pie.
This isn’t just a dessert; it’s a mood. It’s the pie you make when you want to turn a regular Wednesday into a celebration, or when you need a show-stopping centerpiece for a holiday table that secretly came together without a ton of fuss. The chocolate doesn’t overpower; it weaves itself into the cherry filling like a best friend, creating a velvety, luxurious sauce that makes each bite an event. The crust? We’re going for golden, flaky, and so buttery it practically sings. This recipe rides that beautiful BiteTide wave between classic comfort and bold, creative flavor. So, tie on your favorite apron, and let’s make some magic—and probably a happy little mess. I promise, the result is so worth it.
The Pie That Sparked a Thousand Smiles
This pie always takes me back to my grandma’s linoleum kitchen, with its perpetually warm oven and the smell of sugar in the air. She was a wizard with a rolling pin, but her cherry pie was always… traditional. One summer, during a marathon baking session, my teenage self decided to “help” by sneaking a handful of chocolate chips into the filling before she poured it in. I was convinced I’d invented the next great culinary masterpiece (or was in for a serious scolding).
When she pulled that pie out of the oven, the chocolate had melted into a gorgeous, glossy ripple through the ruby-red cherries. She raised an eyebrow at me, I held my breath, and then she just laughed—a full, warm sound that filled the whole kitchen. “Well,” she said, slicing a piece, “let’s see what your rebellion tastes like.” That first bite was pure revelation. The chocolate made the cherries taste *more* cherry, richer and brighter all at once. It became our little secret, our “fancy” pie for special occasions. This recipe is that memory, perfected and shared with so much love. It’s proof that sometimes, the best kitchen adventures start with a tiny, delicious rebellion.
Print
Chocolate Cherry Pie : A Rich & Fruity Dessert Classic
- Total Time: 1 hour 5 minutes
- Yield: 8 slices 1x
Description
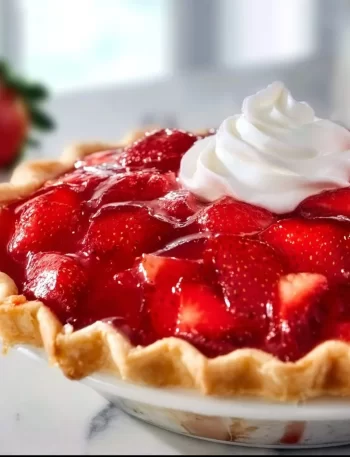
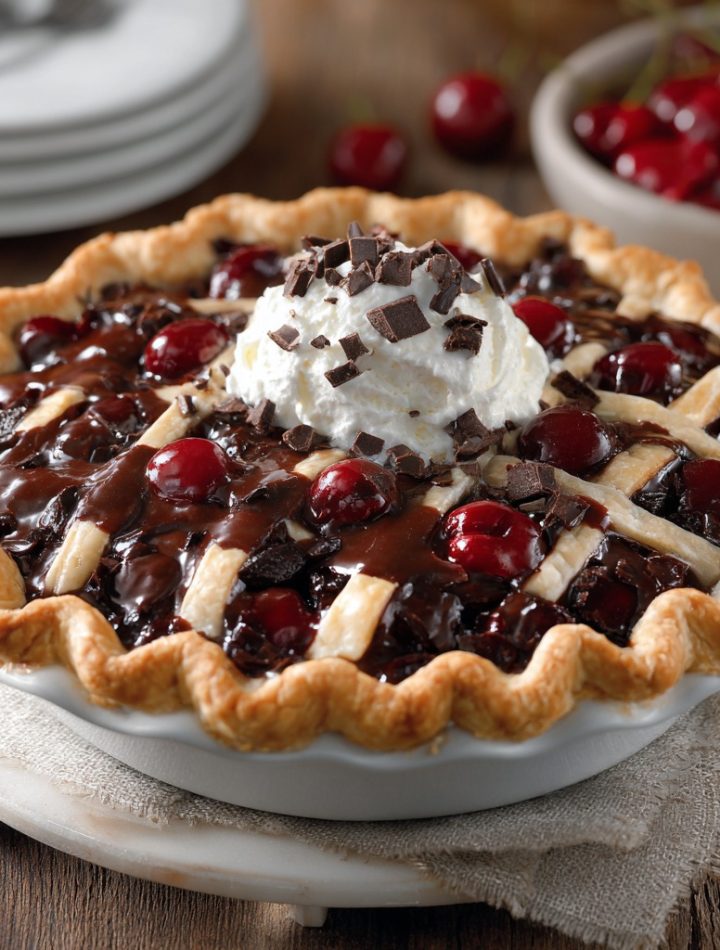
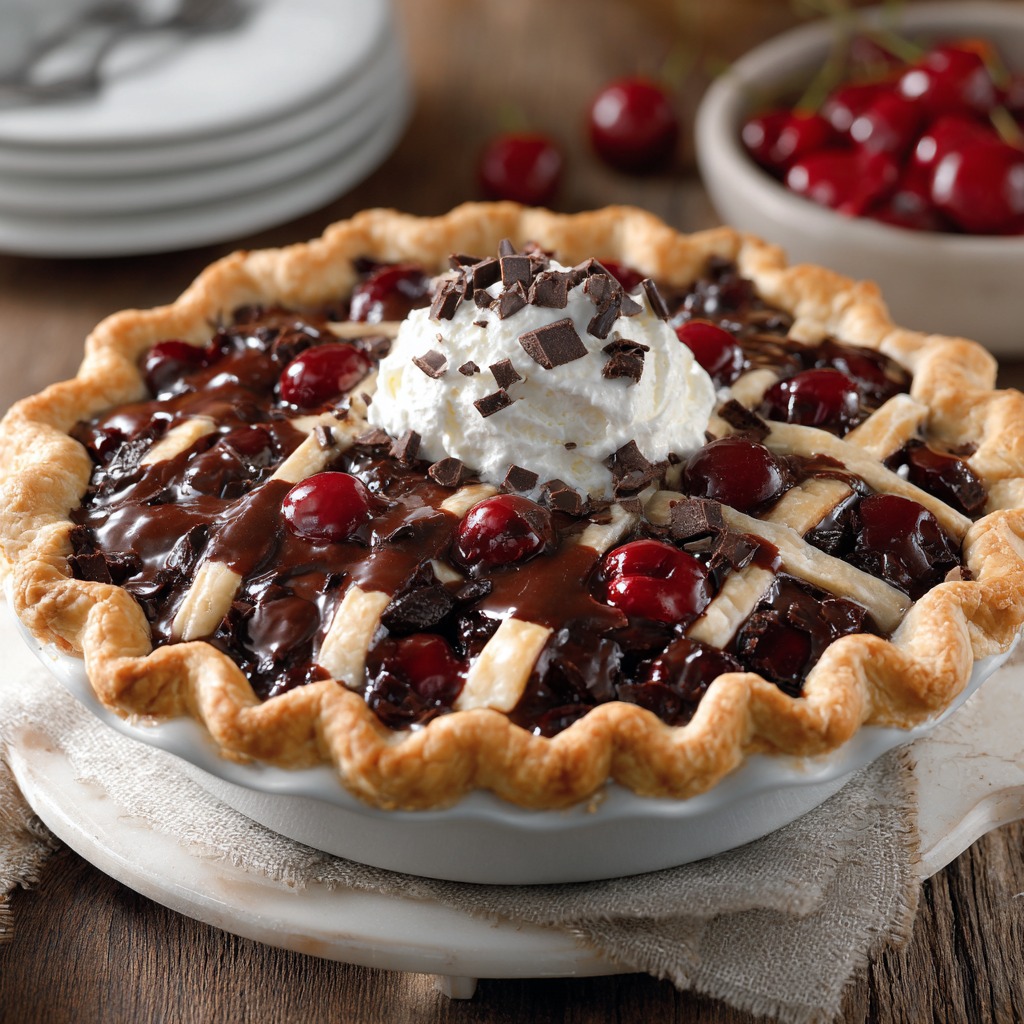
This Chocolate Cherry Pie is everything a dessert lover dreams of—sweet-tart cherries hugged by a velvety chocolate filling, all tucked into a flaky, buttery crust. It’s a beautiful fusion of two iconic flavors that feels indulgent but not over-the-top. Whether served warm with a scoop of vanilla ice cream or chilled straight from the fridge, this pie is guaranteed to disappear slice by slice. Perfect for holidays, special dinners, or when you just want to impress with minimal fuss.
Ingredients
For the crust:
1½ cups all-purpose flour
2 tbsp sugar
½ tsp salt
½ cup (1 stick) cold unsalted butter, cubed
4–5 tbsp ice water
For the filling:
1 (15 oz) can tart cherries in water, drained
½ cup cherry preserves or jam
½ cup sugar
2 tbsp cornstarch
½ cup semi-sweet chocolate chips
1 tsp vanilla extract
1 tbsp butter
For the topping (optional):
Extra chocolate chips or shavings
Whipped cream or vanilla ice cream
Instructions
Make the crust: In a bowl, whisk flour, sugar, and salt. Cut in butter with a pastry cutter or fork until crumbly. Add ice water one tablespoon at a time until dough just comes together. Shape into a disc, wrap in plastic, and chill for 30 mins.
Prepare filling: In a saucepan over medium heat, combine cherries, cherry preserves, sugar, and cornstarch. Stir until thickened (about 5–7 mins). Remove from heat, stir in chocolate chips, vanilla, and butter. Let cool slightly.
Assemble: Roll out chilled dough and press into a 9-inch pie dish. Pour in the cherry-chocolate filling. Preheat oven to 375°F (190°C).
Bake: Bake for 35–40 mins, until crust is golden and filling is bubbly. Cool before slicing.
Serve: Top with whipped cream or a scoop of ice cream and a sprinkle of chocolate shavings.
- Prep Time: 25 minutes
- Cook Time: 40 mins
- Category: Dessert
Gathering Your Flavor Crew: Ingredients & Insights
Here’s everything you’ll need to create this masterpiece. I’ve included my favorite chef-y notes and swaps because life happens, and flexibility is key to fearless cooking!
For the Flaky, Buttery Crust:
- 1½ cups all-purpose flour: The foundation. Spoon and level it into your measuring cup for accuracy—no packing it down!
- 2 tbsp sugar: A little sweetness in the crust balances the tart filling beautifully.
- ½ tsp salt: Essential. It amplifies all the other flavors. Don’t skip it!
- ½ cup (1 stick) cold unsalted butter, cubed: COLD is the non-negotiable secret to flaky layers. I dice it and throw it back in the fridge for 10 minutes before I start. For a fun twist, swap half for cold vegetable shortening for an even more tender crumb.
- 4–5 tbsp ice water: The key word is *ice*. We want just enough to bring the dough together without melting the butter.
For the Luscious Chocolate Cherry Filling:
- 1 (15 oz) can tart cherries in water, drained: I love the consistent tang of canned tart cherries (like Montmorency). Chef Insight: Drain them well, but save a tablespoon or two of the juice in case your filling gets too thick while cooking! Fresh or frozen pitted sour cherries work wonderfully in season—just use the same weight.
- ½ cup cherry preserves or jam: This is our flavor booster and natural thickener. It gives the filling a gorgeous, glossy finish.
- ½ cup sugar: Adjust to your sweet tooth! Start with ⅓ cup if your preserves are very sweet.
- 2 tbsp cornstarch: Our thickening agent. Mix it with the sugar first to prevent lumps. For a clear, glossy finish, you can use an equal amount of tapioca starch.
- ½ cup semi-sweet chocolate chips: The star of the show! I prefer semi-sweet to balance the cherries, but dark chocolate (60-70%) is a decadent alternative. Chop a bar if you don’t have chips.
- 1 tsp vanilla extract: The flavor bridge that ties everything together. A splash of almond extract (¼ tsp) is also incredible here.
- 1 tbsp butter: Stirred in at the end for a silky, rich mouthfeel. Because why not?
For the Grand Finale (Optional but Highly Recommended):
- Extra chocolate chips or shavings: For that gorgeous, professional-looking finish.
- Whipped cream or vanilla ice cream: The perfect cool, creamy contrast to the warm, rich pie. It’s not optional in my heart.
Let’s Build Your Pie: Step-by-Step with Chef Hacks
Follow these steps, breathe, and have fun. Pie-making is a practice of love, not perfection!
Step 1: Make & Chill the Crust
In a large bowl, whisk together your flour, sugar, and salt. Grab your cold, cubed butter and start “cutting it in.” You can use a pastry cutter, two forks, or even quick pulses with your clean fingers. You’re looking for a crumbly mixture with pea-sized (and some smaller) bits of butter. Chef Hack: Those visible butter bits are what will steam in the oven, creating incredible flaky layers. Now, drizzle in your ice water, one tablespoon at a time, gently tossing with a fork. Stop when the dough just holds together when pinched. Dump it onto a piece of plastic wrap, shape it into a disc (not a ball—a disc chills evenly), wrap it tightly, and chill for at least 30 minutes. This relaxes the gluten and re-firms the butter for the ultimate roll-out.
Step 2: Cook the Filling to Glossy Perfection
While the dough chills, let’s make the magic happen. In a medium saucepan, combine your drained cherries, cherry preserves, sugar, and cornstarch. Give it a good stir to coat everything. Cook over medium heat, stirring frequently. It will look cloudy at first, then suddenly turn clear and thicken dramatically—this usually takes 5-7 minutes. Watch for big, lazy bubbles plopping to the surface; that’s your sign it’s ready. Remove it from the heat immediately. Now, stir in the chocolate chips, vanilla, and that tablespoon of butter. The residual heat will melt everything into a velvety, dreamy filling. Let this cool on the counter while you roll the crust. A warm filling is okay; a scalding hot one will melt your crust dough!
Step 3: Roll, Press, and Assemble
Preheat your oven to 375°F (190°C). On a lightly floured surface, roll your chilled dough disc into a circle about 12 inches wide. Don’t worry about a perfect circle! Rustic is charming. Gently transfer it to a 9-inch pie dish. I like to roll the dough loosely over my rolling pin to move it. Press it in gently, letting the excess hang over the edges. Chef Hack: If the dough tears, don’t panic! Just patch it with a scrap and press to seal—it’s baking magic. Pour your slightly cooled chocolate cherry filling into the crust. You can fold the overhang under itself to create a thicker rim, then crimp it with your fingers or a fork.
Step 4: Bake, Cool, and Practice Patience
Place your beautiful pie on a baking sheet (to catch any potential bubble-overs) and slide it into the preheated oven. Bake for 35-40 minutes. You’re looking for a golden-brown crust and filling that is bubbling actively in the center. This is crucial—those bubbles mean the cornstarch has fully activated and your slice will hold its shape. When it’s done, pull it out and let it cool completely on a wire rack. I know, the wait is torture and your kitchen smells incredible, but slicing into a warm pie leads to a soupy slice. Letting it cool (at least 2-3 hours) allows the filling to set up perfectly.
How to Serve This Show-Stopper
Once your pie has set, it’s time for the grand reveal! Run a thin knife around the edge to loosen, then slice with a sharp, clean knife. For ultra-neat slices, wipe the knife between cuts. Plate each gorgeous slice and immediately crown it with a generous dollop of freshly whipped cream or a melting scoop of high-quality vanilla ice cream. A final shower of chocolate shavings or a light dusting of powdered sugar makes it look straight out of a bakery case. Serve it with a big smile—you made this!
Ride Your Own Flavor Wave: Creative Twists
- Black Forest Pie: Add ¼ cup of Kirsch (cherry brandy) to the filling with the vanilla. Top with whipped cream and chocolate curls.
- Nutty Crumble Top: Skip the full top crust and instead mix ½ cup flour, ½ cup brown sugar, ½ cup chopped almonds or pecans, and 4 tbsp melted butter into a crumble. Sprinkle over the filling before baking.
- Boozy & Bold: Stir 1 tbsp of bourbon or rum into the filling along with the butter for a deep, complex note.
- Double Chocolate: Use a chocolate pastry crust! Add ¼ cup cocoa powder to the flour when making your dough, reducing the flour by 2 tablespoons.
- Fresh Summer Swap: In peak season, use 4 cups of fresh, pitted sour cherries. You may need to increase the cornstarch by 1 tablespoon as fresh fruit releases more juice.
Isla’s Kitchen Notebook
This pie has evolved so much from my grandma’s kitchen! I’ve learned that a tablespoon of lemon juice in the filling can make the cherry flavor truly sing if your preserves are very sweet. I’ve also had my share of “learning experiences”—like the time I used hot water in the crust and baked a beautiful, rock-hard pastry brick. We laughed, we cried, we ordered pizza. The journey is part of the fun. These days, I sometimes make a batch of the filling alone and spoon it over pancakes or swirl it into brownie batter. It’s that versatile. Remember, your pie tells a story—a little crack, a slightly dark edge, that’s just character. It means it was made by a real person, with real love.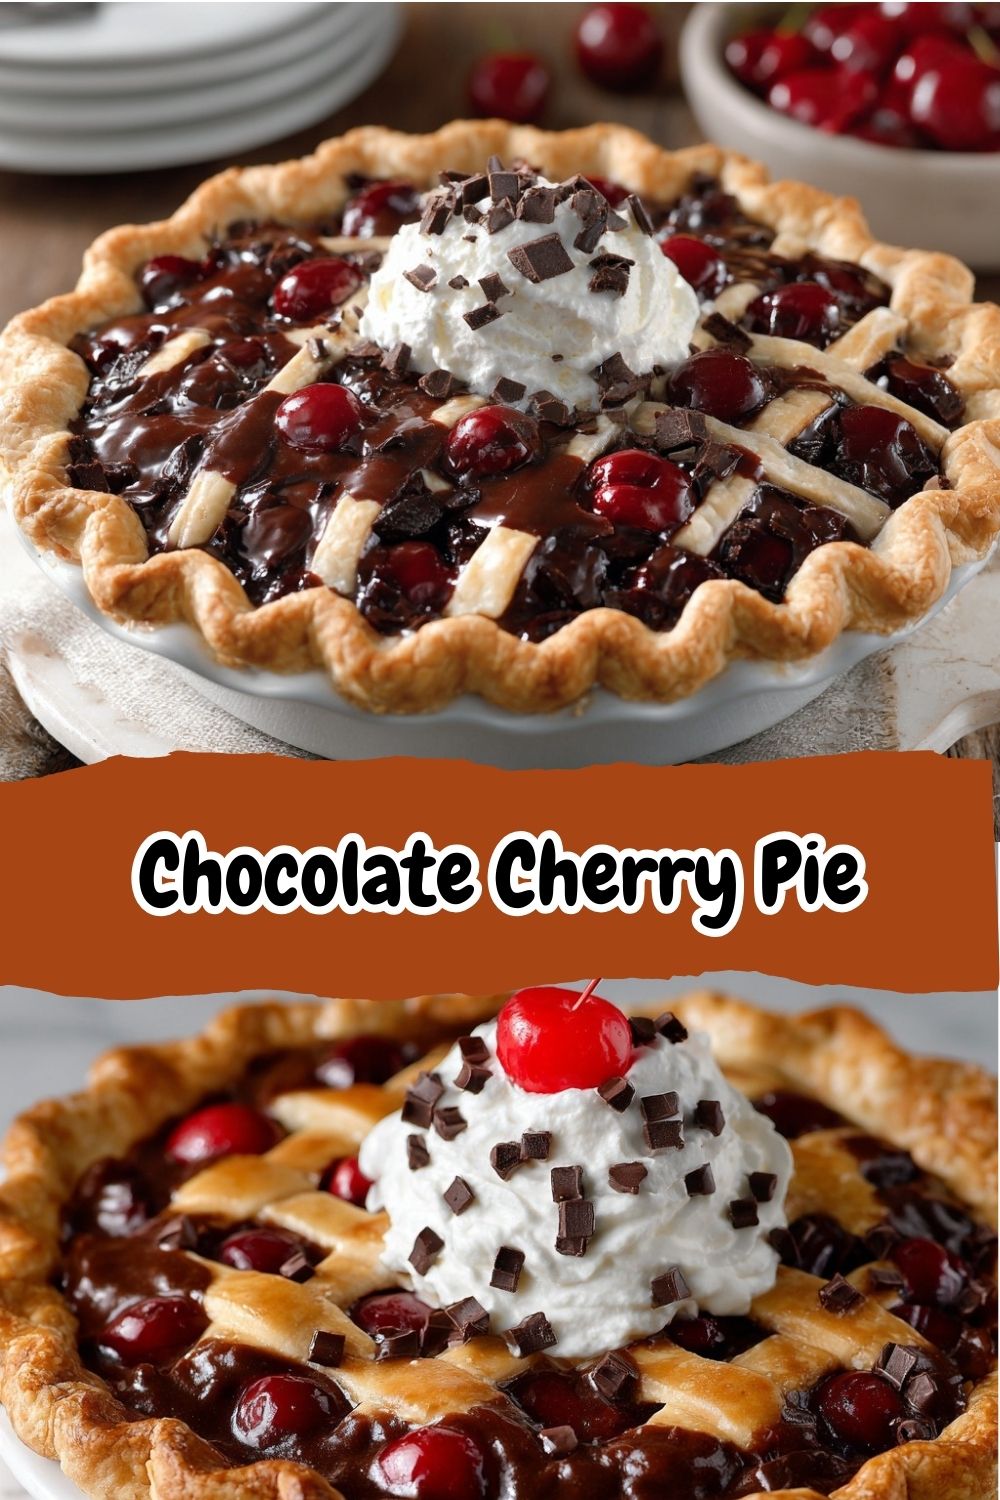
Your Pie Questions, Answered!
Can I make this pie ahead of time?
Absolutely! This pie is a meal-prep hero. You can bake it fully 1-2 days ahead, let it cool completely, cover loosely, and store at room temperature. The crust stays surprisingly crisp. You can also freeze the baked and cooled pie (well-wrapped) for up to 3 months. Thaw overnight in the fridge.
My filling is too runny after baking/cutting. What happened?
This usually means 1) The filling didn’t boil long enough on the stovetop to activate the thickener, or 2) The pie wasn’t cooled completely before slicing. The filling continues to set as it cools. If it happens, it still tastes amazing—just serve it in a bowl with a spoon and extra ice cream! Next time, make sure you see those thick, glossy bubbles in the saucepan and be patient during the cool-down.
Can I use a pre-made crust?
You sure can, friend! I’m all about saving time. Use a high-quality, cold-from-the-fridge pie crust or even a frozen deep-dish shell (no need to thaw). Follow the package instructions for blind-baking if needed, though with this cooked filling, you often don’t have to. Your kitchen, your rules!
The edges of my crust are browning too fast!
A classic pie puzzle! If your crust is getting too dark before the filling is bubbly, simply tent the edges with strips of aluminum foil. You can also use a dedicated pie crust shield. This protects the delicate edges while the center of the pie finishes baking to perfection.
Nutritional Information (Approximate, per slice)
Please note: This is an estimate for 1 of 8 slices, without added ice cream or whipped cream. Values may vary based on specific ingredients used.
- Calories: 380
- Total Fat: 20g
- Saturated Fat: 12g
- Carbohydrates: 45g
- Fiber: 2g
- Sugars: 25g
- Protein: 4g
- Sodium: 120mg