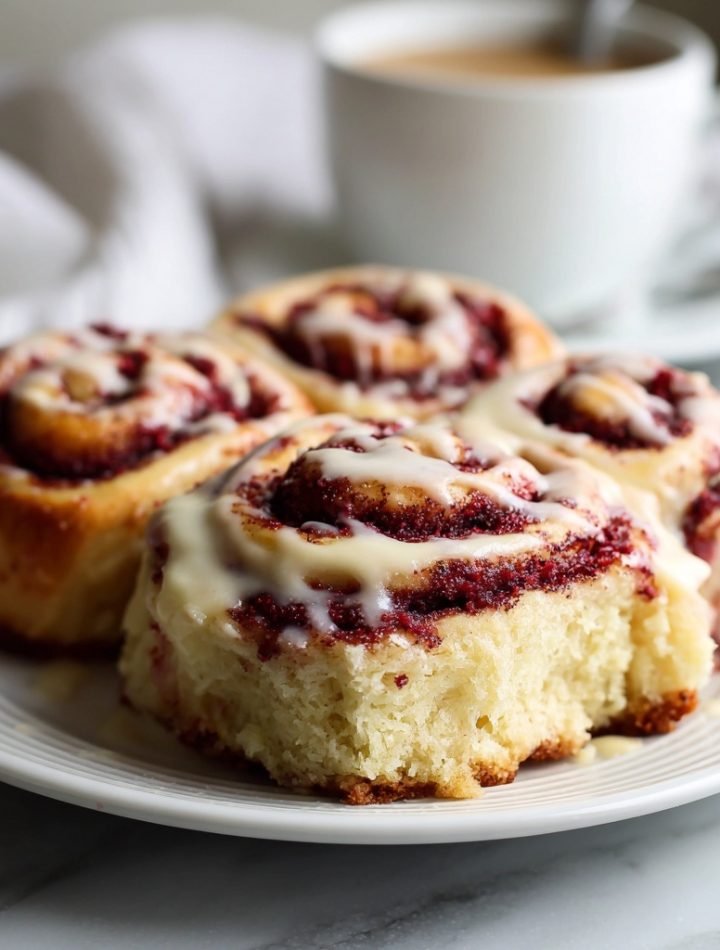
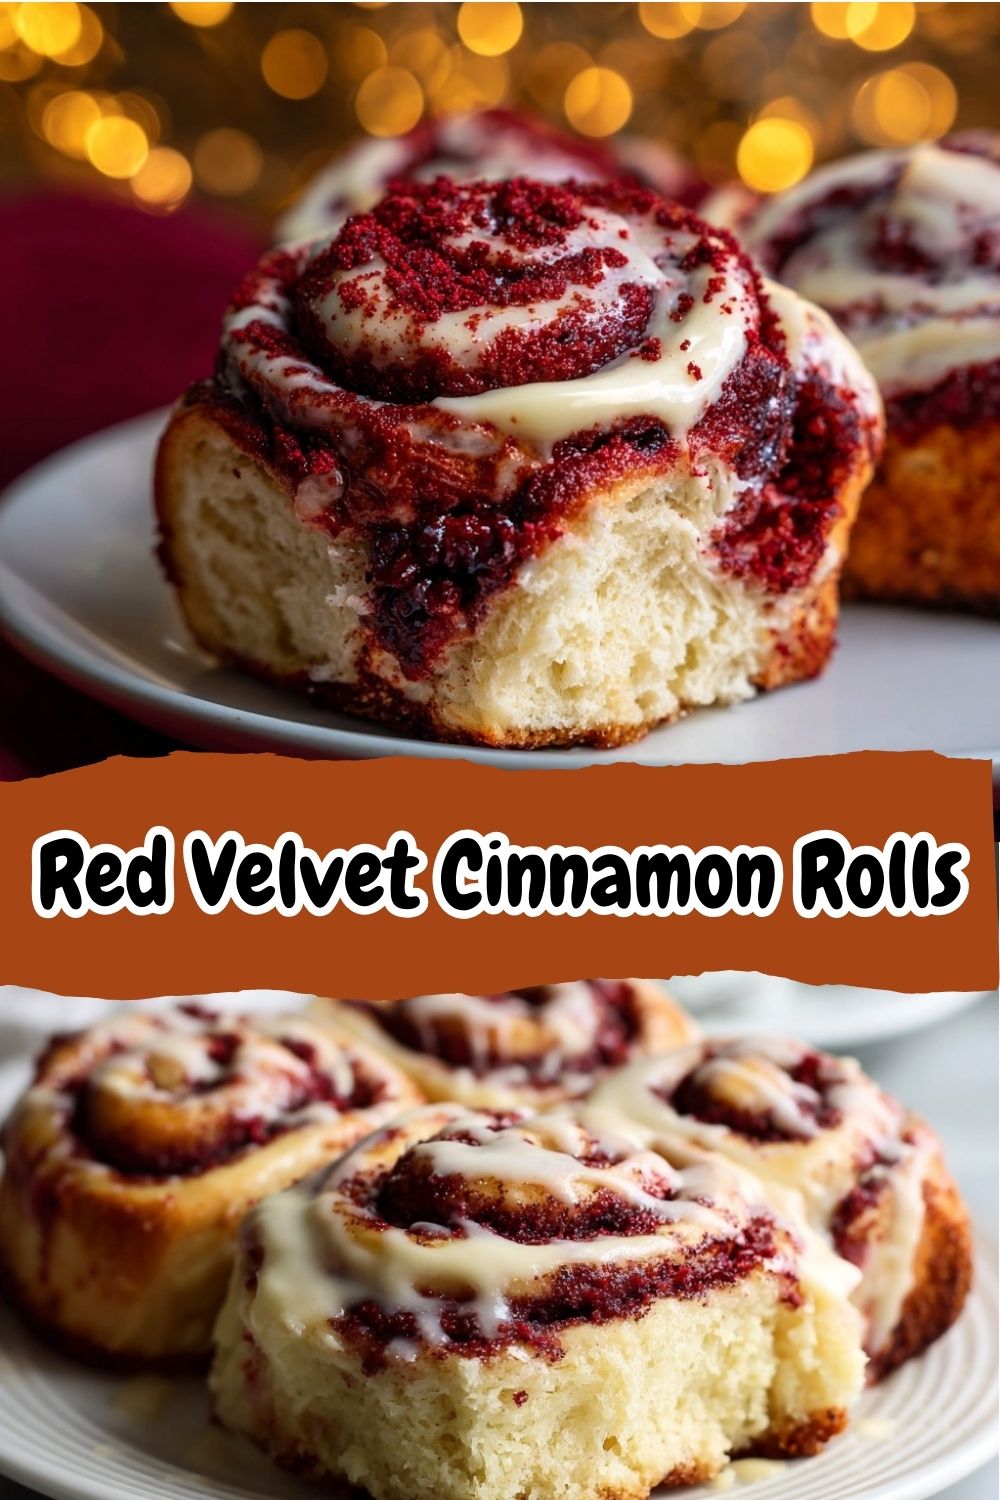
Red Velvet Cinnamon Rolls: The Ultimate Brunch Showstopper
Hey there, flavor friend! Isla here, welcoming you back to my cozy corner of the internet, BiteTide. You know that feeling when you wake up on a lazy weekend morning, and you just crave something special? Not just toast. Not just cereal. I’m talking about a warm, gooey, straight-from-the-oven, makes-the-whole-house-smell-like-a-bakery kind of treat. Well, my friend, you’ve just stumbled upon the recipe that answers that call every single time.
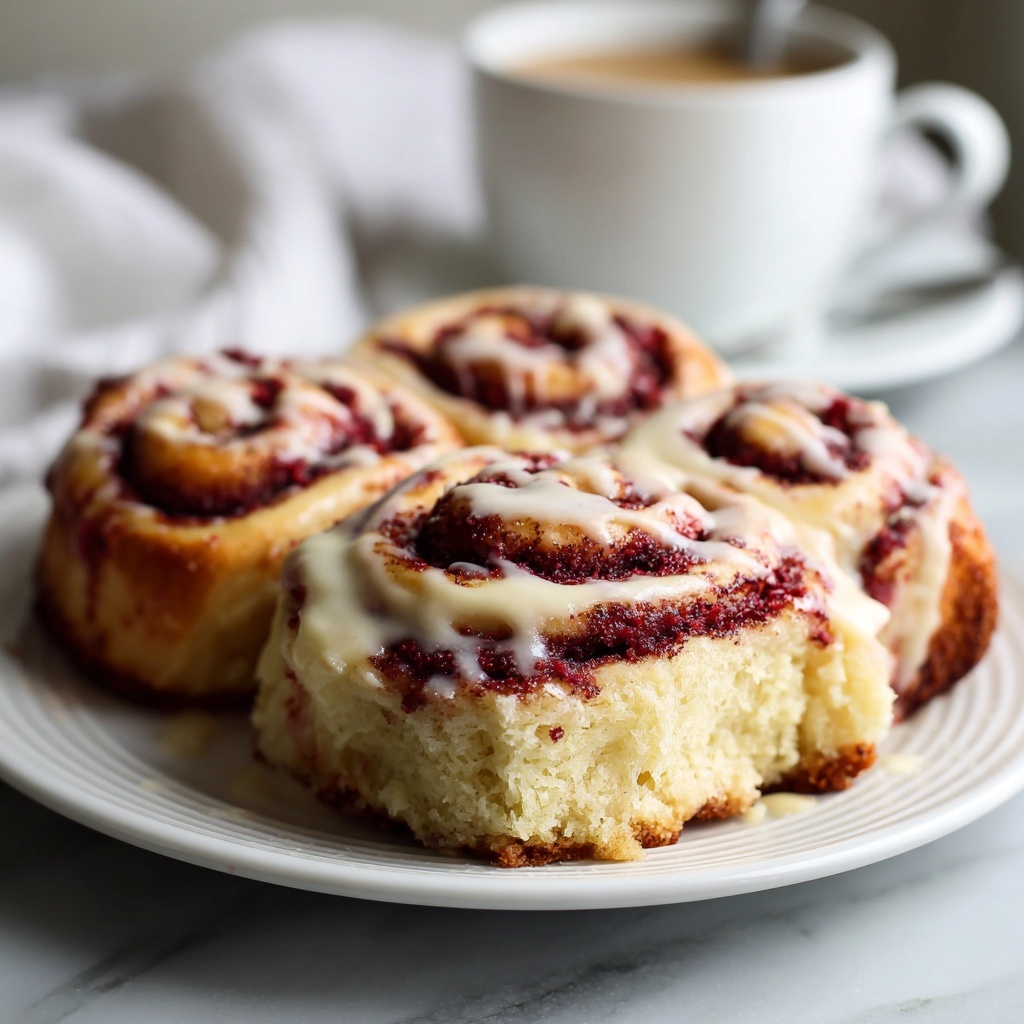
Today, we’re taking two of the world’s greatest comfort foods—the rich, romantic charm of red velvet cake and the warm, spiced swirl of a classic cinnamon roll—and smashing them together into one breathtaking masterpiece. These Red Velvet Cinnamon Rolls are the definition of a happy accident. They’re soft, they’re stunningly vibrant, and that tangy cream cheese glaze dripping down every layer? Pure magic.
I know what you might be thinking: “Isla, yeast dough? That sounds fussy!” But I promise you, we’re keeping it fun and never fussy. I’ve tested this recipe through and through in my own chaotic kitchen (often with a toddler tugging on my apron strings), and I’ve packed it with all my best tips and hacks to make sure you feel like a rockstar baker. Whether it’s for a Valentine’s Day surprise, a holiday brunch centerpiece, or just because it’s Tuesday, these rolls are about to become your new secret weapon. So, tie on your favorite apron, and let’s bake some joy!
Print
Red Velvet Cinnamon Rolls (Soft, Swirled & Stunning for Any Celebration)
- Total Time: ~2½ hours
- Yield: 9 Rolls 1x
Description
These red velvet cinnamon rolls are the ultimate mash-up of rich cocoa flavor and sweet, gooey cinnamon goodness. With their vibrant swirl and tangy cream cheese glaze, they’re perfect for Valentine’s Day, brunch, or any time you want a show-stopping treat that feels as special as it tastes.
Ingredients
For the Dough:
2¾ cups all-purpose flour
2 tbsp cocoa powder
¼ cup sugar
1 packet (2¼ tsp) instant yeast
½ tsp salt
¾ cup warm milk
3 tbsp butter, melted
1 egg
Red food coloring (gel preferred)
For the Filling:
¼ cup softened butter
½ cup brown sugar
1 tbsp cinnamon
For the Cream Cheese Glaze:
4 oz cream cheese, softened
2 tbsp butter, softened
½ cup powdered sugar
½ tsp vanilla extract
1–2 tbsp milk (to thin if needed)
Instructions
In a bowl, mix flour, cocoa, sugar, yeast, and salt. Add warm milk, melted butter, egg, and red food coloring. Mix into a soft dough. Knead 5–7 minutes until smooth.
Cover and let rise 1 hour, or until doubled.
Roll dough into a rectangle (about ¼-inch thick). Spread with softened butter, sprinkle with brown sugar and cinnamon.
Roll tightly and cut into 9 even rolls. Place in a greased baking dish.
Cover and rise another 30–45 minutes.
Bake at 350°F (175°C) for 20–25 minutes until puffy and lightly browned.
Mix glaze ingredients until smooth. Spread over warm rolls and serve.
- Prep Time: 25 minutes
- Cook Time: 25 mins
- Category: Breakfast
- Cuisine: American
A Dash of Nostalgia: Where This Recipe Was Born
This recipe has its roots in one of my favorite kitchen memories. Picture this: It’s a chilly February morning in my little coastal hometown. I’m about ten years old, and my grandma and I are in her warm, flour-dusted kitchen, preparing for our annual Galentine’s Day brunch. Her signature move was always a towering plate of classic cinnamon rolls, but this particular year, I had a wild idea. We had just made a red velvet cake for my dad’s birthday, and I was obsessed with that brilliant red color.
“Grandma,” I announced, holding up the bottle of food coloring with all the seriousness a ten-year-old can muster. “What if we made the cinnamon rolls… red?” She didn’t skip a beat. With a twinkle in her eye, she said, “Well, Isla, the only rule in this kitchen is that there are no rules when it comes to having fun.” We kneaded that vibrant red dough with our hands, laughing as they turned pink, and created a batch of the most shocking, wonderful cinnamon rolls our tiny town had ever seen. They were a massive hit, and that day taught me that the best recipes often come from a little bit of courage and a whole lot of play. This version is a loving, grown-up homage to that day in Grandma’s kitchen.
Gathering Your Flavor Crew: The Ingredients
Let’s get our mise en place ready! (That’s just a fancy chef term for having all your ingredients prepped and measured—it makes everything flow so smoothly). Here’s your shopping list for these stunning rolls.
For the Dough:
- 2¾ cups All-Purpose Flour: The sturdy backbone of our dough. For a slightly lighter roll, you can swap in ½ cup of bread flour, but all-purpose works beautifully.
- 2 tbsp Cocoa Powder: This is the secret! It gives that authentic, subtle red velvet flavor. Use natural, unsweetened cocoa for the best result.
- ¼ cup Granulated Sugar: Just enough to feed the yeast and add a touch of sweetness to the dough itself.
- 1 packet (2¼ tsp) Instant Yeast: Our little miracle worker. Instant yeast is my best friend because you can mix it right in with the dry ingredients—no proofing required!
- ½ tsp Salt: Crucial for balancing all the sweetness. Don’t skip it!
- ¾ cup Warm Milk: Whole milk will give you the richest, softest dough, but 2% works great too. “Warm” means just that—about 110°F (43°C). Think warm bath water, not hot. Too hot will kill the yeast!
- 3 tbsp Butter, melted: For that irresistible, tender crumb. I use unsalted, but salted works in a pinch.
- 1 large Egg: This adds richness and helps structure the dough for a perfect, pillowy texture.
- 1-2 tbsp Red Food Coloring (gel preferred): Gel coloring is my #1 tip here! It gives you that vibrant, signature red color without adding extra liquid to your dough, which can throw off the texture. If you only have liquid, you’ll need quite a bit more.
For That Gooey Cinnamon Filling:
- ¼ cup Softened Butter: Softened, NOT melted. This makes it easy to spread in a thin, even layer without tearing the dough.
- ½ cup Brown Sugar: I love the deep molasses flavor of dark brown sugar here, but light brown works perfectly too.
- 1 tbsp Cinnamon: Use the good stuff! Give it a quick sniff—it should smell fragrant and sweet.
For the Legendary Cream Cheese Glaze:
- 4 oz Cream Cheese, softened: The star of the show. Full-fat will give you the creamiest, most luxurious glaze.
- 2 tbsp Butter, softened: Because more butter is always a good idea. It adds a silky richness.
- ½ cup Powdered Sugar: Sweetens and thickens the glaze. Sift it if it’s lumpy!
- ½ tsp Vanilla Extract: The flavor enhancer. Always use pure vanilla if you can!
- 1-2 tbsp Milk: This is your throttle for consistency. Start with one and add more until it’s perfectly drizzle-able.
Let’s Get Rolling: The Step-by-Step Fun
Ready to create some magic? Follow these steps, and you’ll be a red velvet roll pro in no time. I’m right here with you in spirit, cheering you on!
- Create Your Dough Base: In the bowl of a stand mixer fitted with a dough hook (or a large bowl if you’re kneading by hand—get those arms ready!), whisk together your flour, cocoa powder, sugar, instant yeast, and salt. This ensures everything is evenly distributed. Now, pour in the warm milk, melted butter, egg, and that glorious red food coloring. Chef’s Tip: Start with one tablespoon of gel coloring. You can always add more after you start mixing if you want a deeper red.
- Knead to Smooth Perfection: Turn your mixer on low to combine, then increase to medium speed. Let it knead for 5-7 minutes. You’re looking for a soft, slightly tacky dough that pulls away from the sides of the bowl. If it’s sticking a lot, add a tablespoon of flour at a time. If you’re kneading by hand, turn the shaggy dough out onto a floured surface and knead for 8-10 minutes. Use the “windowpane test”: take a small piece of dough and gently stretch it. If you can stretch it thin enough to see light through it without it tearing, you’re done!
- The First Rise (Let it Breathe!): Shape your beautiful red dough into a ball. Place it in a lightly greased bowl, turning it once to coat it lightly in oil. This prevents a skin from forming. Cover the bowl with a clean kitchen towel or plastic wrap and let it rest in a warm, draft-free spot. I like to turn my oven on for just one minute, then turn it off and place the bowl inside. Let it rise for about 1 hour, or until doubled in size. Don’t rush this—it’s where the flavor and airy texture develop!
- Roll and Fill (The Best Part): Once your dough is puffy and perfect, punch it down gently to release the air. Turn it out onto a lightly floured surface and roll it into a rectangle, about 9×13 inches and ¼-inch thick. Now, spread the ¼ cup of softened butter over the entire surface, leaving a small border along one long edge—this will help it seal later. In a small bowl, mix the brown sugar and cinnamon, then sprinkle it evenly over the butter. Chef’s Hack: Use your hands to press the sugar mixture gently into the butter so it doesn’t all fall out when you roll.
- Create the Signature Swirl: Starting with the long edge closest to you (the one with the sugar border), begin rolling the dough tightly and evenly into a log. When you get to the bare edge, pinch the seam firmly to seal it. You should have a gorgeous, long red log filled with cinnamon sugar.
- Slice with Confidence: Using a sharp serrated knife, a piece of unflavored dental floss, or a bench scraper, cut the log into 9 even rolls. To use dental floss (my favorite no-squish method!), slide a 12-inch piece of floss under the roll, cross the ends over the top, and pull—it gives you a perfect, clean cut. Place the rolls cut-side up in a greased 9×9 inch baking dish or round cake pan.
- The Second Rise (Almost There!): Cover the pan with a towel and let the rolls rise again for 30-45 minutes. They should look puffy and have snuggled up close to each other. Meanwhile, preheat your oven to 350°F (175°C).
- Bake to Golden Bliss: Once risen, pop those beauties into the preheated oven. Bake for 20-25 minutes. You’ll know they’re done when they’re puffed up, the tops are set, and the edges are just starting to get a hint of golden brown. The center might look a little soft, but that’s okay—it will be cooked through! Chef’s Note: Don’t overbake, or they can dry out.
- Glaze and Devour: While the rolls are baking, make your glaze. In a medium bowl, beat the softened cream cheese and butter together until completely smooth. Beat in the powdered sugar and vanilla. Then, stream in the milk, one tablespoon at a time, until it reaches your desired drizzling consistency. Let the rolls cool in the pan for about 10 minutes after baking—this lets them set just enough. Then, pour that luscious cream cheese glaze all over the warm rolls. Serve immediately and watch the happy dances begin!
How to Serve These Vibrant Beauties
Presentation is part of the fun! I love serving these rolls right from the baking dish for a cozy, family-style feel. But for a real “wow” factor, you can carefully transfer one roll to each individual plate with a spatula, making sure to drizzle extra glaze from the pan over the top. They are heavenly all on their own, but if you’re feeling extra, a cold glass of milk, a hot cup of coffee, or even a side of fresh berries to cut through the sweetness is pure perfection. These are best served warm, when the glaze is melty and the cinnamon sugar is still gooey.
Ride Your Own Flavor Wave: Fun Variations
This recipe is a fantastic canvas for your creativity! Here are a few of my favorite twists:
- Chocolate Chip Swirl: Sprinkle a handful of mini chocolate chips over the cinnamon-sugar filling before rolling.
- Orange Zest Zing: Add the zest of one orange to the cream cheese glaze for a bright, citrusy kick that pairs amazingly with the chocolate.
- Pecan Praline: Before the second rise, sprinkle chopped toasted pecans over the rolls in the pan. They’ll toast up and get deliciously crunchy in the oven.
- White Chocolate Drizzle: Swap the cream cheese glaze for a simple glaze made with powdered sugar, milk, and melted white chocolate.
- Naturally Red: For a natural food coloring option, you can experiment with 1-2 tablespoons of beet powder mixed in with the dry ingredients. The color will be more muted but still lovely!
Isla’s Chef’s Notes & Kitchen Confessions
This recipe has been a labor of love, and it’s evolved so much since that first batch in my grandma’s kitchen. My biggest “aha!” moment was switching to gel food coloring—it was a total game-changer for achieving that deep, vibrant red without a soggy dough disaster. I’ve also learned to embrace the mess. The first time I made these, I got red food coloring *everywhere*—on my face, my phone, my dog… it looked like a crime scene! Now I wear an apron and use a silicone spatula for the initial mixing.
Don’t be intimidated by the rise times. This is the perfect recipe to make on a slow morning while you’re puttering around the house, doing laundry, or catching up on your favorite show. The dough is very forgiving. And a little secret? I sometimes prepare the rolls up through the second rise the night before, cover the pan tightly with plastic wrap, and pop it in the fridge. In the morning, I just let them sit on the counter for 30 minutes to take the chill off, then bake as usual. Fresh, warm rolls for breakfast with zero morning fuss!
Your Questions, Answered! (FAQs & Troubleshooting)
I’ve gotten so many DMs about this recipe over the years! Here are the answers to the most common questions.
Q: My dough didn’t rise. What went wrong?
A: Oh, I’ve been there! The most common culprits are old yeast or milk that was too hot. Yeast is a living organism, and if it’s past its expiration date, it won’t work. Always check the date! Also, if your milk was too hot (over 130°F/54°C), it likely killed the yeast. A thermometer is a cheap and handy tool to prevent this. If you think this happened, it’s best to start over.
Q: Can I make these rolls ahead of time?
A: Absolutely! You have two great options. 1) Overnight Method: Assemble the rolls as directed, cover the pan tightly with plastic wrap, and refrigerate immediately for up to 24 hours. The next morning, let them sit at room temperature for 30-60 minutes (until puffy) before baking. 2) Freeze Before Baking: After slicing and placing in the pan, freeze the UNRISEN rolls until solid. Then transfer to a freezer bag. The night before baking, place the frozen rolls in a greased pan, cover, and let them thaw and rise in the fridge overnight. Then, bake as usual, adding a few extra minutes if needed.
Q: My rolls are a little dense. How can I make them lighter?
A> A dense roll usually points to one of three things: not enough kneading (so the gluten didn’t develop properly), the dough rose in a spot that was too cool, or you used too much flour. Next time, make sure you knead until the dough passes the windowpane test, find a nice warm spot for rising (like that warmed-then-off oven trick!).