Mustard Hasselback Kielbasa Bites: Your New Go-To Party Hero!
Hey there, flavor friend! Isla here, from my cozy kitchen to yours. Tell me, have you ever been to a gathering, taken one bite of a snack, and immediately needed to hunt down the person who made it just to get the recipe? That’s the kind of magic we’re creating today. I live for those moments—the raised eyebrows, the mumbled “oh wow” through a full mouth, the quick swarm of people around a platter that empties in seconds. That’s the power of a truly great, no-fuss recipe.
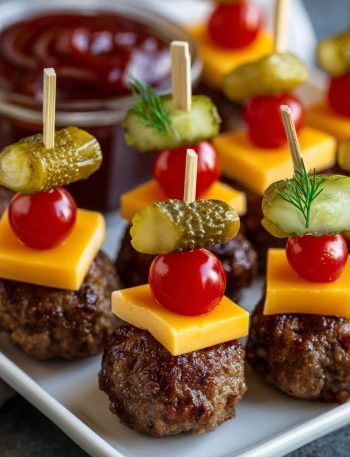
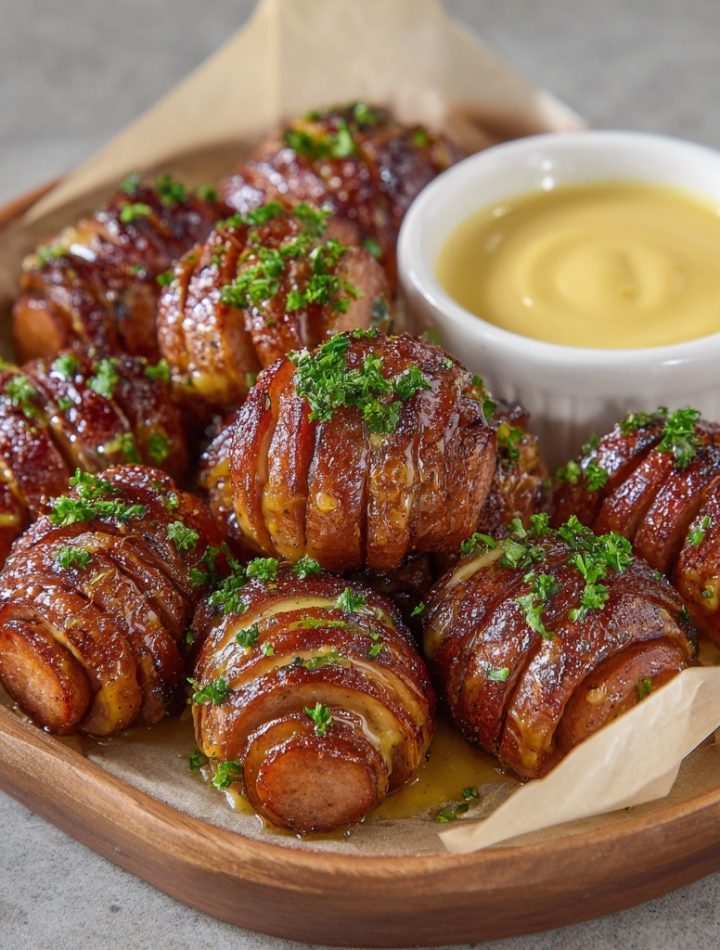
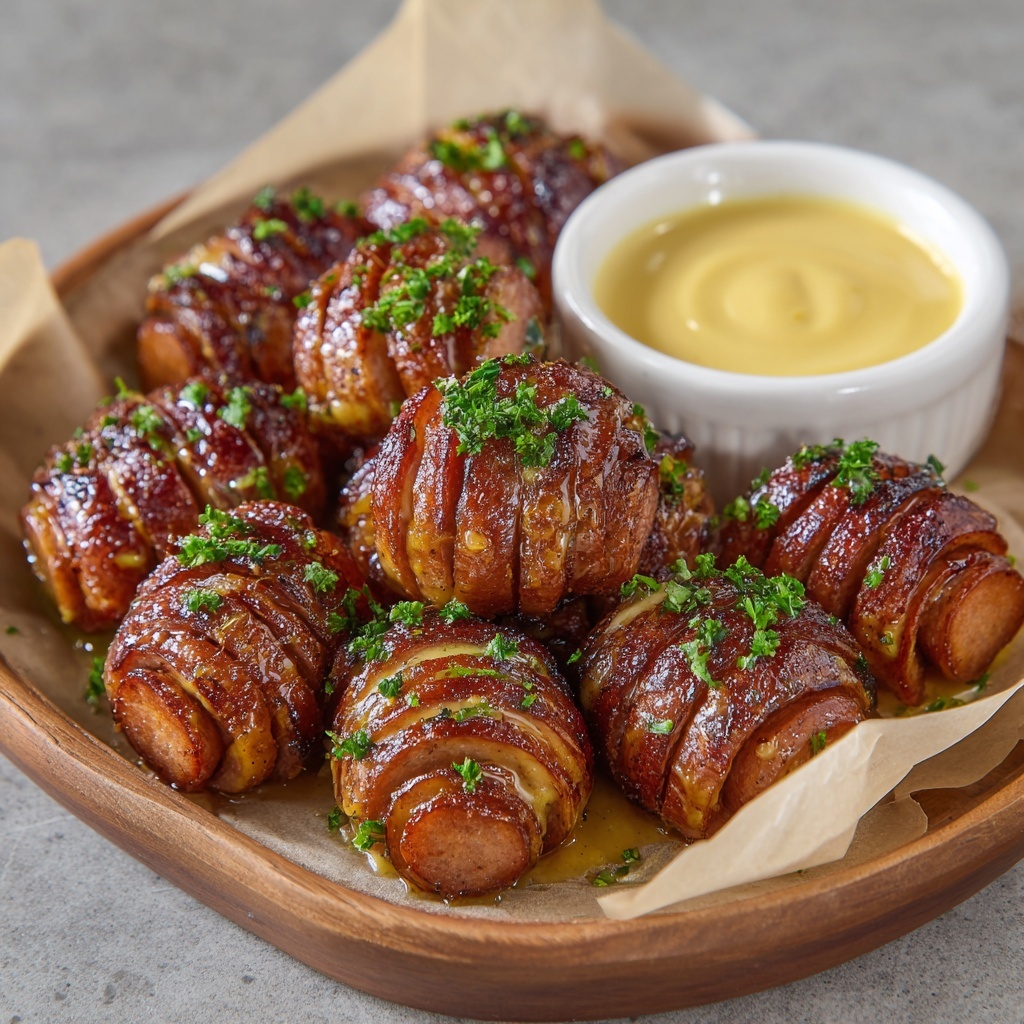
And let’s be real, we’ve all been tasked with bringing “a little something” to a party, only to spend hours stressing over what to make. It needs to be easy, it needs to travel well, and it absolutely needs to be a crowd-pleaser. Enter these Mustard Hasselback Kielbasa Bites. They are the undeniable rockstars of the snack table. We’re taking juicy, smoky kielbasa and giving it the hasselback treatment—those little accordion cuts you see on fancy potatoes—which creates a ton of nooks and crannies for our sweet and tangy mustard glaze to caramelize into. The result? A bite that’s crispy on the edges, tender in the middle, and packed with a flavor that’s seriously bold and impossible to resist.
So, whether you’re gearing up for the big game, hosting a casual get-together, or just treating yourself to a next-level snack, this recipe is your new secret weapon. It’s fun, it’s flavorful, and it proves that the best food doesn’t have to be complicated. Let’s get cooking and make your kitchen the most delicious place to be!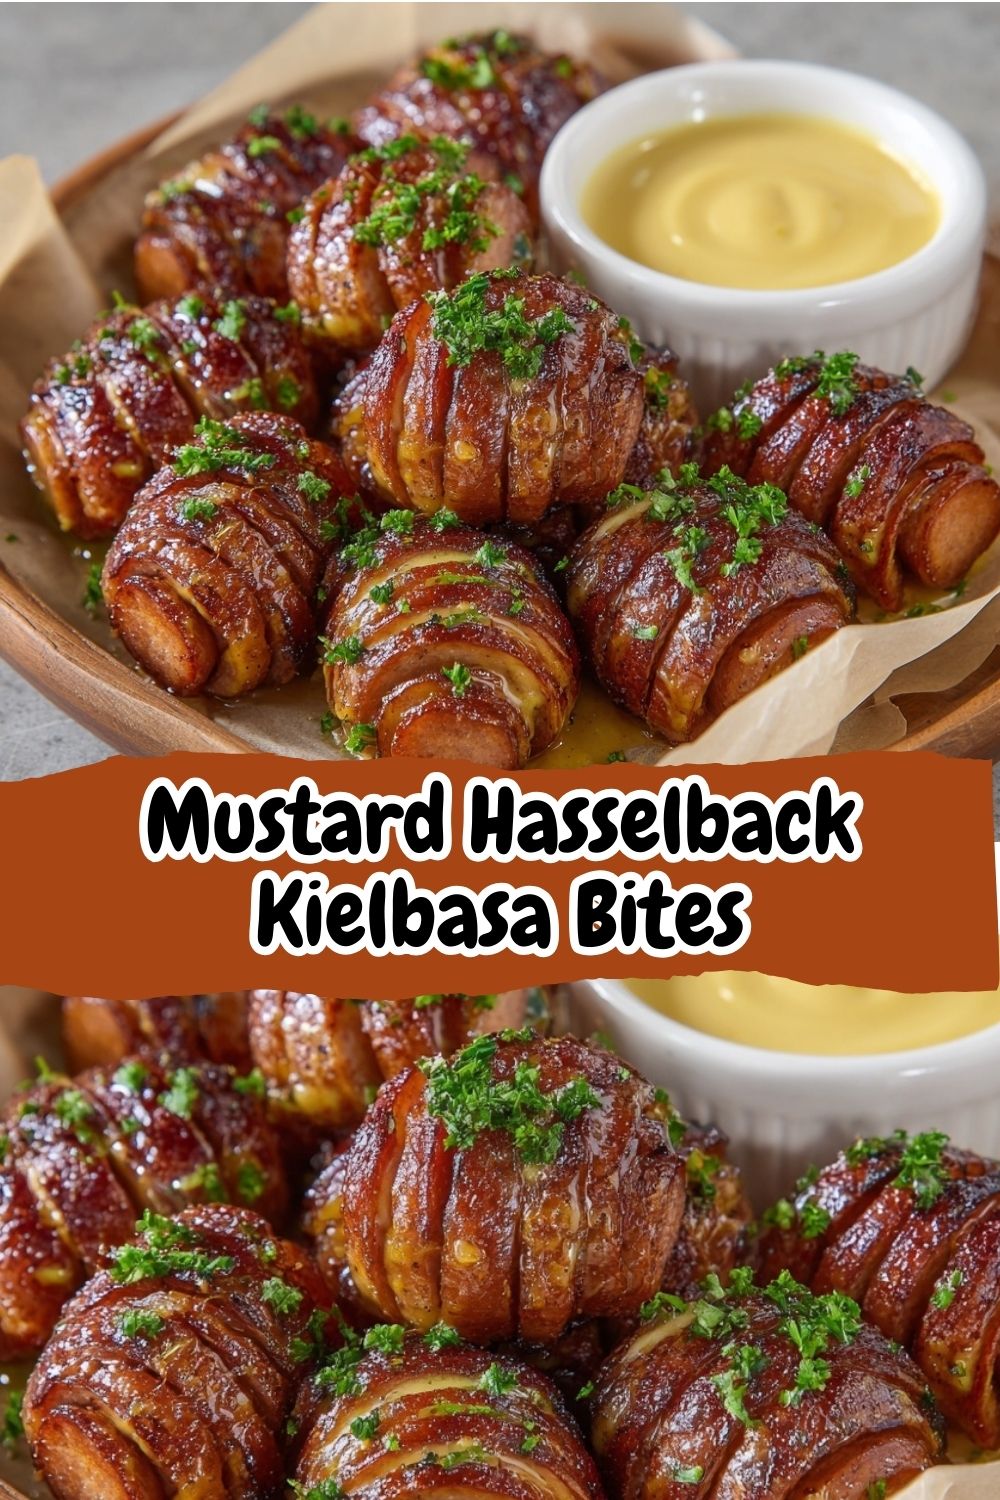
A Tale of Two Mustards and One Happy Family
This recipe takes me right back to my childhood, standing on a wobbly stool next to my dad in our tiny, fish-scented kitchen. He was a man of simple tastes but a wizard with whatever was in the fridge. His version of “fancy” appetizers was slicing up smoked sausage and pan-frying it until it was blistery and perfect. He’d always have two mustards on the table—a smooth yellow one for my mom and a fiery, grainy one for him. The rule was you had to try both.
One rainy Sunday, during a particularly intense board game marathon with friends, I decided to combine his two-mustard philosophy into one glorious glaze. I whisked them together with a big glug of honey from a local farm stand, and the second it hit the hot sausage, the whole house smelled like pure, unadulterated joy. The sizzle, the aroma, the way my friends’ eyes lit up when they tried it… it was a core memory in the making. That’s the spirit I’ve bottled up in this recipe. It’s a little nod to my dad’s kitchen wisdom and a big high-five to the power of a simple, shareable bite that brings people together.
Gather Your Flavor All-Stars
Here’s everything you need to create this snack-table sensation. I’ve included some of my favorite swaps and chef-y insights to make this recipe truly your own!
- 2 lbs Kielbasa Sausage: This is our star! Look for a good quality, fully-cooked smoked kielbasa. The smoky flavor is non-negotiable for that classic taste. Chef’s Insight: If you can find a Polish brand from your local butcher or international aisle, they often have a superior snap and flavor.
- ¼ cup Dijon Mustard: Our flavor base. Dijon brings a sharp, tangy complexity that cuts through the richness of the sausage. Substitution Tip: No Dijon? Yellow mustard works in a pinch, but the flavor will be a bit brighter and less complex.
- 2 tbsp Whole Grain Mustard: This is the texture hero! Those little mustard seeds pop with flavor and give a wonderful rustic feel. Chef’s Insight: This is my secret for a “from-a-fancy-bistro” feel. Don’t skip it!
- 3 tbsp Honey or Brown Sugar: Hello, sweetness and caramelization! Honey gives a floral note, while brown sugar offers a deeper, almost molasses-like warmth. Substitution Tip: Maple syrup is a FANTASTIC swap here for a fall-inspired twist.
- 1 tbsp Apple Cider Vinegar: A splash of acidity is key to balancing the sweet and savory elements. It brightens the whole dish. Chef’s Insight: If you don’t have ACV, a little fresh lemon juice will do the trick.
- ½ tsp Garlic Powder: We’re using powder here for its ability to evenly coat every nook and cranny. Substitution Tip: One small minced garlic clove works too, but be careful not to burn it in the hot oven.
- Fresh Parsley for Garnish: A sprinkle of green at the end makes everything look fresh and finished. It’s not just for looks—it adds a tiny pop of freshness.
For the Optional (But Highly Recommended) Mustard Dipping Sauce:
- ¼ cup Mayonnaise: The creamy, cool base for our dip. Substitution Tip: Greek yogurt or sour cream are awesome, tangier alternatives.
- 1 tbsp Dijon Mustard & 1 tsp Honey: We’re echoing the glaze flavors here to create a cohesive taste experience.
- Pinch of Salt and Pepper: The essential seasonings to wake up all the flavors in the dip.
Let’s Make Some Magic: Step-by-Step
Ready to transform these simple ingredients into the talk of the party? Follow these steps, and you’ll be a hasselback hero in no time. I’ve packed this section with all my favorite kitchen hacks to ensure your success!
- Preheat and Prep: First things first, get that oven roaring hot to 425°F (220°C). A hot oven is our secret weapon for getting those crispy, caramelized edges without drying out the sausage. While it’s heating, line a baking sheet with parchment paper. Chef’s Hack: This isn’t just for easy cleanup! The parchment paper prevents the sugary glaze from sticking and burning onto the pan, giving you perfect little bites every time.
- The Hasselback Hack: Now for the fun part! Take your kielbasa coins and make small, vertical cuts about halfway down through each one. Don’t cut all the way through! I like to place the coin flat on the cutting board and rest two chopsticks on either side of it—they act as little guard rails so your knife can’t go too deep. Chef’s Insight: This technique isn’t just for looks. Those cuts dramatically increase the surface area, which means more crispy bits and more places for that glorious glaze to cling to.
- Whisk the Wow-Worthy Glaze: In a medium-sized bowl, grab a whisk and get ready to make magic. Combine the Dijon mustard, whole grain mustard, honey (or brown sugar), apple cider vinegar, and garlic powder. Whisk it until it’s smooth and beautifully combined. Give it a taste! This is your moment to adjust—want it sweeter? A bit more honey. Tangier? A dash more vinegar. You’re the boss of this sauce.
- Get Cozy with the Glaze: Time to introduce the kielbasa to its new best friend. Dump all your hasselbacked sausage coins right into the bowl with the glaze. Using a spatula or your hands (my preferred messy-but-fun method!), toss everything together until every single piece is thoroughly coated. Be gentle but deliberate, making sure you’re getting that glaze down into all those little cuts you made.
- Roast to Perfection: Spread the glazed kielbasa bites out in a single layer on your prepared baking sheet. Give them a little space so the hot air can circulate and work its crispy magic. Pop them into the preheated oven and roast for 25-30 minutes. You’re looking for them to be deeply caramelized, sizzling, and the edges of the cuts to be slightly crispy. Chef’s Hack: For extra caramelization, I like to give the pan a quick shake or stir about halfway through the cooking time.
- Whip Up the Dipping Sauce: While the bites are roasting, let’s make that dip. It takes 30 seconds! In a small bowl, stir together the mayonnaise, Dijon mustard, honey, and a pinch of salt and pepper. Done. Cover it and pop it in the fridge to let the flavors meld while the main event finishes in the oven.
- The Grand Finale: Once your kielbasa bites are beautifully bronzed and bubbly, carefully take the pan out of the oven. Transfer them to a serving platter, sprinkle generously with that fresh, chopped parsley for a beautiful color contrast, and serve immediately with the cool, creamy mustard dip on the side. Get ready for the compliments to roll in!Print

Mustard Hasselback Kielbasa Bites : Sweet, Savory & Game Day-Ready
- Total Time: 45 minutes
- Yield: 12 rolls 1x
Description
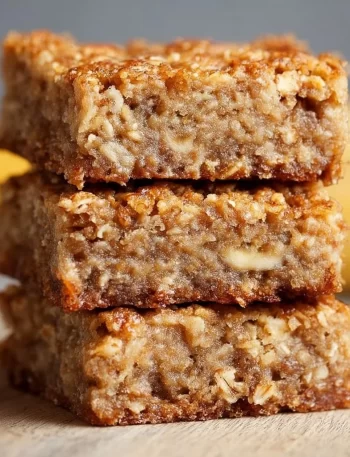
These Banana Bread Cinnamon Rolls combine the best of both worlds—moist banana bread flavor rolled into soft, cinnamon-swirled buns, topped with a dreamy glaze. Sweet, tender, and comfort-filled, they’re perfect for brunch, holidays, or a cozy baking day. Once you try them, there’s no going back to plain rolls!
Ingredients
Scale1 cup mashed ripe bananas (about 2–3 bananas)
¼ cup granulated sugar
¼ cup unsalted butter, melted
½ cup milk, warmed to about 110°F
(Note: This image offers a partial ingredient list. Full recipe likely includes flour, yeast, cinnamon-sugar filling, and icing glaze.)
Instructions
Mix mashed bananas, sugar, melted butter, and warm milk in a large bowl.
Add yeast (if not already mixed in) and let it sit until bubbly, about 5–10 minutes.
Gradually stir in flour until a soft dough forms. Knead until smooth and elastic.
Let rise in a warm spot until doubled in size (about 1 hour).
Roll out dough into a rectangle, spread with cinnamon sugar and butter filling, then roll up and slice.
Place in a greased baking dish, let rise again, and bake at 350°F (175°C) for 20–25 minutes.
Drizzle with cream cheese or vanilla glaze while warm.
- Prep Time: 20 minutes
- Cook Time: 25 mins
- Category: Snack
How to Serve These Flavor Bombs
Presentation is part of the fun! I love serving these on a rustic wooden board or a simple white platter to let their gorgeous, glazed color really pop. Pile them high right out of the oven when they’re at their crispiest. Place the bowl of mustard dipping sauce right in the middle, and maybe add a few extra sprigs of parsley around the edge for a chef’s touch. Don’t forget to put out a small bowl for the discarded toothpicks—it keeps things tidy! For a real crowd-feeding setup, I’ll often spear each bite with a colorful toothpick right on the platter, making them the ultimate grab-and-go snack.
Ride Your Own Flavor Wave: Fun Variations!
One of my favorite things about this recipe is how adaptable it is. Feel free to get creative and make it your own!
- Spicy Kick: Add ½ teaspoon of smoked paprika or a few shakes of your favorite hot sauce to the glaze.
- Apple & Onion Twist: Toss a thinly sliced sweet onion and a diced apple onto the baking sheet with the kielbasa. They’ll roast alongside the bites and soak up all the delicious glaze drippings.
- BBQ Swap: Not a mustard fan? Substitute your favorite BBQ sauce for the mustard glaze. It’s a completely different, but equally delicious, direction!
- Lower-Carb Option: Use a sugar-free maple syrup or a monk fruit sweetener in place of the honey.
- Mini Smokies Version: For a super cute, poppable version, use little smoked sausage links (like Lit’l Smokies) and just toss them in the glaze without slicing. Reduce the cooking time to 15-20 minutes.
Isla’s Chef Notes & Kitchen Confessions
This recipe has become a staple in my home, and like any good friend, it’s evolved over time. I originally made it with just Dijon, but adding the whole grain mustard was a game-changer—it was a happy accident after I ran out of Dijon one day! I’ve also learned that while these are best served immediately, you can absolutely prep the glaze and make the hasselback cuts on the sausage a few hours ahead. Just keep them separate in the fridge and toss them right before they go in the oven.
My biggest kitchen confession? I once made a double batch for a holiday party and completely forgot the dipping sauce. You know what? They were still gone in under ten minutes. The glaze is so flavorful that the dip, while amazing, is a bonus. So if you’re in a real pinch, you can skip it—but trust me, it’s worth the extra 30 seconds. This recipe is all about joy, not stress. So put on some music, don’t worry about a few messy fingers, and enjoy the process.
Your Questions, Answered!
I’ve made this recipe countless times and have answered tons of questions from the BiteTide community. Here are the most common ones to help you out!
Q: Can I make these Mustard Hasselback Kielbasa Bites ahead of time?
A: You can do some of the work ahead! You can slice the kielbasa and whisk the glaze up to a day in advance. Keep them separate in the fridge. For the best texture and crispiness, I highly recommend tossing and roasting them right before you want to serve them. They just don’t reheat as well once glazed and cooked.
Q: My glaze is burning in the oven! What did I do wrong?
A> Great question! This usually means your oven is running a bit hot, or your rack is too high. Honey and sugar can burn quickly. The fix is simple: try lowering your oven temperature to 400°F (200°C) and/or moving your baking sheet to the middle rack. Also, double-check that you’re using parchment paper, as it provides a buffer. Don’t worry if the edges are a *little* dark—that’s caramelization and it’s delicious—but if it’s tasting bitter, just adjust the temp next time.
Q: I can’t find kielbasa. What’s a good substitute?
A: No problem at all! Any fully-cooked, smoked sausage will work beautifully. Andouille sausage will give you a spicier kick, while a good quality smoked bratwurst is a very close substitute. Just make sure it’s pre-cooked so you’re just heating and glazing it, not trying to cook it through from raw.
Q: Help! My slices are sticking together when I try to cut them.
A> This is a common little hiccup! If the sausage is very soft, it can be tricky. Here are two tips: 1) Pop the whole kielbasa link in the freezer for 15-20 minutes before slicing. This firms it up perfectly for clean cuts. 2) Use a super sharp knife. A dull knife will mash the sausage instead of slicing through it cleanly.
Nutritional Information*
Servings: 8 | Prep Time: 10 mins | Cook Time: 25 mins
Calories: 290 | Protein: 11g | Fat: 24g | Carbs: 6g | Sugar: 4g | Sodium: 680mg
*Please note: Nutritional information is an estimate only and can vary based on the specific brands and ingredients you use.