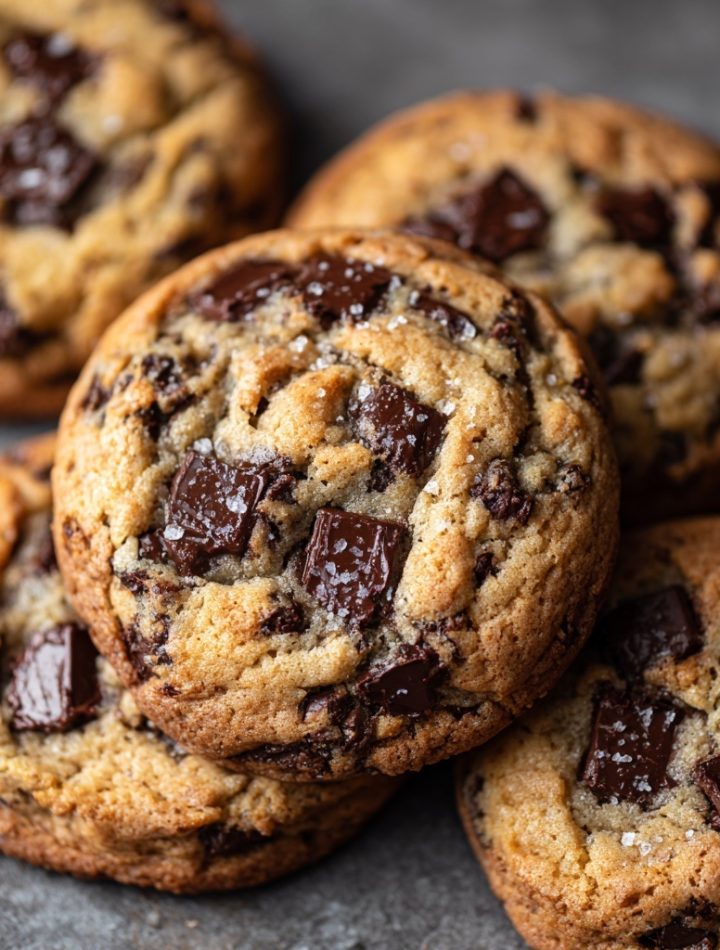
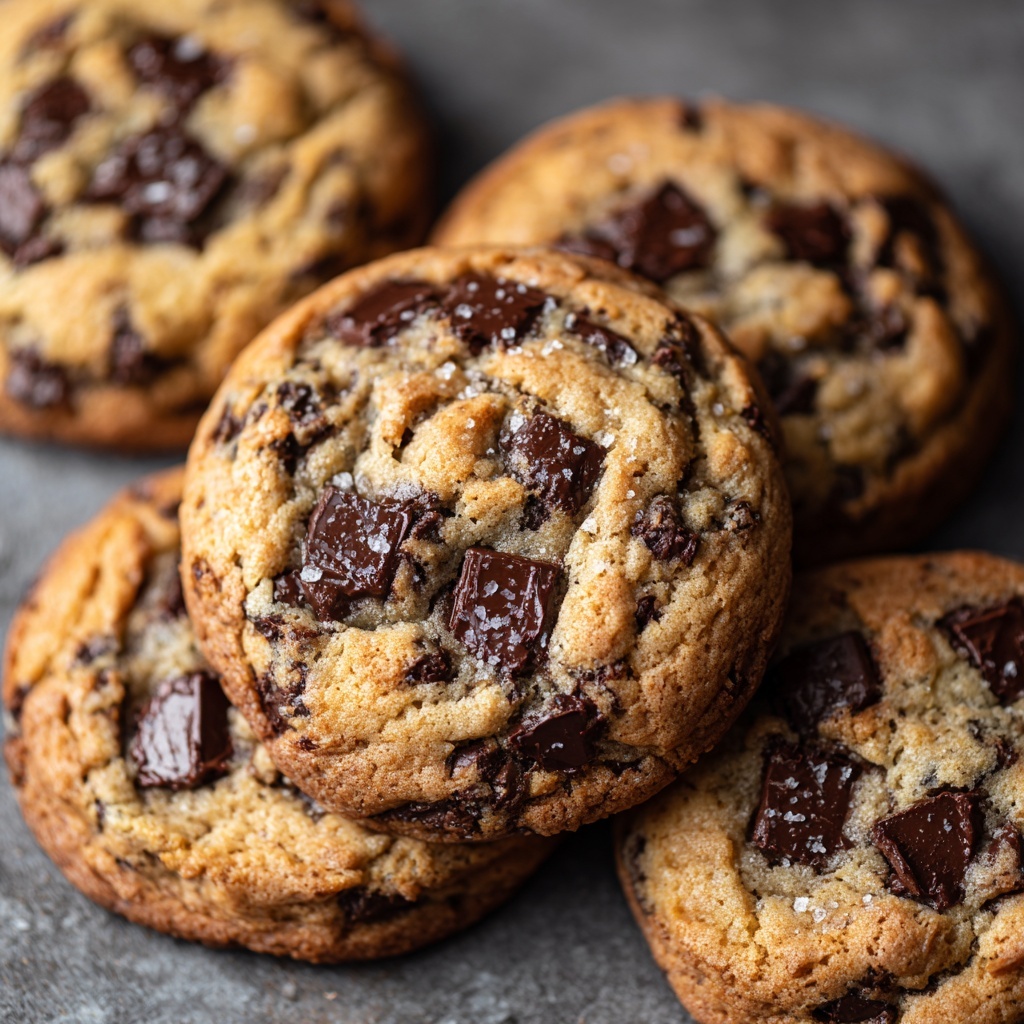
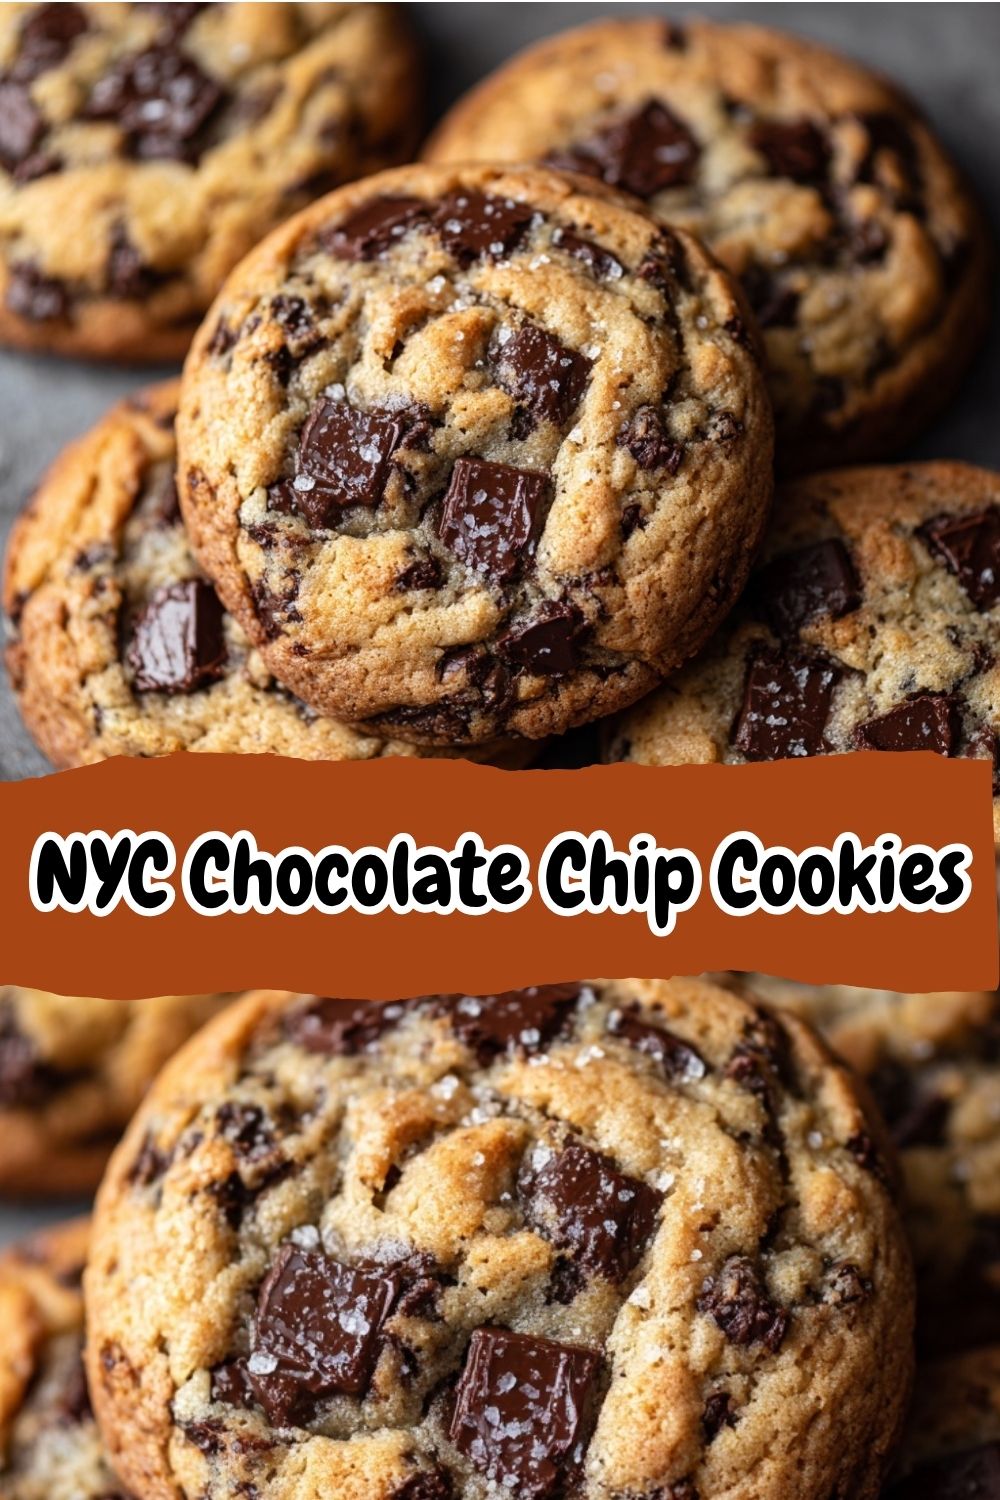
Thick NYC-Style Chocolate Chip Cookies with Chocolate Chunks & Sea Salt
Your New Favorite Cookie is Here to Stay
Hey there, friend! Isla here, your partner-in-crime for all things delicious. Let’s talk about a cookie that’s less of a snack and more of an experience. You know the one—the kind you dream about after a long day, the kind that’s so thick and decadent it feels like a hug from the inside. I’m talking about the legendary, bakery-style, NYC chocolate chip cookie.
This isn’t just any chocolate chip cookie. This is the cookie of your dreams. We’re talking a ridiculously thick, almost brownie-like center that stays gloriously soft and gooey for days, all wrapped in a perfectly golden, slightly crisp edge. It’s loaded with pools of melted chocolate chunks and finished with a flaky sprinkle of sea salt that cuts through the sweetness in the most perfect way. This recipe is my love letter to that iconic bakery treat, but designed for our real, sometimes chaotic, home kitchens. No fancy equipment or hard-to-find ingredients needed—just a whole lot of love and a few secret chef hacks I’m so excited to share with you. So, preheat your oven and get ready to bake up some pure, unadulterated joy.
The Cookie That Started It All
My obsession with the perfect chocolate chip cookie started not in a fancy New York bakery, but in my Grandma Dotty’s warm, flour-dusted kitchen. Her cookies were legendary in our small town. They were the classic, thin, buttery kind that spread into lacy, crisp circles—and I adored them. But one rainy afternoon, a batch went… differently. She’d run out of softened butter and used cold, straight from the fridge. We were in a hurry, so we only chilled the dough for a few minutes. What came out of the oven were these puffy, thick, and wonderfully under-baked-looking cookies. We thought we’d failed.
Until we took a bite. They were a revelation! Dense, rich, and so chewy. It was my first taste of what I now know as that “NYC-style” texture. Grandma Dotty just winked and said, “See, honey? The best mistakes are the tasty ones.” That happy accident forever changed my baking philosophy. It taught me that sometimes, breaking the “rules” (like using cold butter!) leads to the most magical, memorable creations. This recipe is a nod to her, to that rainy day, and to the beautiful, delicious surprises that can happen in the kitchen.
Print
NYC Chocolate Chip Cookies : Thick, Gooey & Bakery-Style Perfection
- Total Time: ~1 hour 30 minutes
- Yield: 12 large cookies 1x
Description
These NYC-style chocolate chip cookies are big, bold, and irresistibly rich. Made with cold butter, loads of dark and light sugars, and plenty of melty chocolate chunks, they bake up thick with soft, gooey centers and golden edges. A pinch of sea salt brings out the richness, making each bite absolutely crave-worthy.
Ingredients
Cookie Dough:
1 cup (230g) unsalted butter, cold and cubed
¾ cup (150g) granulated sugar
¾ cup (165g) packed dark brown sugar
2 large eggs, room temp
1 tbsp vanilla extract
2¾ cups (345g) all-purpose flour (spooned & leveled)
1 tsp baking soda
1 tsp fine sea salt (plus more for topping)
2 cups (340g) semi-sweet chocolate chunks (not chips for best melt)
Instructions
Make the Dough:
In a stand mixer, cream cold butter and both sugars until just combined (small butter flecks are fine).
Beat in eggs one at a time, then mix in vanilla.
In a separate bowl, whisk together flour, baking soda, and salt.
Gradually mix dry into wet ingredients until just combined.
Fold in chocolate chunks by hand.
Chill:
Scoop dough into 12 large balls (about ¼ cup each).
Place on a tray, wrap, and chill for at least 1 hour. For extra thickness, freeze balls for 15 minutes before baking.
Bake:
Preheat oven to 375°F (190°C). Line baking sheets with parchment.
Arrange dough balls 3 inches apart.
Bake 12–14 minutes, until edges are golden and centers are slightly underdone.
Immediately sprinkle with sea salt. Cool on sheet 5 minutes, then transfer to a rack.
- Prep Time: 15 mins
- Cook Time: 15 mins
- Category: Dessert
Nutrition
- Calories: 380
- Sugar: 28g
- Fat: 20g
- Carbohydrates: 45g
Gathering Your Flavor Arsenal
Great cookies start with great ingredients. Here’s everything you’ll need, along with a few of my chef-y insights to help you understand the *why* behind the *what*.
- 1 cup (230g) unsalted butter, cold and cubed: This is our secret weapon for thickness! Cold butter melts slower in the oven, preventing the cookies from spreading too much. It creates steam, which helps the center stay soft and the edges get a little lift. Chef’s Tip: Don’t have time to soften butter? Perfect! This recipe is for you.
- ¾ cup (150g) granulated sugar: Our white sugar adds sweetness and helps create those lovely crisp edges.
- ¾ cup (165g) packed dark brown sugar: This is the flavor MVP. Dark brown sugar has more molasses than light brown, giving our cookies a deeper, almost caramel-like flavor and that signature moist, chewy texture. Pack it tightly into your measuring cup!
- 2 large eggs, room temperature: Room temp eggs blend into the dough more evenly, creating a smoother, more cohesive batter. Quick Hack: Place cold eggs in a bowl of warm water for 5-10 minutes to quickly bring them to room temp.
- 1 tbsp vanilla extract: Yes, a full tablespoon! This isn’t the time to be shy. Vanilla provides a warm, aromatic backbone that makes the chocolate taste even more chocolatey.
- 2¾ cups (345g) all-purpose flour (spooned & leveled): The structure of our cookie. To measure correctly, spoon the flour into your measuring cup and level it off with a knife. Scooping directly from the bag can pack in too much flour, leading to dry cookies.
- 1 tsp baking soda: Our leavening agent that helps the cookies rise and become nice and tender.
- 1 tsp fine sea salt (plus more for topping): Salt is the ultimate flavor enhancer. It balances the sweetness and makes the chocolate pop. We use fine salt in the dough and flaky sea salt on top for a final touch.
- 2 cups (340g) semi-sweet chocolate chunks (not chips for best melt): This is a non-negotiable for that bakery-style look! Chocolate chunks are irregular and create those beautiful, rippling pools of chocolate. Chips are designed to hold their shape. Substitution Tip: A mix of semi-sweet and dark chocolate chunks is absolutely divine here.
Let’s Bake Some Magic: Step-by-Step
Ready to create cookie perfection? Follow these steps, and don’t skip my little hacks along the way—they make all the difference!
- Make the Dough:In the bowl of your stand mixer fitted with the paddle attachment (a hand mixer works too!), combine the cold, cubed butter with both the granulated and dark brown sugars. Now, here’s the trick: cream them together on medium speed for just 1-2 minutes, until they’re *just* combined. You don’t want it light and fluffy like traditional cookie recipes. You should still see small, pea-sized flecks of butter throughout. This is your first defense against flat cookies!
- Add Wet Ingredients:With the mixer on low, add your room-temperature eggs one at a time, letting each one fully incorporate before adding the next. Then, pour in that glorious tablespoon of vanilla. Mix until everything is homogenous. The mixture might look a little curdled at this point—that’s totally okay! It’s just the cold butter doing its thing.
- Combine Dry Ingredients:In a separate, medium-sized bowl, whisk together your flour, baking soda, and that one teaspoon of fine sea salt. Whisking ensures the baking soda and salt are evenly distributed, so every bite is perfectly seasoned.
- Bring It All Together:With your mixer on low, gradually add the dry ingredients to the wet mixture. Mix until *just* combined and no dry streaks of flour remain. Be careful not to overmix! Overworking the dough develops gluten, which can make cookies tough.
- The Grand Finale: Chocolate!Take the bowl off the mixer. This next part is a hand job—it’s more gentle and prevents overmixing. Dump in all those beautiful chocolate chunks and use a sturdy spatula to fold them in until they’re evenly distributed. The dough will be thick and a little shaggy, and that’s exactly what we want.
- The All-Important Chill:This is the step that separates the good cookies from the LEGENDARY ones. Using a large cookie scoop (about ¼ cup), portion your dough into 12 massive balls. Place them on a parchment-lined baking sheet. They don’t need space yet—this is just for chilling. Wrap the entire tray tightly with plastic wrap and pop it in the fridge for at least 1 hour, but up to 24. Chilling solidifies the butter again, which is the #1 key to a thick, non-spread cookie. For an extra thick cookie, you can even freeze the balls for 15 minutes right before baking!
- Bake to Perfection:Preheat your oven to 375°F (190°C). Line a *second* baking sheet with parchment paper. Arrange your chilled dough balls at least 3 inches apart—they need room to breathe and spread a little! Bake for 12-14 minutes. You’re looking for golden-brown, set edges, but the centers should still look soft, puffy, and slightly underdone. Remember, they continue to cook on the hot baking sheet out of the oven.
- The Finishing Touch:As soon as you pull the tray from the oven, grab a pinch of flaky sea salt and sprinkle it over the top of each cookie. Let the cookies cool on the hot baking sheet for a full 5 minutes. This allows them to set up enough to move. Then, transfer them to a wire rack to finish cooling… if you can wait that long!
How to Serve These Beauties
Honestly, these cookies are a event all on their own. For the ultimate experience, serve one still warm from the oven, maybe even with a small scoop of vanilla bean ice cream melting over the top. The contrast of cold ice cream and the warm, gooey center is pure bliss. For a simple, elegant touch, place a few on a wooden board for sharing (or not sharing, I don’t judge!). A tall glass of cold milk or a hot coffee is their perfect partner in crime.
Ride Your Own Flavor Wave: Fun Variations
Once you’ve mastered the base, get creative! Here are a few of my favorite twists:
- Salted Carilla Swirl: Replace 1 cup of the chocolate chunks with 1 cup of chopped caramel-filled chocolate bars. Thank me later.
- Espresso Crunch: Whisk 1-2 tablespoons of instant espresso powder into the dry ingredients for a deep coffee flavor that complements the chocolate.
- Peanut Butter Pocket: Take each dough ball and press a miniature peanut butter cup into the center before baking.
- Gluten-Free Goodness: Substitute the all-purpose flour with a 1:1 gluten-free baking blend. The texture will be nearly identical!
- Double Nutty: Fold in 1 cup of toasted pecans or walnuts along with the chocolate chunks for a wonderful crunch.
Isla’s Chef’s Notes & Kitchen Confessions
This recipe has been a labor of love, tested more times than I can count (my friends and family were very willing taste-testers!). The first time I made it, I was so impatient I skipped the chill. The result? A tray of one giant, flat, cookie puddle. It was still tasty, but it wasn’t the thick, proud cookie I was after. That experience drilled into me the importance of patience and trusting the process.
Over time, I’ve learned that the brand of chocolate matters, too. Don’t be afraid to splurge on a good bar of chocolate and chop it yourself—the irregular shards and chunks create pockets of molten chocolate that you just can’t get from uniform chips. This recipe is forgiving, so make it your own. That’s the true spirit of BiteTide!
Your Cookie Questions, Answered!
I’ve gotten so many questions about this recipe over the years. Here are the most common ones to ensure your baking success!
- Q: My cookies spread too much! What happened?A: The most common culprits are: 1) Your butter was too warm. We use it cold for a reason! 2) You didn’t chill the dough long enough. The fridge is your best friend here. 3) Your baking soda might be old. Test it by sprinkling a bit in vinegar—if it doesn’t bubble vigorously, it’s time for a new box.
- Q: Can I make the dough ahead of time?A: Absolutely! You can keep the dough balls, covered, in the fridge for up to 3 days. This actually deepens the flavors! You can also freeze the unbaked dough balls for up to 3 months. Bake from frozen, just adding 1-2 extra minutes to the bake time.
- Q: My cookies are cakey, not gooey. Why?A: This usually means you used a bit too much flour. Remember to spoon and level your flour, don’t scoop! Also, make sure you’re not over-baking them. They should look slightly underdone in the center when you take them out.
- Q: Can I use all light brown sugar instead of dark?A: You can, but the cookies will have a lighter, more butterscotch-like flavor and might be a bit less moist. The dark brown sugar is key for that rich, chewy depth, so I highly recommend it!
Nutritional Info (Per Cookie – Approx. for 12)
Because knowledge is power, even with cookies!
- Calories: 380
- Fat: 20g
- Carbs: 45g
- Sugar: 28g
- Protein: 4g
Prep & Storage
- Prep Time: 15 minutes (+1 hour chill)
- Bake Time: 12–14 minutes
- Total Time: ~1 hour 30 minutes
- Servings: 12 large cookies
Storage: Keep your cooled cookies in an airtight container at room temperature for up to 5 days. To bring back that “fresh-from-the-oven” warmth and gooeyness, microwave a cookie for 10-15 seconds.