 The Irresistible Allure of Classic Peanut Butter Cookies
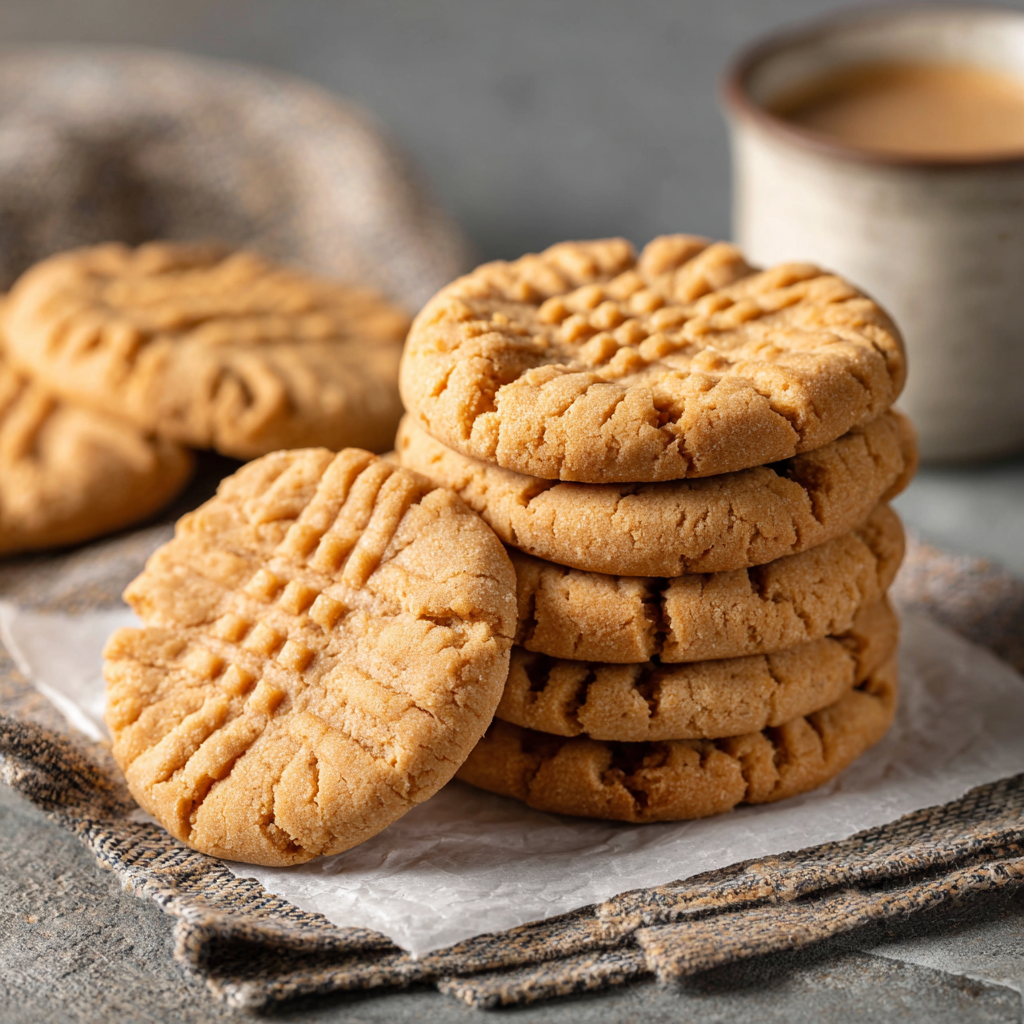
Hey, friend! Isla here from BiteTide, and I’m practically buzzing with excitement because today we’re diving into one of my all-time favorite kitchen rituals: baking Classic Peanut Butter Cookies. You know the ones—those golden-brown beauties with the iconic crisscross fork marks, crisp edges hugging a cloud-soft center, and that nutty aroma that hijacks your senses the second they hit the oven. If happiness had a flavor, it’d taste exactly like these cookies fresh off the baking sheet.
Why am I so obsessed? Because these aren’t just cookies; they’re edible nostalgia. In a world of complicated pastry trends and fussy desserts, these humble gems remind us that magic lives in simplicity. They’re the ultimate weeknight warrior—ready in under 30 minutes with pantry staples—yet impressive enough for holiday cookie swaps. Whether you’re a baking newbie or a seasoned pro, this recipe is your golden ticket to joy. I’ve tweaked my grandma’s original formula (shh, don’t tell her!) for foolproof perfection every time. So tie on that apron, crank up your favorite playlist, and let’s turn your kitchen into a peanut butter paradise!
My Grandma’s Cookie Jar: A Sweet Memory
Picture this: Eight-year-old me, standing on a wobbly step stool in my grandma’s seaside kitchen, flour dusting my nose like edible confetti. Grandma Mae would hand me her chipped fork—the one with the bent tines—and say, “Press hard, little wave-rider! Give ’em character.” Together, we’d transform lumpy dough balls into cookie canvases, laughing as peanut butter speckles flew like edible glitter. The real magic happened when that first batch emerged. We’d race to sneak a cookie while they were still dangerously warm, the caramelized edges crackling as we dunked them in icy cold milk. Grandma always said, “Cookies taste better when shared,” and she was right. To this day, every crisscross pattern I press feels like a love letter to those sun-drenched afternoons—where patience was measured in oven timers, and joy came in batches of 24.
Print
Classic Peanut Butter Cookies
- Total Time: 22 minutes
- Yield: 24 cookies 1x
Description
These cookies are straight from grandma’s kitchen—soft in the center, crisp at the edges, and full of rich peanut butter flavor. I remember the joy of pressing the crisscross pattern with a fork, knowing the smell of baked goodness was minutes away. A timeless treat that brings smiles with every bite.
Ingredients
1 cup smooth peanut butter
½ cup (1 stick) unsalted butter, softened
½ cup granulated sugar
½ cup packed brown sugar
1 large egg
1 tsp vanilla extract
1¼ cups all-purpose flour
¾ tsp baking soda
¼ tsp salt
Instructions
Preheat oven to 350°F and line a baking sheet with parchment paper.
In a large bowl, cream together peanut butter, butter, sugars, egg, and vanilla until smooth.
In another bowl, whisk together flour, baking soda, and salt. Gradually mix into wet ingredients.
Roll dough into 1-inch balls and place on the baking sheet. Flatten each with a fork, making a crisscross pattern.
Bake for 10–12 minutes until edges are lightly golden. Let cool on a rack.
- Prep Time: 10 minutes
- Cook Time: 12 minutes
- Category: Dessert
Nutrition
- Calories: 150
- Sodium: 90mg
- Fat: 9g
- Carbohydrates: 15g
- Protein: 3g
Gather Your Ingredients: Simple Pantry Staples
Here’s the beautiful part: You likely have everything you need already! These ingredients are pantry MVPs, but I’ve included pro tips to make them shine:
- 1 cup smooth peanut butter – The STAR! Use conventional brands like Jif or Skippy for ideal texture (natural PB can make cookies oily). Crave crunch? Swap in ¼ cup chunky PB.
- ½ cup (1 stick) unsalted butter, softened – Soften it FAST: Cut cold butter into cubes; let sit 15 mins. Salted butter works too—just skip the added salt later.
- ½ cup granulated sugar – Creates those crisp edges we adore. For deeper flavor, sub coconut sugar!
- ½ cup packed brown sugar – Pack it like sandcastle sand! This adds moisture and caramel notes. Dark brown sugar = extra molasses magic.
- 1 large egg – Your binding agent. Room temp blends smoother—just soak it in warm water for 5 mins if you forgot to set it out!
- 1 tsp vanilla extract – Pure vanilla elevates the nuttiness. Bourbon vanilla? Even better.
- 1¼ cups all-purpose flour – Spoon and level it—don’t scoop! Over-measuring causes dryness. Gluten-free? Use a 1:1 GF blend.
- ¾ tsp baking soda – The lift master. Ensure it’s fresh (test by dropping in vinegar—if it fizzes, you’re golden!).
- ¼ tsp salt – Balances sweetness. Flaky sea salt on top? *Chef’s kiss*
Baking Magic: Step-by-Step Instructions
Ready? Let’s turn these simple ingredients into legendary cookies. I’ve packed each step with my tested hacks—no chef secrets withheld!
- Preheat oven to 350°F and line a baking sheet with parchment paper. Why parchment? It prevents sticking AND promotes even browning. No parchment? Grease lightly with butter—but trust me, parchment’s a game-changer!
- In a large bowl, cream together peanut butter, butter, sugars, egg, and vanilla until smooth. Use a hand mixer on medium for 2-3 mins until fluffy and pale. Pro tip: Scrape the bowl halfway! Unmixed butter = sad, flat cookies.
- In another bowl, whisk together flour, baking soda, and salt. Whisking = no baking soda lumps. Sift if yours is clumpy! Add this to the wet mix in 3 batches, mixing on LOW until JUST combined. Hack: Overmixing = tough cookies. Fold in any stray flour with a spatula.
- Roll dough into 1-inch balls and place on the baking sheet. Use a cookie scoop for twinsies! Space them 2 inches apart—they spread. Secret weapon: Chill dough balls 10 mins for thicker cookies. Flatten each with a fork into a crisscross pattern. Dip the fork in sugar between presses for sparkle and non-stick perfection!
- Bake for 10–12 minutes until edges are lightly golden. Rotate the sheet at 8 mins for even baking. They’ll look underdone—that’s GOOD! Let them cool 5 mins on the sheet (they firm up), then transfer to a rack. Critical tip: Bake in batches—crowded sheets = steamy cookies.
Serving Up Smiles: How to Enjoy Your Cookies
Presentation is half the fun! Pile these beauties high on a rustic wooden board or stack them in mason jars tied with twine for gifting. Serve warm with a cold glass of oat milk (my fave) or dunked in hot cocoa. For next-level indulgence, sandwich a scoop of vanilla ice cream between two cookies—it’s a melty masterpiece! Store leftovers (ha, as if!) in an airtight container for up to 5 days. Freeze dough balls for instant cookie emergencies—just add 2 mins to bake time!
Mix It Up: Delicious Twists on the Classic
Once you’ve mastered the classic, ride the flavor wave with these fun spins:
- Chocolate Swirl – Fold in ½ cup chopped dark chocolate before baking. Drizzle melted chocolate on cooled cookies.
- Salty-Sweet Crunch – Press crushed pretzels or potato chips onto dough balls before baking. Finish with flaky sea salt.
- Gluten-Free & Vegan – Use GF flour and flax eggs (1 tbsp ground flax + 2.5 tbsp water per egg). Coconut oil replaces butter.
- PB&J Thumbprints – Press your thumb into dough balls; fill with raspberry jam before baking.
- Espresso Kick – Add 1 tbsp instant espresso powder to the dry ingredients—coffee + PB = bliss!
Isla’s Chef Notes: Behind the Cookie Curtain
This recipe has been my kitchen companion for 15 years, evolving through hilarious fails (remember my “salt instead of sugar” batch of 2017? Our dog refused them!). The fork crisscross isn’t just cute—it ensures even baking. And here’s a confession: I still eat cookie dough straight from the bowl. Safety note: If raw eggs worry you, pasteurize yours in the shell by soaking in 140°F water for 3 mins! The biggest lesson? Perfection is overrated. So what if your crisscrosses look like abstract art? As Grandma Mae said: “Crooked cookies taste just as sweet.” Now go make memories—and tag me @BiteTide so I can cheer you on!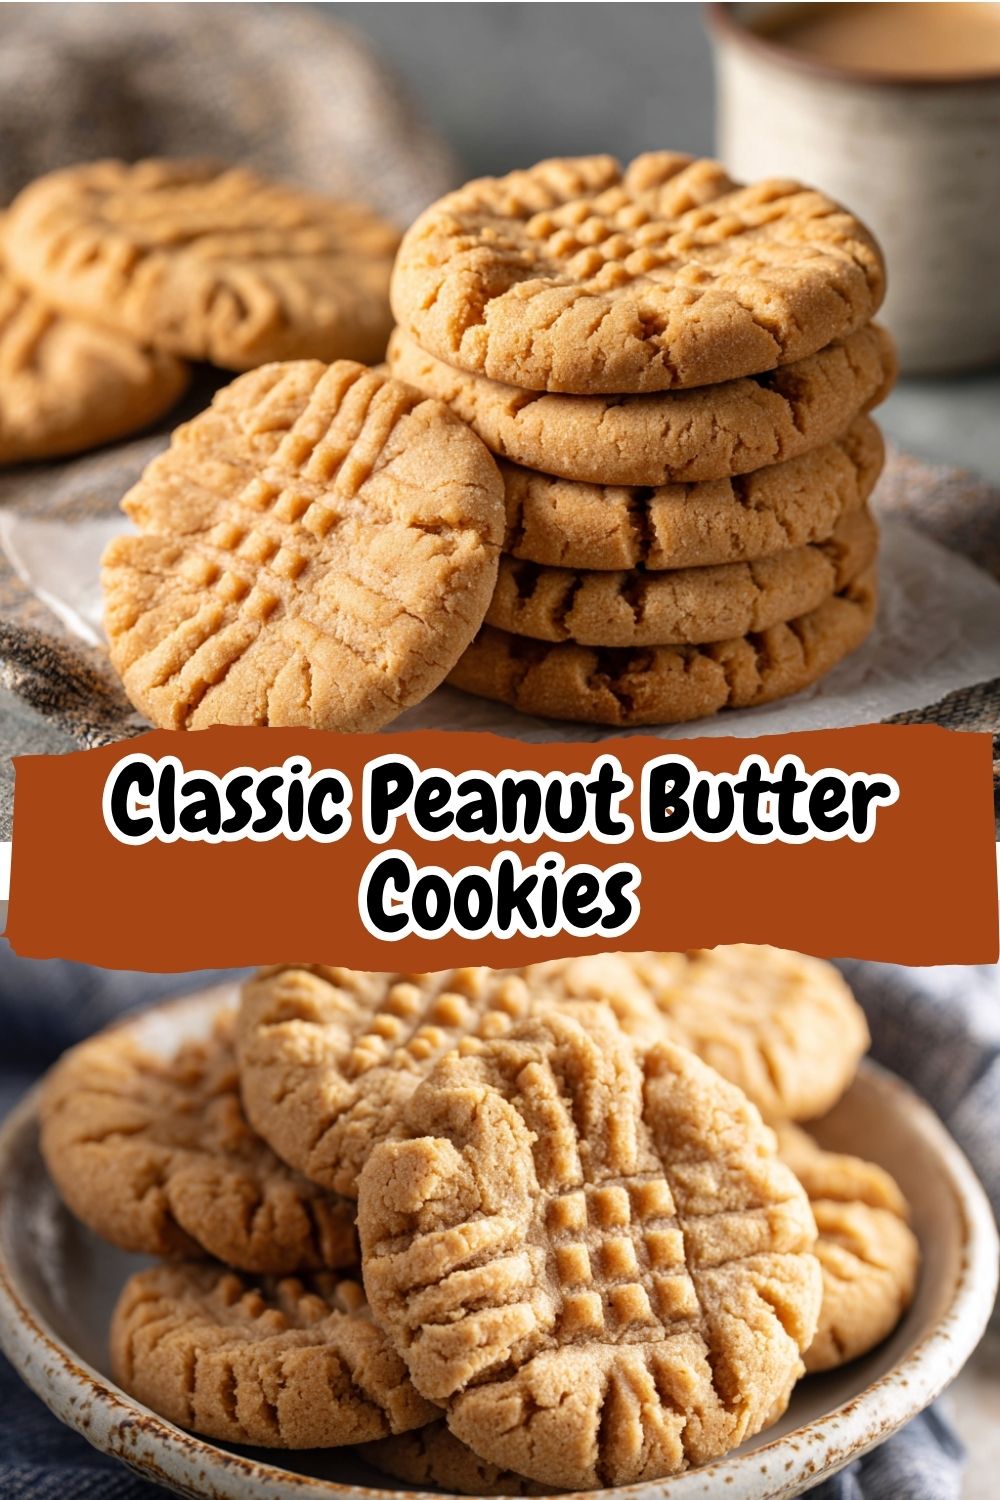
Peanut Butter Cookie FAQs: Your Questions, Answered
Q: Why did my cookies spread into flat pancakes?
A> Butter was too warm! Chill dough 15 mins next time. Also, check your baking soda’s expiry—old soda won’t lift properly.
Q: Can I use natural peanut butter?
A> You *can*, but they’ll be denser and oilier. If you go natural, drain excess oil and add 1-2 tbsp extra flour.
Q: Why are my cookies dry/crumbly?
A> Over-measuring flour is the usual culprit. Spoon flour into your cup—don’t scoop! Or overbaking—they firm up as they cool.
Q: Can I make these without a mixer?
A> Absolutely! Use a sturdy spatula and elbow grease. Cream butter and sugars first, then mash in PB. Add egg and vanilla, then fold in dry ingredients.
Nutritional Information
Prep Time: 10 mins | Cook Time: 12 mins | Servings: 24 cookies
Per Cookie: Calories: 150 • Fat: 9g • Carbs: 15g • Sugar: 9g • Protein: 3g • Sodium: 90mg
These Classic Peanut Butter Cookies are more than just a sweet treat—they’re little bites of comfort, joy, and golden-edged memories. Whether you’re baking with kids, gifting a homemade hug, or simply craving a cookie that never goes out of style, this recipe delivers every time. So grab that fork, make your mark, and enjoy the simple pleasure of a cookie done right.