
Cheesy Taco Lasagna: The Crazy-Good Dinner Mashup You NEED Tonight
Hey, friend! Isla here from BiteTide. Let’s get real for a second. Are you currently staring into your fridge, caught in that classic dinner-time tug-of-war? On one side, you have a deep, primal craving for the cozy, cheesy comfort of a classic lasagna. On the other, your taste buds are doing a full-on mariachi dance for the bold, zesty kick of taco night. Choosing feels impossible, right?
Well, what if I told you that you don’t have to choose? What if you could have it all—the soul-warming layers of pasta-less lasagna and the fiesta-in-your-mouth fun of tacos—in one incredible, bubbling, golden-brown dish? Enter: Cheesy Taco Lasagna. This is the kind of recipe that makes you look like a total kitchen rockstar with, honestly, minimal effort. It’s the ultimate “more than the sum of its parts” meal, a glorious mess of flavor that will have everyone at the table asking for seconds before they’ve even finished their first bite.
I live for recipes like this. They’re the heart and soul of BiteTide—unfussy, packed with serious flavor, and designed for real life. Whether you’re wrangling hungry kids, hosting a last-minute game night, or just treating yourself to a dinner that truly delivers, this Cheesy Taco Lasagna is your new weeknight warrior. So, tie on your favorite apron (the one with the questionable stains that tell the best stories), and let’s make some magic happen. This is comfort food, level up!
Print
Cheesy Taco Lasagna
- Total Time: 45 minutes
- Yield: 6 servings 1x
- Diet: Halal
Description
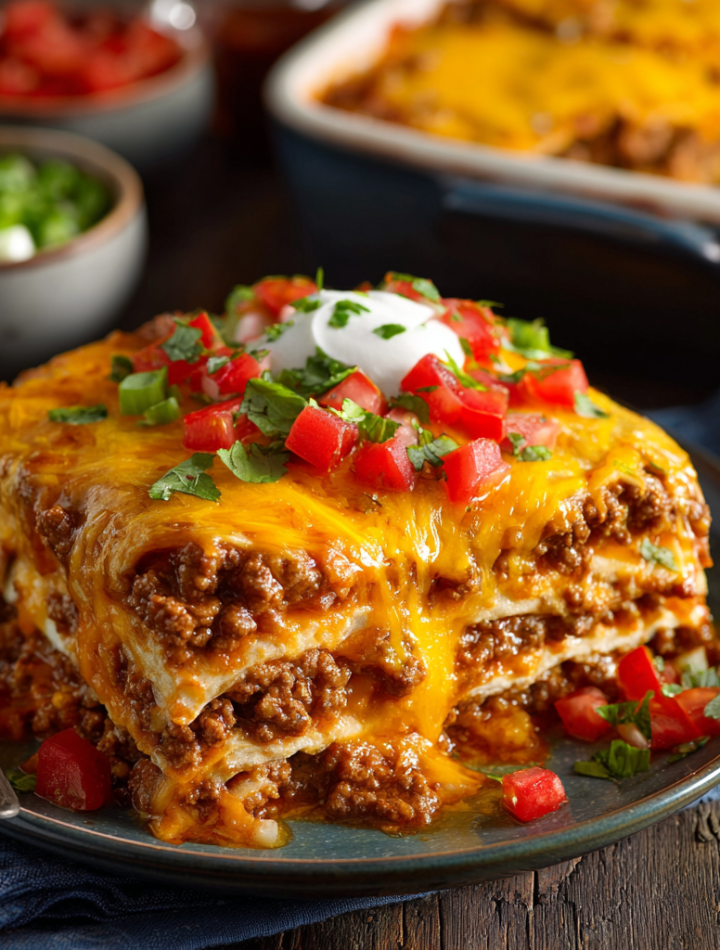
Cheesy taco lasagna is a fun, layered twist on traditional tacos, made with seasoned ground beef, tortillas, salsa, and plenty of gooey cheese. It’s a crowd-pleasing comfort food casserole that’s perfect for family dinners or potlucks.
Ingredients
- 1 lb ground beef
- 1 small onion, diced
- 2 cloves garlic, minced
- 1 packet taco seasoning (or 2 tbsp homemade)
- 1/2 cup water
- 8 small flour or corn tortillas
- 1 cup salsa
- 1 can (15 oz) black beans, drained and rinsed
- 2 cups shredded cheddar or Mexican blend cheese
- 1/2 cup sour cream (optional, for layering)
- Chopped cilantro or green onions, for garnish
Instructions
- Preheat oven to 375°F (190°C). Grease a 9×13-inch baking dish.
- In a skillet, cook ground beef and onion over medium heat until beef is browned. Drain grease.
- Add garlic and taco seasoning, then stir in water. Simmer for 5 minutes.
- In the baking dish, layer 2 tortillas on the bottom, followed by 1/3 of the beef mixture, salsa, black beans, and cheese. Repeat layers two more times.
- Top final layer with remaining tortillas and cheese. Add dollops of sour cream on top if desired.
- Cover with foil and bake for 20 minutes. Remove foil and bake an additional 10 minutes until bubbly and golden.
- Let rest for 5–10 minutes before slicing. Garnish with cilantro or green onions.
Notes
- Use corn tortillas for a gluten-free option.
- Add jalapeños or hot sauce for a spicy kick.
- Swap black beans for refried beans or omit for fewer carbs.
- Make it vegetarian by skipping the beef and doubling the beans and veggies.
- Great for freezing—just assemble and bake later.
- Prep Time: 15 minutes
- Cook Time: 30 minutes
- Category: Casserole
- Method: Baking
Nutrition
- Serving Size: 1 slice
- Calories: 470
- Sugar: 5g
- Fat: 27g
- Saturated Fat: 12g
- Unsaturated Fat: 11g
- Fiber: 4g
- Protein: 28g
- Cholesterol: 85mg
The Kitchen Accident That Started It All
This recipe, like so many of my favorites, was born from a beautiful kitchen disaster. Picture this: It was a chaotic Tuesday, the kind where you’re running on caffeine and sheer willpower. I’d promised my family tacos, but when I went to grab the taco shells, my heart sank. The box was empty, save for a few sad, crumbled bits at the bottom. A mutiny was imminent.
But then, my eyes landed on a package of soft flour tortillas, a half-eaten tub of refried beans from the night before, and a mountain of cheese (because in this house, we always have a mountain of cheese). In a moment of “what’s the worst that could happen?” inspiration, I started layering it all in a baking dish like a lasagna. I popped it in the oven, crossed my fingers, and prayed to the food gods.
What emerged 30 minutes later was nothing short of a miracle. It was bubbly, cheesy, and smelled like heaven. That night, instead of complaints, there was silence—the good kind, broken only by the sound of forks scraping plates. My dad, the toughest critic, looked at me and said, “Isla, you’ve got to make this again.” And just like that, a family legend was born. It’s a reminder that sometimes, the best recipes aren’t found in fancy cookbooks; they’re created in the beautifully messy, real-life moments of our own kitchens.
Gather Your Flavor Crew: What You’ll Need
Here’s the beautiful part: you probably have most of this hanging out in your pantry and fridge right now. This is a no-judgment zone, so feel free to get creative with substitutions—I’ve included my favorite swaps below!
- 6 Soft Taco Flour Tortillas: These are our “noodles”! They get wonderfully soft and soak up all the amazing flavors. Chef’s Insight: If you’re gluten-free, corn tortillas work beautifully, though they have a firmer texture. For a low-carb option, try large, pliable coconut or almond flour tortillas.
- 1 Pound Ground Beef (80/20 blend is perfect): Our hearty, savory base. Substitution Tip: Ground turkey, chicken, or a plant-based crumble are all fantastic, leaner alternatives. The taco seasoning will make anything taste incredible!
- 1 Packet Taco Seasoning: The flavor powerhouse! It’s a perfect blend of chili powder, cumin, and garlic. Chef’s Hack: If you have 2 extra minutes, make your own! Mix 1 tbsp chili powder, 1 1/2 tsp cumin, 1 tsp each of garlic powder, paprika, and onion powder, and 1/2 tsp each of oregano and a pinch of cayenne. You control the salt, and the flavor is next-level.
- 1 (16oz) Can Refried Beans: This is the secret weapon! They add creaminess, body, and a delicious, earthy flavor that balances the spice. Substitution Tip: Not a bean fan? Try mashed black beans or even a layer of seasoned rice!
- 4 Cups Shredded Cheese (Cheddar or Mexican Blend): The glorious, melty glue that holds our masterpiece together. Chef’s Insight: For the love of all things cheesy, please shred your own block of cheese if you can! Pre-shredded bags contain anti-caking agents that can make the sauce a bit grainy. Freshly shredded melts like a dream.
- Optional Toppings (The Fun Part!): Sour cream, diced tomatoes, creamy avocado, sliced green onions, fresh cilantro. Don’t skip these! They add fresh, cool, crunchy contrasts that take each bite from great to mind-blowing.
Let’s Build Our Flavor Masterpiece: Step-by-Step
Ready to assemble the ultimate comfort food? It’s as easy as 1-2-3… literally! I’ll walk you through each step with my favorite little chef hacks to ensure perfection.
- Preheat and Prep: Fire up that oven to 375°F (190°C). This is our magic number for getting a perfectly bubbly center and a gorgeous, golden-brown top without burning the tortillas. While it’s heating, grab a 9×13 inch baking dish and give it a quick spritz with cooking spray. Chef’s Hack: A light coating of oil or butter on the bottom will also help the first tortilla layer get a tiny bit crispy and prevent any major sticking.
- Brown the Beef: Crumble your ground beef into a large skillet over medium-high heat. Cook it up until it’s no longer pink, breaking it up with your spoon as you go. Once it’s cooked, drain off the excess grease. Chef’s Note: A little fat is fine for flavor, but draining most of it keeps the final dish from being too oily. Now, add your taco seasoning and about 1/4 cup of water. Let it simmer for 2-3 minutes until the sauce thickens and clings to the meat. Your kitchen should already smell amazing.
- Wake Up the Beans: While the meat is simmering, scoop your refried beans into a microwave-safe bowl. Zap them for 30-60 seconds, just until they’re warm and spreadable. Chef’s Hack: Stirring a tablespoon of salsa or a splash of beef broth into the warm beans makes them even easier to spread and adds a little extra flavor!
- The Grand Layering Ceremony: This is the fun, artistic part! Here’s the blueprint for success:
- Layer 1: Place two tortillas in the bottom of your dish, slightly overlapping them. You might need to tear a third to fill any gaps—think of it as a flavorful jigsaw puzzle!
- Layer 2: Use a spoon or spatula to spread half of the warm refried beans over the tortillas. An offset spatula is my secret weapon for this!
- Layer 3: Sprinkle half of your seasoned taco meat evenly over the bean layer.
- Layer 4: Now for the cheese! A generous handful (about one-third of your cheese) over the meat.
Now, repeat the entire process: Tortillas, the rest of the beans, the rest of the meat, and another third of the cheese. Finish with a final layer of tortillas and crown the whole beautiful thing with the remaining cheese. Go on, be generous—this is the golden crown of our lasagna!
- Bake to Bubbly Perfection: Slide your masterpiece into the preheated oven, uncovered, for 25-30 minutes. You’re looking for the cheese to be completely melted, gloriously golden, and for the edges to be actively bubbling. That bubbling sound is the flavor wave crashing, I promise.
- The Most Important Step: Let it Rest! I know, I know. It’s torture. The aroma is intoxicating, and you just want to dive in. But trust me on this: let it sit on the stovetop for 5-10 minutes before you slice into it. Chef’s Insight: This allows the layers to set, so when you cut it, you get clean, beautiful squares instead of a delicious-but-sloppy scoop. It’s worth the wait!

How to Serve This Cheesy Wonder
Presentation is part of the fun! I like to slice my Cheesy Taco Lasagna into big, hearty squares. Use a sharp knife and a sturdy spatula to lift each portion onto a plate. Now, it’s time for the toppings bar! I set out little bowls of cool sour cream (or Greek yogurt!), juicy diced tomatoes, creamy avocado slices, a sprinkle of vibrant green onions, and a handful of fresh, chopped cilantro. Let everyone customize their own plate. It turns a simple weeknight dinner into a mini-fiesta and makes the whole experience interactive and super fun.
Ride Your Own Flavor Wave: Recipe Variations
The beauty of this recipe is its adaptability. Make it your own!
- Spicy Fiesta: Add a 4oz can of diced green chiles to the meat layer, or mix 1-2 tablespoons of your favorite hot sauce into the refried beans.
- Enchilada-Style: Pour a half cup of red or green enchilada sauce over the final tortilla layer *before* adding the last bit of cheese. It adds incredible moisture and a tangy kick.
- Vegetarian Delight: Swap the ground beef for a bag of plant-based ground “meat” or sautéed mushrooms and bell peppers. So hearty and delicious!
- Extra Creamy: Stir an 8oz block of softened cream cheese into the warm refried beans. You’ll thank me later.
Isla’s Chef Notes & Kitchen Confessions
This recipe has evolved so much since that first desperate Tuesday night. I’ve learned that a little sprinkle of cumin and a dash of smoked paprika in the refried beans takes the flavor to a whole new dimension. I’ve also been known to sneak a layer of cooked, seasoned rice in there when I have leftovers—it makes the dish even more substantial and stretches it to feed a bigger crowd.
My funniest kitchen fail with this was the time I was so distracted telling a story that I completely forgot the final layer of cheese. I popped it in the oven, realized my mistake five minutes in, and had to frantically pull the hot dish out to blanket it in cheesy goodness. It turned out fine, but it was a great reminder that we’re all human in the kitchen! The recipe is resilient, just like us. Don’t stress the small stuff.
Your Questions, Answered!
Q: Can I make Cheesy Taco Lasagna ahead of time?
A: Absolutely! You are a meal-prep genius. Assemble the entire dish, cover it tightly with foil, and stash it in the fridge for up to 24 hours. When you’re ready, just pop it in the oven. You might need to add 5-10 minutes to the baking time since it’s going in cold.
Q: My lasagna is a bit watery. What happened?
A: This usually happens if the ground beef wasn’t drained well enough or if the tomatoes in your toppings release a lot of liquid. No worries! Let it rest for the full 10 minutes after baking—this allows the layers to reabsorb that liquid. Also, make sure you’re simmering the taco meat until the water has mostly evaporated.
Q: Can I freeze it?
A: You bet! Bake it, let it cool completely, then wrap the whole dish (or individual portions) tightly in plastic wrap and foil. It will keep for up to 3 months. To reheat, thaw in the fridge overnight and bake at 350°F until heated through, about 20-30 minutes.
Q: The tortillas got a little hard on the edges. How can I prevent that?
A: This can happen if the oven runs a bit hot. Make sure your rack is in the center of the oven. If you notice it browning too quickly, you can loosely tent the top with foil for the last 10 minutes of baking. Ensuring there’s enough sauce and cheese covering the edges of the top tortilla layer also helps protect them.
Nutritional Information (Estimate)
Please note: This is a rough estimate and will vary based on the specific brands and ingredients you use, especially the type of meat, cheese, and tortillas.
Per Serving (1/6th of the dish, without toppings): Calories: 560 | Protein: 33g | Fat: 34g | Saturated Fat: 16g | Carbohydrates: 31g | Fiber: 4g | Sugar: 3g | Sodium: 1100mg