Healthy Peanut Butter Greek Yogurt Cookies: Your New Gooey, Guilt-Free Obsession
When a Cookie Craving Meets a Healthy Hunch
Hey there, friend! Isla here, from my cozy kitchen to yours. Let’s be real for a second: some days, the only thing standing between you and a full-blown, gotta-have-it-now cookie craving is a whole lot of guilt and a recipe that calls for a pound of butter and two cups of sugar. Sound familiar?
Well, I’m about to change the game for you. What if I told you that you could have a cookie that’s soft, fudgy, and packed with melty chocolate chips, but also secretly packed with protein and made with wholesome ingredients? A cookie you can feel genuinely good about eating for an afternoon snack or even (dare I say it?) for breakfast?
That’s the magic of these Healthy Peanut Butter Greek Yogurt Cookies. They are the ultimate proof that “healthy” and “decadent” can absolutely live in the same delicious, gooey bite. We’re using simple, real ingredients you probably have in your pantry right now to create a treat that’s satisfying, simple, and seriously craveable. So, tie on your favorite apron, put on some fun music, and let’s bake some joy—without any of the fuss!
Print
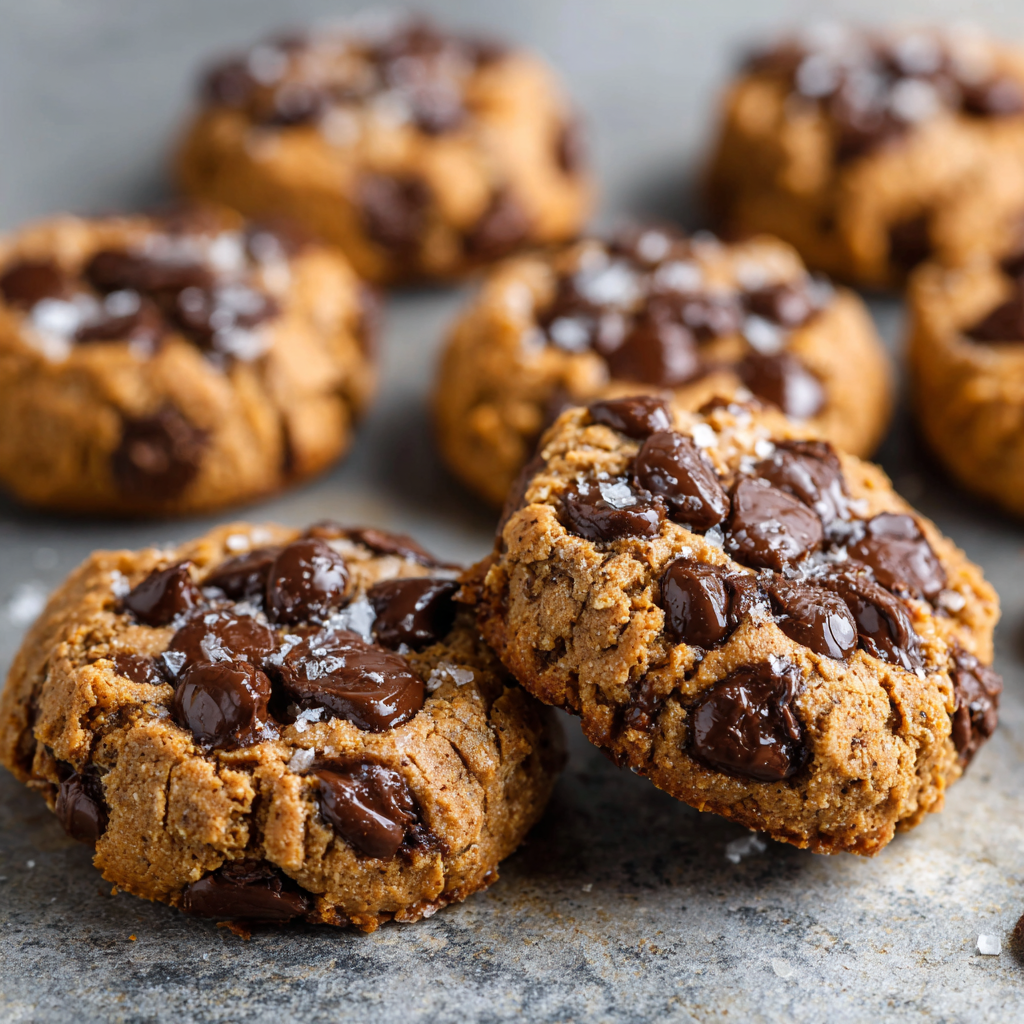
Healthy Peanut Butter Greek Yogurt Cookies with Soft Centers
- Total Time: 30 mins
- Yield: 9–12 cookies/bars 1x
Description
Soft, fudgy, and protein-packed — these cookies are a healthier twist on a classic treat. With just a few wholesome ingredients, you’ll get gooey peanut butter bites sweetened naturally and loaded with chocolatey goodness. Perfect for when you want dessert without the guilt!
Ingredients
1/2 cup natural peanut butter
1/2 cup plain Greek yogurt
1/4 cup honey or maple syrup
1/2 cup oat flour (or almond flour for gluten-free)
1/2 tsp baking powder
1/2 tsp vanilla extract
Pinch of salt
1/4–1/3 cup dark chocolate chips
Instructions
Preheat oven to 350°F (175°C) and line a baking dish or tray with parchment.
In a bowl, mix peanut butter, Greek yogurt, honey/maple syrup, and vanilla until smooth.
Stir in oat flour, baking powder, and salt until a soft dough forms.
Fold in chocolate chips.
Spread dough into a baking dish for cookie bars or scoop into rounds for cookies.
Bake for 12–15 minutes (cookies) or 18–20 minutes (bars) until edges are set but centers remain soft.
Let cool slightly before slicing or serving.
- Prep Time: 10 minutes
- Cook Time: 15–20 minutes
- Category: Breakfast
My Grandma’s Counter and a Messy, Beautiful Lesson
This recipe takes me right back to my grandma’s warm, always-smelling-like-something-sweet kitchen. I was about seven, and she was determined to teach me how to make her famous peanut butter blossoms. I was her eager, if not slightly messy, sous-chef. I’ll never forget the feeling of digging my hands into that thick, sticky peanut butter dough, and the sheer joy of pressing a chocolate kiss into the center of each warm cookie. It was pure, uncomplicated happiness.
As I got older and my own kitchen adventures began, I held onto that feeling but started playing with the formula. How could I capture that same soul-warming, peanut-buttery joy but make it a little kinder to my everyday life? After more batches than I can count (my friends were very happy taste-testers!), I landed on this version. Swapping in Greek yogurt for loads of butter and using natural sweeteners was my “aha!” moment. It’s my modern, health-conscious nod to my grandma’s classic—a recipe that still feels like a hug, but one you can enjoy any day of the week.
Your Wholesome, Pantry-Staple Lineup
One of the best things about these cookies? The ingredient list is short, sweet, and simple. No weird, hard-to-find items here! Let’s break it down so you know exactly what each one brings to the party.
- 1/2 cup natural peanut butter – The star of the show! I use the kind where the only ingredient is peanuts (and maybe a little salt). The natural oils give these cookies an incredible, fudgy texture. Chef’s Insight: If your peanut butter is super oily, give it a good stir before measuring. If it’s the no-stir kind, that’s fine too! You can also sub with any other nut or seed butter like almond or sunflower.
- 1/2 cup plain Greek yogurt – Our secret weapon! This magical ingredient adds moisture and a huge protein boost, replacing the need for loads of fat. Sub Tip: Make sure it’s plain and not flavored. For a dairy-free version, a thick, plain plant-based yogurt will work in a pinch.
- 1/4 cup honey or maple syrup – This is our natural sweetener. I love the floral notes of honey with peanut butter, but maple syrup gives a lovely, warm depth and keeps it vegan-friendly.
- 1/2 cup oat flour – This keeps our cookies gluten-free and tender. Chef’s Hack: No oat flour? No problem! Just blitz old-fashioned or quick-cook oats in your blender or food processor until they form a fine powder. It takes 30 seconds and works perfectly.
- 1/2 tsp baking powder – Our little lift agent! It gives the cookies just enough puff so they aren’t dense.
- 1/2 tsp vanilla extract – The flavor enhancer. It rounds out all the other flavors and makes the whole kitchen smell amazing.
- Pinch of salt – Crucial for balancing the sweetness and making the peanut butter flavor pop!
- 1/4–1/3 cup dark chocolate chips – Because what’s a cookie without chocolate? I love the richness of dark chocolate against the sweet, salty cookie base. Sub Tip: Use milk chocolate, white chocolate chips, or even chopped-up chocolate bar. For a lower-sugar option, sugar-free chocolate chips are a great choice.
Let’s Make Some Magic: The Foolproof Method
Ready to see how easily this all comes together? This is the fun part. I’ve included all my little kitchen hacks to ensure your cookie success.
- Preheat and Prep. Fire up your oven to 350°F (175°C). Line a baking sheet with parchment paper. Chef’s Hack: Parchment paper is your best friend here! It prevents sticking and makes cleanup an absolute dream. No parchment? A light spray of cooking oil will do the trick.
- Create the Wet Team. In a medium-sized bowl, add your peanut butter, Greek yogurt, honey (or maple syrup), and vanilla extract. Now, grab a spatula or a whisk and mix until it’s completely smooth and well-combined. Chef’s Tip: If your peanut butter is straight from the fridge and a little stiff, warming the honey for 10 seconds in the microwave can make everything blend together much more easily.
- Welcome the Dry Team. Sprinkle in your oat flour, baking powder, and that all-important pinch of salt. Gently fold everything together until a soft, slightly sticky dough forms. Watch Out! Don’t overmix here. We just want everything incorporated. The dough will be softer than a traditional cookie dough—that’s exactly what we want for that soft, cake-like center!
- The Grand Chocolate Fold-In. Now for the best step! Add your chocolate chips and fold them gently into the dough until they’re evenly distributed. I always sneak a few extra chips on top of each cookie before baking because, well, why not?
- Scoop and Shape. For cookies, use a tablespoon or a small cookie scoop to drop rounded mounds of dough onto your prepared baking sheet. They don’t spread a ton, so you can gently press them down just a little with the back of a spoon or your fingers if you want a more traditional cookie shape. For super-easy cookie bars, simply press the entire batch of dough evenly into a small, parchment-lined baking dish (an 8×8 works great).
- Bake to Gooey Perfection. Pop them in the oven! For cookies, bake for 12-15 minutes. For bars, bake for 18-20 minutes. You’re looking for the edges to be lightly golden and set, but the centers should still look a little soft and underdone. This is the secret to a fudgy center! They will continue to set up as they cool.
- The Most Important Step: Let Them Cool! I know, the temptation is REAL. But you have to let them cool on the baking sheet for at least 10-15 minutes. This allows them to firm up enough to handle. If you try to move them too soon, they might fall apart. Trust me, it’s worth the wait!
How to Serve Your Masterpiece
Okay, they’ve cooled (mostly… I won’t judge if you snag a warm one). Now, let’s make it an experience! These cookies are fantastic all on their own with a cold glass of your favorite milk—dairy, almond, or oat. For the ultimate cozy moment, crumble one over a bowl of vanilla Greek yogurt for a next-level breakfast. Or, my personal favorite: warm one up for about 10 seconds in the microwave and watch the chocolate chips get all melty and glorious. It’s pure bliss.
Ride Your Own Flavor Wave: Fun Variations
One of my favorite things about this recipe is how adaptable it is. Feel like mixing it up? Here are some of my go-to twists:
- Double Chocolate Chip: Swap out 2 tablespoons of the oat flour for cocoa powder for an intense chocolate experience.
- Peanut Butter & Jelly Thumbprints: Before baking, press a small indentation into the top of each cookie and fill it with a tiny spoonful of your favorite jam or jelly.
- Monster Cookie Style: Fold in 2 tablespoons of old-fashioned oats and swap the chocolate chips for a mix of M&Ms and butterscotch chips.
- Sunflower Seed Sweetness: Have a nut allergy? Use sunflower seed butter and enjoy that same delicious, nutty flavor profile.
- Cinnamon Spice: Add 1/2 teaspoon of cinnamon to the dry ingredients for a warm, cozy flavor that pairs perfectly with the peanut butter.
Isla’s Kitchen Confidential
This recipe has been a living, evolving thing in my kitchen. The first time I made them, I was so nervous they’d be a total flop that I barely told anyone what was in them. When my partner, who is a self-proclaimed cookie traditionalist, devoured three in a row and asked when I was making them again, I knew I was onto something. The batch you’re making today is the result of all that tweaking and tasting.
A funny story: I once, in a pre-coffee haze, accidentally used baking SODA instead of baking POWDER. Let’s just say they were… very flat and had a distinct metallic taste. We still ate them (waste not, want not!), but it was a great reminder to always double-check your labels! The beauty of this recipe is its forgiving nature. As long as you get the main players right, you’re in for a treat.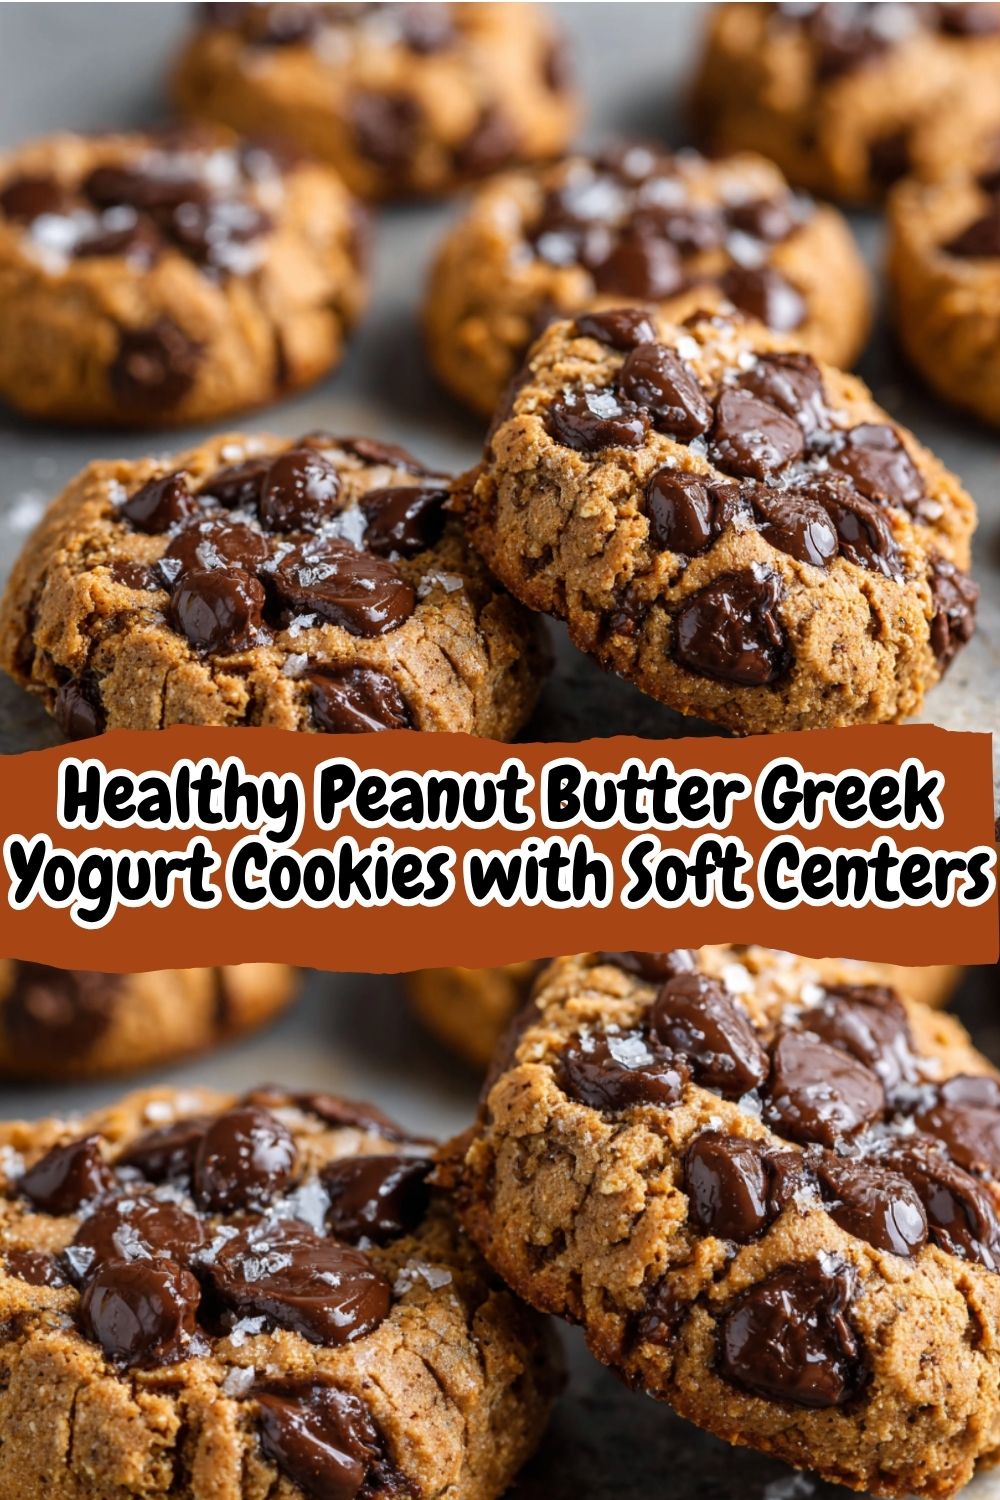
Your Questions, Answered!
I’ve made these cookies more times than I can count, and I’ve heard all your wonderful questions! Here are the most common ones to ensure your baking success.
Q: My dough is really sticky and wet. Did I do something wrong?
A: Not at all! The dough is meant to be softer and stickier than a traditional cookie dough because of the Greek yogurt. This is what gives it that amazing, soft texture. If it’s unmanageably sticky, you can pop it in the fridge for 15-20 minutes to firm up a bit, or just use a cookie scoop—it’s a game-changer for sticky doughs!
Q: Can I make these cookies vegan?
A: Absolutely! Use maple syrup instead of honey, a thick, plain plant-based yogurt (like coconut or soy), and ensure your chocolate chips are vegan-friendly. It works like a charm!
Q: Why are my cookies cakey and not gooey?
A> The most likely culprit is overbaking. Remember, we want to take them out when the edges are set but the centers still look soft. They continue to cook from residual heat as they cool. Also, make sure your baking powder is fresh—old baking powder won’t give them the right lift.
Q: How should I store these, and can I freeze them?
A: They are best stored in an airtight container in the fridge for up to 5 days. The cold helps them stay firm. And yes, they freeze beautifully! Place cooled cookies in a freezer bag for up to 3 months. Just thaw at room temperature or warm them up in the microwave or a low oven.
Nutritional Nibbles (Because We’re Curious!)
Disclaimer: This is an estimate for informational purposes only, based on a yield of 9 cookies using the specified ingredients.
- Calories: ~160
- Protein: 6g
- Fat: 8g
- Carbohydrates: 16g
- Fiber: 2g
Prep time: 10 minutes | Cook time: 15-20 minutes | Total time: 25-30 minutes | Makes: 9-12 cookies/bars
There you have it! My go-to recipe for when a cookie craving strikes but I want to feel my best. I hope you love making (and eating!) these as much as I do. Don’t forget to tag me @BiteTide on social media if you make them—I love seeing your creations! Now, go enjoy that well-deserved cookie.
With love and a full cookie jar,
Isla 💛