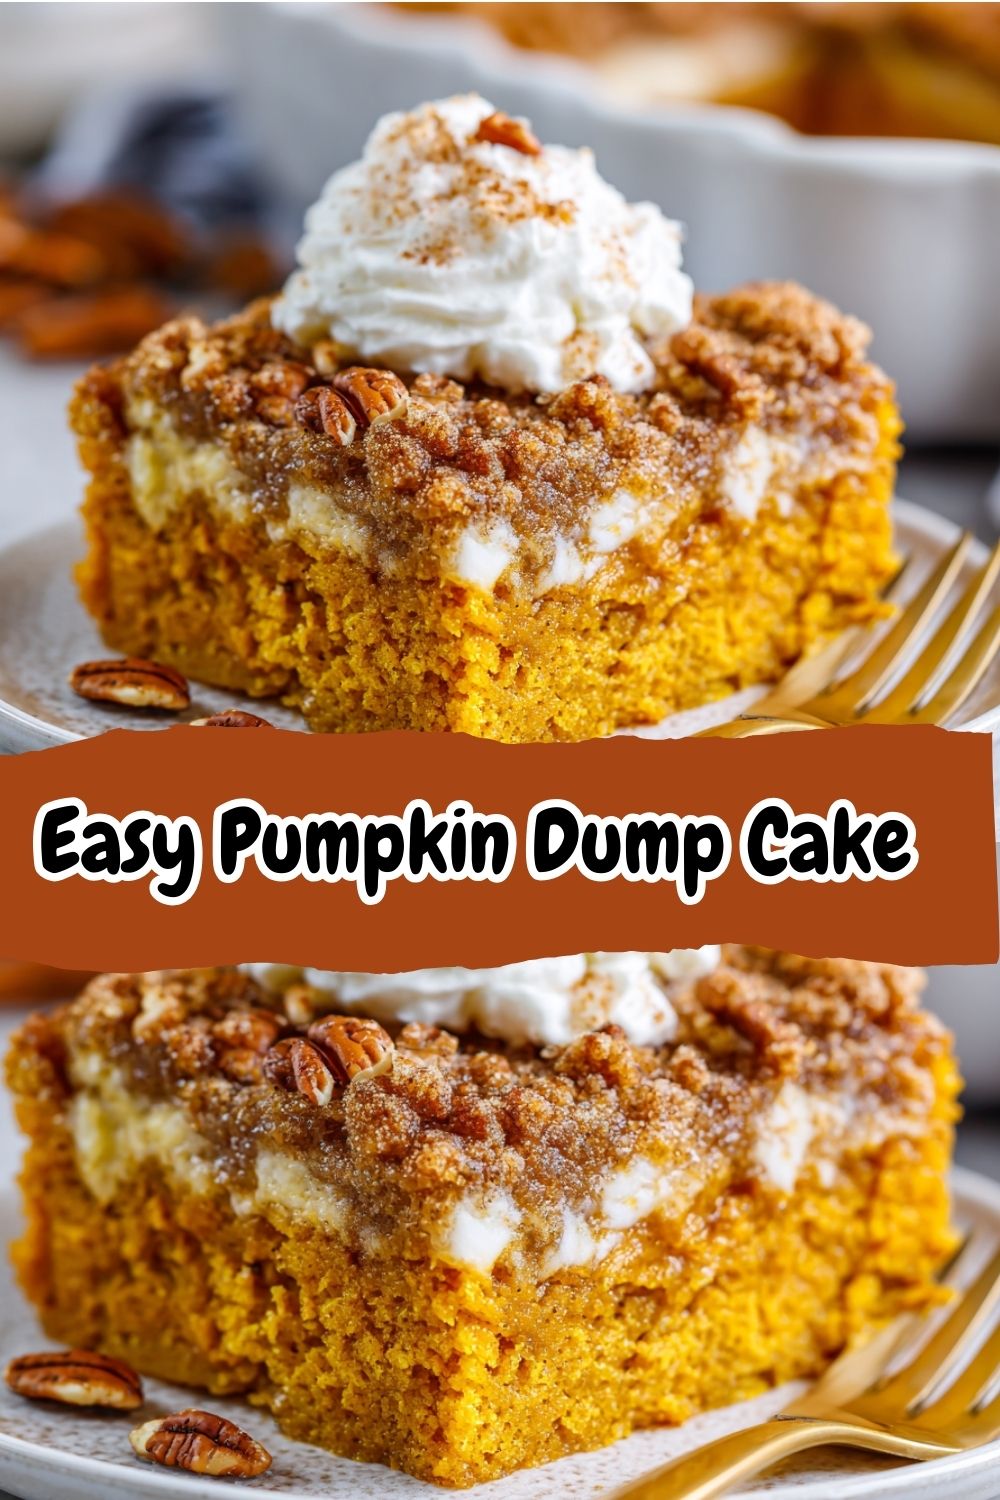
 Easy Pumpkin Dump Cake: Your New Favorite Fall Obsession
Hey there, friend! Isla from BiteTide here. Can you feel it? That crisp, cozy shift in the air that whispers of crunchy leaves, cozy sweaters, and the unmistakable scent of cinnamon and pumpkin spice wafting from the kitchen. It’s the season of comfort, and my mission is to make your fall baking as joyful and fuss-free as possible. If the thought of making a from-scratch pie crust makes you break out in a cold sweat, I have the absolute perfect solution for you. Enter: the legendary Pumpkin Dump Cake.
This dessert is the undisputed heavyweight champion of easy, impressive, and soul-warmingly delicious autumn treats. Imagine the spiced, custardy heart of the best pumpkin pie you’ve ever had, meeting the buttery, crumbly, crisp topping of a coffee cake. It’s a magical collision of textures and flavors that requires barely any effort. We’re talking about 10 minutes of active prep time. Yes, you read that right. This is the dessert you can whip up while your main course is in the oven, the one you can proudly bring to any potluck or Thanksgiving feast, and the one that will have everyone begging for the recipe. So, tie on your favorite apron, put on a fun playlist, and let’s make some magic happen. This is the kind of recipe that creates happy kitchen dances, and I am so here for it.
Print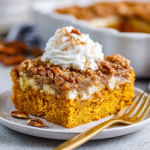
Easy Pumpkin Dump Cake
- Total Time: ~1 hr 5 min
- Yield: 12 servings 1x
Description
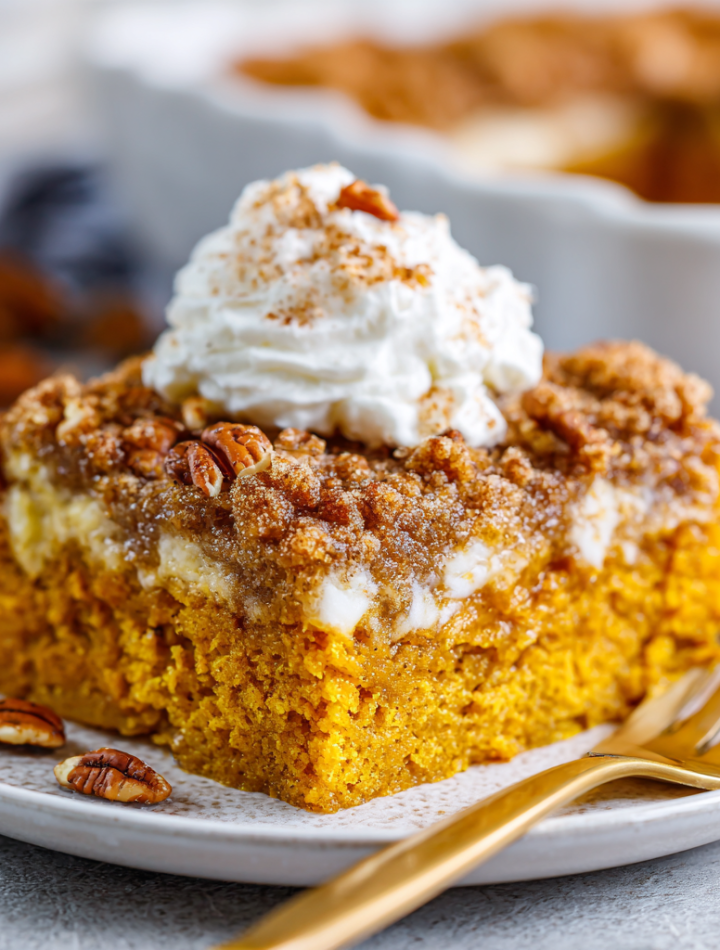
This cozy fall dessert is the ultimate no-fuss recipe. With layers of pumpkin, spice, and buttery cake mix topping, it’s like pumpkin pie meets crisp. Perfect for potlucks, Thanksgiving, or any time you crave an easy autumn treat.
Ingredients
1 (15 oz) can pumpkin purée
1 (12 oz) can evaporated milk
3 large eggs
1 cup sugar
1 tsp cinnamon
½ tsp nutmeg
½ tsp ginger
½ tsp salt
1 box yellow cake mix
1 cup (2 sticks) melted butter
½ cup chopped pecans (optional)
Instructions
Preheat oven to 350°F (175°C). Grease a 9×13 baking dish.
In a large bowl, whisk pumpkin, evaporated milk, eggs, sugar, and spices until smooth.
Pour mixture into prepared dish.
Sprinkle dry cake mix evenly over pumpkin layer.
Drizzle melted butter over the top, covering as much as possible.
Sprinkle with pecans if using.
Bake 50–55 minutes, until golden brown and set in the center.
Cool slightly before serving. Best enjoyed with whipped cream or vanilla ice cream.
Optional Twists
Use spice cake mix for extra warmth.
Swap pecans for walnuts or crushed gingersnaps.
Add a swirl of caramel before baking for gooey sweetness.
- Prep Time: 10 minutes
- Cook Time: 55 min
- Category: Dessert
Nutrition
- Calories: 360
- Sugar: 27g
- Sodium: 410mg
- Fat: 18g
- Fiber: 2g
- Protein: 5g
A Slice of Nostalgia: My Grandma’s “Secret” Recipe
This recipe takes me right back to my grandma’s warm, always-bustling kitchen in our little coastal town. Thanksgiving was her Super Bowl, and she’d spend days preparing a feast for what felt like the entire town. But amidst the elaborate pies and perfectly golden dinner rolls, there was always one humble, unassuming dish that disappeared first: her pumpkin dump cake.
She called it her “lazy day dessert,” a secret weapon for when she needed to feed a crowd without the fuss. I remember standing on a stool next to her, “helping” by pouring the pumpkin mixture into her well-loved ceramic baking dish. She’d let me sprinkle the bright yellow cake mix powder over the top, creating a tiny dust storm of potential. The best part was drizzling the melted butter—she’d always leave a little extra for me to “test” with a piece of bread. It wasn’t a fancy, French pastry. It was better. It was real, it was heartfelt, and it was made with the simple joy of feeding the people you love. Every time I make it, that buttery, spiced smell transports me right back to her table, crowded with family and overflowing with laughter. It’s a memory I bake right into every bite.
Gathering Your Flavor Crew: The Ingredients
Here’s the beautiful part: you probably have most of these ingredients in your pantry right now. This is a no-judgment zone, so canned pumpkin and boxed cake mix are not just welcome; they’re the heroes of this story!
- 1 (15 oz) can pumpkin purée: Not pumpkin pie filling! We want plain, unsweetened pumpkin purée. This is the rich, earthy base of our dessert. Chef’s insight: Libby’s is the classic for a reason—its consistency is always perfect.
- 1 (12 oz) can evaporated milk: This is the secret to that luxuriously creamy, custardy texture without being too heavy. It’s concentrated milk magic. Don’t have any? You can substitute with half-and-half or even whole milk in a pinch, but the texture will be slightly less firm.
- 3 large eggs: Our binding agents! They give the pumpkin layer structure and richness. Make sure they’re at room temperature to help everything blend together smoothly and evenly.
- 1 cup granulated sugar: The perfect amount of sweetness to balance the spices. For a deeper flavor, you could swap half of it for brown sugar.
- The Spice Squad (1 tsp cinnamon, ½ tsp nutmeg, ½ tsp ginger): This is the soul of the dish! Feel free to add a pinch of cloves or allspice if you’re feeling extra spicy. No fresh ginger? Ground works perfectly here.
- ½ tsp salt: Crucial! It enhances all the other flavors and keeps the dessert from tasting flat. Never skip the salt in baking.
- 1 box yellow cake mix: The “dump” in dump cake! This creates that incredible crispy, crumbly topping. The dry mix absorbs the butter and creates magic. A pro tip: spice cake mix is an incredible swap for an extra kick of warm flavor.
- 1 cup (2 sticks) unsalted butter, melted: This is what transforms the dry cake mix into that glorious, golden, buttery crisp topping. Using unsalted lets you control the sodium level. For a nuttier flavor, try browning your butter first!
- ½ cup chopped pecans (optional): I highly recommend them! They add a wonderful crunch and toasty flavor. Walnuts are a great alternative, or leave them out for a nut-free version.
Let’s Build This Beauty: Step-by-Step
Ready? This is where the fun begins. Pre-heat your oven to 350°F (175°C) and grab a 9×13 inch baking dish. Grease it lightly with butter or cooking spray. Let’s go!
- Create the Pumpkin Base: In a large bowl, combine the pumpkin purée, evaporated milk, eggs, sugar, spices, and salt. Now, grab your whisk and go to town! You want to whisk it until it’s completely smooth and homogenous. No streaks of egg white or pockets of spice should remain. This is your moment to feel like a wizard—you’re conjuring the creamy dreamy layer. Chef’s Hack: If you’re worried about over-whisking, don’t be. You’re not developing gluten here; you’re just achieving silky perfection.
- The Big Pour: Carefully pour your beautiful orange mixture into your prepared baking dish. Give the dish a gentle tap on the counter to settle it and release any sneaky air bubbles.
- The “Dump”: Here it is, the namesake step! Take your box of dry cake mix and sprinkle it evenly over the entire surface of the pumpkin layer. I like to use my fingers to break up any large clumps as I go. Don’t stir! You’re creating a distinct layer that will transform in the oven. The goal is a uniform blanket of cake mix powder.
- Butter Up: Take your melted butter and slowly, deliberately drizzle it all over the top of the cake mix. Try to cover as much surface area as possible. This is the key to that craggy, crispy, irresistible topping. A spoon can help you distribute it evenly. Chef’s Hack: If you see a few dry patches of cake mix after drizzling, that’s okay! They will hydrate during baking. Resist the urge to mix it.
- Add the Crunch (Optional): If you’re using pecans or any other nuts, now’s the time to scatter them generously over the top.
- Bake to Perfection: Slide your masterpiece into the preheated oven and bake for 50-55 minutes. You’re looking for a deep golden brown topping and a center that is set (it might still have a very slight jiggle, but it shouldn’t look liquidy). The edges will be bubbly and glorious. Your kitchen will smell like a fall fairy tale.
- The Hardest Part: Wait. Remove the pan from the oven and place it on a wire rack. You must let it cool for at least 20-30 minutes before serving. This allows the pumpkin layer to set properly, so you get clean slices instead of soup. I know, the wait is torture!
How to Serve This Masterpiece
This cake is best served warm, not scalding hot. Scoop out a generous portion into a bowl. The contrast between the hot cake and a cold topping is *chef’s kiss*. The absolute non-negotiable pairing is a giant dollop of whipped cream or a scoop of high-quality vanilla ice cream. The creamy, cold element melts into the spiced, warm cake and creates a bite that is pure heaven. For a pretty presentation, dust the top with a little extra cinnamon or a drizzle of caramel sauce right before serving.
Ride Your Own Flavor Wave: Recipe Variations
The beauty of a dump cake is its versatility. Make it your own!
- Spice Cake Swap: Use a spice cake mix instead of yellow cake for a double dose of warm, autumnal flavor.
- Caramel Apple Twist: Swap the pumpkin purée for a can of apple pie filling. Drizzle ½ cup of caramel sauce over the filling before adding the cake mix for a gooey, decadent treat.
- Gingersnap Crunch: Instead of (or in addition to) pecans, sprinkle ½ cup of crushed gingersnap cookies over the buttered top for a spicy, molasses-kissed crunch.
- Chocolate Pumpkin: For the chocolate lovers, use a chocolate cake mix! The combination of chocolate and pumpkin is surprisingly and deliciously decadent.
- Gluten-Free Friendly: Use a 1:1 gluten-free yellow cake mix and ensure your other ingredients are certified gluten-free. The method remains exactly the same!
Isla’s Chef Notes & Kitchen Stories
This recipe has been through it all with me. I’ve made it in a beach rental with a dodgy oven that only had one working rack, and it still turned out perfectly. I’ve made it while simultaneously trying to stop my dog from stealing the Thanksgiving turkey—true story, and the cake was the only thing that survived unscathed! Over time, I’ve learned that this recipe is incredibly forgiving. A little more spice? Great. Forgot to grease the pan? It might stick a tiny bit on the edges, but no one will care. The evolution of this recipe in my kitchen has been towards even more simplicity and joy. It’s a reminder that the best food isn’t about perfection; it’s about the love and the people you share it with. And if you happen to have a piece for breakfast the next day with your coffee… I won’t tell. In fact, I highly recommend it.
Your Questions, Answered: FAQs & Troubleshooting
Q: My topping is still powdery/dry in places after baking. What happened?
A: This usually means the butter wasn’t distributed quite evenly enough. It’s a common hiccup! Don’t worry, those powdery bits are still delicious. Next time, take an extra minute to drizzle slowly and use a spoon to spread the butter over any obvious dry patches before baking.
Q: Can I make this ahead of time?
A: Absolutely! You can assemble the entire cake, cover it tightly with plastic wrap, and keep it in the refrigerator for up to 8 hours before baking. You might need to add 5-10 minutes to the baking time since it will be going into the oven cold. You can also bake it a day ahead, let it cool completely, cover it, and keep it at room temperature. Reheat individual servings in the microwave for 20-30 seconds before serving.
Q: The center is super jiggly. Is it done?
A: A slight jiggle in the center is normal—it will set up as it cools. If the center looks completely liquid and the top is still very pale, it needs more time. If the edges are getting too dark but the center is still underdone, loosely tent the top of the dish with aluminum foil for the remainder of the baking time.
Q: Why did my cake sink or crack in the middle?
A: This is almost always due to underbaking. The structure hasn’t had enough time to set. Use the time as a guide, but always rely on the visual cues: golden brown topping and a set (not liquid) center. A toothpick inserted near the edge should come out relatively clean.
Nutritional Information*
*This is an estimate provided for informational purposes only. I am not a nutritionist.
Per serving (1/12 of the recipe, without ice cream):
Calories: ~360 | Protein: 5g | Fat: 18g | Carbohydrates: 44g | Sugar: 27g | Fiber: 2g | Sodium: 410mg
This Pumpkin Dump Cake is the ultimate easy fall dessert—rich, comforting, and irresistibly simple. With its creamy pumpkin base and golden crunchy topping, it’s a guaranteed hit for holidays, gatherings, or whenever you’re craving a cozy seasonal treat.