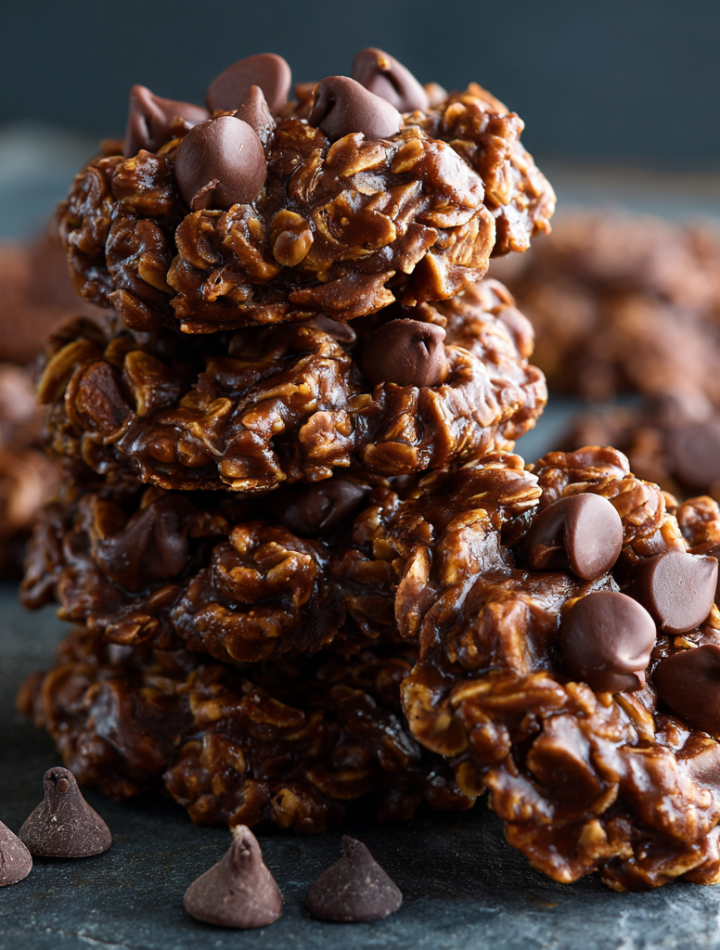

Double Chocolate Peanut Butter No-Bake Cookies: Your New Favorite 15-Minute Treat
Hey there, friend! Isla here from BiteTide. Can we talk about cravings for a second? You know the ones—those sudden, powerful waves of need that hit you out of nowhere, demanding something rich, chocolatey, and preferably ready in under 20 minutes. I’ve been there more times than I can count, usually right around 3 PM or during a serious late-night snack hunt. That’s exactly why this recipe is my kitchen’s secret weapon and an all-time reader favorite.
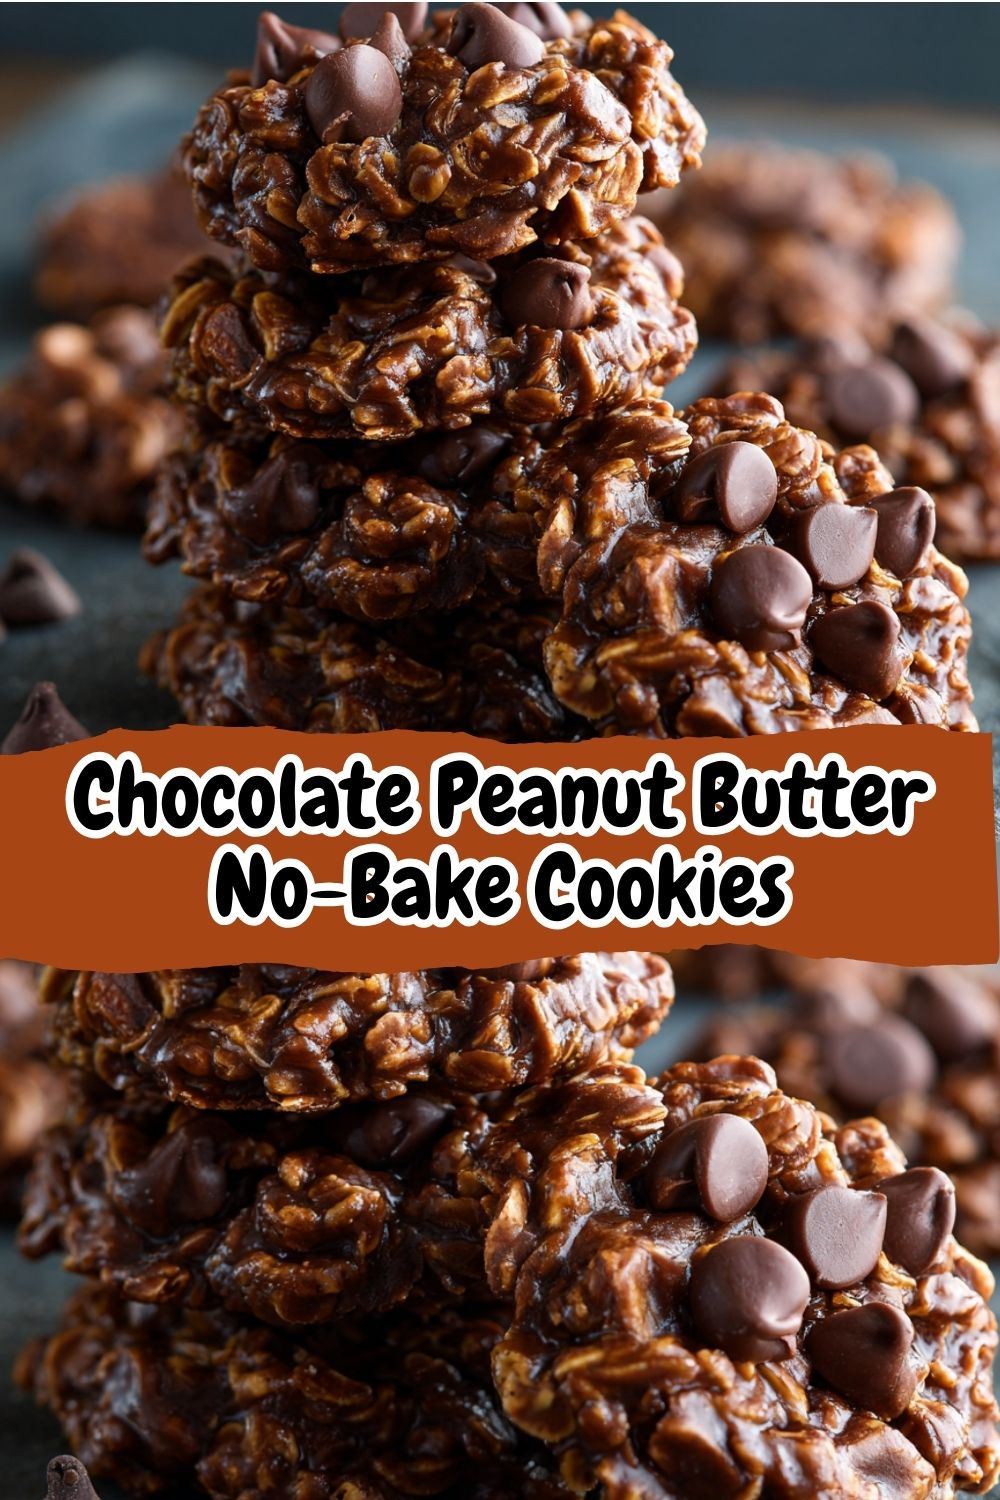
These Double Chocolate Peanut Butter No-Bake Cookies are pure, unadulterated magic. We’re talking a fudgy, chewy, oat-packed cookie that’s loaded with peanut butter goodness and doesn’t require you to even think about turning on your oven. They’re the ultimate rescue mission for a sweet tooth emergency, a potluck panic, or when you just need a little homemade joy without the fuss.
I promise you, this isn’t just another no-bake cookie recipe. This is the perfected, foolproof, flavor-maximized version I’ve tweaked and loved for years. It’s the one I make when friends come over, when my family needs a lunchbox surprise, or when I simply deserve a happy dance in the kitchen. So, grab your biggest saucepan and let’s whip up a batch of these irresistible, no-fuss cookies together. Trust me, your future self will thank you!
A Sticky, Sweet Memory: My Grandma’s Kitchen
This recipe instantly transports me back to my grandma’s warm, always-smelling-like-sugar kitchen in our little coastal town. She was the queen of “pantry cooking,” creating incredible things from whatever we had on hand. One rainy afternoon, when my brother and I were bouncing off the walls with boredom, she herded us into the kitchen with a mischievous grin. “We’re making magic,” she declared, pulling out the oats, cocoa, and a giant jar of peanut butter.
I remember standing on a wobbly stool, tasked with stirring the mysterious dark potion on the stove, my eyes wide as it transformed from separate ingredients into a glossy, bubbling river of chocolate. The best part was the “quality control” taste test she let us do straight from the spoon—a dangerously hot but utterly delicious risk we were always willing to take. We’d drop messy spoonfuls onto wax paper, our fingers covered in sticky chocolate, laughing as we tried to wait the agonizingly long 30 minutes for them to set. To this day, the smell of melting peanut butter and chocolate is the smell of love, impatience, and my grandma’s brilliant, no-fuss approach to creating joy. It’s a feeling I hope this recipe brings to your kitchen, too.
Print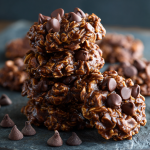
Chocolate Peanut Butter No-Bake Cookies
- Total Time: 15 minutes
Description
Craving a rich, chewy, no-fuss treat that comes together in minutes? These Double Chocolate Peanut Butter No-Bake Cookies are your sweet escape—fudgy, nutty, and loaded with texture. No oven, no stress, just pure homemade magic. Make a batch (or two) and share the love!
Ingredients
1 cup butter, cut into pieces
4 cups granulated sugar
1 cup whole milk
½ cup unsweetened cocoa powder
1 cup creamy peanut butter
2 tsp vanilla extract
6 cups oats (use half rolled + half quick oats for the best texture)
Twists:
½ cup mini chocolate chips (add after mixture cools slightly)
½ tsp sea salt (sprinkle on top for contrast)
Instructions
In a large saucepan, melt butter over medium heat.
Stir in sugar, milk, and cocoa powder. Bring to a rolling boil and let it bubble for exactly 1 minute.
Remove from heat. Immediately stir in peanut butter and vanilla until smooth.
Fold in oats, mixing until fully coated.
Let mixture cool for 5 minutes. Stir in mini chocolate chips (optional).
Drop spoonfuls onto wax paper. Flatten slightly with a spoon if desired.
Sprinkle with a pinch of sea salt. Let set at room temperature for 30–45 minutes until firm.
- Prep Time: 10 minutes
- Cook Time: 5 min
- Category: Dessert
Nutrition
- Calories: 160
- Sugar: 15g
- Fat: 8g
- Carbohydrates: 22g
- Protein: 3g
Gathering Your Flavor Crew: The Ingredients
Here’s the beautiful part: you probably have most of this in your pantry right now! This is a simple, humble list of ingredients that work together to create something truly greater than the sum of its parts. Let’s break it down.
- 1 cup (2 sticks) butter, cut into pieces – This is our rich, creamy base. I use unsalted butter so I can control the salt level myself. Chef’s Insight: Cutting it into pieces helps it melt evenly and quickly, preventing the sugar from burning.
- 4 cups granulated sugar – Yes, it’s a lot! This is what gives the cookies their structure and that classic chewy texture as it crystallizes while setting. Substitution Tip: I don’t recommend reducing it, as it can affect the setting process, but you can use organic cane sugar for a slight twist.
- 1 cup whole milk – The liquid that brings everything together. The higher fat content in whole milk contributes to a richer, creamier final product. Substitution Tip: Any milk you have on hand will work—2%, almond milk, or even oat milk are fine swaps!
- ½ cup unsweetened cocoa powder – This is where our deep, chocolatey flavor comes from. Don’t use hot chocolate mix! Chef’s Insight: For a seriously intense chocolate experience, use a dark cocoa powder (like Dutch-process). It’s a game-changer.
- 1 cup creamy peanut butter – The other star of the show! I prefer creamy for a smooth texture, but crunchy works great if you want extra nutty bits. Substitution Tip: Feel free to use natural peanut butter, but make sure it’s well-stirred. Almond butter or sunflower seed butter are fantastic alternatives for allergies.
- 2 tsp vanilla extract – The flavor enhancer that makes the chocolate and peanut butter pop. Always use pure vanilla extract if you can!
- 6 cups oats – The heart and soul of the cookie, providing heft and chew. Chef’s Secret: My perfect texture hack is to use a mix of 3 cups old-fashioned rolled oats and 3 cups quick-cooking oats. The rolled oats give a sturdy, chewy body, and the quick oats help bind everything together for the perfect consistency.
Twists & Shout-Outs:
- ½ cup mini chocolate chips – Stirred in after the mixture cools slightly, these add glorious melty pockets of extra chocolate.
- ½ tsp sea salt – A flaky sprinkle on top of each cookie right after dropping them creates an incredible sweet-and-salty contrast. Do not skip this!
Let’s Make Some Magic: The Foolproof Method
Don’t let the stovetop part intimidate you! This is incredibly simple. The key is having everything measured and ready to go (mise en place, as the fancy chefs say) because once things start moving, they move fast!
- The Melt: Grab your largest, heav-bottomed saucepan. Trust me on the size—this mixture will bubble up dramatically, and you do not want a sugary lava flow all over your stovetop (I’ve learned this the hard way so you don’t have to!). Place it over medium heat and melt the butter pieces. Swirl the pan occasionally until it’s just melted and foamy.
- The Simmer: Add the granulated sugar, whole milk, and unsweetened cocoa powder directly to the melted butter. Grab a sturdy wooden spoon or silicone spatula and start stirring. You’ll whisk or stir continuously until the sugar has completely dissolved and the mixture is smooth. This takes about 3-5 minutes. You should see no gritty sugar crystals on the back of your spoon.
- The ROLLING BOIL (This is the most important step!): Now, stop stirring and let the mixture come to a full, rolling boil. This means bubbles are covering the entire surface and can’t be stirred down. The second it reaches this point, start your timer for exactly 1 minute (60 seconds!). Boiling for the full minute is crucial for the cookies to set properly. Too little, and they’ll stay sticky and never firm up. Too long, and they can become dry and crumbly. I use my phone timer every single time—no guessing!
- The Power Down: After your minute is up, immediately remove the saucepan from the heat. This stops the cooking process right where we want it.
- The Stir-In: Now, quickly add the creamy peanut butter and vanilla extract to the hot mixture. Stir vigorously until the peanut butter is completely melted and the mixture is smooth, glossy, and uniformly brown. It will smell absolutely incredible.
- The Oaty Embrace: Dump all your oats into the pot. Switch to folding and stirring motions to ensure every single oat is thoroughly coated in that luxurious chocolate peanut butter sauce. The mixture will be very thick!
- The Cool Down (for chips!): If you’re adding mini chocolate chips, let the mixture sit in the pot for about 5 minutes. This cools it down just enough so the chips melt slightly when stirred in but still hold their shape, creating those perfect little chocolate pockets.
- The Drop: Line your countertops with wax paper, parchment paper, or silicone baking mats. Using two spoons (a cookie scoop works great too!), drop tablespoon-sized mounds of the mixture onto the prepared sheets. If you like a flatter, more traditional cookie shape, use the back of your spoon to gently press and flatten each mound. This is when you sprinkle each one with a tiny pinch of flaky sea salt!
- The Wait (The Hardest Part!): Walk away. Let the cookies set undisturbed at room temperature for 30-45 minutes. They will firm up perfectly. You can speed this up by popping the entire tray into the refrigerator for 15-20 minutes if you’re desperately impatient like me!
How to Serve & Savor Your Masterpiece
Once set, these cookies are ready for their glory! Pile them high on a rustic wooden board for a casual gathering, stack them in a glass jar for a cute kitchen counter display, or simply shove a few into a zip-top bag for on-the-go goodness. They pair perfectly with a giant glass of cold milk, a hot cup of coffee, or a scoop of vanilla ice cream (for the ultimate indulgence). They’re the ultimate shareable treat, but I totally won’t judge if you decide to keep the whole batch for yourself.
Ride Your Own Flavor Wave: Creative Twists!
The beauty of this base recipe is how adaptable it is! Here are a few of my favorite ways to mix it up:
- The Tropical Twist: Swap the peanut butter for 1 cup of canned coconut milk (the creamy part) and 1 cup of shredded coconut for a tropical, dairy-free version.
- The Nutty Professor: Use crunchy peanut butter and stir in ½ cup of chopped roasted peanuts or pecans along with the oats for a mega-texture experience.
- The S’mores Situation: After dropping the cookies, press a few mini marshmallows and a piece of graham cracker into the top of each one. Let them set as usual.
- The Protein Power-Up: Stir in 2 scoops of your favorite chocolate or vanilla protein powder along with the oats. It might make the texture a bit denser, but it’s a great way to add a nutritional boost!
- The Espresso Kick: Add 1-2 tablespoons of instant espresso powder or finely ground coffee to the sugar and cocoa mixture. It deepens the chocolate flavor beautifully.
Isla’s Chef Notes & Kitchen Confessions
This recipe has evolved so much since my grandma first showed me! My biggest breakthrough was the half-rolled, half-quick oats hack—it truly creates the ideal chewy-yet-holdable texture. I’ve also learned that weather is a sneaky factor. On super humid or rainy days, the cookies might take a bit longer to set, or you might need to give them a little help in the fridge. Don’t stress! They’ll still taste amazing.
One of my funniest kitchen fails involved this very recipe. I was filming a quick video for Instagram and got so caught up in chatting that I completely forgot to set the timer for the boil. I boiled it for what felt like “about a minute,” which was probably closer to three. The result was a pan of delicious but hopelessly crumbly cookies that we had to eat with a spoon straight from the pot. It was a mess, but we laughed the whole time. Even the “failures” are tasty! So don’t be afraid—you’ve got this.
Your Questions, Answered: No-Bake Cookie FAQ
Q: Why are my cookies too sticky and not setting?
A: This is usually due to not bringing the mixture to a full rolling boil or not boiling it for the full minute. The sugar needs to reach a specific temperature to crystallize correctly as it cools. If they’re still sticky after a few hours, you can try placing them in the fridge to firm up.
Q: Why is my mixture grainy or sugary?
A: This means the sugar didn’t fully dissolve during the initial stirring phase before the boil. Next time, make sure you stir continuously over medium heat until the mixture is completely smooth and you can’t feel any grit on the back of your spoon before you stop stirring and let it come to a boil.
Q: Can I make these gluten-free?
A: Absolutely! Just ensure you are using certified gluten-free oats. All the other ingredients are naturally gluten-free, so it’s a super easy swap.
Q: How should I store these, and how long do they last?
A: Once set, store them in an airtight container at room temperature for up to a week (if they last that long!). You can also layer them between sheets of wax paper to prevent sticking. They also freeze beautifully for up to 3 months. Just thaw at room temperature for 15 minutes before eating.
Quick Nutritional Breakdown
Per Cookie (Approximate, based on 48 cookies): Calories: 160 | Fat: 8g | Saturated Fat: 3.5g | Carbohydrates: 22g | Fiber: 1g | Sugar: 15g | Protein: 3g
Disclaimer: This is an estimate provided for informational purposes only. Actual values will vary based on specific ingredients used and portion size.
There you have it! My ultimate, most beloved recipe for Double Chocolate Peanut Butter No-Bake Cookies. I hope this recipe becomes a source of easy joy and delicious memories in your home, just like it is in mine. If you make them, I’d be absolutely thrilled to see your creation! Tag me @BiteTide on Instagram or Pinterest so I can share in your success. Now, go forth and create some no-bake magic!
With love and a full cookie jar,