 Let’s Make the Coziest, Creamiest Vegetarian Pot Pie Together!
Hey there, friend! Isla here from BiteTide. Can you smell that? It’s the smell of buttery, flaky pastry giving way to a steamy, creamy, veggie-packed filling. It’s the kind of smell that pulls everyone into the kitchen, noses first, asking “Is it ready yet?” That’s the magic of a classic pot pie, and today, we’re making a vegetarian version that’s every bit as comforting, hearty, and soul-warming as the original. This isn’t just food; it’s a hug in a baking dish.
I know what you might be thinking: “Pot pie? Isn’t that a project?” I’m here to tell you—with a wink and a whisk—that it’s so much easier than you think. We’re keeping it real, just like we always do at BiteTide. No fussy techniques, no intimidating chef skills. Just simple, wholesome ingredients coming together to create something truly spectacular. This recipe is my go-to for Sunday night family dinners, for impressing guests without stress, and for stocking the freezer with love (because future you will be SO grateful). So, tie on your favorite apron, put on some good music, and let’s create some kitchen magic together. This creamy, dreamy vegetarian pot pie is about to become your new favorite comfort food hero.
The Pot Pie That Built a Friendship
This recipe always takes me back to my first tiny apartment in the city. My best friend, Sarah, and I were broke, it was pouring rain, and we were surviving on a questionable diet of instant noodles. We decided we needed a proper, home-cooked meal to feel like actual adults. We pooled our cash, raided the discount produce bin, and decided to tackle a pot pie with zero prior experience. What ensued was a glorious mess. Flour was everywhere. We accidentally used frozen pastry for the bottom and top crust, creating a singular, giant pastry lump. We weren’t sure if the filling was thick enough, so we just… crossed our fingers.
When we pulled that golden-brown beauty out of the oven, we were terrified it would be a disaster. But you know what? It was perfect. We sat on the floor of my living room, eating steaming slices straight from the pan, laughing until we cried. It was more than dinner; it was a triumph. It taught me that the best meals aren’t about perfection—they’re about the joy you stir into them. That’s the spirit I’ve baked into this very recipe. It’s forgiving, it’s fun, and it’s guaranteed to create a happy memory, even if your kitchen ends up looking like a flour bomb went off.
Print
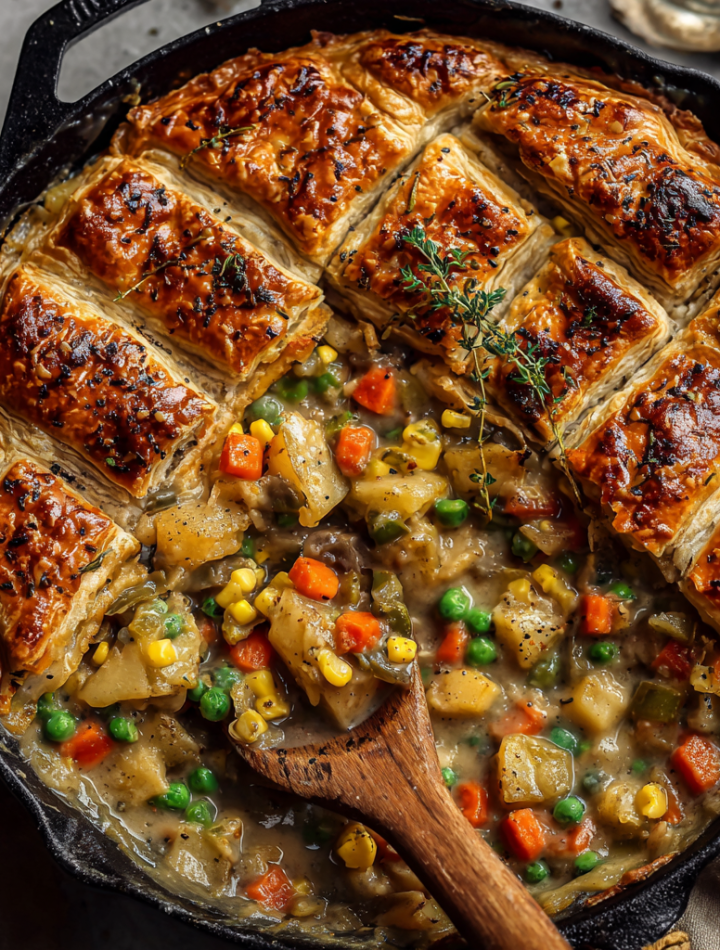
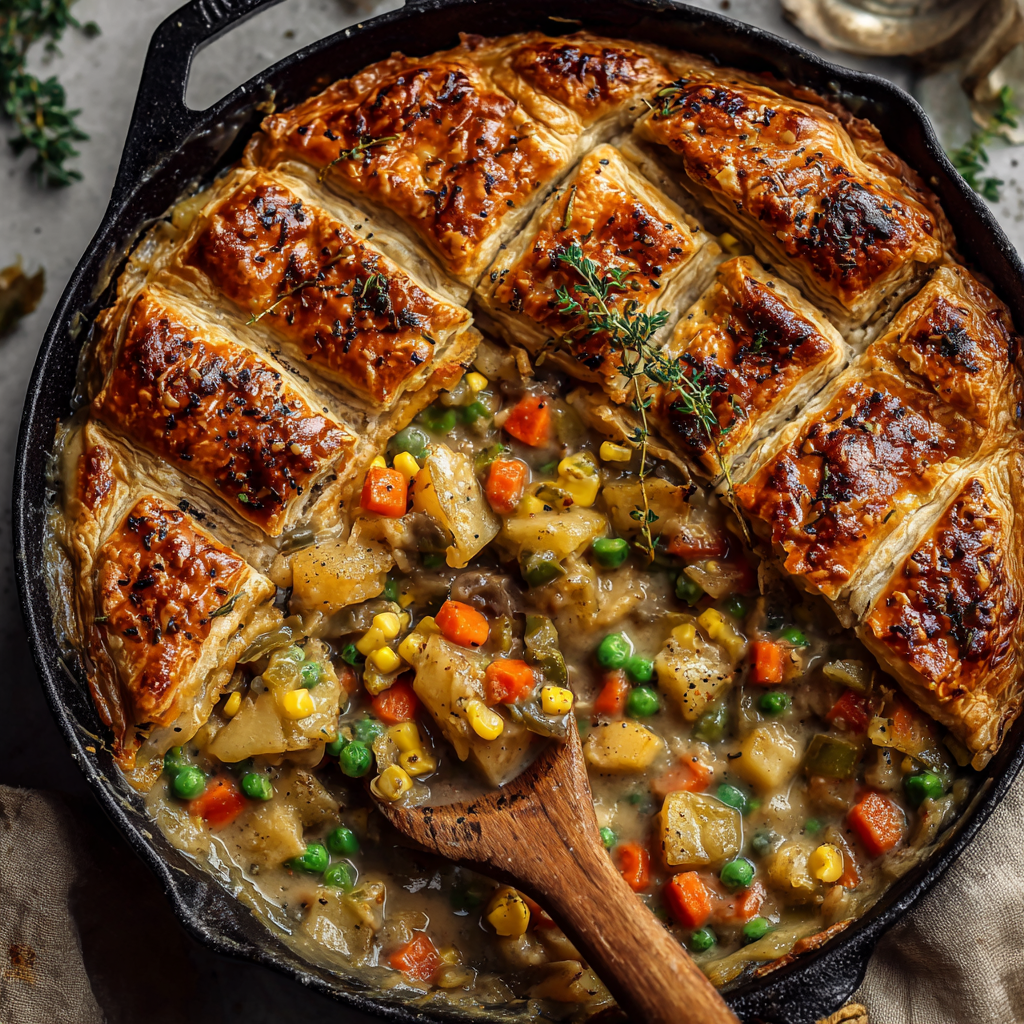
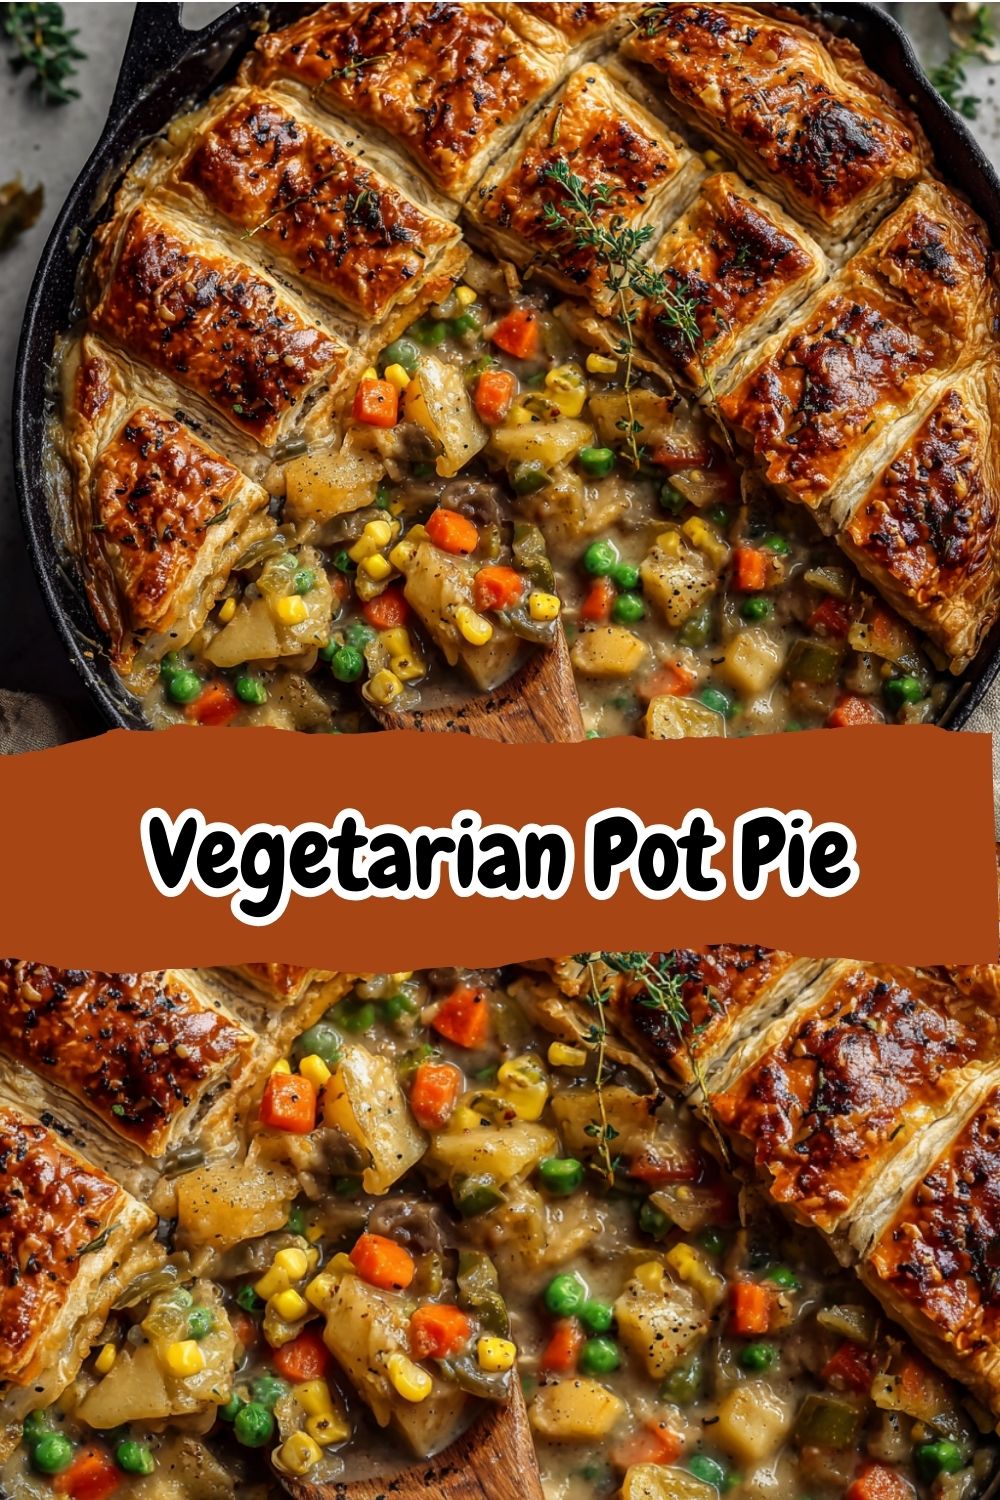
Vegetarian Pot Pie
- Total Time: 50 mins
- Yield: 6 servings 1x
Description
This Vegetarian Pot Pie is comfort food at its wholesome best—loaded with colorful veggies, creamy sauce, and topped with golden, flaky crust. It’s a family-friendly, freezer-friendly, and feel-good meal that warms you from the inside out.
Ingredients
2 tbsp olive oil or butter
1/2 cup chopped onion
2 garlic cloves, minced
1 cup diced carrots
1 cup peas
1 cup diced potatoes
1/2 cup corn
1/4 cup all-purpose flour
2 cups vegetable broth
1/2 cup milk or plant milk
1 tsp thyme
Salt & pepper to taste
1 sheet puff pastry or pie crust (store-bought or homemade)
Instructions
Preheat oven to 400°F (200°C).
In a skillet, heat oil and sauté onion and garlic until soft.
Add carrots, potatoes, corn, and peas; cook 5–7 minutes.
Sprinkle flour over veggies and stir to coat.
Slowly stir in broth and milk, cooking until thickened (about 5 mins).
Season with thyme, salt, and pepper.
Pour filling into a baking dish or pie pan.
Top with puff pastry or crust, seal edges, and cut slits for steam.
Bake 25–30 minutes, until crust is golden brown.
Cool slightly before serving.
- Prep Time: 20 mins
- Cook Time: 30 mins
- Category: Dinner
Nutrition
- Calories: 290
- Fat: 15g
- Carbohydrates: 30g
- Fiber: 4g
- Protein: 6g
Gathering Your Flavor Crew
Here’s your cast of characters! This list is all about building layers of flavor and texture. Don’t stress if you’re missing something—I’ve got plenty of swaps and ideas to make it work with what you’ve got.
- 2 tbsp olive oil or butter: Our cooking fat! Butter gives a rich, classic flavor, while olive oil offers a fruity, savory note. Use what you love. Vegan butter works great too!
- 1/2 cup chopped onion: The aromatic foundation. Yellow or white onion is perfect here. No onions? A leek or a couple of shallots are a lovely, mild substitute.
- 2 garlic cloves, minced: Non-negotiable flavor booster! Fresh is best, but ½ tsp of garlic powder in a pinch will do the trick.
- 1 cup diced carrots: For that classic sweet flavor and a pop of color. Dice them small so they cook evenly with the potatoes.
- 1 cup peas: I use frozen peas for convenience and bright green perfection. No need to thaw!
- 1 cup diced potatoes: Yukon Gold are my favorite—they hold their shape but get nice and tender. Russets will work, but can get a bit softer.
- 1/2 cup corn: A little sweetness and a delightful pop! Frozen, canned (drained), or fresh off the cob all work beautifully.
- 1/4 cup all-purpose flour: This is our thickening agent, the key to a luxuriously creamy sauce, not a brothy soup. For a gluten-free version, a 1:1 GF flour blend works wonders.
- 2 cups vegetable broth: The soul of our sauce! Use a good-quality broth for the best flavor. I like a low-sodium version so I can control the salt level myself.
- 1/2 cup milk or plant milk: For added creaminess. Whole milk is rich, but any unsweetened, unflavored plant milk (like oat, soy, or almond) will create a luscious dairy-free filling.
- 1 tsp thyme: That quintessential “comfort food” herb. Dried is great, but if you have fresh, use 1 tablespoon.
- Salt & pepper to taste: Season as you go! Taste your filling before it goes into the dish. This is your masterpiece—make it taste good to YOU.
- 1 sheet puff pastry or pie crust: The glorious, golden crown! Store-bought is a total lifesaver and I use it 99% of the time. Thaw it according to package directions. Puff pastry gives incredible flaky layers, while a standard pie crust is more traditionally sturdy and buttery.
Let’s Build Your Pie, Step-by-Step!
Ready to create some magic? Follow these steps, and you’ll have a perfect pot pie in no time. I’ve sprinkled in all my favorite chef hacks to make it foolproof.
- Preheat your oven to 400°F (200°C). This is our first step for a reason! We want that oven screaming hot and ready for our pie so the crust gets that instant blast of heat and puffs up beautifully.
- In a large oven-safe skillet or Dutch oven, heat the oil or butter over medium heat. Chef’s Hack: Using an oven-safe skillet means you can cook your filling and bake it all in the same pan. Fewer dishes = more happiness. If you don’t have one, a regular skillet is fine; you’ll just transfer the filling to a baking dish later.
- Add the chopped onion and sauté for 3-4 minutes, until soft and translucent. Add the garlic and cook for another 30 seconds until fragrant. Don’t let the garlic burn! Burnt garlic turns bitter. We’re just waking up its flavors.
- Add the diced carrots and potatoes. Cook, stirring occasionally, for about 5-7 minutes. We’re not trying to cook them all the way through here, just giving them a head start and building a roasted flavor foundation.
- Stir in the peas and corn. These are more delicate, so we add them later. If you’re using frozen, no need to thaw—they’ll heat through perfectly in the sauce.
- Sprinkle the flour over the vegetable mixture. Stir constantly for about 1 minute to coat everything evenly. This is a crucial step! Cooking the flour for a minute gets rid of that raw flour taste and ensures our sauce thickens up nicely later.
- Slowly pour in the vegetable broth and milk, stirring constantly to avoid lumps. I mean it—go slow! Add a splash, stir until it’s fully incorporated into the flour-veggie paste, then add a bit more. This is the secret to a smooth, lump-free gravy.
- Bring the mixture to a simmer, then reduce the heat slightly. Cook for 3-5 minutes, stirring often, until the sauce has thickened nicely. It should coat the back of a spoon. It will thicken a bit more in the oven, so don’t worry if it seems a tad loose.
- Remove from heat and stir in the thyme, salt, and a generous amount of black pepper. Taste it! Does it need more salt? More herbs? Now is the time to adjust. Remember, the pastry adds saltiness too.
- If you didn’t use an oven-safe skillet, carefully transfer the filling to a 9-inch pie dish or similar-sized baking dish. Let the filling cool for a few minutes—this helps the top pastry cook evenly without getting soggy from immediate steam.
- Drape the thawed puff pastry or pie crust over the top of the filling. If using a pie dish, you can crimp the edges with a fork for a cute, sealed look. If using a skillet, just let the pastry drape over the sides—it’s rustic and beautiful! Cut a few slits in the top to allow steam to escape. This prevents a soggy top and a volcanic filling explosion!
- Optional: Brush the top with an egg wash (1 egg beaten with 1 tbsp water or milk) for an extra-deep golden, glossy finish. This is a pro move for maximum visual impact, but it’s totally optional. Your pie will still be delicious without it.
- Bake for 25-30 minutes, or until the pastry is puffed and golden brown and the filling is bubbly around the edges. Your kitchen will smell like heaven. Trust me.
- This is the hardest part: let it cool for at least 10-15 minutes before serving. I know, I know! It’s torture. But this rest time allows the filling to set up so you get clean, beautiful slices instead of a delicious but soupy mess. It’s worth the wait, I promise!
How to Serve Your Masterpiece
Presentation is part of the fun! I love placing the whole skillet or baking dish right in the middle of the table for that family-style, dig-in vibe. Use a big spoon to scoop out generous portions. This pie is rich, so it doesn’t need much on the side. A simple, bright green salad with a tangy vinaigrette is the perfect contrast to cut through the creaminess. For a true comfort food feast, a side of mashed potatoes (because can you ever have too many potatoes?) or some roasted green beans would be absolutely divine. Don’t forget to garnish with a little extra fresh thyme or parsley for a pop of color!
Make It Your Own: Delicious Twists
The beauty of this recipe is its flexibility! Ride the flavor wave and try one of these fun variations.
- “Cream” of Mushroom: Sauté 8 oz of sliced cremini mushrooms with the onions for a deep, earthy, umami-packed version.
- White Wine Herbs de Provence: Deglaze the pan with ¼ cup of dry white wine after sautéing the veggies. Swap the thyme for 1 tsp of Herbs de Provence for a French countryside feel.
- Curry Pot Pie: Add 1-2 tbsp of your favorite curry powder with the flour for a warmly spiced, aromatic filling. Stir in a handful of spinach at the end for color.
- Vegan & Dairy-Free: You’re already most of the way there! Use olive oil, plant-based milk, and ensure your pastry is vegan-friendly (many store-bought puff pastries are accidentally vegan!).
- Potato Top: For a gluten-free crown, skip the pastry and top the filling with a layer of creamy mashed potatoes. Bake until the topping is golden and the filling is bubbly.
Isla’s Kitchen Notes
This recipe has evolved so much since that first messy apartment attempt! I’ve learned a few things along the way. First, don’t skip the step of cooking the veggies with the flour. It makes all the difference for a non-gloopy sauce. Second, this is the perfect freezer meal. Assemble the pie completely but don’t bake it. Wrap it tightly in a few layers of plastic wrap and foil, and freeze for up to 3 months. Bake from frozen, adding 15-20 minutes to the baking time. Dinner salvation on a busy night! Lastly, my kids love it when I use cookie cutters to cut fun shapes out of the pastry before laying the sheet on top—little stars or leaves peeking through make it so special. It’s these little touches of joy that make cooking so much fun.
Your Pot Pie Questions, Answered!
Q: My filling is too runny. What did I do wrong?
A: The most common culprit is not cooking the flour-and-broth mixture long enough on the stovetop. It needs a good few minutes at a simmer to reach its full thickening power. Also, remember it will continue to thicken as it cools. If it’s already baked and still soupy, you can scoop out the filling, simmer it in a pan to reduce further, and then return it to the dish (though the top crust won’t be as pretty).
Q: Can I make this ahead of time?
A: Absolutely! You can prepare the filling up to 2 days in advance and store it covered in the fridge. When you’re ready to bake, let it come to room temperature for a bit, top with the pastry, and bake. You’ll likely need to add a few extra minutes to the baking time since the filling is cold.
Q: The bottom of my pastry is soggy. How can I prevent that?
A: A few tricks! First, make sure your filling isn’t piping hot when you add the pastry—let it cool for 10 minutes. Second, placing your pie dish on a preheated baking sheet in the oven can help blast heat onto the bottom and crisp it up. Finally, using an oven-safe skillet to bake it creates a hot surface that cooks the bottom pastry perfectly.
Q: My pastry is burning before the filling is bubbly!
A> If your pastry is getting too dark too quickly, simply tent the top loosely with a piece of aluminum foil for the remainder of the baking time. This will shield it from direct heat while allowing the interior to continue cooking.
Nutritional Information*
*This is an estimate for 1 serving (based on 6 servings) using whole milk and puff pastry. Values will vary based on specific ingredients and brands used.
Calories: ~290 | Fat: 15g | Carbs: 30g | Protein: 6g | Fiber: 4g
Prep Time: 20 mins | Bake Time: 30 mins | Total Time: 50 mins | Servings: 6