
Waffle Crumble Cookies: Your New Favorite Kitchen Hack is Here!
Hey there, friend! Isla here, from my cozy kitchen to yours. Have you ever had one of those glorious, lightbulb-over-the-head moments where two amazing ideas collide into one even more amazing creation? For me, it was the day I stared at my waffle iron and a bowl of cookie dough and thought… what if?
What if we could capture the buttery, crisp-edged magic of a waffle and pack it into the handheld, joy-filled package of a cookie? The result? These Waffle Crumble Cookies. And let me tell you, they are a total game-changer.
Imagine: a cookie that’s shatteringly crisp on the outside, thanks to those beautiful, deep waffle-grid pockets, yet miraculously soft and tender on the inside. They’re like the love child of a Belgian waffle and your favorite sugar cookie, and they are begging to be part of your life. They’re perfect for a lazy weekend brunch, a show-stopping addition to a holiday cookie tray, or just a 3pm treat that makes you do a little happy dance. They come together in minutes, and the best part? No oven required! So, grab your waffle iron and let’s turn up the fun dial. It’s time to make some magic.
The Happy Accident That Started It All
This recipe, like most of the best things in my life, was born from a beautiful, flour-dusted mess. It was a Sunday morning, and I was in full-on brunch mode for a crowd of hungry friends. Pancakes were flipping, bacon was sizzling, and my trusty waffle iron was working overtime. In the midst of the chaos, my best friend’s daughter, Lily, who was my official “little chef” for the day, was “helping” me make a batch of my classic brown sugar cookie dough for dessert later.
We had just finished the dough when Lily, in a moment of adorable, syrup-fueled excitement, reached for a spoonful and… plop. A perfect, egg-shaped scoop of our precious cookie dough landed right in the center of the still-hot, freshly greased waffle iron. Before I could even gasp, she slammed the lid down with a determined little grunt.
We held our breath for a second, and then the most incredible smell started to waft out—a caramelized, buttery, sweet scent that was distinctly not a waffle. When we peeked inside, we found a golden-brown, crispy, puffed-up cookie with the most gorgeous waffle pattern. We broke it in half, steam rising from its tender center, and took a bite. Our eyes went wide. It was a revelation! A happy accident that instantly became a BiteTide legend. Now, I can’t imagine a world without these cookies, and I’m so thrilled to share our delicious mistake with you.
Print
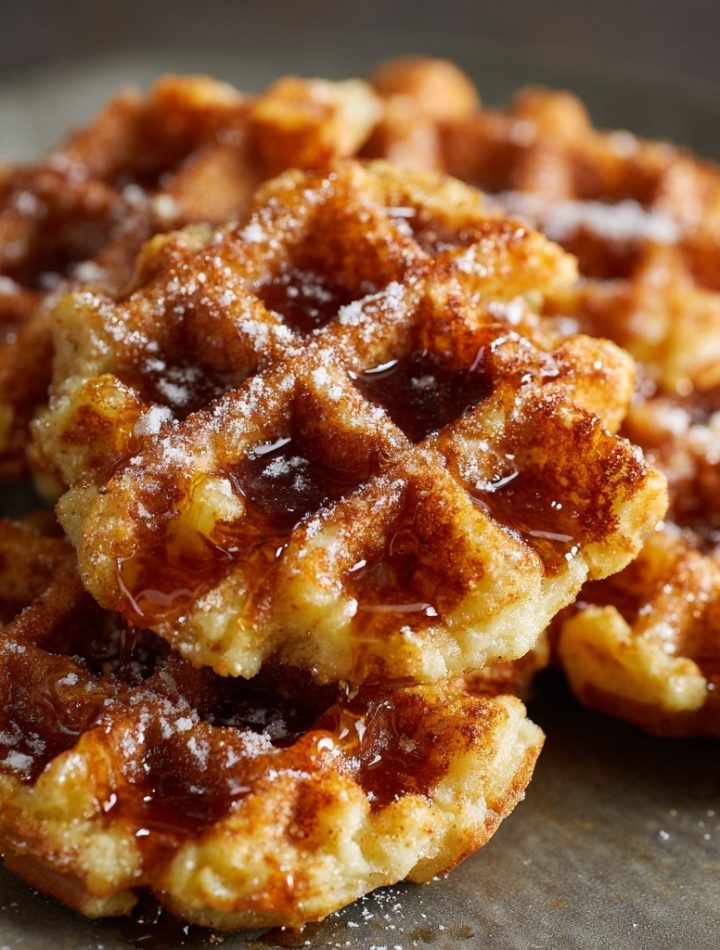
Waffle Crumble Cookies : Crispy, Golden & Melt-in-Your-Mouth Good
- Total Time: 25 minutes
- Yield: 24 cookies 1x
- Diet: Vegetarian
Description
Waffle Crumble Cookies are crispy‑golden cookies inspired by the waffle look and texture—complete with nooks and crannies and a delightful melt‑in‑your‑mouth finish. They combine a soft chewy center with lightly crisp edges and a fun pattern, making them perfect anytime you want a cookie that feels a little special.
Ingredients
- 1 cup unsalted butter, softened
- 1 ¼ cups packed brown sugar
- ¼ cup granulated sugar
- 2 large eggs
- 1 tbsp vanilla extract
- 2 ½ cups all‑purpose flour
- 2 tbsp cornstarch
- ½ tsp salt
- 2 tsp baking powder
Instructions
- Preheat the oven to 375°F (190°C) and line baking sheets with parchment paper.
- In a large mixing bowl, cream together the softened butter, brown sugar and granulated sugar until light and fluffy.
- Beat in the eggs one at a time, then stir in the vanilla extract.
- In a separate bowl, whisk together the flour, cornstarch, salt and baking powder.
- Gradually add the dry ingredients to the wet mixture and mix just until combined to form a soft dough.
- Using a cookie scoop or tablespoon, form dough balls and place them on the prepared sheets. Flatten each ball slightly.
- Using a skewer, chopstick or the back of a knife, press a criss‑cross pattern into each dough disc to create the “waffle” look.
- Bake for about 10‑12 minutes, or until the edges are lightly golden and the centers look set but still soft.
- Allow cookies to cool on the baking sheet for 5 minutes (they’ll firm up as they cool), then transfer to a wire rack to finish cooling.
Notes
- For extra flavor, you can drizzle warm maple syrup over each cookie just before serving, turning them into a breakfast‑meets‑dessert treat. :contentReference[oaicite:0]{index=0}
- If you’d like extra crispness, bake for an additional 1‑2 minutes until the edges deepen slightly in color.
- Try stirring in a handful of chopped nuts or chocolate chips into the dough for texture variation.
- To keep the waffle pattern crisp, press the indentations just after shaping the dough and before chilling or baking.
- Prep Time: 15 minutes
- Cook Time: 10 minutes
- Category: Dessert
- Method: Baking
- Cuisine: American
Nutrition
- Serving Size: 1 cookie
- Calories: 150
- Sugar: 12g
- Sodium: 70mg
- Fat: 7g
- Saturated Fat: 4g
- Unsaturated Fat: 2g
- Trans Fat: 0g
- Carbohydrates: 19g
- Fiber: 0g
- Protein: 2g
- Cholesterol: 20mg
Keywords: waffle cookies, crispy golden cookies, fun pattern cookies, breakfast style cookie, melt in your mouth cookies
Gather Your Ingredients: The Flavor Blueprint
This is where the fun begins! The ingredient list is simple and straightforward, but each one plays a starring role. Here’s your shopping list, plus a little chef’s insight into why each one matters.
- 2 1/4 cups (281g) All-Purpose Flour: This is our foundation. It gives the cookies their structure. For a slightly more tender cookie, you can swap in 1/2 cup of cake flour, but all-purpose works perfectly!
- 3/4 cup (150g) Granulated Sugar: The sweet workhorse! White sugar helps create those beautifully crisp, golden edges we’re after.
- 1/2 cup (100g) Packed Brown Sugar: This is the secret to that deep, caramel-like flavor and the soft, almost chewy interior. The molasses in the brown sugar is a flavor powerhouse. Use dark brown sugar for an even richer taste.
- 3/4 cup (170g) Unsalted Butter, Melted: Melted butter is key here. It creates a denser, richer batter (similar to brownie batter) that cooks perfectly in the waffle iron, giving us that fantastic crisp texture. Using unsalted lets you control the salt level.
- 1 tbsp (15ml) Vanilla Extract: Don’t be shy! A full tablespoon might seem like a lot, but it adds a beautiful, warm aroma and depth that makes these cookies taste truly special.
- 1 1/2 tsp Baking Powder: Our leavening agent! This is what gives the cookies their lift and airy crumb inside the crispy shell.
- 1/4 tsp Salt: The ultimate flavor enhancer. Salt makes the sweet flavors pop and balances the richness of the butter. If you only have salted butter, just reduce this to a tiny pinch.
- 3 large Eggs (150g): Our binding agent. Eggs give the batter structure and richness, and help create that lovely tender interior. Make sure they’re at room temperature for best results—just pop them in a bowl of warm water for 5 minutes if you forgot to take them out!
Let’s Get Cooking: Your Step-by-Step Roadmap to Waffle Cookie Bliss
Ready to see the magic happen? Follow these steps, and you’ll be a waffle cookie pro in no time. I’ve packed this section with all my favorite chef hacks to ensure your success.
- Prepare the Waffle Iron: This is our most important step! Preheat your waffle iron to a medium-high heat, which is usually around 375°F (190°C). You want it nice and hot to get that instant crisp. While it’s heating, take a pastry brush or a paper towel and lightly grease the top and bottom plates with a little melted butter or non-stick spray. Chef’s Hack: Doing this between every few batches ensures your cookies release perfectly and get extra-buttery, golden edges.
- Make the Batter: In a large bowl, whisk together your dry ingredients—the flour, both sugars, baking powder, and salt. Whisking them first ensures the baking powder and salt are evenly distributed, so every bite is perfect. Now, pour in the glorious melted butter, that generous glug of vanilla, and crack in your eggs. Chef’s Insight: Switch to a sturdy spatula or wooden spoon for this part. The batter will be thick, almost like a brownie batter, and you want to mix just until no streaks of flour remain. Overmixing can make the cookies tough, so a gentle hand is key!
- Cook in Batches: Now for the fun part! Using a cookie scoop or two heaping tablespoons, drop about 90g of batter right into the center of your preheated, greased waffle iron. Pro-Tip: Don’t worry about spreading it out—the iron will do all the work for you. Gently close the lid. You’ll hear a satisfying sizzle—that’s the sound of deliciousness happening! Cook for 3-4 minutes. I know it’s tempting to peek, but try to resist for the first 2 minutes to let the structure set. You’re looking for a deep, golden-brown color and a crisp surface.
- Transfer and Repeat: Carefully remove the cookie with a fork or silicone-tipped tongs. It will be hot and delicate! Place it on a wire rack. Why a rack? This is crucial for keeping the bottom crisp. If you leave them on a plate, steam gets trapped and they can get soggy. Repeat with the remaining batter, and please, PLEASE remember to re-grease the waffle iron between batches. This little habit is a total game-changer for non-stick success.
- Serve and Enjoy! The final, and most rewarding, step. Let the cookies cool for just a minute or two on the rack. Then, give them a heavenly dusting of powdered sugar or a generous drizzle of warm maple syrup. And then? Take a bite. Listen for the crunch. Savor the soft center. You’ve just made waffle cookies, and you are officially a kitchen rockstar.
How to Serve These Golden Gems
Presentation is part of the fun! For a simple, elegant look, stack two or three cookies on a plate and give them a snowy dusting of powdered sugar using a fine-mesh sieve. For a classic brunch vibe, serve them in a single layer with a small pitcher of warm, real maple syrup for dipping or drizzling right at the table. Want to go all out? Add a dollop of freshly whipped cream and a handful of mixed berries on the side. They’re also absolutely fantastic with a scoop of vanilla ice cream melting into the warm waffle grooves—trust me on this one.
Ride the Flavor Wave: 5 Fun Twists to Try
Once you’ve mastered the classic, the waffle world is your oyster! Here are a few of my favorite ways to mix things up:
- Chocolate Chip Tide: Fold 1 cup of semi-sweet or milk chocolate chips into the batter right at the end. Melty, chocolatey pockets in every bite? Yes, please.
- Lemon Blueberry Bliss: Add the zest of one lemon to the dry ingredients and gently fold in 3/4 cup of fresh blueberries. It’s like a sunny, bright waffle cookie muffin!
- Cinnamon Spice Swirl: Whisk 1 1/2 teaspoons of ground cinnamon into the flour mixture. This creates the coziest, most comforting cookie that smells like heaven.
- Funfetti Fiesta: Celebrate everything! Fold in 1/2 cup of rainbow sprinkles for a cookie that’s pure, unadulterated joy.
- Gluten-Free Goodness: Simply swap the all-purpose flour for your favorite 1:1 gluten-free baking blend. The texture works like a dream!
Isla’s Chef’s Notes: A Few More Secrets
This recipe has evolved so much since that first fateful plop of dough! I’ve found that letting the melted butter cool for just a minute before adding it prevents it from accidentally cooking the eggs. Also, if your batter seems a little too stiff, don’t panic! A tablespoon of milk can loosen it right up. The beauty of this recipe is its flexibility.
One of my favorite kitchen memories is of my dad, a man who believes toast is a gourmet meal, attempting to make these for my mom. He called me five times, sent a blurry photo asking, “Is this golden-brown?!”, and was so proud of the final plate that he framed a picture of it. That’s the spirit of BiteTide—it’s not about perfection, it’s about the fun, the connection, and the delicious results. So don’t stress if your first cookie isn’t picture-perfect. I promise it will still taste incredible.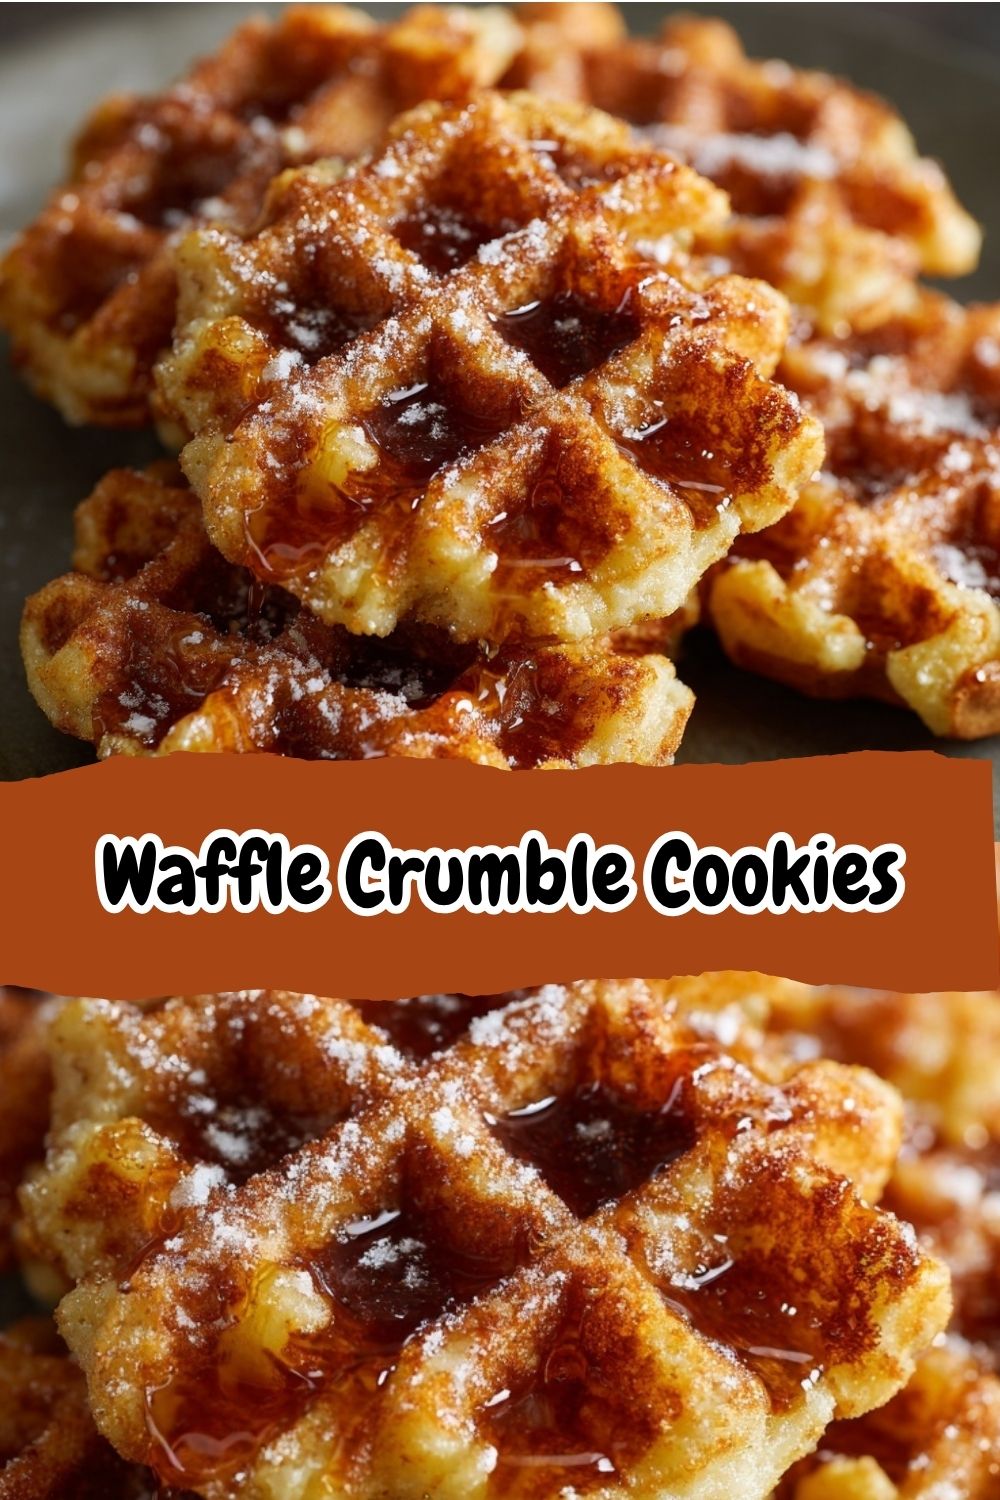
Your Questions, Answered!
I’ve gotten so many DMs about these cookies, so I’m answering the most common questions right here!
Q: My cookie stuck to the waffle iron! What did I do wrong?
A: Oh, I’ve been there! The two most common culprits are 1) not enough grease, or 2) the waffle iron wasn’t hot enough. Make sure you’re greasing between *every* batch and that the indicator light says it’s fully preheated before you add the batter. A well-seasoned Belgian waffle iron also tends to work better than a super-thin one.
Q: Can I make the batter ahead of time?
A: You can! I’ve had great success covering the bowl tightly with plastic wrap and stashing it in the fridge for up to 24 hours. The batter will firm up, so let it sit on the counter for 15-20 minutes before scooping onto the hot iron.
Q: My cookies are soft, not crispy. Help!
A> No worries! This usually means they needed another 30-60 seconds of cooking time. All waffle irons are a little different, so use the visual cues (deep golden brown color) more than the timer. Also, ensure they’re cooling on a wire rack and not a plate, as this traps steam.
Q: Can I freeze these?
A> Absolutely! These cookies freeze like a dream. Let them cool completely, then place them in a single layer on a baking sheet to “flash freeze” for an hour. Once solid, transfer them to a freezer bag. They’ll keep for up to a month. You can reheat them straight from the freezer in a toaster or a 350°F oven for a few minutes to bring back that incredible crispness.
Quick Nutrition Bite
Please note: This is an estimate per cookie without toppings, based on the ingredients listed. For precise dietary needs, use a calculator with your specific brands.
- Calories: ~210
- Fat: 10g
- Saturated Fat: 6g
- Carbs: 26g
- Sugars: 15g
- Protein: 3g
- Fiber: <1g
Prep Time: 15 minutes | Cook Time: 30 minutes | Cooling Time: 15 minutes | Total Time: 1 hour | Yield: 24 cookies
There you have it! Your complete guide to the most fun you’ll ever have with a waffle iron. I can’t wait for you to try them. Be sure to tag me @BiteTide on Instagram or Pinterest so I can see your gorgeous creations! Now, go forth and make some cookie magic.
With love and a full cookie jar,
Isla 💛