 The Viral Treat That’s Actually Good for You: No-Bake Brownie Batter Balls
Picture this: it’s 3:17 PM. You’re deep in that afternoon lull, your brain is begging for a boost, and your sweet tooth is screaming for something—anything—chocolate. You could grab a candy bar, but that sugar crash is lurking. You could force down another plain rice cake, but… let’s be real, that’s not going to hit the spot. What you really want is something rich, fudgy, and deeply chocolatey—something that feels like a decadent treat but doesn’t leave you feeling like you just derailed your day.
Friend, I have been there approximately one million times. And that exact scenario is why I became utterly obsessed with perfecting these Viral Brownie Batter Balls. They are the answer to that universal, soul-deep call for chocolate. They’re spoon-licking good, incredibly satisfying, and come together in about ten minutes flat with zero baking required. The best part? They’re secretly packed with wholesome, protein-powered ingredients that will actually fuel you, not fool you.
This isn’t just another healthy snack recipe. This is your new go-to chocolate fix—a little bite of joy you can make on a Sunday and have waiting for you all week. We’re talking a texture that’s perfectly chewy and fudgy, a flavor that’s deeply rich and complex, and a process so simple you could do it with your eyes closed (though maybe keep them open for the rolling part). Let’s ditch the fuss and get straight to the fun. Grab a bowl, and let’s make magic.
Print
Viral Brownie Batter Balls : High-Protein, No-Bake Chocolate Fix
- Total Time: 10 mins (+ chilling)
- Yield: 12–15 balls 1x
- Diet: Low Fat
Description
High‑protein, no‑bake brownie batter balls that satisfy chocolate cravings while delivering a protein boost — perfect as a snack or quick treat.
Ingredients
- 1 ½ cups rolled oats (or oat flour)
- ½ cup chocolate protein powder
- ¼ cup unsweetened cocoa powder
- ¼ tsp salt
- ½ cup almond butter (or peanut butter)
- ¼ cup honey or maple syrup
- 2–3 tbsp milk of choice (dairy or plant‑based)
- 1 tsp vanilla extract
- Optional mix‑ins: 2 tbsp mini chocolate chips, chopped nuts, chia seeds
Instructions
- In a large mixing bowl, combine rolled oats (or oat flour), chocolate protein powder, cocoa powder, and salt.
- Add almond butter, honey (or maple syrup), and vanilla extract to the dry ingredients; stir until a crumbly dough begins to form.
- Add milk 1 tablespoon at a time and mix until the dough becomes sticky and holds together. Adjust amount as needed.
- Fold in optional mix‑ins like mini chocolate chips or chia seeds if using.
- Using your hands or a small cookie scoop, form the mixture into 1‑inch balls and place on a parchment‑lined tray.
- Refrigerate the balls for at least 30 minutes to firm up.
- Store in an airtight container in the fridge for up to 1 week or in the freezer for up to 2 months.
Notes
- Swap almond butter for sunflower seed butter for a nut‑free version.
- Add a pinch of sea salt on top of each ball for a salted chocolate twist.
- For extra fiber, add 1–2 tbsp ground flaxseed or chia seeds.
- Rolling the balls in extra cocoa powder or shredded coconut adds texture and flavor.
- Prep Time: 10 mins
- Cook Time: 0 mins
- Category: Snack / Dessert
- Method: No‑Bake / Mixing
- Cuisine: Healthy / Protein Snack
Nutrition
- Serving Size: 1 ball
- Calories: ≈ 100–120 kcal
- Sugar: ≈ 6–8g
- Sodium: ≈ 50–80mg
- Fat: ≈ 5–7g
- Saturated Fat: ≈ 1g
- Unsaturated Fat: ≈ 3–5g
- Trans Fat: 0g
- Carbohydrates: ≈ 10–12g
- Fiber: ≈ 2–3g
- Protein: ≈ 6–8g
- Cholesterol: 0mg
Keywords: viral brownie batter balls, no bake protein snack, chocolate protein bites, healthy dessert balls
My Grandma’s Bowl & The Joy of Licking the Spoon
My love for this recipe, and for anything that tastes like raw brownie batter, goes way back. Some of my happiest kitchen memories are of standing on a wobbly stool next to my grandma, both of us covered in a fine dusting of flour, patiently waiting for the best part of baking. The finished cake or batch of cookies was great, sure. But the real prize was getting to scrape the bowl clean with our fingers after the batter was poured into the pan.
My grandma would always hand me the big wooden spoon with a conspiratorial wink. “The chef’s treat,” she’d whisper, as if we were getting away with something wildly rebellious. That raw, chocolatey, sugary-salt dough was pure, unadulterated joy. It felt like a secret, stolen moment of bliss before the “proper” dessert was even served.
These Brownie Batter Bills are my full-circle, grown-up (but not too grown-up) homage to that feeling. They capture that illicit, spoon-licking joy in a tidy little ball you can eat without a single worry. They’re my way of saying that the “chef’s treat” doesn’t have to be a guilty secret—it can be a nourishing, protein-packed little powerhouse that brings the same giant smile to your face. Every time I roll a batch, I think of her, that wobbly stool, and the simple truth that sometimes the best part of food is the fun you have making it.
What You’ll Need: Simple Ingredients, Big Flavor
Here’s the beautiful part: we’re making something that tastes incredibly indulgent with a shortlist of pantry-friendly stars. Each one plays a crucial role. Let’s break it down.
- 1 cup almond flour – This is our base, giving the balls structure and that wonderful, tender bite. Chef’s Insight: Almond flour adds healthy fats and keeps these gluten-free. For a nut-free version, you can swap in an equal amount of oat flour (just blitz rolled oats in a blender until fine!).
- 1 scoop chocolate protein powder – The stealth protein booster! This thickens our “batter” and deepens the chocolate flavor. Pro Tip: Use a brand you love the taste of on its own. A whey/casein blend or a plant-based pea protein powder both work great.
- 3 tbsp unsweetened cocoa powder – Non-negotiable for that deep, authentic brownie flavor. Don’t use hot chocolate mix! We want the pure, bitter chocolate punch of unsweetened cocoa.
- ½ cup cashew butter – Our “fat” and binder. Cashew butter is my favorite here for its incredibly neutral, buttery flavor that lets the chocolate shine. Easy Swap: Any runny, natural nut or seed butter works—almond butter or sunflower seed butter are fantastic.
- ⅓ cup honey – This is our natural sweetener and glue. Honey adds a subtle floral note that’s just lovely with chocolate. For a vegan version, use pure mapire syrup—it works perfectly.
- Pinch of salt – The flavor superhero! Salt makes the chocolate taste more chocolatey. Trust me on this.
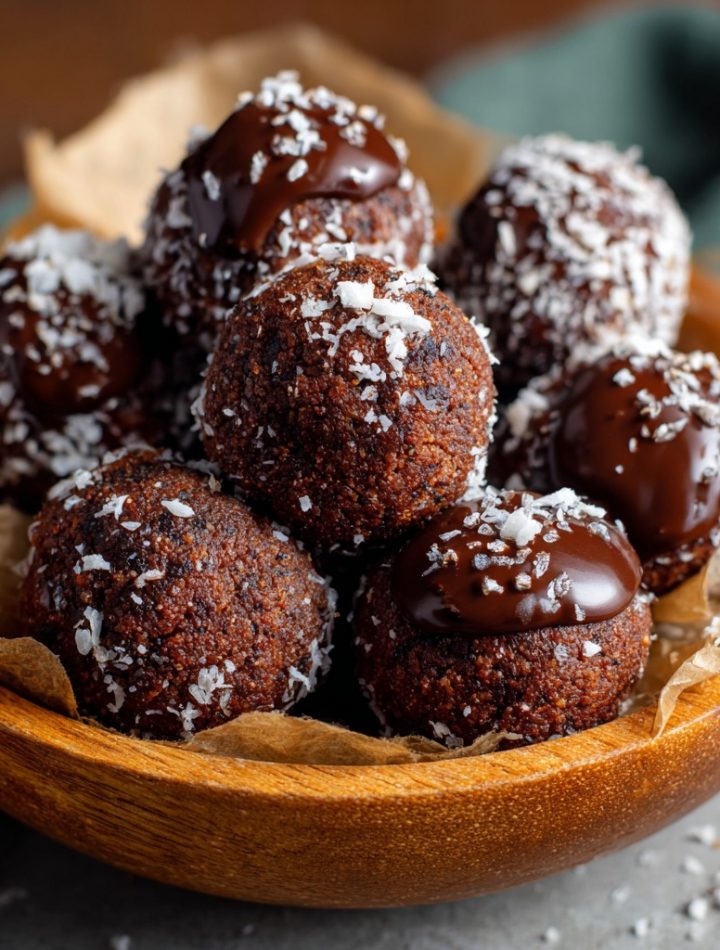
- Optional: Dark chocolate for coating, flaky sea salt for garnish – Taking these from amazing to “ARE YOU KIDDING ME?” status. A thin, snappy shell of dark chocolate and a flake of salt on top is a game-changer.
Let’s Make Them! Your Foolproof, 10-Minute Method
No fancy equipment needed. Just a bowl, a spoon, and your hands. Let’s ride the flavor wave.
- Mix Your Dry Team. In a medium-sized mixing bowl, add the almond flour, chocolate protein powder, cocoa powder, and that all-important pinch of salt. Grab a whisk and give them a really good stir. This isn’t just about combining; it’s about aerating the ingredients and breaking up any lumps in the protein powder. You’ll know it’s ready when it looks like a uniform, chocolaty sand. Chef Hack: Sifting the cocoa powder is a pro move for an extra-smooth texture, but if you whisk vigorously, you can skip the extra dish!
- Bring in the Wet Crew. Pour the cashew butter and honey right on top of the dry ingredients. Now, get ready to use some elbow grease! Start stirring with a sturdy spoon or spatula. At first, it’s going to seem dry and crumbly—don’t panic! Keep folding and pressing. After about a minute of dedicated mixing, you’ll see it transform. It will suddenly come together into a thick, fudgy, play-dough-like dough that pulls away from the sides of the bowl. This is the magic moment. Chef’s Note: If, after a full minute of mixing, it still seems too dry, add a teaspoon of water or milk. If it seems too sticky, add a tablespoon more almond flour.
- Roll with It. Line a small tray or plate with parchment paper. Using a tablespoon or a small cookie scoop, portion out the dough. Then, using the palms of your hands, roll each portion into a smooth, tight ball. Aim for about 1-inch in diameter. This part is oddly therapeutic! If the dough starts sticking to your hands, lightly dampen your palms with water. Place each ball on the parchment as you go.
- The Optional (But Highly Recommended) Glossy Coat. If you’re going for the chocolate dip, melt your dark chocolate in a small, deep bowl in the microwave in 20-second bursts, stirring well between each. Using two forks or a dipping tool, roll a ball in the chocolate until coated, let the excess drip off, and return it to the parchment. Immediately sprinkle with a tiny pinch of flaky sea salt. That salt on warm chocolate? Chef’s kiss.
- The Chill. This is the only “hard” part: waiting. Pop the tray into the fridge for at least 30 minutes. This lets the fats firm up and the flavors meld into perfect, fudgy harmony. They’ll keep their shape and have that ideal chewy texture.
How to Serve & Savor Your Creation
Once they’re set, transfer your brownie batter balls to an airtight container. They live happily in the fridge for up to two weeks (if they last that long!). I love pulling one out as my afternoon pick-me-up with a cup of coffee—it’s the perfect pairing. They’re also a brilliant post-workout snack, a sweet ending to lunch, or a sneaky little treat tucked into a lunchbox. There’s no wrong way to eat them. Just enjoy every single chocolatey, chewy bite.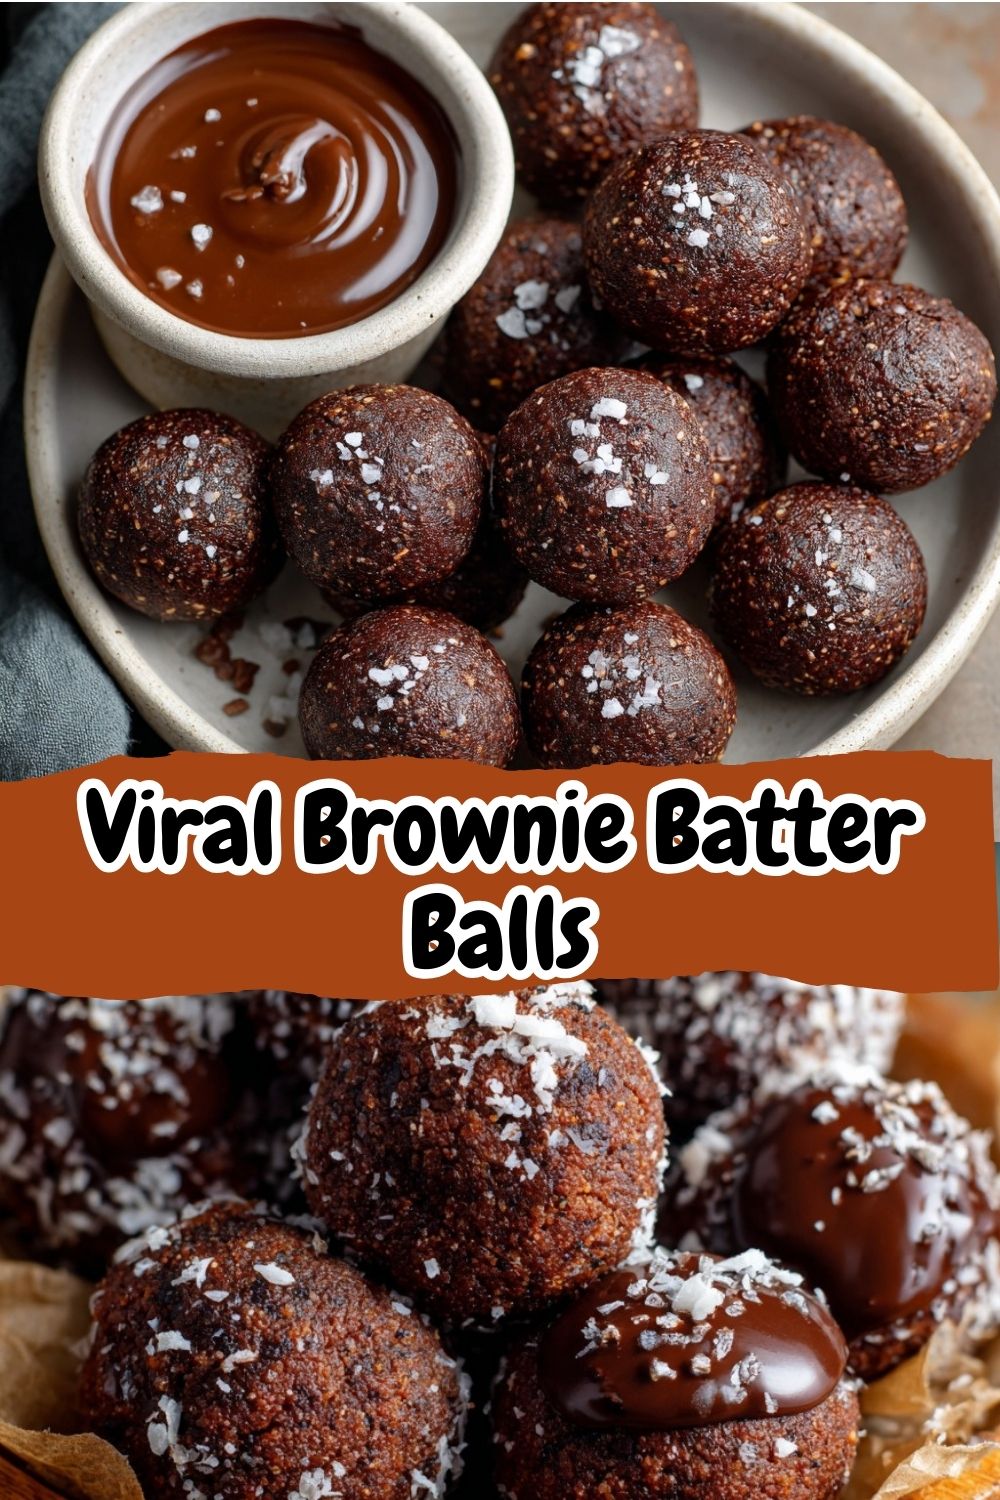
Get Creative! 5 Fun Flavor Twists
Once you’ve mastered the classic, the kitchen playground opens up! Here are a few of my favorite riffs:
- Cookie Dough Delight: Swap the cocoa powder for 2 tbsp of oat flour, and add ¼ cup of mini chocolate chips and a dash of vanilla extract.
- Peanut Butter Cup: Use natural peanut butter instead of cashew butter, and roll the finished balls in crushed, salted peanuts before chilling.
- Mint Chocolate Chip: Add ½ tsp of peppermint extract to the wet ingredients and fold in 2 tbsp of cacao nibs or chopped dark chocolate.
- Salted Caramel Swirl: Before rolling, gently fold in 2 tbsp of a thick, sugar-free caramel sauce or paste for ribbons of gooey sweetness.
- Double-Double Chocolate: Fold in 2 tbsp of chopped dark chocolate or cacao nibs for an extra hit of texture and intense chocolate flavor.
Isla’s Kitchen Notes & Stories
This recipe has been a living, evolving thing in my kitchen. The first batch I ever made was… a disaster. I used a chalky protein powder and not enough binder, and I ended up with a pile of delicious-tasting chocolate crumbs! But that’s the beauty of no-bake recipes—you can often fix them right in the bowl. Too dry? Add more nut butter or a splash of milk. Too wet? More almond flour to the rescue.
My kids are now my official “roll squad,” and let me tell you, no two balls are ever the same size. We have giants and wee tiny bites, and it just makes the container more fun to dig into. It’s a reminder that food doesn’t have to be perfect to be perfectly delicious. These little balls have been my saving grace on busy blog days, my pre-gym fuel, and my shareable treat for neighbors. They’re more than a recipe; they’re a tiny, edible high-five.
Your Questions, Answered!
Q: My mixture is too dry and crumbly and won’t form a ball. What did I do wrong?
A: Don’t worry! This is usually because the nut butter was too thick or the almond flour was extra-absorbent. The fix is easy: add a little more moisture. Start with a teaspoon of water, milk, or maple syrup and mix. Repeat until it just comes together. Next time, if your nut butter is very stiff, gently warm it to make it runnier before measuring.
Q: Can I make these without protein powder?
A> Absolutely. The protein powder acts as a dry ingredient and flavor booster. To replace it, use an additional ¼ cup of almond flour and add an extra tablespoon of cocoa powder. The texture will be slightly softer, but just as yummy!
Q: How do I store these, and how long will they last?
A> They are best stored in an airtight container in the refrigerator for up to 2 weeks. The cold gives them that perfect fudgy texture. You can also freeze them for up to 3 months! Just let them thaw for a few minutes before eating.
Q: My balls are really sticky when I try to roll them. Help!
A> This means your dough is a touch too warm or wet. First, pop the whole bowl in the fridge for 15 minutes to firm up the fats. Then, when rolling, lightly dampen your hands with water. This creates a barrier and prevents sticking.
Nutritional Information (Per Ball, without chocolate coating)
This is an approximation for your convenience. Values will vary based on specific brands and ingredients used.
- Calories: ~140
- Protein: 5g
- Carbohydrates: 10g
- Fat: 9g
- Fiber: 2g
Prep Time: 10 minutes | Chill Time: 30 minutes | Meal Type: Snack / Dessert / High-Protein Treat
These Brownie Batter Balls prove that indulgence can be healthy, quick, and protein-packed. Ready in just 10 minutes with no baking required, they’re perfect for snacks, dessert, or post-workout fuel. Customize with your favorite mix-ins, stash extras in the fridge or freezer, and enjoy a chocolatey treat that satisfies cravings without the guilt.