
Hey there, friend! Isla here, welcoming you back to my cozy kitchen corner. Can you feel it? That little flutter of excitement in the air, the sea of pink and red in every store window, the undeniable urge to bake something spectacularly sweet? That’s right—Valentine’s Day is on the horizon, and I am here for all of it. Not just the romantic dinners, but the classroom parties, the Galentine’s brunches, the “treat yourself” afternoons that deserve a little extra sparkle.
But let’s be real: sometimes, the thought of rolling, chilling, cutting, and decorating a zillion individual sugar cookies can make even the most enthusiastic baker want to close the recipe book and order takeout. I’ve been there! That’s exactly why I’m practically bouncing to share these Valentine’s Sugar Cookie Bars with you today. Imagine everything you adore about a perfect, soft-batch sugar cookie—the tender crumb, the buttery vanilla hug, that melt-in-your-mouth magic—but baked into one glorious, thick slab. Then, we crown it with a cloud of dreamy pink buttercream and a joyful shower of heart sprinkles. No rolling pin required, no cookie cutters to wash, just one pan, one swoop of frosting, and maximum happiness.
This is my love letter to easy, impactful baking. It’s for the parent who needs a quick-but-stunning treat for the school party, the partner who wants to surprise their sweetie with a homemade gesture, or the friend who just wants to make a Tuesday feel special. We’re ditching the fuss and keeping all the flavor and festivity. So, preheat that oven, grab your favorite mixing bowl, and let’s make a batch of edible, shareable joy. Trust me, these bars are about to become your new February tradition.
The Year We Frosted Everything Pink
My love for Valentine’s baking is deeply, messily rooted in childhood. I grew up in a small town where my dad, a fisherman, would often be out on the water before dawn. But every February 13th, without fail, he’d come home with a specific request: “Isla-bug, think we can make a mess tomorrow?” That was code for our annual Valentine’s Baking Day. My mom would clear the table, my grandma would bring over her ancient, stained recipe box, and we’d embark on a flour-dusted mission to create treats for his whole crew.
One year, I was deemed old enough to be in charge of the food coloring. It was a position of great power. What started as a few drops of red in the buttercream for sugar cookies quickly spiraled. I was possessed by a pink-frosting fervor! We had pink-frosted brownies, pink-glazed donut holes, even pink-tinted shortbread. At one point, I looked at the bowl of potato salad for lunch and seriously contemplated its potential. (I was wisely vetoed.) The kitchen looked like a confectionery bomb had gone off, but the laughter was louder than the mixer. The next morning, my dad packed up tins of our pink creations, his crew’s tough exteriors melting at the sight of those silly, heartfelt treats. It taught me that the best Valentine’s gifts aren’t about perfection; they’re about the joy infused in the making. These cookie bars? They’re the spirit of that day—unpretentious, colorful, and made to be shared with a full heart.
Gathering Your Flavor Toolkit
Here’s everything you’ll need to create these soft, celebratory bars. I’ve added my little chef insights next to each one because knowing your ingredients is the first step to fearless baking!
For the Cookie Base:
-
- 1 cup (2 sticks) unsalted butter, softened: This is our flavor foundation. Unsalted lets us control the salt level. “Softened” is key! It should press easily with a finger but not be oily or melted. Pro tip: cut it into tablespoon-sized pieces to speed up the process.
- 1 cup granulated sugar: Sweetens and helps create that lovely, lightly crisp edge as the bars bake.
- 1 large egg: Our binding agent, adding structure and richness. Make sure it’s at room temperature to blend seamlessly with the butter.
- 1 teaspoon pure vanilla extract: The classic warm flavor we all love. Use the good stuff if you can!
- 1/2 teaspoon almond extract (optional but highly recommended): This is my secret weapon! It doesn’t taste like almonds; it adds a deeply sweet, almost cherry-like aroma that makes people say, “What is that amazing flavor?” If you’re nut-averse, just leave it out.
- 2 ½ cups all-purpose flour: The structure of our bars. For a tender bite, spoon the flour into your measuring cup and level it off. Don’t scoop directly from the bag—it packs in too much!
- 1/2 teaspoon baking powder: Our leavening friend. It gives the bars a slight lift and soft, cakey texture, keeping them from being dense.
- 1/4 teaspoon fine salt: The flavor enhancer! It balances the sweetness and makes all the other ingredients sing. Don’t skip it.
For the Pink Buttercream & Decor:
- 1/2 cup (1 stick) unsalted butter, softened: Yes, more butter. This is for a luxuriously creamy frosting that holds its shape.
- 2 cups powdered sugar: Also called icing sugar or confectioners’ sugar. It dissolves beautifully for a smooth frosting. Sift it if it’s lumpy!
- 2 tablespoons heavy cream or whole milk: Heavy cream will give you a richer, thicker frosting. Milk works perfectly too! This is our thinning agent, so add a little extra if needed to reach a spreadable consistency.
- 1/2 teaspoon vanilla extract: A little more vanilla magic for the frosting.
- Pinch of salt: Again, this cuts the cloying sweetness. A game-changer for buttercream.
- Pink food coloring: Gel food coloring is my MVP. It gives vibrant color without thinning the frosting. Start with a toothpick dab! Liquid works in a pinch, but use sparingly.
- Heart sprinkles (or any Valentine’s sprinkles!): The festive finish! I use a mix of quins and jimmies for texture. Let the kids (or your inner child) handle this part.
Let’s Bake: The Step-by-Step Fun
Ready? Put on some happy music, tie on your apron, and let’s do this. I’m walking you through every step with my favorite kitchen hacks.
- Preheat & Prep: Fire up your oven to 350°F (175°C). Grab your 9×13-inch baking pan. Now, here’s a chef’s choice: you can grease it lightly OR line it with parchment paper. I’m Team Parchment for easy lift-out and clean slices! Just let a little overhang on two sides to create “handles.”
- Cream the Butter & Sugar: In a large bowl (I use my stand mixer with the paddle, but a hand mixer works great), beat the softened butter and granulated sugar together on medium-high speed. We’re not just mixing; we’re creaming. Do this for 2-3 minutes until the mixture is pale, fluffy, and wonderfully smooth. This incorporates air, which is part of what gives our bars that lovely texture. Scrape down the bowl once halfway through.
- Add the Wet Players: Crack in the egg and add both the vanilla and almond extracts. Mix on medium until fully combined, about 1 minute. It might look a little curdled at first—that’s totally okay! Just keep mixing, and it’ll come together into a glossy, fragrant mixture.
- Whisk the Dry Team: In a separate bowl, whisk together the flour, baking powder, and salt. This isn’t just busywork; it ensures the leavening and salt are evenly distributed throughout the flour so every bite is consistent.
- Combine with Care: With your mixer on low, gradually add the dry ingredients to the wet mixture. Mix just until the flour disappears and a soft dough forms. Overmixing at this stage can lead to tough bars, so the second you don’t see dry flour, stop! The dough will be thick and lovely.
- Press & Bake: Dump the cookie dough into your prepared pan. Now, use slightly damp fingers or the bottom of a flat measuring cup to press the dough into a perfectly even, smooth layer. This ensures even baking. Pop it into your preheated oven and bake for 18-22 minutes. You’re looking for the edges to be a light golden brown. The center will still look soft and puffy—it will set as it cools. This is the secret to a soft, not-crunchy, bar!
- The Crucial Cool-Down: I know it’s tempting, but you MUST let the cookie base cool completely in the pan on a wire rack before frosting. If you frost a warm base, the buttercream will melt into a sad, runny puddle. This is the perfect time to wash dishes or dance to that happy playlist.
- Whip Up the Buttercream: In a clean bowl, beat the softened butter until creamy (about 1 minute). Gradually add the powdered sugar, starting on low speed (to avoid a sugar cloud!) then increasing to medium. Add the cream, vanilla, and pinch of salt. Beat for 2-3 minutes until incredibly light and fluffy. Add your pink food coloring a little at a time until you reach your dream shade.
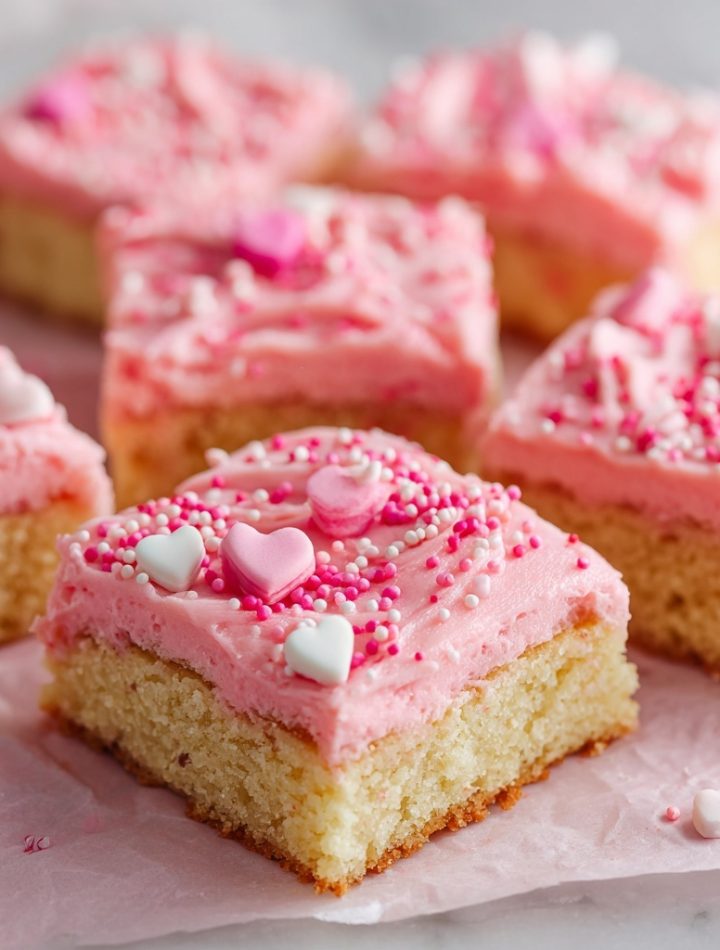
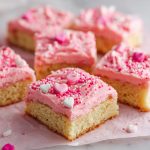
- Frost & Celebrate: Once the base is 100% cool, spread the pink buttercream evenly over the top. Immediately shower it with heart sprinkles so they stick. For clean cuts, you can even pop the whole pan in the fridge for 15-20 minutes to let the frosting set a bit.
- Slice & Serve the Love: Use a sharp knife to cut into squares. I usually go for 24 generous bars or 32 smaller, two-bite pieces. Wipe the knife between cuts for super-clean edges.Print
Valentine’s Sugar Cookie Bars : Sweet, Soft & Full of Love
- Total Time: 35 minutes (plus cooling)
- Yield: 24 bars 1x
Description
These Valentine’s Sugar Cookie Bars are everything you love about classic sugar cookies—but easier to make and even more festive. Baked into a thick, soft bar and topped with dreamy pink buttercream and heart-shaped sprinkles, they’re the ultimate treat for Valentine’s Day parties, dessert tables, or a sweet afternoon surprise.
Ingredients
ScaleFor the cookie base:
1 cup unsalted butter, softened
1 cup granulated sugar
1 large egg
1 teaspoon vanilla extract
1/2 teaspoon almond extract (optional)
2 ½ cups all-purpose flour
1/2 teaspoon baking powder
1/4 teaspoon salt
For the pink buttercream:
1/2 cup unsalted butter, softened
2 cups powdered sugar
2 tablespoons heavy cream or milk
1/2 teaspoon vanilla extract
Pinch of salt
Pink food coloring
Heart sprinkles for decorating
Instructions
Preheat oven to 350°F (175°C). Grease or line a 9×13-inch baking pan.
In a bowl, cream together butter and sugar until light and fluffy. Add egg, vanilla, and almond extract.
In a separate bowl, whisk flour, baking powder, and salt. Gradually add to wet mixture and mix until combined.
Press dough evenly into the prepared pan. Bake for 18–22 minutes, or until edges are lightly golden. Let cool completely.
For the frosting, beat butter until creamy. Add powdered sugar, cream, vanilla, and salt. Beat until smooth. Mix in pink food coloring.
Spread frosting over cooled cookie bars. Decorate with heart sprinkles.
- Prep Time: 15 mins
- Cook Time: 20 minutes
- Category: Dessert
Nutrition
- Calories: 210
- Sugar: 18g
- Carbohydrates: 28g
Serving Up the Sweetness
Presentation is part of the fun! Pile these bars on a cute vintage plate or a simple white platter to let that pink frosting pop. For a party, I love arranging them on a tiered dessert stand. They pair beautifully with a glass of cold milk, a mug of hot coffee, or even a flute of bubbly prosecco for the adults. The beauty of a bar cookie is its portability—wrap a couple in parchment paper and tie with a ribbon for the sweetest handmade Valentine’s gift. Just be sure to add a little note that says “Baked with love, by YOU!”
Ride Your Own Flavor Wave: Fun Variations!
One recipe, endless possibilities. Make it your own with these easy twists:
- Chocolate Chip Valentine Bars: Fold 1 cup of white chocolate chips or pink-and-red M&M’s into the cookie dough before pressing it into the pan.
- Fruity Fun: Add 1-2 teaspoons of freeze-dried strawberry or raspberry powder to the buttercream for a natural pink hue and a subtle fruit flavor.
- Citrus Zing: Replace the almond extract in the base with 1 tablespoon of fresh lemon or orange zest for a bright, sunny twist.
- “Funfetti” Fever: Mix ¼ cup of Valentine’s sprinkles right into the cookie dough for a confetti-filled base that’s as fun to look at as it is to eat.
- Dairy-Free/Gluten-Free: Use your favorite plant-based butter and milk alternative. For gluten-free, swap the all-purpose flour for a 1:1 gluten-free baking blend. The texture will be slightly more delicate but just as delicious!
Isla’s Chef Notes & Kitchen Confessions
This recipe has been my Valentine’s rock for years, but it didn’t start out perfect. The first time I made them, I was so impatient that I frosted the base while it was still warm. Let’s just say I ended up with “Pink Swirl Soup on a Cookie Sponge.” Not my finest moment! Now, I use the cooling time wisely (a.k.a. sampling the sprinkles).
Over time, I’ve learned that the almond extract is the magic whisper that makes people ask for the recipe. I’ve also started using gel food coloring exclusively—one tiny drop from a toothpick gives the most beautiful pastel pink. And a little secret: if you’re in a true pinch, you can use a tub of store-bought vanilla frosting, whip in a little extra softened butter to improve the flavor and texture, tint it pink, and go! I won’t tell. The goal is joy, not judgement, in this kitchen.
Your Questions, Answered!
Q: My dough is really sticky and hard to press into the pan. What did I do wrong?
A: This usually means your butter was too soft or you may have slightly over-measured the flour. No worries! Simply chill the dough in the bowl for 20-30 minutes to firm up the butter. When pressing it in the pan, use a piece of parchment paper or plastic wrap on top of the dough—it will keep your hands or measuring cup from sticking.
Q: Can I make these ahead of time?
A: Absolutely! You have options: 1) Bake and cool the base, then wrap the whole pan tightly and frost the next day. 2) Fully assemble the bars, then store them covered in the fridge for up to 3 days. Let them come to room temperature for the softest texture before serving. 3) You can also freeze the un-frosted, baked base for up to a month. Thaw, then frost as directed.