Spooky Eyeball Oreo Truffles: Your New Halloween Party Superstar!
Hey there, spooky season superstar! Isla here from BiteTide, waving my chocolate-covered spatula at you. Can you feel it? That crisp October air, the rustle of fallen leaves, and the giddy anticipation of Halloween creeping closer? There’s magic in this season – and I firmly believe that magic tastes best when it’s dunked in chocolate and rolled in pure, unadulterated fun. That’s where these Spooky Eyeball Oreo Truffles waltz in (or should I say, float in?).
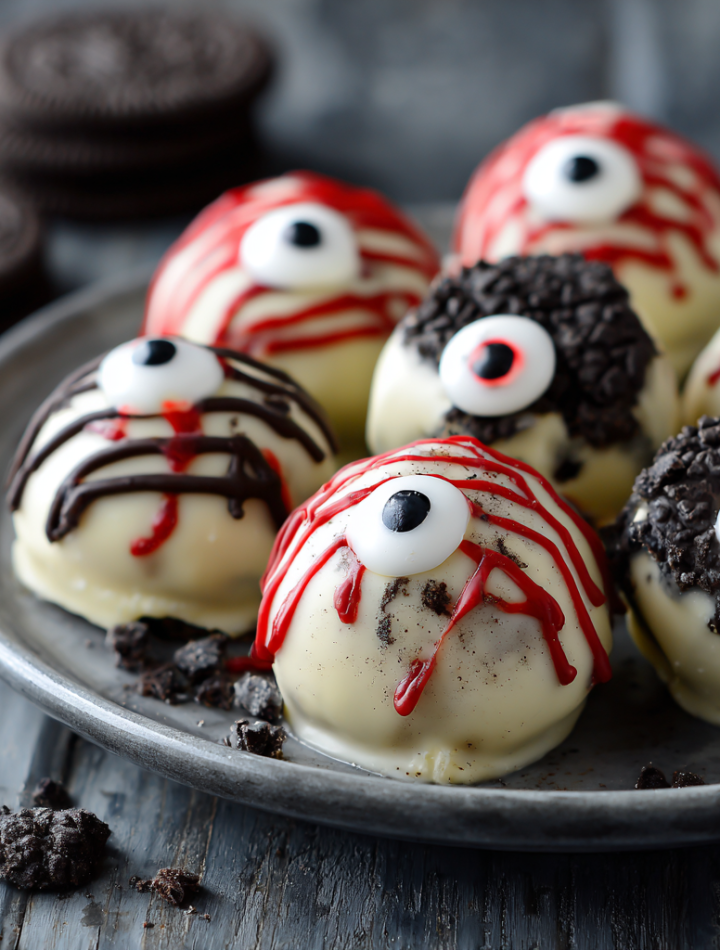
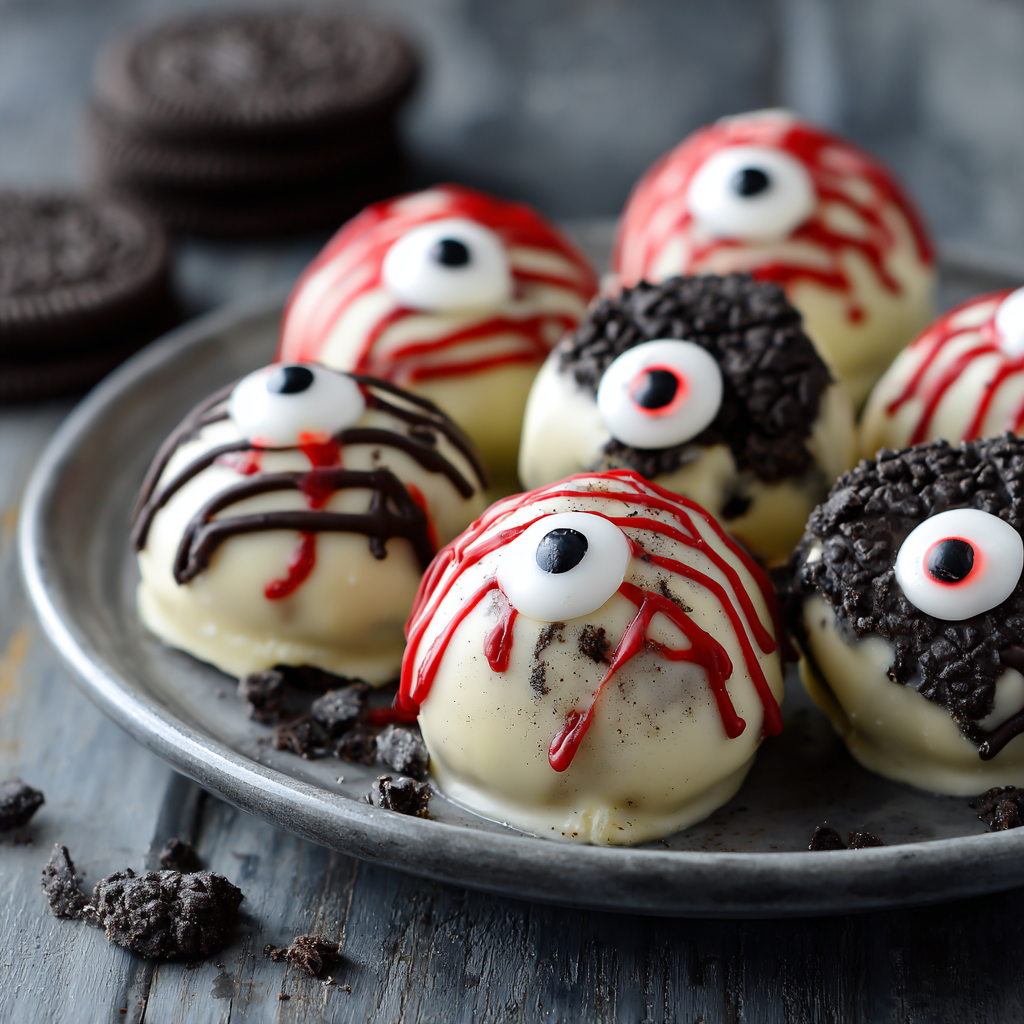
Picture this: velvety, rich Oreo filling hugged by a smooth white chocolate shell, transformed into delightfully eerie eyeballs that stare back at you from the dessert table. They’re creepy. They’re cute. They’re ridiculously easy to make, even if your kitchen currently looks like a pumpkin exploded in there (no judgment, friend!). Forget slaving over a hot oven – these no-bake beauties come together faster than you can say “Boo!” and are guaranteed to steal the spotlight at any Halloween bash. Whether you’re hosting a monster mash, a cozy movie night with Hocus Pocus, or just need a sweet pick-me-up after a day of wrangling tiny goblins, these truffles are your edible happy dance. So grab your apron (the one with the questionable pumpkin stain – it adds character!), crank up your favorite spooky playlist, and let’s make some mischief! Trust me, these eyeballs won’t just watch the party… they’ll be the party.
Grandma Edna & The Haunted Candy Jar
Making these always takes me back to my grandma Edna’s kitchen – a place perpetually dusted in flour and smelling like cinnamon and mischief. Halloween was her Super Bowl. She’d transform her tiny seaside cottage into a haunted wonderland, complete with a “spiderweb” lace tablecloth older than me and a legendary candy jar that seemed bottomless. One year, when I was about seven and desperately wanting to help with the “grown-up treats,” she plopped me on a stool and handed me a rolling pin. “We’re making eyeballs, Isla,” she declared with a wink, holding up a bag of Oreos like a trophy. My job? Smash those cookies into oblivion. With every thunderous whack, we’d cackle like witches, imagining they were monster bones. She’d tell outrageous stories about the cookie monster’s cousin who lived in her pantry, demanding Oreo sacrifices. When we finally pressed the candy eyeballs onto our chocolate-dipped creations, she arranged them on a platter with dramatic flair. “Look alive, my pretties!” she’d whisper to the truffles, making me dissolve into giggles. Seeing the neighborhood kids’ eyes (real ones!) light up with delight when they spotted our spooky offerings… that pure, sugary joy? That’s the magic I want to bottle and share with you every time I make these. Grandma Edna knew: food isn’t just fuel; it’s laughter, connection, and a little bit of edible theatre.
Print
Spooky Eyeball Oreo Truffles
- Total Time: 40 minutes
- Yield: 36 truffles 1x
- Diet: Vegetarian
Description
No‑bake Oreo truffle eyeballs—creamy, spooky, and perfect for Halloween parties.
Ingredients
- 36 regular Oreos (not thins or double‑stuffed)
- 8 oz cream cheese, room temperature
- 12 oz white chocolate or white candy melts
- ¼ cup green candy melts
- Candy eyes (about 2 cm size)
Instructions
- Line a baking sheet with wax paper.
- Crush the Oreos (with filling) into fine crumbs.
- Mix the crumbs with the room‑temperature cream cheese until well combined.
- Scoop tablespoon‑sized portions and roll into balls—aim for about 36.
- Place balls on the lined baking sheet and freeze for 15 minutes.
- While freezing, melt the white chocolate (or candy melts) per package directions.
- Melt the green candy melts separately and pour into a disposable frosting bag for drizzling.
- Remove truffle balls from freezer, dip each into melted white chocolate, allow excess to drip off, then place back on wax paper.
- Work in batches of 7–8: dip, immediately drizzle green candy melt, and top each with a candy eye while still wet.
- Let set in the fridge until firm. Store in the refrigerator until serving.
Notes
- I use a Wilton Chocolate Melting Pot for the white chocolate and a silicone cup for the colored melts.
- Nutrition is approximate—102 kcal per truffle, based on original recipe.
- Prep Time: 40 minutes
- Category: Dessert
- Method: No‑bake, chilling, dipping
- Cuisine: American
Nutrition
- Serving Size: 1 truffle
- Calories: 102 kcal
- Sugar: 8 g
- Sodium: 71 mg
- Fat: 6 g
- Saturated Fat: 3 g
- Trans Fat: 0.01 g
- Carbohydrates: 12 g
- Protein: 1 g
- Cholesterol: 6 mg
Keywords: Halloween, Oreo truffles, eyeball treats, spooky dessert
Gathering Your Ghoulish Goods
Here’s the beautiful part: you only need a handful of simple ingredients to create maximum spooky impact! Let’s break it down:
- 1 package (14 oz) Oreo cookies: The glorious foundation! Classic Oreos work perfectly, but feel free to get playful. Mint Oreos? Spooky and refreshing! Peanut Butter? A deliciously eerie twist! (Chef Insight: Don’t remove the filling! That creamy center is KEY to the texture.)
- 1 block (8 oz) cream cheese, softened: Our magic binder, bringing luscious tang and richness. (Crucial Tip: SOFTENED is non-negotiable! Leave it out for 30-60 mins. Cold cream cheese = lumpy struggle.) Substitution? Full-fat mascarpone works in a pinch for extra decadence.
- 2 cups white chocolate chips or white candy melts: The gleaming “eyeball white.” Candy melts are more forgiving and set firmer/faster, perfect for beginners. High-quality white chocolate chips taste incredible but can be trickier to temper. (Pro Swap: Can’t find white? Use dark chocolate for demonic red eyes or matcha powder in white chocolate for zombie green!)
- Candy eyeballs (or colored candy melts for decorating): The star of the show! Pre-made candy eyeballs are the easiest route. Want DIY? Use a dab of melted dark chocolate for pupils on white chocolate chips, or pipe irises with colored candy melts.
- Optional: Red food coloring gel (NOT liquid): For those gloriously gruesome bloodshot veins! Gel gives intense color without thinning the coating. (Fun Fact: A tiny toothpick is your best tool for delicate veining!)
Conjuring Your Creepy Creations: Step-by-Step
Ready to roll? Literally! Let’s transform these simple ingredients into edible art. Don’t worry – I’ll walk you through every step with my favorite kitchen hacks!
- Obliterate Those Oreos! Dump the entire package of Oreos (filling included!) into your food processor. Pulse until you have fine, dark crumbs that resemble haunted beach sand. (No processor? No panic! Seal cookies in a sturdy zip-top bag and unleash your inner Hulk with a rolling pin. Therapeutic AND effective!)
- Cheesecake Fusion Station! Add the softened cream cheese to the Oreo crumbs in the processor. Blend until it forms a thick, cohesive, almost-black dough that pulls away from the sides. (Hack Alert: Scrape down the sides halfway through! You want zero streaks of white.)
- Roll Call for Eyeballs! Scoop out tablespoon-sized portions (about 1 inch). Roll them swiftly between clean palms into smooth balls. Pro Tip: If the mixture gets sticky, lightly dampen your hands with cold water. Place balls on a parchment-lined baking sheet. (Consistency is Key: Aim for uniform size so they set and decorate evenly.)
- Chill Out, Spookies! Pop the tray into the FREEZER for 20 minutes. This is CRITICAL! Firm balls won’t fall apart during the chocolate dunk. (Don’t skip or shorten! Set a timer. Use this time to clean up or melt your chocolate!)
- Melt That Magic Shell! Place white chocolate chips or candy melts in a microwave-safe bowl. Microwave in 20-second bursts, stirring vigorously in between, until completely smooth and drippy. (Chef’s Secret: Add 1/2 tsp coconut oil to thin the chocolate for easier dipping and a shinier finish!)
- The Great Dunk! Remove a few chilled balls from the freezer at a time (keep the rest cold!). Spear a ball gently with a fork or dipping tool. Lower it into the melted chocolate, swirl to coat completely, then lift and let excess drip off. Slide it gently back onto the parchment. (Work FAST! Cold balls + warm chocolate = setting starts quickly.)
- Eye See You! IMMEDIATELY, while the coating is still wet, press a candy eyeball firmly onto the top of each truffle. For DIY eyes, pipe a small colored candy melt circle (iris), then a tiny dot of dark chocolate in the center (pupil). (Placement Perfection: Slightly off-center looks delightfully creepy!)
- Optional: Vein of Terror! For bloodshot eyes, dip a toothpick tip into red gel food coloring. Gently drag wiggly lines radiating out from the eyeball onto the white chocolate. (Less is More! A few dramatic veins are spookier than a red mess.)
- Set the Scene! Let the truffles set completely at room temperature (about 1 hour) or refrigerate for 15-20 minutes to speed things up. The coating should be firm to the touch.
Plating Your Spooky Spectacle
Presentation is half the fun with these little guys! Skip the boring plate. Arrange them on a clean black slate, a bed of edible “dirt” (crushed chocolate cookies!), or nestled amongst fake cobwebs (keep it away from direct food contact!). Pile them high on a cake stand for dramatic effect, or line them up on a long platter like a chorus line of creepy critters. For a truly immersive experience, label them with a spooky sign: “Witch’s Gaze,” “Zombie Eyeballs,” or “Monster Mashup.” Serve them slightly chilled for that perfect cool, firm bite. Watch your guests giggle, gasp, and ultimately gobble them up!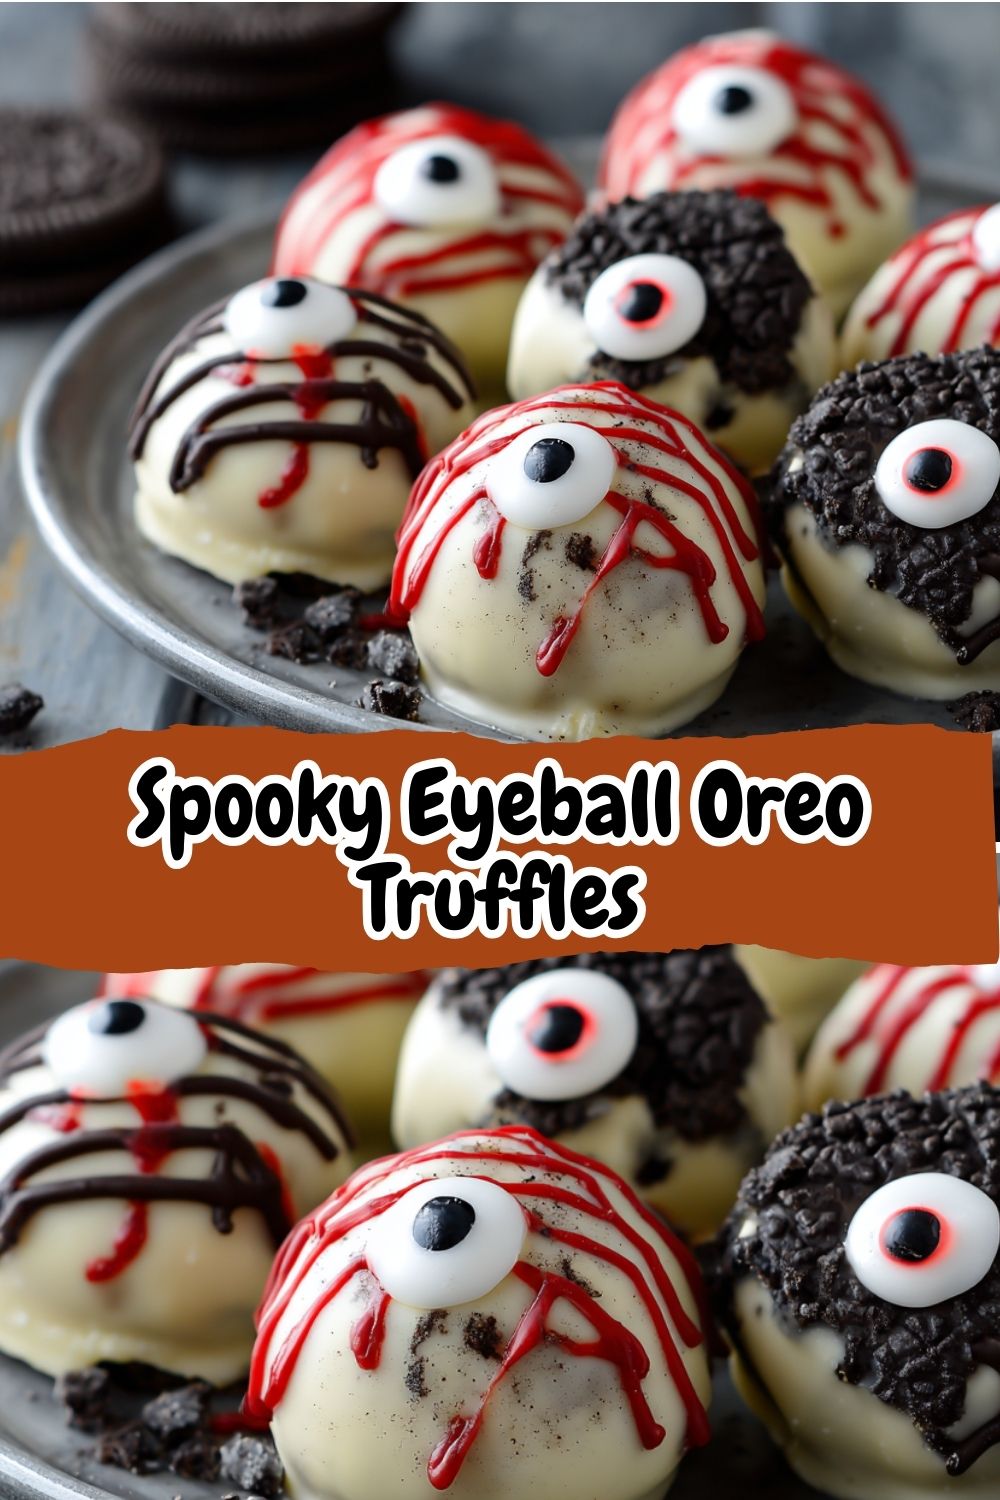
Spooky Swaps & Ghoulish Twists
Make these truffles your own haunting masterpiece! Here are some playful variations:
- Cookie Monster: Swap Oreos for Golden Oreos + 1 tbsp matcha powder for Zombie Green Eyeballs, or use chocolate sandwich cookies with orange filling for Pumpkin Spice Eyeballs.
- Coating Chameleon: Use dark chocolate coating and red candy melts for veins to create Demonic Red Eyes. Or, tint white chocolate with purple food gel for Alien Amethyst Eyes.
- Decorate Differently: Skip the eyeballs! Pipe spooky spider webs, mini fangs (with sliced almonds!), or simple “boo!” messages with melted chocolate.
- Flavor Infusion: Add 1/4 tsp peppermint extract to the filling for Frosty Phantom Eyes, or a dash of espresso powder for Mocha Mummy Eyes.
- Dietary Ghosts: Use gluten-free sandwich cookies and dairy-free cream cheese & white chocolate. Vegan candy eyeballs exist too! Check labels.
Isla’s Insider Scoop: Tales from the Truffle Trenches
Oh, the stories these truffles could tell! Like the year I decided piping hundreds of DIY iris details was a brilliant idea… at 11 PM… before a big party. Let’s just say my kitchen looked like a rainbow bomb went off, and my hand cramped for days. Lesson learned: pre-made candy eyeballs are a gift from the Halloween gods! Embrace them! These truffles have evolved too. My first batch? More like “lumpy ghost eyeballs” – I didn’t chill the balls long enough, and they melted into puddles when dipped! The freezer step is now my gospel. The best part? Seeing YOUR creations! One reader made “cyclops” versions with one giant eye. Another used different sizes for a whole “eyeball family.” A mom told me her toddler proudly declared they were making “monster boogers” (close enough!). That’s the real magic – these aren’t just treats; they’re memory makers. Embrace the mess, laugh at the lopsided eyeballs (they have character!), and savor the sweet, spooky fun.
Spooky Truffle SOS: Your Questions, Answered!
Ran into a ghoulish glitch? Don’t fret! Here’s how to troubleshoot common eyeball emergencies:
- Q: My truffle mixture is too sticky to roll! Help!
A: Chances are, your cream cheese was too warm, or you processed it a tad too long. Pop the mixture into the fridge for 15-20 minutes to firm up. When rolling, lightly dampen your hands with cold water – it’s a game-changer! If it’s still sticky, a tiny dusting of cocoa powder on your hands can help. - Q: My white chocolate coating is thick and clumpy! Did I ruin it?
A: You might have overheated it! White chocolate is delicate. If it’s seized (grainy), try stirring in a teaspoon of coconut oil or vegetable shortening. Sometimes it can be rescued! If it’s just thick, a tiny bit more oil/shortening can thin it. Next time, use shorter microwave bursts and stir like crazy in between. Candy melts are more forgiving here. - Q: The candy eyeballs keep falling off! How do I make them stick?
A: Timing is everything! You MUST place the eyeballs onto the wet chocolate coating immediately after dipping. If the coating starts to set, it won’t adhere. If you miss the window, dab a tiny dot of *freshly melted* chocolate onto the truffle and press the eye on quickly. - Q: How long do these spooky treats last? And how should I store them?
A: Store your eyeballs in an airtight container in the refrigerator! They’ll stay fresh and delicious for up to 5 days. Bring them to room temperature for about 10-15 minutes before serving for the best texture and flavor. You can freeze them for up to 2 months (thaw overnight in the fridge).
Spooky Eyeball Oreo Truffle Nutrition (Per Truffle)
(Approximate values based on standard ingredients)
- Calories: ~120 kcal
- Fat: 7g
- Carbohydrates: 13g
- Sugar: 10g
- Protein: 1g
Remember, these are treats meant for spooky enjoyment! Savor them, share them, and let the Halloween fun flow.