
The Ultimate Peanut Butter Blossoms: Your New Holiday Hero Cookie
Hey there, friend! Isla here, from my flour-dusted kitchen to yours. Is there anything that smells more like pure, unadulterated holiday joy than a batch of warm peanut butter cookies fresh from the oven? Okay, maybe a fresh evergreen tree or a simmering pot of mulled wine, but it’s a close call! And if those cookies happen to be soft, chewy, and cradling a perfect, melty milk chocolate kiss in the center? That, my friend, is the magic of Peanut Butter Blossoms.
This cookie is a total legend for a reason. It’s the undisputed champion of cookie swaps, the star of every holiday cookie tin, and the treat that makes kids’ (and let’s be real, adults’) eyes light up. It’s the perfect bite of salty-sweet, soft-crunchy, cozy-nostalgic goodness. Today, I’m sharing my ultimate, doubled-batch version of this classic. We’re making a BIG batch because, let’s be honest, a small batch of these never lasts long enough. This recipe is designed for gifting, for freezing (hello, future-you will be so grateful!), and for those moments when you just need to have a plate of perfect cookies ready for surprise guests or a serious cookie craving. So, tie on your favorite apron, put on some festive tunes, and let’s bake up a storm of these irresistible blossoms together!
A Kitchen Full of Memories & Melty Chocolate
I can’t even think about these cookies without being instantly transported back to my grandma’s warm, tiny kitchen. Every December, her counter would become a cookie factory assembly line. My job, from the time I could reach the counter on my step-stool, was the most important one: Unwrapping the chocolate kisses. I’d sit there with a giant bowl, meticulously peeling away the silver foil, my little pile of chocolates growing as the pile of shiny wrappers grew even faster. I’d get caught “quality testing” one (or three) every now and then, and Grandma would just wink and say, “A good chef always tastes her ingredients, Isla.”
The best part was the moment the cookies came out of the oven. The whole house would smell like toasted peanuts and brown sugar. My dad would swoop in, claiming he was there to “help press the chocolate in,” but we all knew he was just there to sneak the first warm, fragile cookie off the tray. That feeling of togetherness, of a simple shared task creating something so delicious and joyful, is exactly the vibe I want to bring to your kitchen with this recipe. It’s more than a cookie; it’s a little edible hug, a memory in the making.
Print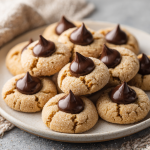
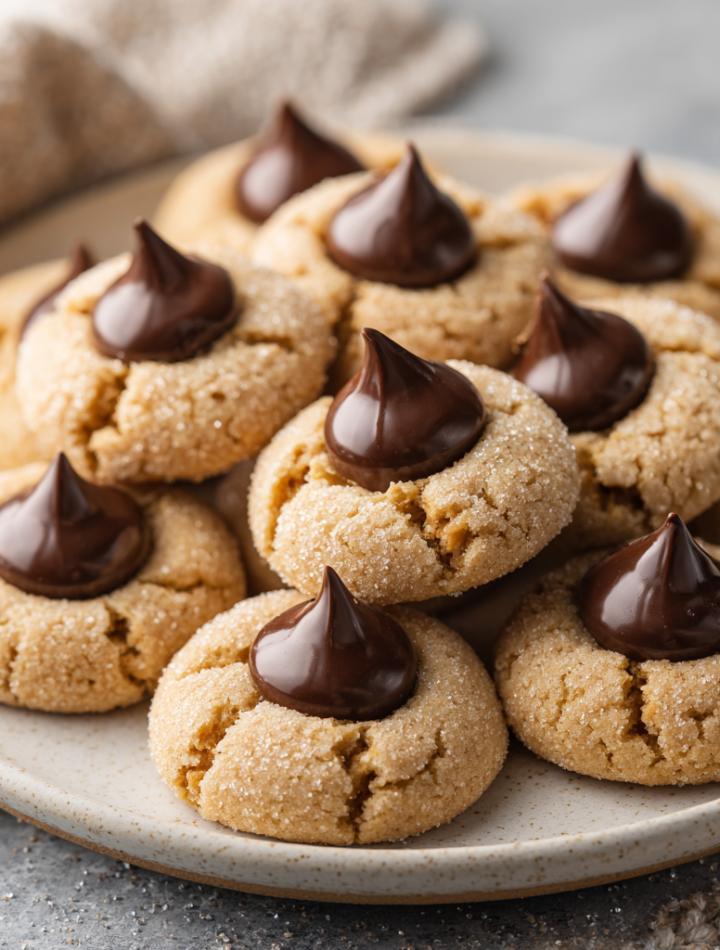
Peanut Butter Blossoms Cookies
- Total Time: 1 hr 30 mins
- Yield: ~168 cookies (14 dozen)
Description
Soft, chewy, and crowned with a melty chocolate kiss, these peanut butter blossoms are a holiday classic that never go out of style. This doubled version yields a big batch—perfect for cookie swaps, gifting, and freezing. A few simple twists make them even more crave-worthy.
Ingredients
2 cups shortening
2 cups peanut butter (creamy or crunchy)
2 cups packed brown sugar
3 cups white sugar, divided
4 large eggs
½ cup milk
4 tsp vanilla extract
7 cups all-purpose flour
4 tsp baking soda
2 tsp salt
4 (9 oz) bags milk chocolate kisses, unwrapped
Optional Flavor Twists:
Swap half the peanut butter for almond or cashew butter
Add 1 tsp cinnamon to the dough for a warm touch
Instructions
In a large bowl, cream shortening, peanut butter, brown sugar, and 2 cups white sugar until fluffy.
Beat in eggs, milk, and vanilla until smooth.
In a separate bowl, whisk flour, baking soda, and salt. Gradually mix into wet ingredients.
Chill dough for 30–45 minutes. Preheat oven to 375°F (190°C).
Shape dough into 1-inch balls, roll in remaining sugar, and place 2 inches apart on baking sheets.
Bake 8–10 minutes. Immediately press a chocolate kiss into the center of each warm cookie. Cool on wire racks.
- Prep Time: 30 mins
- Cook Time: 15 mins
- Category: dessert
Nutrition
- Calories: 90–100
- Fat: 5g
- Carbohydrates: 10g
Gathering Your Cookie Crew: The Ingredients
Here’s the dream team of ingredients that’ll come together to create cookie magic. Don’t worry, it’s all simple, straightforward stuff you probably already have!
- 2 cups shortening: This is the secret to that wonderfully soft and chewy texture that doesn’t spread too much. Butter can be used (see variations below!), but shortening gives them that classic, pillowy structure. For a fluffier option, try butter-flavored shortening!
- 2 cups peanut butter: Use creamy for a smooth texture or crunchy for a little extra bite and nostalgia. I’m a creamy gal myself! Natural peanut butter can sometimes separate and alter the texture, so for this recipe, a standard, no-stir kind like Jif or Skippy is your best bet for consistent results.
- 2 cups packed brown sugar: Pack it in there, friends! The molasses in the brown sugar is what gives these cookies their deep, caramel-like flavor and that gorgeous chewy moisture.
- 3 cups white sugar, divided: We use 2 cups in the dough for sweetness and structure, and the remaining 1 cup is for rolling! Rolling the dough balls in sugar creates that iconic crackly, sparkly crust and a delightful slight crunch.
- 4 large eggs: Our binding agents! They bring everything together and add richness. Make sure they’re at room temperature to create a smoother, more emulsified dough.
- ½ cup milk: A little splash of milk adds extra tenderness and helps bring the dough to the perfect consistency. Any kind you have on hand works!
- 4 tsp vanilla extract: The flavor enhancer! It amplifies all the other wonderful notes in the cookie. Don’t be shy with it.
- 7 cups all-purpose flour: The foundation of our cookie. I always fluff my flour up in the container before scooping it into my measuring cup and leveling it off to avoid accidentally using too much, which can make the cookies dry.
- 4 tsp baking soda: Our leavening agent! It helps the cookies puff up beautifully and gives them that perfect slight spread.
- 2 tsp salt: Crucial for balancing all that sweetness and making the peanut butter flavor truly pop. Trust me, don’t skip it!
- 4 (9 oz) bags milk chocolate kisses, unwrapped: The crowning glory! Unwrapping them is a great job for little helpers (or for you to do while watching your favorite holiday movie).
Let’s Get Baking: The Step-by-Step Fun
Okay, team! Let’s turn these ingredients into cookie perfection. Read through these steps first—I’ve packed them with all my best chef hacks to set you up for success.
- Cream It Like You Mean It: In the bowl of a stand mixer fitted with the paddle attachment (or in a very large bowl with a hand mixer), cream together the shortening, peanut butter, brown sugar, and 2 cups of the white sugar. Now, “creaming” isn’t just mixing—we want to beat it on medium-high speed for a good 2-3 minutes until it becomes light, fluffy, and pale in color. This incorporates air, which is key for a tender cookie! Scrape down the sides of the bowl halfway through.
- Combine the Wet Team: Beat in the eggs, one at a time, making sure each is fully incorporated before adding the next. This prevents the batter from breaking. Then mix in the milk and vanilla until the mixture is smooth and glorious. It might look a little curdled at this point—that’s okay! The flour will bring it all together.
- Whisk the Dry Squad: In a separate, large bowl, whisk together the flour, baking soda, and salt. This isn’t just busywork—whisking ensures the baking soda and salt are evenly distributed throughout the flour, so every single cookie bakes up consistently.
- Bring It All Together: With your mixer on low speed, gradually add the dry ingredients to the wet ingredients. Mix until just combined and no streaks of flour remain. Chef’s Hack: Overmixing at this stage develops gluten and can lead to tough cookies. A few flour specks are better than overmixing!
- The Chill Factor: Cover the bowl and chill the dough for at least 30-45 minutes. I know, I know—waiting is the hardest part! But this step is non-negotiable. Chilling the dough solidifies the fat, which prevents the cookies from spreading too much into flat puddles in the oven. It also allows the flour to hydrate fully, resulting in a chewier texture and a more developed flavor. Use this time to preheat your oven to 375°F (190°C) and unwrap all those chocolate kisses!
- Scoop and Roll: Using a small cookie scoop or a tablespoon, portion out the dough and roll it into 1-inch balls. Roll each ball in the remaining 1 cup of white sugar until fully coated. This gives them that beautiful, sparkling, crackly finish. Pro tip: Use a #60 cookie scoop for perfect, uniform balls every time!
- Bake to Perfection: Place the sugared dough balls about 2 inches apart on ungreased or parchment-lined baking sheets. Bake for 8-10 minutes. They are done when the edges are very lightly golden and the centers still look soft and slightly puffy. They might look underdone, but they will continue to set as they cool. Do not overbake! This is the secret to a super soft, chewy cookie.
- The Grand Finale: As soon as the cookies come out of the oven, immediately press a chocolate kiss firmly into the center of each one. The warm cookie will soften the chocolate perfectly. Let the cookies cool on the baking sheet for 5 minutes before transferring them to a wire rack to cool completely. This allows them to set up so they don’t fall apart when you move them.
How to Serve These Shining Stars
Presentation is part of the fun! Pile these blossoms high on a vintage cake stand for a homey, festive feel. For gifting, stack them in a cellophane bag tied with a pretty ribbon, or create a cookie box mix-and-match with your other holiday favorites. They are best served at room temperature with a tall glass of ice-cold milk, a mug of hot coffee, or even a glass of red wine—the peanut butter and chocolate pairing is divine. The chocolate will be firm but will melt delightfully in your mouth.
Ride the Flavor Wave: Creative Twists
Feel like playing? Here are a few ways to make this classic recipe your own:
- Nut Butter Swap: Use half peanut butter and half almond butter or cashew butter for a more complex, sophisticated nutty flavor.
- Chocolate Change-Up: Swap the milk chocolate kisses for dark chocolate for a richer, less sweet option, or use caramel-filled kisses for a gooey surprise inside!
- Spiced Sugar Roll: Add 1 teaspoon of cinnamon (or even a pinch of cayenne for a kick!) to the sugar you roll the dough in for a warm, spiced crust.
- Double Chocolate: Stir ½ cup of mini chocolate chips into the dough for an extra hit of chocolate in every bite.
- Gluten-Free Friendly: Substitute the all-purpose flour with a 1:1 gluten-free baking blend. The texture will be slightly more delicate but just as delicious!
Isla’s Chef Notes & Kitchen Confessions
This recipe has been my ride-or-die for years, but it’s had its share of kitchen disasters! One year, in a frantic pre-holiday rush, I accidentally used baking POWDER instead of soda. Let’s just say the cookies spread into one giant, thin, peanut butter-and-chocolate continent on my baking sheet. We broke it into pieces and called it “bark”—it was still delicious, but not exactly blossoms! So, double-check your containers, friends.
I’ve also learned that the “immediately press” instruction is sacred. I once let a tray cool for just a few minutes before adding the kisses, and they just sat on top like little hats and fell off as soon as you picked the cookie up. The warm cookie is what creates that perfect fusion between cookie and chocolate. This recipe is forgiving and fun, so don’t stress. Even the “ugly” ones taste incredible!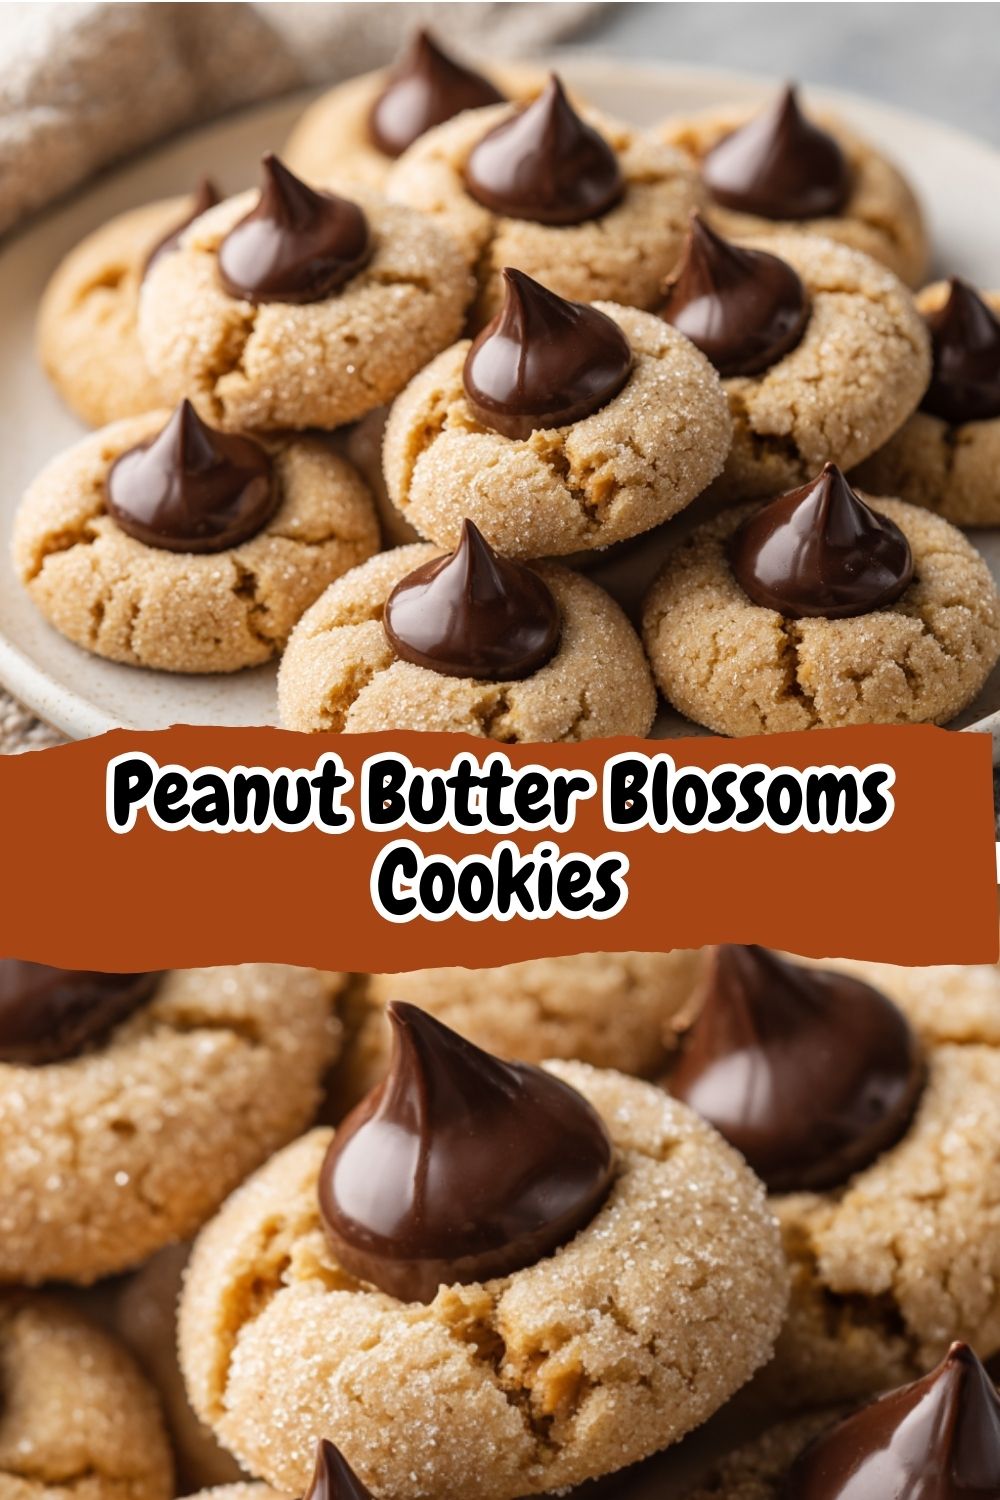
Your Questions, Answered!
Q: My dough is really sticky and hard to roll. What did I do wrong?
A: Don’t worry! This usually means the dough just needs to chill a bit longer. Pop it back in the fridge for another 15-20 minutes. If you’re in a real pinch, you can lightly dampen your hands with water to prevent sticking while rolling.
Q: Can I freeze the dough or the baked cookies?
A: Absolutely! This is one of my favorite meal prep tips. You can freeze the unbaked dough balls (after rolling in sugar) on a sheet pan, then transfer them to a freezer bag. Bake from frozen, adding 1-2 minutes to the bake time. You can also freeze the fully baked and cooled cookies in an airtight container for up to 3 months. They thaw perfectly at room temperature.
Q: Why did my cookies spread too much and come out flat?
A: The usual suspects are: not chilling the dough long enough, your baking soda might be old (it loses potency over time), or your oven temperature might be off. An oven thermometer is a cheap and invaluable tool for any baker!
Q: Can I use all butter instead of shortening?
A> You can, but the texture will change. Butter has water that creates steam, leading to a crisper, flatter, and more buttery-tasting cookie. They’ll be delicious, but they won’t have the classic soft, pillowy chew that shortening provides. For a hybrid approach, try using half butter and half shortening!
Nutritional Information (Approximate, Per Cookie)
Calories: 95kcal | Carbohydrates: 11g | Protein: 1g | Fat: 5g | Saturated Fat: 2g | Cholesterol: 5mg | Sodium: 60mg | Sugar: 7g
(Note: This is an estimate based on the ingredients used and will vary slightly with any substitutions.)