 Let’s Make Some Magic: The No-Bake Oreo Dirt Cake That Never Fails to Delight
Hey there, friend! Isla here, waving from my flour-dusted kitchen. Have you ever had one of those days where you desperately need a show-stopping dessert but the very thought of turning on the oven makes you want to lie down? Maybe it’s a last-minute potluck, a kid’s birthday party that snuck up on you, or just a Tuesday where your sweet tooth is throwing a full-blown tantrum. I hear you. I’ve been there, standing in front of the pantry, willing a cake to magically appear.
That’s exactly why I’m so deeply, madly in love with this Oreo Dirt Cake. It’s not just a dessert; it’s a culinary hug. It’s the promise of something decadent, chocolatey, and wildly satisfying, all without preheating a single thing. This is the recipe you pull out when you want to hear a chorus of “WOW!” but you only have 20 minutes of active energy to give. It’s a nostalgic trip back to childhood potlucks, yet it feels perfectly at home on a grown-up dinner table.
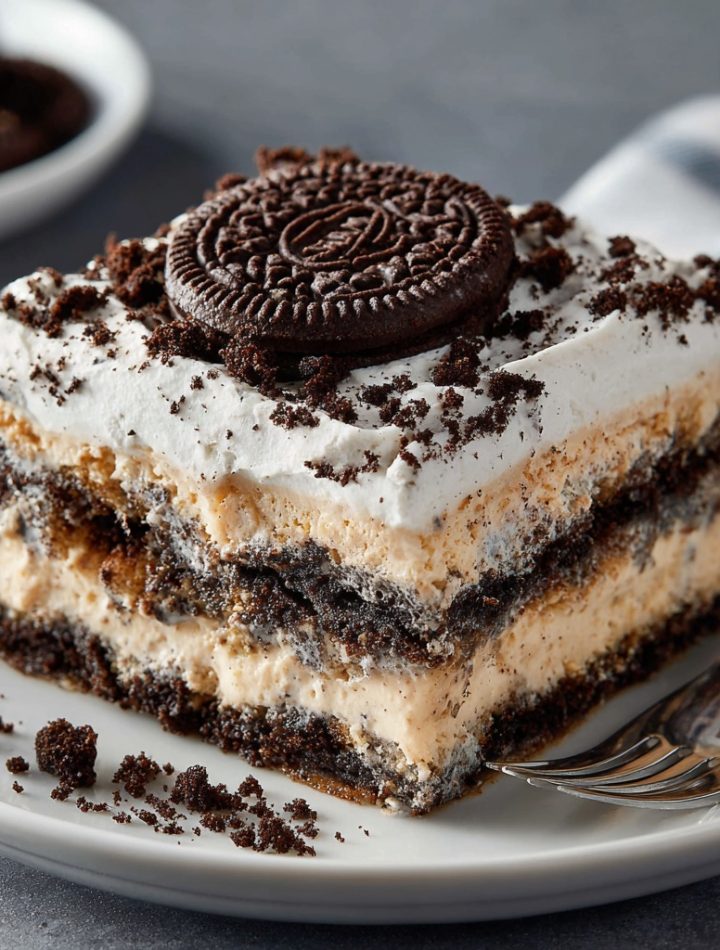
We’re talking about layers of fluffy, creamy, dreamy filling sandwiched between crushed Oreos that mimic rich, dark soil. It’s playful, it’s indulgent, and it has this magical ability to make everyone—from the pickiest eater to the most sophisticated foodie—grin from ear to ear. So, tie on your apron (or don’t, no rules here!), clear a little counter space, and let’s dive into the easiest, most crowd-pleasing dessert in my entire arsenal. Trust me, this one is a flavor wave you’re going to want to ride again and again.
Print
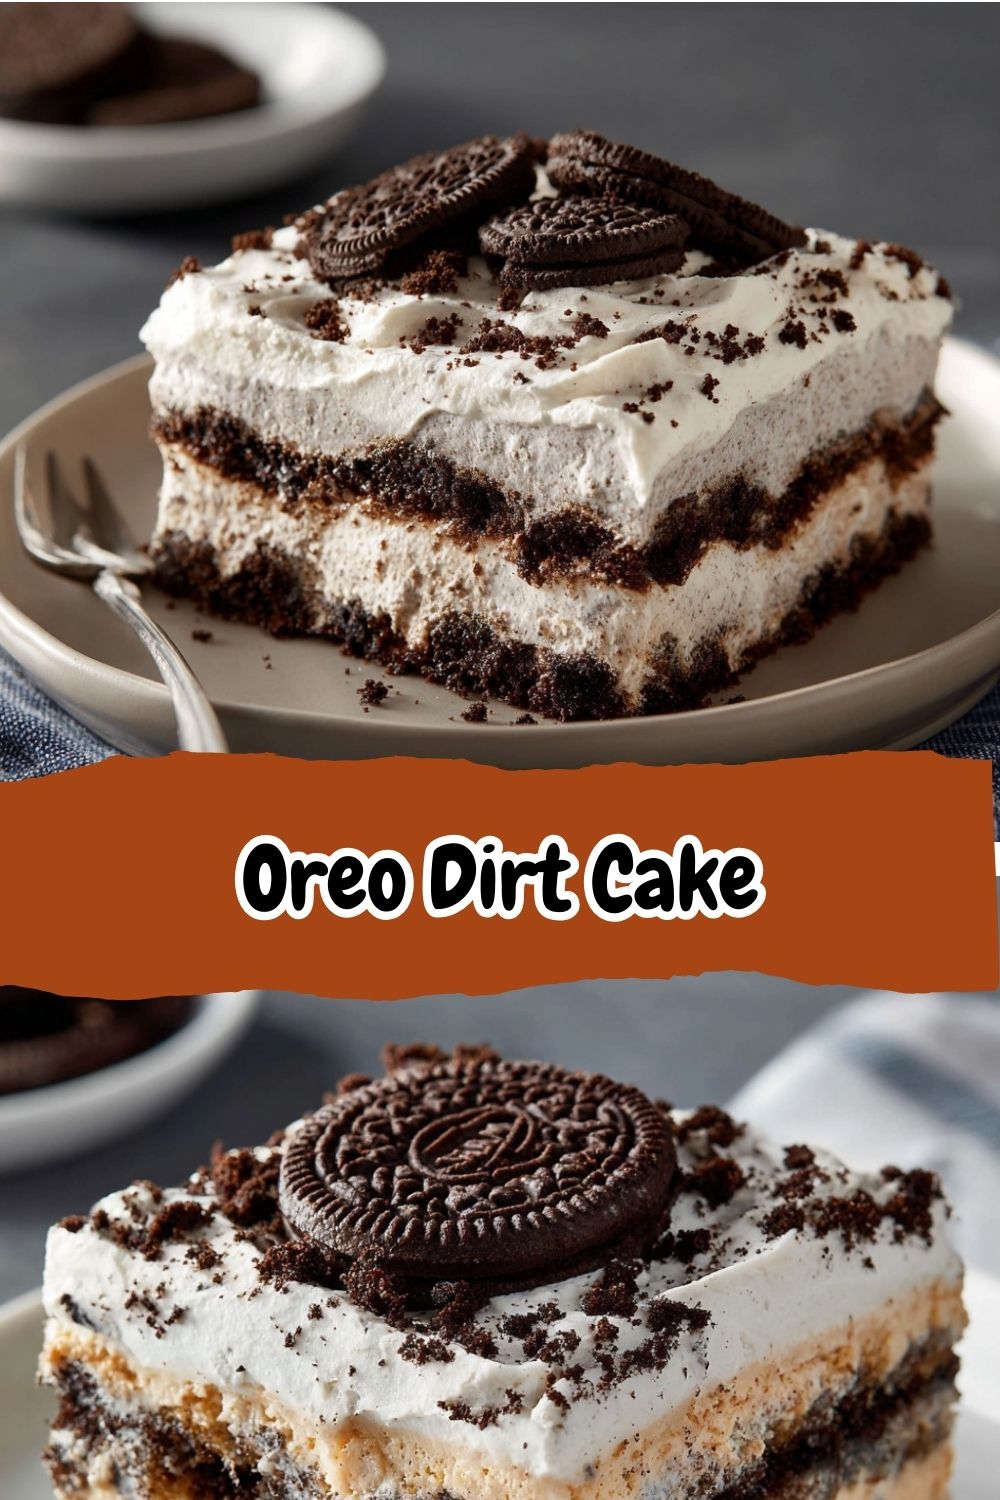
Oreo Dirt Cake : No-Bake Layered Dessert Favorite
- Total Time: 2 hours 20 minutes
- Yield: 12 servings 1x
Description
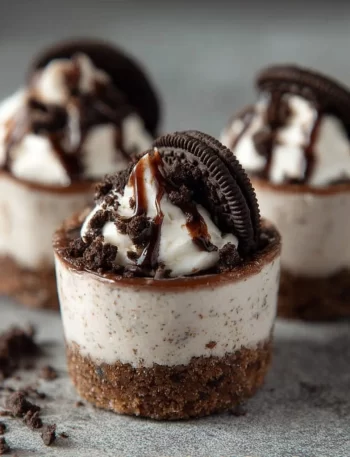
Oreo Dirt Cake is a no-bake classic that layers crushed Oreos with a light, creamy pudding filling for the ultimate crowd-pleaser. With its rich cookies-and-cream flavor and fluffy texture, it’s a fun and nostalgic treat perfect for parties, holidays, or just when you want something sweet and simple—no oven required.
Ingredients
1 package (14.3 oz) Oreo cookies
1 package (8 oz) cream cheese, softened
¼ cup unsalted butter, softened
1 cup powdered sugar
2 packages (3.4 oz each) instant vanilla pudding mix
3 cups cold milk
1 tub (12 oz) whipped topping (like Cool Whip), thawed
Instructions
Crush Oreos into fine crumbs using a food processor or by placing them in a zip-top bag and crushing with a rolling pin. Set aside.
In a mixing bowl, beat cream cheese, butter, and powdered sugar until smooth.
In a separate bowl, whisk together pudding mix and cold milk until thickened (about 2 minutes). Fold in whipped topping.
Combine the pudding mixture with the cream cheese mixture and mix until smooth.
In a 9×13-inch dish or trifle bowl, layer half the crushed Oreos on the bottom.
Pour the creamy filling over the crumbs and spread evenly.
Top with the remaining crushed Oreos.
Chill for at least 2 hours before serving.
- Prep Time: 20 minutes
- Category: Dessert
A Puddle-Jumping Party & The Birth of a Tradition
My love for this dirt cake is wrapped up in one of my messiest, happiest childhood memories. Picture this: I’m seven years old, and a torrential summer rainstorm has just canceled our big backyard barbecue. Us kids were devastated, our visions of tag and sprinklers washed away. But my brilliant mom just winked, hauled us all into the kitchen, and declared we were making “Mud Puddle Pie.”
She handed me the mallet and a bag of Oreos, and my job was to “pound the dirt.” My brother got to mix the “clouds” (the whipped topping). We were covered in cookie dust and pudding splatters, giggling as we layered our creation into a big, clear bowl. She let us top it with gummy worms “swimming” in the mud and a few sprigs of mint for “grass.” That stormy afternoon turned from a disappointment into an legendary kitchen adventure. The cake tasted incredible, but more than that, it felt like we had made magic out of a canceled plan. To this day, every time I make this dessert, I think of that joy, that creativity, and the lesson that the best memories often come from the messiest, most unplanned moments. This recipe is my edible tribute to that feeling.
Gathering Your Treasure: What You’ll Need
Here’s the beautiful part: this recipe uses simple, pantry-friendly ingredients that come together to create something so much greater than the sum of its parts. Let’s break them down.
- 1 package (14.3 oz) Oreo cookies: The star of the show! These provide the iconic “dirt” layer. Chef’s Insight: Don’t skimp on the crushing—you want a mix of fine crumbs and a few small chunks for great texture. For a fun twist, try using Mint Oreos or Golden Oreos!
- 1 package (8 oz) cream cheese, softened: This is the secret weapon for richness and structure. Pro Tip: “Softened” is key! Leave it on the counter for a good 1-2 hours. If you forget, pop it (out of the foil!) on a microwave-safe plate and microwave at 50% power for 15-second intervals until it yields to a gentle press.
- ¼ cup unsalted butter, softened: Butter teams up with the cream cheese for a lush, smooth base. Using unsalted lets you control the sweetness perfectly.
- 1 cup powdered sugar: This sweetens the cream cheese layer without any graininess. Substitution Tip: In a pinch, you can blend regular granulated sugar in a blender until super fine to make your own.
- 2 packages (3.4 oz each) instant vanilla pudding mix: The instant thickener for our creamy layer. Why two? This gives the cake incredible body and that classic pudding flavor. Jell-O brand “Cookies & Cream” instant pudding is also a fantastic choice here!
- 3 cups cold milk: Whole milk will give you the creamiest, richest result, but any milk you have will work. The colder it is, the quicker and better the pudding sets.
- 1 tub (12 oz) whipped topping (like Cool Whip), thawed: This brings the airy, cloud-like texture. Chef’s Hack: For a from-scratch feel, you can swap this with 3 cups of freshly whipped heavy cream sweetened with a tablespoon of powdered sugar. Just fold it in gently at the end!
Building Your No-Bake Masterpiece: Step-by-Step
Ready to create some layers of joy? Let’s do this. I’ll walk you through each step with all my favorite little hacks to ensure perfection.
- Create the “Dirt”: Place all your Oreos (yes, the whole cookie, cream filling and all!) into a food processor. Pulse until you have a lovely mix of fine crumbs and a few pea-sized pieces. No processor? No sweat! Toss them into a large zip-top bag, seal it tightly (get that air out!), and use a rolling pin, wine bottle, or even a heavy skillet to crush them to your heart’s content. Pour the crumbs into a bowl and set aside. Fun Tip: Reserve about ¼ cup of crumbs for a pretty sprinkle on top at the very end!
- Make the Creamy Dreamy Base: In a large mixing bowl, beat the softened cream cheese and butter together with an electric mixer on medium speed until it’s completely smooth, creamy, and lump-free. This should take about 2 minutes. Scrape down the sides of the bowl. Add the powdered sugar and beat again until it’s fully incorporated and silky. This mixture is the decadent foundation of your filling.
- Whip Up the Fluffy Cloud Layer: In a separate, large bowl, whisk the instant pudding mixes and the COLD milk together. Whisk vigorously by hand for a full 2 minutes. It will thicken beautifully right before your eyes. Now, take your thawed whipped topping and gently fold it into the pudding with a rubber spatula. “Folding” means you’re cutting down through the center, sweeping across the bottom, and turning the mixture over itself. Be gentle to keep all that air in! You should have a gloriously fluffy, pale mixture.
- Marry the Creamy and the Fluffy: Here comes the magic. Add the cream cheese mixture to the pudding mixture. Use your electric mixer on low speed (to avoid a snowstorm!) just until the two are fully combined and uniformly smooth. You now have the most luscious, dreamy filling imaginable. Taste it (you know you want to). Revel in it.
- Layer It Like You Mean It: Grab your serving dish—a 9×13-inch pan is classic, but a clear glass trifle bowl is my favorite for showing off those gorgeous layers. Sprinkle a little more than half of the crushed Oreos evenly over the bottom. Press them down lightly with your fingers or the back of a spoon to form your first “dirt” layer. Now, pour all of that glorious creamy filling on top and spread it out gently to the edges. Finally, shower the remaining crushed Oreos over the top, covering every inch in chocolatey goodness.
- The (Very Important) Chill: This is the hardest part: waiting. Cover your dish with plastic wrap and tuck it into the fridge for at least 2 hours, but honestly, overnight is even better. This chill time allows the flavors to meld, the cookies to soften slightly into the filling, and the whole dessert to set up so you get a perfect, clean slice (or scoop!).
How to Serve Your Dirt Cake with Style
Presentation is half the fun! If you used a trifle bowl, just pop a big serving spoon right in and let people dig into the beautiful layers. For a pan, slice it into squares. I love serving it in small mason jars for individual portions at parties—so cute! The classic finishing touch? Push a few gummy worms into the top “dirt” layer so they look like they’re crawling out. You can also add a dollop of extra whipped cream, a fresh raspberry, or a sprig of mint on each plate for a little color. It’s a rustic, playful dessert, so have fun with it!
Ride Your Own Flavor Wave: Creative Twists
- Cookies & Cream Dream: Use Cookies & Cream instant pudding instead of vanilla, and fold in ½ cup of mini chocolate chips with the whipped topping.
- Peanut Butter Paradise: Add ½ cup of creamy peanut butter to the cream cheese mixture when you beat it. Use Reese’s Peanut Butter Cup Minis, chopped, as a garnish on top with the Oreo crumbs.
- Berry “Flower Bed”: Make a layer of fresh raspberries or sliced strawberries between the bottom cookie layer and the cream layer. Top with Oreo crumbs and a few whole berries.
- Dairy-Free Delight: Use dairy-free cream cheese, plant-based butter, your favorite non-dairy milk (oat or almond work great), and a coconut-based whipped topping. Ensure your Oreos are the vegan variety (many are!).
- Decadent Mocha: Dissolve 1-2 tablespoons of instant espresso powder into the cold milk before adding the pudding mix for a subtle coffee kick that pairs amazingly with chocolate.
Isla’s Kitchen Confidential: Extra Thoughts & Stories
This recipe has been my trusty sidekick for years, and it’s evolved in the funniest ways. Once, for a Halloween party, I layered it in a clean, new flower pot and stuck a fake flower in the center—total hit! Another time, I was in a major hurry and tried to mix the cold pudding mix directly into the cream cheese. Friends, do not do this. I created cement-like lumps that no amount of beating could fix. I had to start over. The lesson? Separate bowls are your friend. Also, the recipe is incredibly forgiving. Too many crumbs? Toss ’em on top. Not enough? That’s fine, the creamy layer will shine. This dessert is about joy, not perfection. The version I’ve given you here is my gold-standard, most-tested, crowd-cheered formula. It’s the one I make when I want to see those happy, crumb-covered smiles around my table.
Your Questions, Answered!
Q: My cream cheese layer is lumpy! What did I do wrong?
A: This almost always means your cream cheese (or butter) wasn’t soft enough. True room-temperature cream cheese should spread like very thick frosting. Next time, plan ahead for that counter-top thaw. To fix it now, you can try pressing the lumpy mixture through a fine-mesh sieve with a spatula, or blitzing the entire final filling in a food processor for a few seconds to smooth it out.
Q: Can I make this ahead of time?
A: Absolutely! In fact, I encourage it. You can make this up to 24 hours in advance. The longer it chills, the better the flavors blend and the more set it becomes. Just keep it covered tightly in the fridge.
Q: My pudding/whipped topping mixture seems runny. Will it set up?
A> Did you use Instant pudding mix (not “Cook & Serve”) and cold milk? If yes, trust the process. The pudding continues to set in the fridge, especially when combined with the other ingredients. The 2-hour chill is non-negotiable for structure. If you’re still worried, using a metal bowl that you’ve chilled in the freezer for 10 minutes before whipping can help everything stay firmer.
Q: I don’t have a big trifle bowl. What else can I use?
A> Get creative! A 9×13 pan is perfect. I’ve also used a large salad bowl, individual parfait glasses, or even a springform pan for a “cake” look. Any vessel that holds about 3 quarts will work.
Nutritional Information*
Per Serving (1/12 of recipe, approximate): Calories: 390 | Total Fat: 20g | Saturated Fat: 11g | Cholesterol: 35mg | Sodium: 320mg | Total Carbohydrates: 49g | Dietary Fiber: 1g | Total Sugars: 34g | Protein: 4g
*This information is an estimate provided by an online nutrition calculator. For precise dietary needs, please calculate with your specific ingredients.