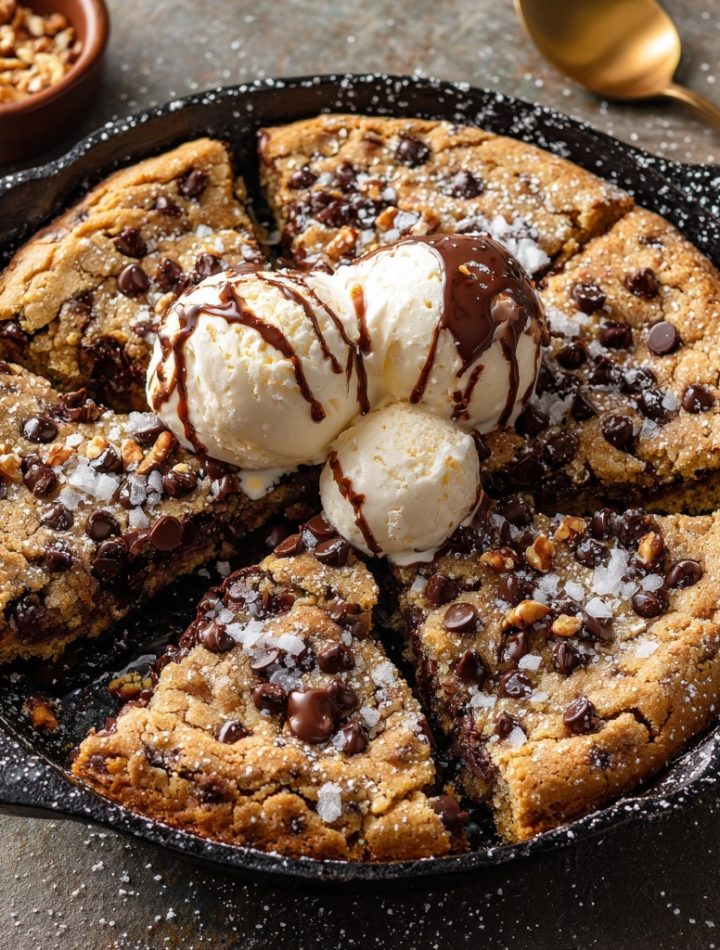
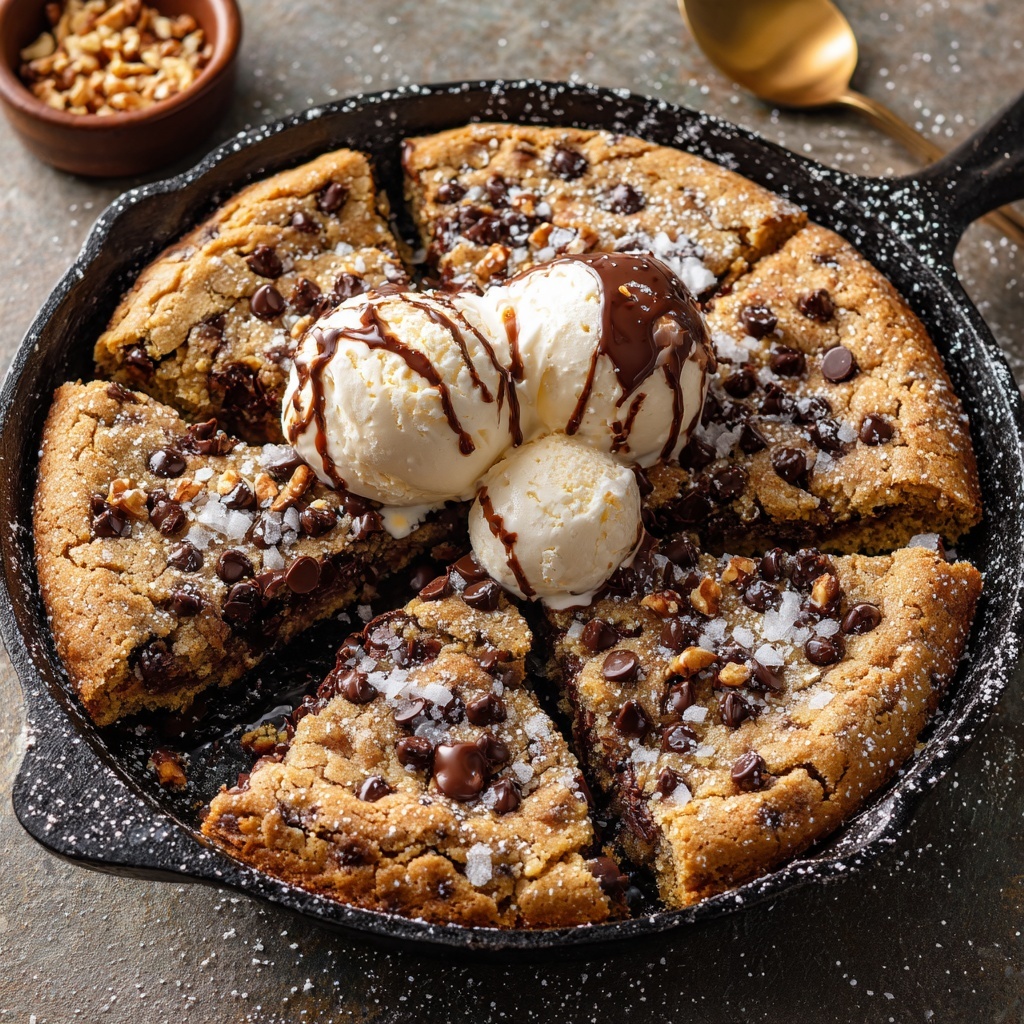
No-Egg, No-Butter Chocolate Chip Skillet Cookie – Gooey, Healthier & Irresistible
Your New Favorite Dessert is Just One Skillet Away
Hey there, friend! Isla here from BiteTide. Let’s talk about a universal truth: the powerful, undeniable, sometimes-all-consuming craving for a warm, gooey chocolate chip cookie. You know the one. It hits you right around 9 PM, when the kitchen is quiet and your sweet tooth starts singing. But then that little voice in your head chimes in with questions about butter, eggs, and whether you really want to commit to a whole batch.
Well, I’m here to tell that little voice to hush, because we’re about to make all your cozy dessert dreams come true. Forget creaming butter and sugar, forget chilling dough, and definitely forget doing a mountain of dishes. We’re making a No-Egg, No-Butter Chocolate Chip Skillet Cookie that is so decadent, so wildly delicious, you’ll have a hard time believing it’s made with better-for-you ingredients.
This isn’t just a “healthy” dessert; it’s a spectacular dessert that just happens to be kinder to your body. We’re talking a cookie with a crispy, golden edge that gives way to an impossibly soft, melt-in-your-mouth center, all studded with pools of dark chocolate. It bakes in one pan, comes together in about 10 minutes, and is literally designed for you to grab a spoon and dig in with your favorite people (or, you know, your favorite cozy blanket—no judgment here). So, let’s preheat that oven and ride this flavor wave together. You’re about to meet your new kitchen hero.
A Cookie That Feels Like Home
This skillet cookie recipe always takes me back to my grandma’s warm, flour-dusted kitchen. She wasn’t a fancy baker, but she was a wizard with what she had. I remember one rainy afternoon, we desperately wanted cookies but were out of eggs. My grandma just waved a hand and said, “No matter, honey. We’ll make it work.” She pulled out a jar of local honey, used the oil from a jar of peaches, and whipped up the most magical, rustic cookie I’d ever tasted. We ate it straight from the pan, scooping up warm, gooey bites with our spoons, laughing as the rain pattered against the window.
That day, she taught me one of my most cherished kitchen philosophies: baking is about joy, not perfection. It’s about the feeling a warm, shared dessert creates. This skillet cookie is my modern, slightly polished homage to her “make it work” spirit. It’s the kind of simple, soul-warming treat that brings people together, no fancy ingredients required. Every time I make it, I get a little taste of that rainy afternoon and the powerful magic of a grandma’s love.
Print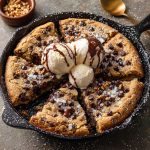
No-Egg, No-Butter Chocolate Chip Skillet Cookie : Gooey, Healthier & Irresistible
- Total Time: 35 minutes
- Yield: 8 servings 1x
Description
This Chocolate Chip Skillet Cookie skips the butter, eggs, and refined sugar—but keeps all the flavor and gooey texture you love. It’s made with better-for-you ingredients, comes together in one pan, and is perfect for sharing (or not). Whether you’re baking for dietary needs or just want a lighter indulgence, this cookie hits the spot without compromise.
Ingredients
½ cup coconut oil (melted) or neutral oil
½ cup maple syrup or honey
1 tbsp vanilla extract
¼ cup almond milk (or any milk)
1¼ cups whole wheat pastry flour or oat flour
½ tsp baking soda
¼ tsp salt
½ cup dark chocolate chips (plus extra for topping)
Optional twist: add ¼ cup chopped walnuts or pecans for crunch
Instructions
½ cup coconut oil (melted) or neutral oil
½ cup maple syrup or honey
1 tbsp vanilla extract
¼ cup almond milk (or any milk)
1¼ cups whole wheat pastry flour or oat flour
½ tsp baking soda
¼ tsp salt
½ cup dark chocolate chips (plus extra for topping)
Optional twist: add ¼ cup chopped walnuts or pecans for crunch
- Prep Time: 10 mins
- Cook Time: 25 mins
- Category: Dessert
Gather Your Ingredients: The Dream Team
One of the best things about this recipe is its beautiful simplicity. You probably have most of these ingredients in your pantry right now! Let’s break down why each one is a superstar in this cookie.
- ½ cup coconut oil (melted) or neutral oil: This is our butter replacement, and it works like a charm! Coconut oil gives a lovely, subtle tropical note, but if you’re not a fan, avocado oil or even light olive oil are fantastic neutral swaps. The key is to melt the coconut oil and let it cool slightly so it doesn’t cook the other ingredients when you mix it.
- ½ cup maple syrup or honey: Nature’s candy! These liquid sweeteners keep our cookie free of refined sugar and add a deep, complex sweetness and moisture. I love the robust flavor of maple syrup, but honey gives a beautiful floral touch. The choice is yours!
- 1 tbsp vanilla extract: Yes, a full tablespoon! This is our secret weapon for that warm, bakery-style aroma and flavor. It enhances the chocolate and makes the whole kitchen smell incredible.
- ¼ cup almond milk (or any milk): A splash of milk brings everything together into a perfect cookie dough consistency. Any plant-based or dairy milk will work beautifully here.
- 1¼ cups whole wheat pastry flour or oat flour: This is where we get our wholesome boost. Whole wheat pastry flour is lighter than regular whole wheat and gives a tender crumb. Oat flour (which you can make by blending rolled oats!) is my go-to for a gluten-free option—it adds a lovely, nutty flavor and chewy texture.
- ½ tsp baking soda: Our leavening agent! It gives the cookie just the right amount of lift and helps create those dreamy crispy edges.
- ¼ tsp salt: Never, ever skip the salt! It’s the flavor enhancer that makes the chocolate taste richer and the sweet notes pop. It’s the difference between a “good” cookie and a “WOW” cookie.
- ½ cup dark chocolate chips (plus extra for topping): The star of the show! I’m a dark chocolate fanatic for its rich, less-sweet flavor, but use whatever chips make your heart sing. Pro-tip: save a few extra chips to press into the top of the dough right before baking for that gorgeous, puddled-chocolate look.
- Optional twist: add ¼ cup chopped walnuts or pecans for crunch: For my texture lovers, this is your moment! The nuts add a wonderful crunch and toasty flavor that pairs perfectly with the gooey chocolate.
Let’s Bake! Your Foolproof Guide to Cookie Bliss
Ready to see some magic happen? This is the fun part. I’ll walk you through every step, with all my favorite chef hacks to ensure your skillet cookie is absolutely perfect.
- Preheat and Prep: First things first, get that oven heating to 350°F (175°C). While it’s warming up, lightly grease your 8–10 inch cast iron skillet with a tiny bit of oil or a quick spray. A chef’s secret? If you have it, a well-seasoned cast-iron skillet is the MVP here—it gives you those incredible, crispy edges and cooks the cookie so evenly. But don’t fret if you don’t have one! Any oven-safe skillet or even a cake pan will work in a pinch.
- Mix the Wet Ingredients: Grab a medium-sized mixing bowl. Add your melted (and slightly cooled) coconut oil, maple syrup, vanilla extract, and almond milk. Now, take a whisk and go to town! You want to whisk it vigorously for about 30 seconds until it’s completely smooth, emulsified, and looks a little creamy. This step is key for a uniform texture, so no lazy stirring! You’ll see the mixture thicken slightly as you whisk—that’s exactly what you want.
- Bring in the Dry Goods: Time to add our structure! Sprinkle the flour, baking soda, and salt right over the wet mixture. I like to switch to a spatula here. Gently fold everything together until you see the last bits of flour disappear. A little chef hack: don’t overmix! Once the flour is incorporated, stop. Overmixing can make the cookie a bit tough, and we’re going for tender and gooey.
- The Grand Finale: Chocolate! Now for the best part. Dump in your ½ cup of chocolate chips (and those chopped nuts, if you’re using them) and fold them gently into the dough. The dough will be thick, soft, and oh-so-scoopable.
- Press and Top: Transfer your gorgeous cookie dough into your prepared skillet. Use your spatula or clean hands to press it down into a smooth, even layer. Now, take those extra chocolate chips you saved and press them lovingly all over the top. This isn’t just for looks—it ensures every single bite is bursting with melty chocolate.
- Bake to Perfection: Slide that beautiful skillet into your preheated oven. Now, set a timer for 20 minutes and resist the urge to open the oven door! The magic is happening. At the 20-minute mark, take a peek. You’re looking for a beautifully golden top and firm, crispy-looking edges. The center will still look soft and a little underdone—this is the secret to the gooey center! If it seems too jiggly, give it another 3-5 minutes. It will continue to set as it cools.
- The Hardest Part: Let it Cool (a little): I know, I know. The aroma is intoxicating. But you have to let it cool for at least 10-15 minutes. This allows the structure to set so you don’t have molten lava cookie (tempting, but dangerous!). This is the perfect time to grab the vanilla ice cream…
How to Serve This Masterpiece
Okay, the timer has dinged, you’ve (im)patiently waited… now what? Presentation is everything, even for a cozy dessert. I love placing the warm skillet right in the middle of the table on a trivet—it’s rustic, inviting, and says “dig in!” For serving, you have two glorious options. Option one: the classic slice. Let it cool completely and cut it into wedges, just like a cookie pie. Option two (and my personal favorite): serve it warm with a stack of spoons and a big scoop of vanilla bean ice cream melting right on top. Watch as it cascades down the sides into all the chocolate pools. A sprinkle of flaky sea salt takes it to a whole new level of gourmet bliss.
Get Creative! 5 Fun Twists to Try
This recipe is a fantastic blank canvas. Once you’ve mastered the classic, play around with these fun variations!
- Salty Peanut Butter Swirl: Drop 3-4 spoonfuls of natural peanut butter right onto the pressed dough and use a knife to swirl it in before baking.
- “Everything but the Kitchen Sink”: Fold in ¼ cup of shredded coconut and ¼ cup of dried cranberries along with the chocolate chips for a fruit and nut situation.
- Double Chocolate Mint: Replace 2 tablespoons of the flour with cocoa powder and use ½ cup of dark chocolate AND ¼ cup of mint chocolate chips.
- Birthday Cake Funfetti: Use vanilla or cashew milk and fold in 3 tablespoons of rainbow sprinkles for a festive, party-ready treat.
- Nut-Free & Seed Crunch: Swap the nuts for 2 tablespoons of sunflower seeds and 2 tablespoons of pumpkin seeds for a delightful, allergy-friendly crunch.
Isla’s Chef Notes & Kitchen Confessions
This recipe has been through so many fun iterations in my kitchen. The first time I made it, I was so excited I accidentally used baking powder instead of soda. Let’s just say we got a very puffy, cake-like cookie! It was still delicious, but it taught me to always double-check my jars. Over time, I’ve learned that the type of flour really changes the game. Oat flour gives it a chewier, denser, almost blondie-like texture that I absolutely adore, while whole wheat pastry flour is a bit more cakey and light.
My biggest piece of advice? Make this recipe your own. Baking should be fun, not stressful. Don’t have maple syrup? Use honey. Out of almond milk? Water works in a true pinch! This cookie is resilient and forgiving, just like my grandma taught me. The goal is a happy cook and a happy kitchen, and this recipe guarantees both.
Your Questions, Answered!
I’ve gotten so many wonderful questions about this skillet cookie over the years. Here are the most common ones to help you bake with confidence!
- Q: My cookie turned out a bit greasy. What happened?
A: This usually means your coconut oil was a little too warm when you mixed it, or you might have been a touch heavy-handed. Make sure it’s melted but not hot to the touch. Also, be sure to use a proper measuring cup for liquids for the oil—a dry measuring cup can sometimes lead to using a bit more than needed. - Q: Can I make this recipe gluten-free?
A: Absolutely! Oat flour is your best friend here. Just make sure you’re using a certified gluten-free brand if you have celiac disease or a serious sensitivity. A 1:1 gluten-free all-purpose flour blend should also work well, though the texture might be slightly more crumbly. - Q: How should I store leftovers?
A: Once completely cool, cover the skillet tightly with foil or plastic wrap, or transfer slices to an airtight container. It will stay delicious at room temperature for 2 days. For longer storage, I pop individual slices in a freezer bag. To reheat, just warm a slice in the microwave for 15-20 seconds or in a 300°F oven for 5-10 minutes until gooey again. - Q: The center was way too gooey/runny. Did I underbake it?
A: The center is meant to be soft, but if it was truly liquid, it might need a few more minutes in the oven. Oven temperatures can vary! Next time, use a toothpick test at the 22-minute mark—it should come out with a few moist crumbs, but not wet batter. Remember, it continues to cook as it cools, so that “just set” stage is perfect.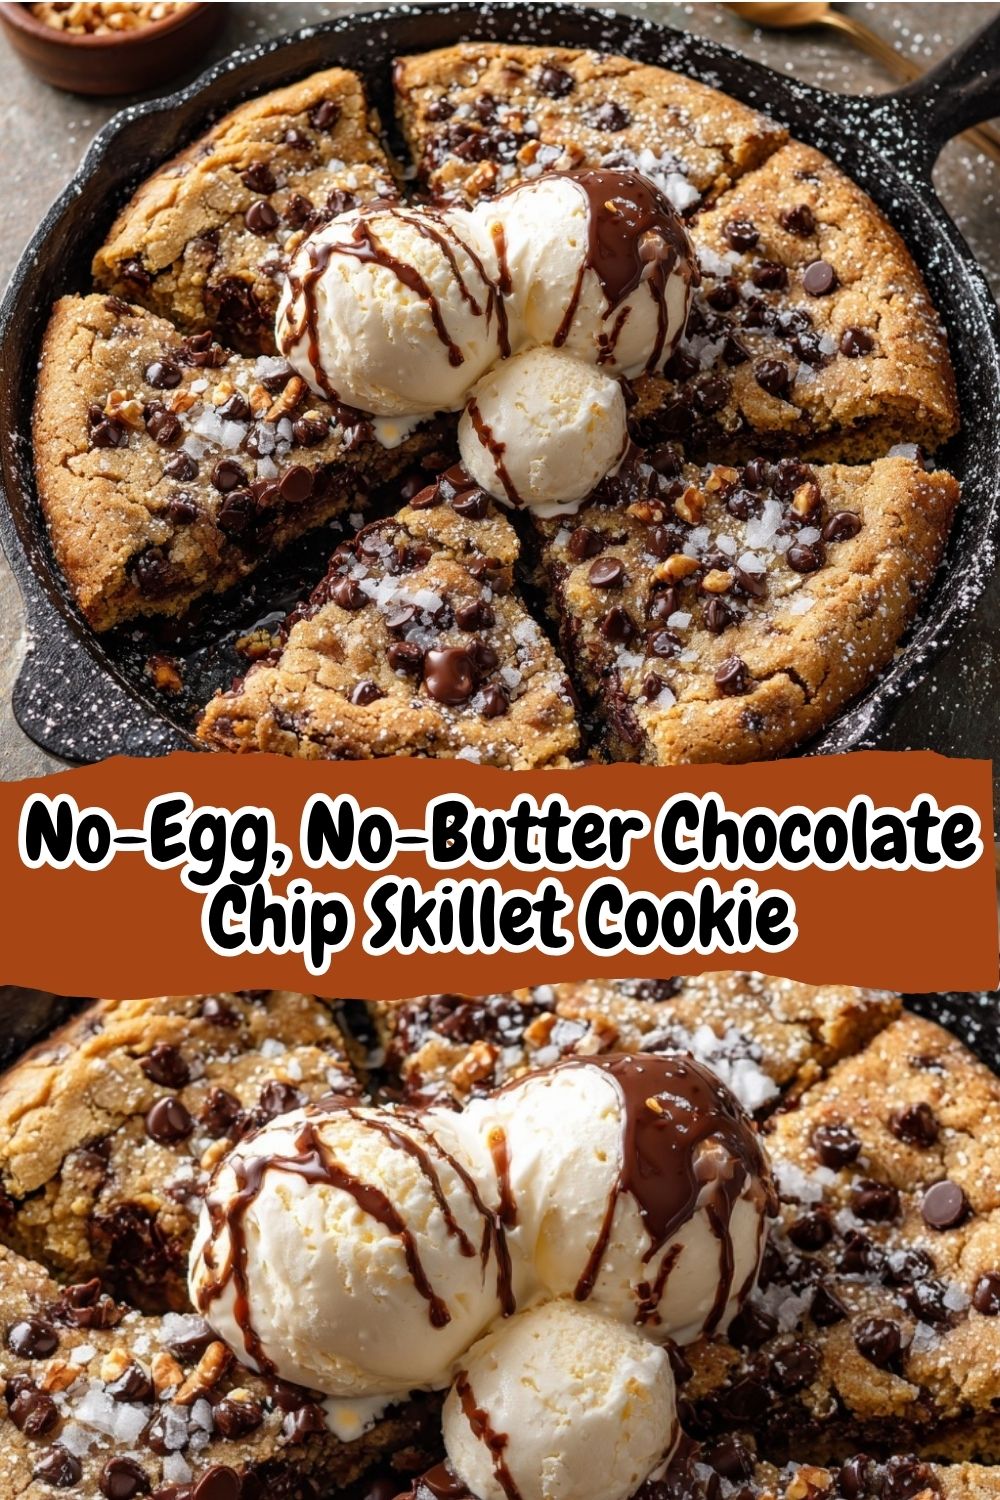
Quick Nutritional Breakdown
This is just a friendly estimate, as your specific ingredients (like the brand of chocolate chips or type of flour) will cause variations. But it’s great to see how this indulgent treat stacks up!
- Prep Time: 10 minutes
- Cook Time: 25 minutes
- Total Time: 35 minutes
- Servings: 8
Per Serving (approx.): Calories: 280 | Fat: 16g | Carbs: 32g | Sugar: 14g | Fiber: 3g