
No-Bake Chocolate Mousse Cups: Your New Secret Weapon for Effortlessly Elegant Desserts
Hey there, friend. Let me paint you a picture. It’s 7 PM. You’ve just finished a delicious, somehow-not-stressful weeknight dinner (high five for that!), and now… the craving hits. That deep, undeniable, soul-level need for something chocolate. Something luxurious. But the thought of preheating the oven, creaming butter and sugar, and doing a whole baking performance? Absolutely not. The energy for that sailed away with the last bite of dinner.
What if I told you that the most decadent, silky-smooth, conversation-stopping chocolate dessert of your life is waiting for you in your pantry right now? And that it requires exactly three ingredients, zero baking, and about 15 minutes of your time? I see that skeptical eyebrow raise, but trust me. These No-Bake Chocolate Mousse Cups are the real deal.
This is the dessert I make when I want to feel like a fancy pastry chef but have the heart of a lazy Sunday home cook. It’s my go-to for last-minute dinner parties, my treat for surviving a tough week, and my ultimate “wow, you made this?!” flex. It’s rich, it’s airy, it’s deeply chocolatey, and it’s so simple it feels like a kitchen magic trick. So, grab your favorite mixing bowl and your coziest whisk (or electric mixer—no judgment here), and let’s make some magic happen. Your future self, happily digging into a cup of cloud-like chocolate bliss, will thank you.
The Day My Grandma Taught Me Kitchen Alchemy
My love for this mousse started long before I knew what “ganache” or “chocolate emulsion” meant. It started in my grandma’s seaside kitchen, with the smell of salt air mixing with melting chocolate. She called it her “emergency chocolate cloud.” No special occasion needed—just a cloudy afternoon and a shared craving.
I remember standing on a wobbly stool, watching her warm cream and chocolate in a chipped porcelain bowl over a pot of simmering water. “The key, Isla,” she’d say, her voice full of mischief, “is to make it feel special without making it difficult.” She’d let me stir with her big wooden spoon, my small hands under hers, feeling the resistance give way to a river of smooth, glossy chocolate. Then came the magic: folding in the whipped cream, watching the dark chocolate transform into something light and spoonable. We’d eat it straight from the big bowl, laughing, with probably more on our faces than in our mouths. It was my first lesson that joy doesn’t have to be complicated—it can be whipped up in minutes, with love and a little bit of chocolate, as the secret ingredients.
Print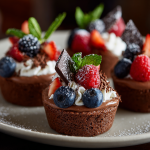
No-Bake Chocolate Mousse Cups : Rich, Silky, and Effortlessly Elegant
- Total Time: 2 hours 15 minutes
- Yield: 4 servings 1x
Description
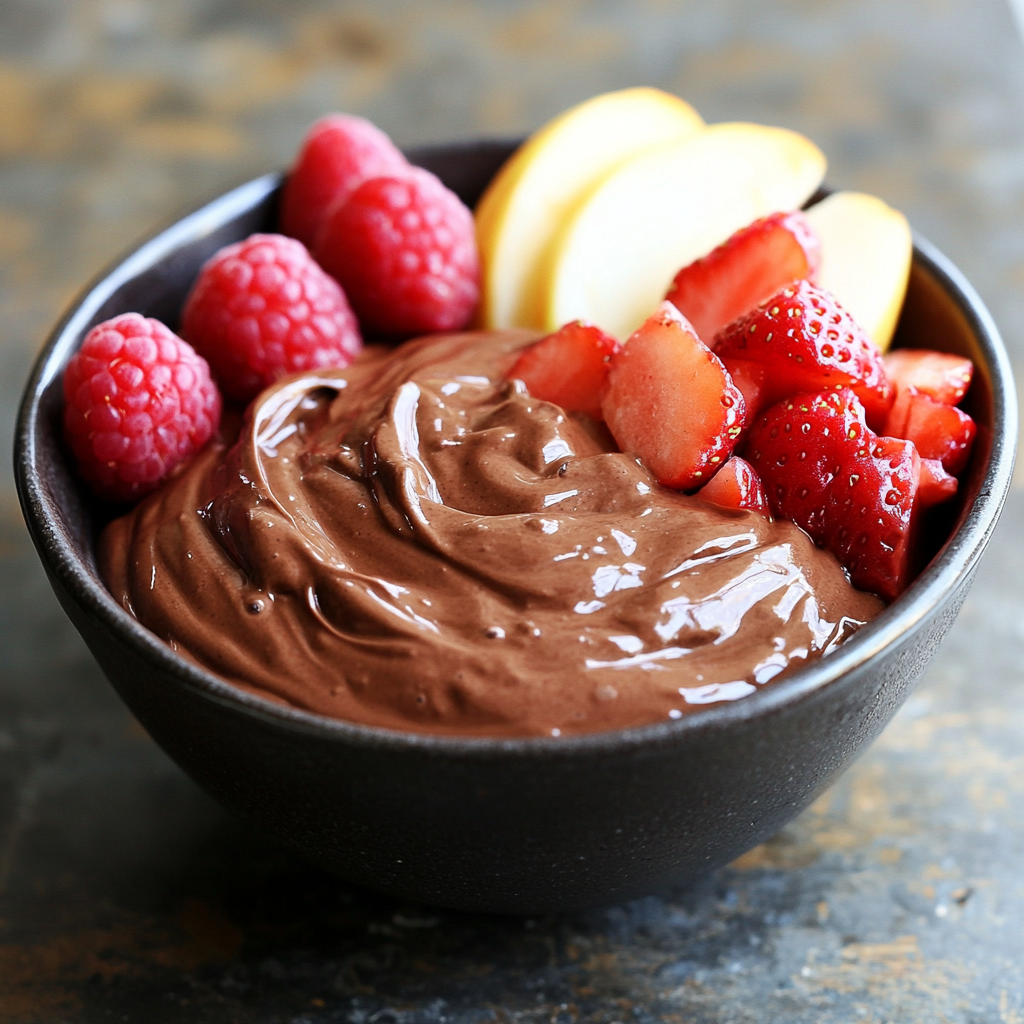
These No-Bake Chocolate Mousse Cups are a dessert dream—deep, chocolatey flavor with a light, airy texture, made from just three ingredients. No eggs, no baking, and no stress. Whether served in glasses, jars, or pastry shells, they’re the perfect make-ahead treat for dinner parties or late-night cravings.
Ingredients
1 cup semi-sweet or dark chocolate chips
1 ¾ cups heavy cream, divided
1 tsp vanilla extract
Instructions
In a heatproof bowl, melt chocolate chips with ¾ cup of heavy cream over a double boiler or in the microwave (in 20-second bursts), stirring until smooth.
Stir in vanilla. Let cool to room temperature.
In a chilled bowl, whip the remaining 1 cup of heavy cream until soft peaks form.
Gently fold whipped cream into cooled chocolate mixture until fully incorporated and fluffy.
Spoon into serving cups or jars. Chill for at least 2 hours or until set.
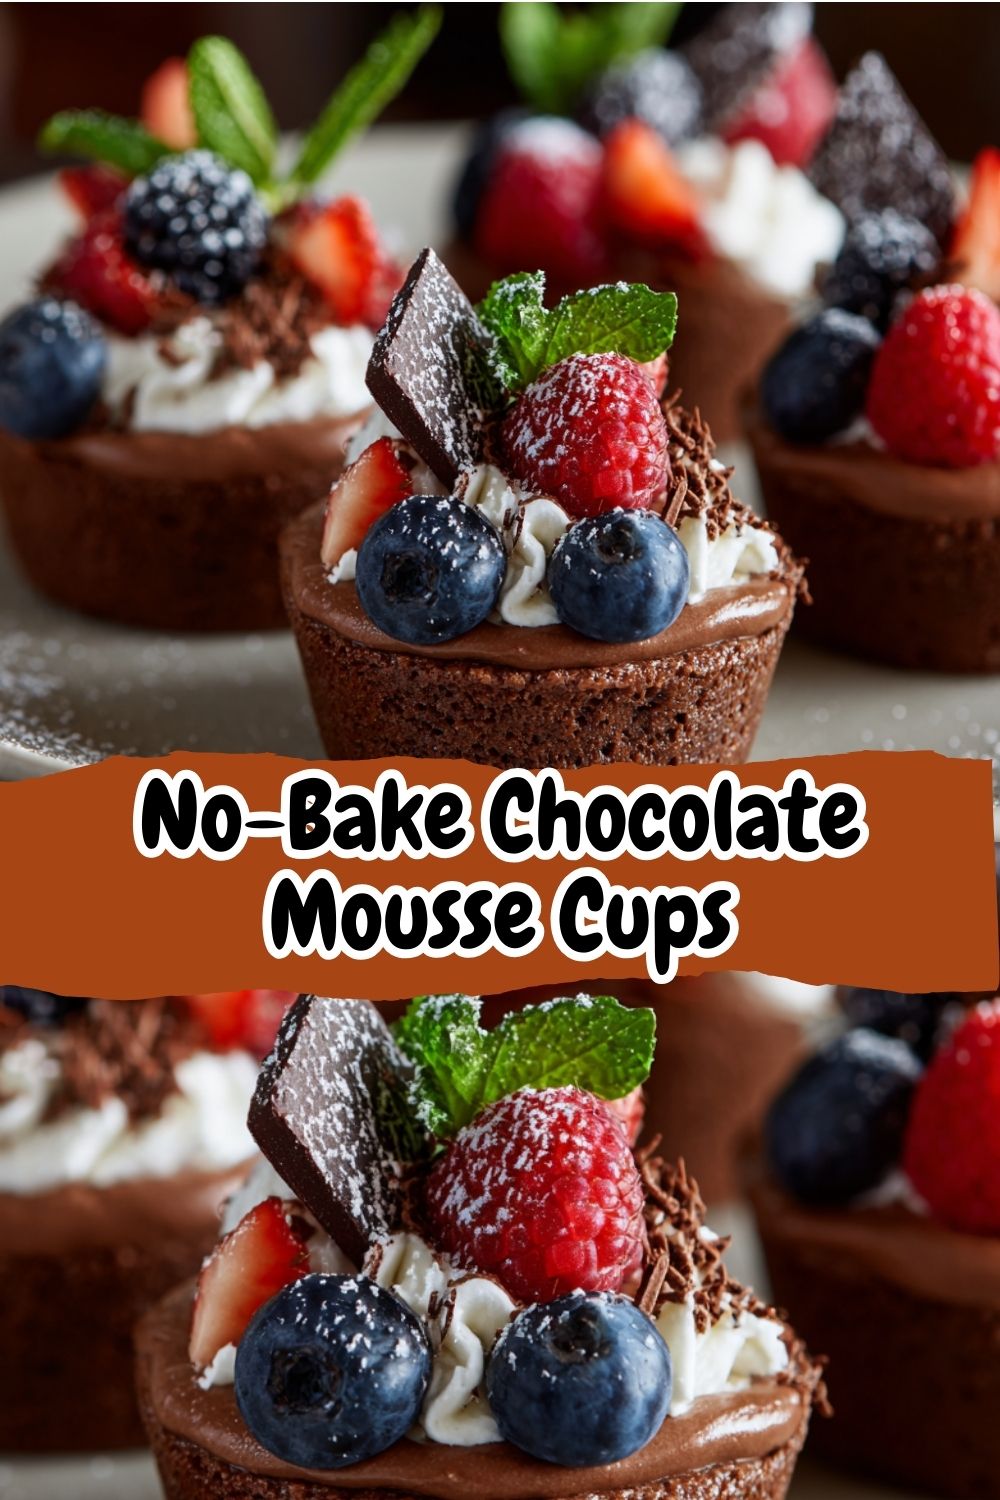
Top with extra whipped cream, chocolate shavings, or berries if desired.
- Prep Time: 15 mins
- Category: Dessert
Gather Your Trio of Champions
See? I told you it was simple. Just three beautiful, humble ingredients come together to create pure magic. Here’s what you need and why each one is a star player:
- 1 cup semi-sweet or dark chocolate chips – This is the soul of your mousse. I love a good semi-sweet for that perfect balance, but a 70% dark chocolate will give you a more sophisticated, grown-up bite. Chef’s Insight: The quality here matters! Use the best chocolate you enjoy eating plain. Chocolate chips are great because they melt evenly, but chopping up a good chocolate bar works beautifully too.
- 1 ¾ cups heavy cream, divided – Don’t be shy with the cream; it’s doing double duty. A portion melts with the chocolate to create a lush base (called a ganache), and the rest gets whipped into fluffy peaks to give the mousse its signature airy texture. Substitution Tip: For a dairy-free version, full-fat coconut cream is a fantastic swap. Just make sure it’s the canned, solid kind, and chill it well first.
- 1 tsp vanilla extract – The flavor enhancer. Vanilla doesn’t make it taste like vanilla; it deepens and rounds out the chocolate flavor, making it taste even more… chocolatey. Chef’s Hack: A tiny pinch of espresso powder or a splash of your favorite liqueur (like Grand Marnier or bourbon) can be added here for a next-level flavor twist.
Let’s Make Some Magic: Step-by-Step
Ready? This is where the fun happens. I’ll walk you through every step with my favorite little hacks to ensure your mousse is foolproof and fabulous.
- Melt & Mingle: In a heatproof bowl, combine your chocolate chips with ¾ cup of the heavy cream. You can melt this over a gently simmering pot of water (a double boiler) or in the microwave in 20-second bursts, stirring well between each. My Pro Tip: Whether you use a microwave or stove, the goal is gentle heat. We’re melting, not cooking. Stop when you have a smooth, glossy mixture. Stir in the vanilla extract at this point. Now, let this chocolate ganache cool down to room temperature. This is CRUCIAL! If it’s too warm, it will deflate our whipped cream later. I sometimes let it sit for 15-20 minutes, giving me time to clean up and get my next step ready.
- The Big Chill (Part 1): While your chocolate is cooling, take your remaining 1 cup of heavy cream and pour it into a chilled mixing bowl. I pop my bowl and beaters/whisk attachment in the freezer for 10-15 minutes before I start. Cold tools are the secret to quick, stable whipped cream. Whip the cream on medium-high speed until you get soft peaks. What’s a soft peak? When you lift the beater, the peak of cream should curl over gently at the tip—like a perfect dairy wave. Don’t go to stiff peaks; that can make folding difficult and the final texture a bit grainy.
- The Grand Fold: This is the most important step! Take about one-third of your whipped cream and plop it right into the cooled chocolate mixture. Fold it in vigorously with a spatula. This first addition lightens the thick chocolate, making it easier to incorporate the rest without deflating it. Now, add the remaining whipped cream. Using a gentle, deliberate folding motion (scoop from the bottom, up and over), combine them until you see no more white streaks. Chef’s Secret: A few streaks are better than over-mixing! Over-mixing = dense mousse. We want fluffy.
- Portion & Dream: Spoon or pipe your gorgeous, fluffy mousse into serving cups. I love using clear glasses or little mason jars so you can see the layers if you add toppings later. Tap the cups gently on the counter to settle everything.
- The Big Chill (Part 2): Cover and refrigerate your mousse cups for at least 2 hours, but ideally 4 or even overnight. This setting time is non-negotiable—it allows the mousse to firm up into that perfect, sliceable-yet-airy texture. This make-ahead nature is what makes it a party superstar!
How to Serve Your Masterpiece
The beauty of these cups is in their versatility! Serve them straight from the fridge. Just before serving, I love adding a final flourish. A dollop of fresh whipped cream, a sprinkle of flaky sea salt, some chocolate shavings made with a vegetable peeler, or a handful of bright, tart raspberries are my go-tos. For a dinner party, line them up on a tray with different toppings—it feels incredibly fancy for almost zero extra work.
Ride Your Own Flavor Wave: Fun Variations
Once you’ve mastered the classic, the world is your oyster… or your chocolate mousse cup! Here are a few of my favorite twists:
- Mint Chocolate Chip: Add ¼ tsp peppermint extract with the vanilla. Fold in ¼ cup of mini chocolate chips after combining.
- Mocha Buzz: Stir 1 tablespoon of instant espresso powder or very strong cooled coffee into the melting chocolate and cream.
- Orange Dream: Add the zest of one orange and 1 tablespoon of orange liqueur (like Cointreau) to the chocolate mixture.
- Vegan Wonder: Use full-fat coconut cream and dairy-free dark chocolate. Whip the second portion of coconut cream just as you would heavy cream.
- PB & Chocolate: Swirl 2 tablespoons of smooth peanut butter into the finished mousse just before chilling for a marbled effect.
Isla’s Chef Notes & Kitchen Confessions
This recipe has been my loyal companion for years, and it’s evolved with me. In my early blogging days, I once tried to “healthy it up” by using milk instead of cream for whipping. Reader, it did not whip. We had chocolate soup. Delicious soup, but soup nonetheless. Lesson learned: trust the cream!
I also used to be terrified of folding, stirring so cautiously it would take me 10 minutes. My grandma finally showed me the “confidence fold”—a firm, swift, but gentle turn of the wrist. It’s all about commitment! Now, I make this mousse when I need a kitchen win, when friends come over unexpectedly, or when I just need a reminder that the best things in life (and in the kitchen) are often the simplest. It never, ever lets me down.
Your Questions, Answered!
Over the years, you’ve asked some brilliant questions about this recipe. Here are the answers to the most common ones:
- Q: My mousse turned out grainy. What happened?
A: This usually means the chocolate mixture was still too warm when you folded in the whipped cream, causing the fat in the chocolate to seize slightly. Next time, ensure the chocolate is truly at room temperature (cool to the touch). Also, avoid over-whipping the cream to stiff peaks. - Q: Can I make this ahead of time?
A: Absolutely! That’s one of its superpowers. It will keep beautifully, covered, in the fridge for up to 3 days. Add any fresh toppings (like berries or extra whipped cream) right before serving. - Q: My cream won’t whip! Help!
A: First, check that your cream, bowl, and beaters are very cold. Second, make sure you’re using “heavy cream” or “heavy whipping cream” (typically 36% milk fat or more). “Light cream” or “table cream” won’t whip properly. If all else fails, a tiny pinch of cream of tartar can help stabilize it. - Q: Can I freeze these mousse cups?
A: You can, but the texture will change slightly—it becomes more like a frozen mousse or ice cream. It’s delicious! Let it thaw in the fridge for 20-30 minutes before eating for a softer texture.
Nutritional Information (Per Serving)
This is an approximate calculation based on the base recipe serving 4.
Calories: ~360 | Protein: 3g | Carbohydrates: 20g | Fat: 30g | Saturated Fat: 19g | Fiber: 2g | Sugar: 15g
Thank you so, so much for spending time in my kitchen today. I hope these mousse cups bring you as much joy and simplicity as they’ve brought me. Now go forth, whip, fold, and conquer! And don’t forget to tag @BiteTide if you make them—I love seeing your creations. ‘Til next time, keep riding that flavor wave!
– Isla 💛