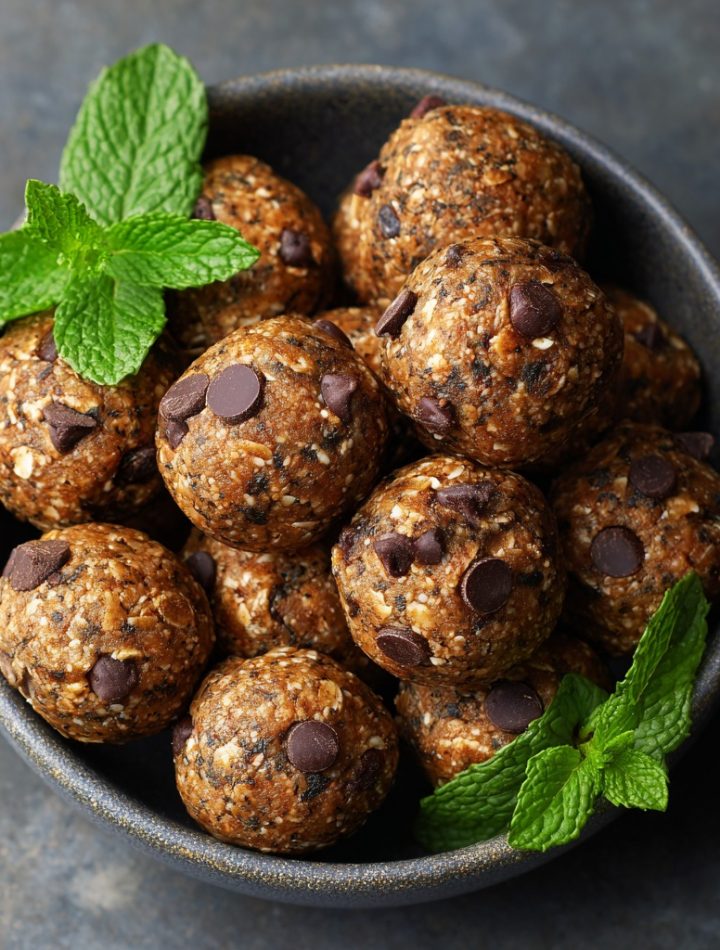

The Snack That Tastes Like a Celebration: Mint Chocolate Chip Protein Balls
Hey there, flavor friend! Have you ever had a craving hit you like a wave—something cool, chocolatey, and refreshing—but you also know your body is whispering (or maybe shouting) for something with a little more substance? That exact moment is why I created these Mint Chocolate Chip Protein Balls. We’re talking about the nostalgic, pure joy of mint chocolate chip ice cream, but transformed into a no-bake, protein-packed bite that actually fuels your day. No fancy equipment, no oven required, just about 10 minutes of your time and a serious craving for something good.
As someone who’s constantly juggling recipe testing, writing, and life’s beautiful chaos (hangry toddlers, I see you), I’m a firm believer in the power of a prepared snack. Something you can grab that feels like a treat but acts like fuel. These little green-flecked energy bites are my secret weapon. They’re cool, creamy, and have that perfect hint of peppermint that just feels uplifting. Whether you’re rushing out the door, need a post-workout refuel, or just want a sweet something after dinner that won’t leave you in a sugar coma, these protein balls are your new kitchen BFF. Let’s make a batch together!
More Than Just a Snack: A Pint-Sized Memory
Every time I taste the combo of cool mint and rich chocolate, I’m instantly eight years old again, sitting on my grandparents’ sun-warmed dock. My Grandpa Joe was a man of simple, brilliant traditions. Every Saturday in the summer, after a morning of helping him check crab pots, our reward wasn’t just the fresh seafood feast to come—it was the stop at the little general store on the way home. He’d let me pick out any ice cream pint I wanted, and my choice was always the same: mint chocolate chip.
We’d sit on the dock, our legs dangling over the water, eating straight from the container with two spoons. He’d tell stories, and I’d listen, mesmerized, the cool creaminess making the salty air taste even sweeter. That flavor combination became my personal symbol of reward, comfort, and connection. These protein balls are my grown-up, kitchen-hack homage to that feeling. They capture that same refreshing, celebratory vibe in a form I can keep in my fridge, ready to turn any ordinary Tuesday into a moment of sweet, satisfying joy. It’s amazing how a flavor can hold a memory, isn’t it?
What You’ll Need: A Peek Into the Flavor Formula
Here’s the beautiful part: this is a pantry-powered recipe. You probably have most of this on hand already! Let’s break down why each ingredient is here and how you can play with it.
- 1 cup rolled oats (old-fashioned): This is our sturdy, fibrous base. They give the balls a perfect, chewy texture and help soak up the moisture to hold everything together. Chef’s Insight: Don’t use instant oats! They’re too powdery and will make the texture mushy. If you’re gluten-free, just ensure your oats are certified GF.
- ½ cup creamy almond butter: Our superstar binder and healthy fat source. It adds a rich, nutty creaminess that makes these bites satisfying. Substitution Tip: Any nut or seed butter works! Peanut butter makes it taste like a peanut butter mint cup (yes, please!). Sunflower seed butter is a great nut-free option.
- ½ cup protein powder (vanilla or chocolate): The “protein” in our protein ball! This also helps absorb moisture and solidify in the fridge. Chef’s Must-Know: The type of protein powder matters. I recommend a whey or casein blend, or a plant-based pea protein blend for best texture. Avoid pure collagen peptides here, as they don’t absorb the same way and can stay sticky.
- 2 tbsp honey or pure maple syrup: Our natural sweetener and second binder. It adds just enough sweetness to balance the protein powder and ties the party together. For a Vegan Swap: Maple syrup is your perfect, plant-based friend here.
- ½ tsp peppermint extract: The flavor MVP! This gives us that classic, refreshing mint chip taste. Pro Tip: Start with ½ tsp! Peppermint extract is potent. You can always add a tiny bit more after mixing, but you can’t take it out. For a subtler flavor, you could use a mint extract blend.
- ¼ cup mini chocolate chips: The “chip” in our mint chocolate chip! Minis are key because they distribute the chocolatey goodness evenly in every single bite. Fun Twist: Try cacao nibs for a less sweet, antioxidant-rich crunch, or chop up a dark chocolate bar for rustic, melty pockets.Print

Mint Chocolate Chip Protein Balls : Cool, No-Bake Energy Bites
- Total Time: 40 mins
- Yield: ~12 Balls
Description
These no-bake mint chocolate chip protein balls are a refreshing and chocolatey way to fuel your day. With creamy almond butter, mini chocolate chips, and a hint of peppermint, they’re perfect for a post-workout boost, a healthy dessert, or a midday snack. Made in minutes, packed with protein, and bursting with flavor—you won’t believe how satisfying these bites are!
Ingredients
Scale1 cup rolled oats
½ cup almond butter
½ cup protein powder (vanilla or chocolate)
2 tbsp honey or maple syrup
½ tsp peppermint extract
¼ cup mini chocolate chips
Instructions
In a large bowl, mix oats, protein powder, and almond butter.
Add in honey (or syrup) and peppermint extract, stirring until well combined.
Fold in mini chocolate chips.
Roll the mixture into 1-inch balls.
Chill in the fridge for 20–30 minutes to set.
Store in an airtight container in the fridge for up to a week.
- Prep Time: 10 mins
- Cook Time: 30 mins
- Category: Snack
Nutrition
- Calories: 110
- Sugar: 6g
- Fat: 6g
- Carbohydrates: 10g
- Protein: 6g
Let’s Make ‘Em: The 10-Minute Kitchen Dance
See? I told you it was easy. Put on some music, grab a big bowl, and let’s get mixing. This is the kind of recipe you can literally do while your morning coffee brews.
- The Big Mix. In a large mixing bowl, add your rolled oats and protein powder. Give them a quick whisk with a fork to break up any clumps in the protein powder. This little pre-mix ensures every bite is smooth and not powdery. Now, plop in that gorgeous, creamy almond butter. It’s time to get your hands ready!
- Bring in the Sweet & Cool. Drizzle in your honey (or maple syrup) and add that ½ teaspoon of peppermint extract. Here’s my chef hack: I like to stir with a sturdy spatula first, until it starts to come together and looks like a crumbly, sticky dough. This saves your fingers from the initial sticky shock! Once it’s mostly combined, it’s hand time.
- Get Hands-On. Dive in and use your clean hands to knead and squeeze the mixture in the bowl for a good 60 seconds. You want it to be completely uniform and hold together when you pinch it. If it feels too dry and won’t stick together, add a teaspoon of water or milk (any kind) and knead again. If it’s too wet/sticky, add a tablespoon more of oats or protein powder.
- The Chocolate Finale. Now, fold in those glorious mini chocolate chips. I like to knead them in gently so they’re evenly distributed without getting smeared. You want little distinct bursts of chocolate, not a muddy brown dough.
- Roll & Rally. Pinch off about a tablespoon of dough and roll it between your palms to form a smooth, 1-inch ball. Place it on a plate or small baking sheet. Repeat with the rest of the mixture. Pro tip for consistent size? I use a #50 cookie scoop (about 1 Tbsp) – it’s a game-changer for speed and uniformity!
- The Chill Factor. Pop your plate of protein balls into the refrigerator for at least 20-30 minutes. This is non-negotiable, friends! The chilling time allows the oats to fully absorb the moisture and the fats to firm up, transforming them from slightly sticky to perfectly portable, firm-yet-chewy energy bites.
How to Serve Your Flavorful Fuel
Once they’re set, the world is your oyster! I keep mine in a glass container with a lid right in the fridge for grab-and-go perfection. For serving, I love to pile them high on a little plate for a healthy dessert platter, or toss a couple in a small reusable bag for my gym bag or purse. They’re fantastic with a cold glass of almond milk, a hot cup of coffee for an afternoon pick-me-up, or just on their own as a sweet, satisfying punctuation to any part of your day. No fancy plating needed—their deliciousness speaks for itself!
Ride Your Own Flavor Wave: 5 Fun Twists
The basic formula is your playground. Once you’ve mastered the mint chip classic, try these easy swaps!
- Cookies & Cream: Use chocolate protein powder and swap the peppermint extract for 1 tsp of vanilla. Fold in 2 tbsp of crushed gluten-free oreo-style cookies instead of chocolate chips.
- Double Chocolate Espresso: Use chocolate protein powder, replace peppermint with 1 tsp vanilla, and add 1 tsp of instant espresso powder to the dry ingredients. Use dark chocolate chips.
- Sunshine Butter Cup: Use sunflower seed butter, vanilla protein, and swap the mint for vanilla. Add 2 tbsp of dried blueberries or chopped raisins for a “PB&J” vibe.
- Tropical Escape: Use vanilla protein, swap almond butter for coconut butter (warmed to soften), and omit mint. Add 2 tbsp of chopped dried mango and 2 tbsp of unsweetened shredded coconut.
- Birthday Cake: Use vanilla protein, swap mint for vanilla and almond butter for cashew butter. Fold in 2 tbsp of rainbow sprinkles! (The mix-in will get a little streaky but it’s so fun).
Isla’s Kitchen Notes & Stories
This recipe has lived about five different lives in my kitchen! It started as a very basic oat-and-nut-butter ball that my kids helped me make. One day, my daughter—a mint chocolate chip fanatic like her mama—suggested we add “the green ice cream flavor” to them. We tried mint extract, and it was a revelation. Then we added protein powder to make them more filling for after soccer practice. The final “aha” moment was realizing that chilling them was the key to the perfect texture. The first batch we made, we were too impatient to wait and ate them immediately… they were delicious, but let’s just say we needed forks! Now, the 30-minute fridge wait is a sacred, anticipation-building ritual. These balls have been through it all with me—kitchen disasters, last-minute potlucks, and many, many happy snack times. They’re a testament to the fact that the best recipes evolve with you.
Your Questions, Answered!
Q: My mixture is too dry and won’t stick together. Help!
A: No worries! This is the most common issue and it’s an easy fix. Simply add a little more liquid, one teaspoon at a time. Water, milk (any kind), or even a tiny bit more maple syrup/honey works. Knead it in thoroughly after each addition until it holds together when pinched.
Q: Can I make these without protein powder?
A: Absolutely! The protein powder acts as a dry ingredient that soaks up moisture. If you omit it, you’ll need to replace that volume. Try adding an extra ¼ cup of oats and 2 tablespoons of ground flaxseed or coconut flour. The texture will be slightly different but still delicious.
Q: How long do they really last in the fridge/freezer?
A: In an airtight container in the fridge, they’re perfect for 7-10 days. For longer storage, freeze them on a sheet pan, then transfer to a freezer bag. They’ll keep for up to 3 months! You can eat them straight from the freezer—they have a fabulous frozen-cookie-dough-like texture.
Q: Why is my mixture too wet and sticky?
A> This usually happens if your nut butter is very runny or if you accidentally added too much liquid. The rescue mission: add more dry ingredients. Sprinkle in a tablespoon of extra oats or protein powder and knead it in. Repeat until it’s no longer sticking aggressively to your hands.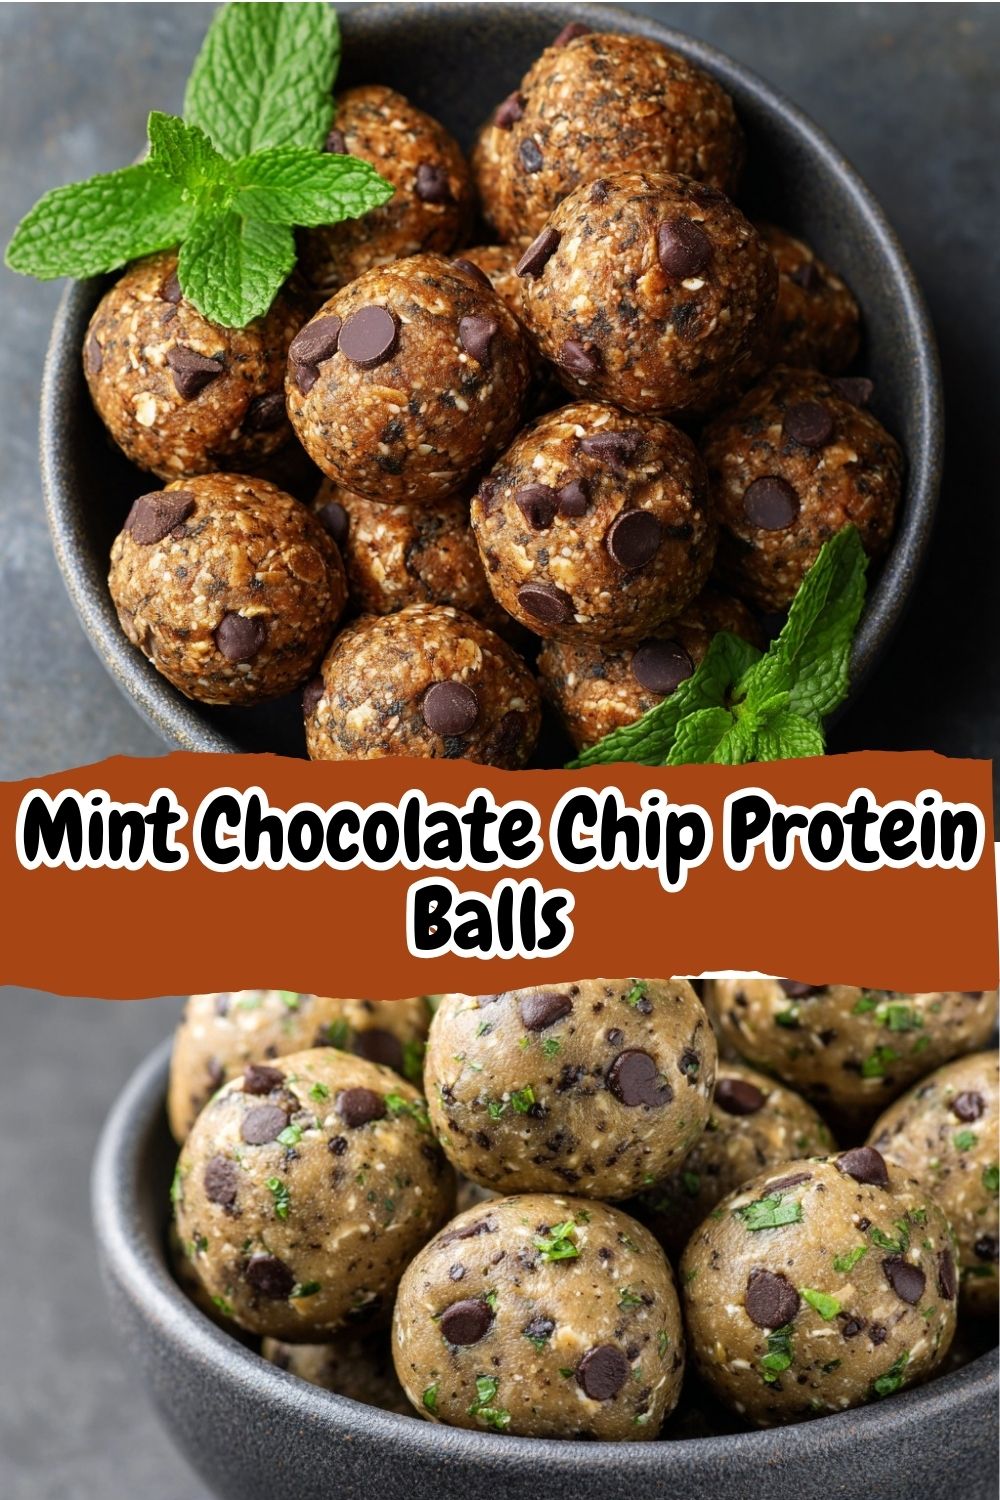
Nutritional Information*
*Approximate values per ball (based on 12 balls, using vanilla whey protein powder, almond butter, and honey).
- Calories: 110
- Protein: 6g
- Carbohydrates: 10g
- Dietary Fiber: 2g
- Sugars: 4g
- Total Fat: 6g
Prep Time: 10 mins | Chill Time: 30 mins | Total Time: 40 mins | Makes: ~12 balls
There you have it! Your new secret weapon for delicious, healthy energy. I hope these Mint Chocolate Chip Protein Balls bring as much cool, creamy joy to your kitchen as they have to mine. Don’t forget to tag me @BiteTide if you make them—I love seeing your creations! Now, go fuel your fabulous self.
– Isla 💛