Mini Red Velvet Cinnamon Rolls: Your New Favorite Holiday Tradition
Hey there, friend! Isla here from BiteTide. Can you smell it? That magical, heart-warming aroma of cinnamon and sugar baking into something soft and wonderful? Now, imagine that classic comfort smell, but with a festive, fun, and totally irresistible twist. I’m talking about my new obsession: Mini Red Velvet Cinnamon Rolls.
We all adore a classic cinnamon roll, right? That fluffy, buttery, swirled-up perfection is a hug in food form. But what happens when you take that beloved recipe and give it a vibrant red velvet makeover? Pure magic, that’s what. These mini rolls are impossibly soft, with that signature hint of cocoa, swirled with a cozy cinnamon-sugar heart, and topped with a tangy cream cheese frosting that’s the perfect counterpoint to the sweetness. And the best part? They’re mini! That means you can pop one (or three) in your mouth without a single ounce of guilt. They’re perfect for holiday brunches, festive breakfasts in your pajamas, or just because you deserve a little sparkle in your day.
I promise you, this recipe is just as fun to make as it is to eat. We’re leaving the fussy, complicated baking at the door and diving into a process that’s all about joy. So, tie on your favorite apron, put on some festive music, and let’s create some delicious, red-velvet magic together!
Print
Mini Red Velvet Cinnamon Rolls : Fluffy, Festive & Frosted
- Total Time: 2 hours
- Yield: 12 mini rolls 1x
- Diet: Vegetarian
Description
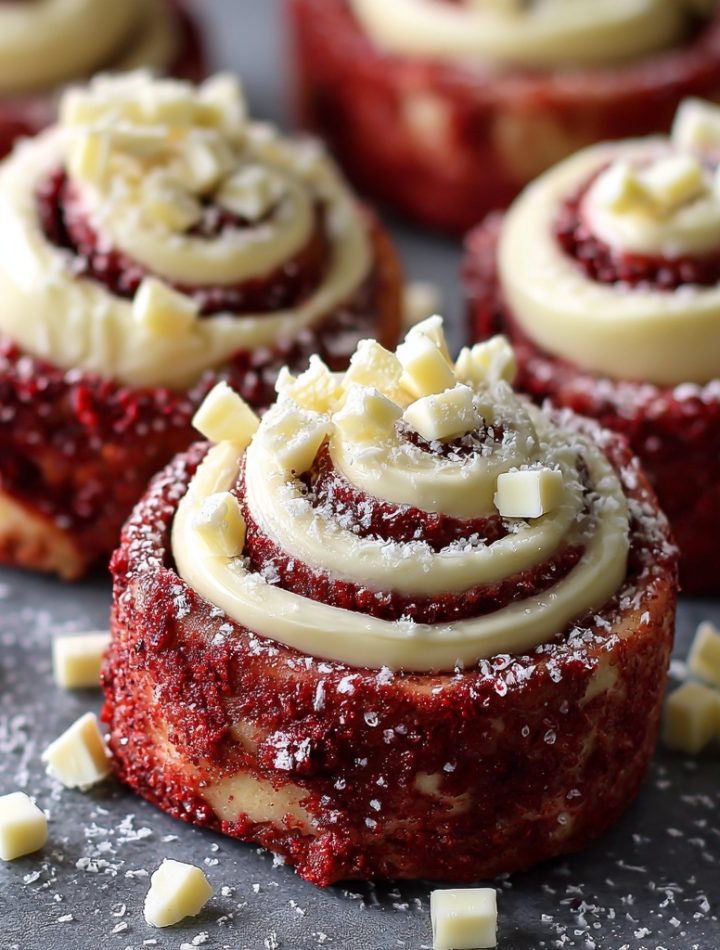
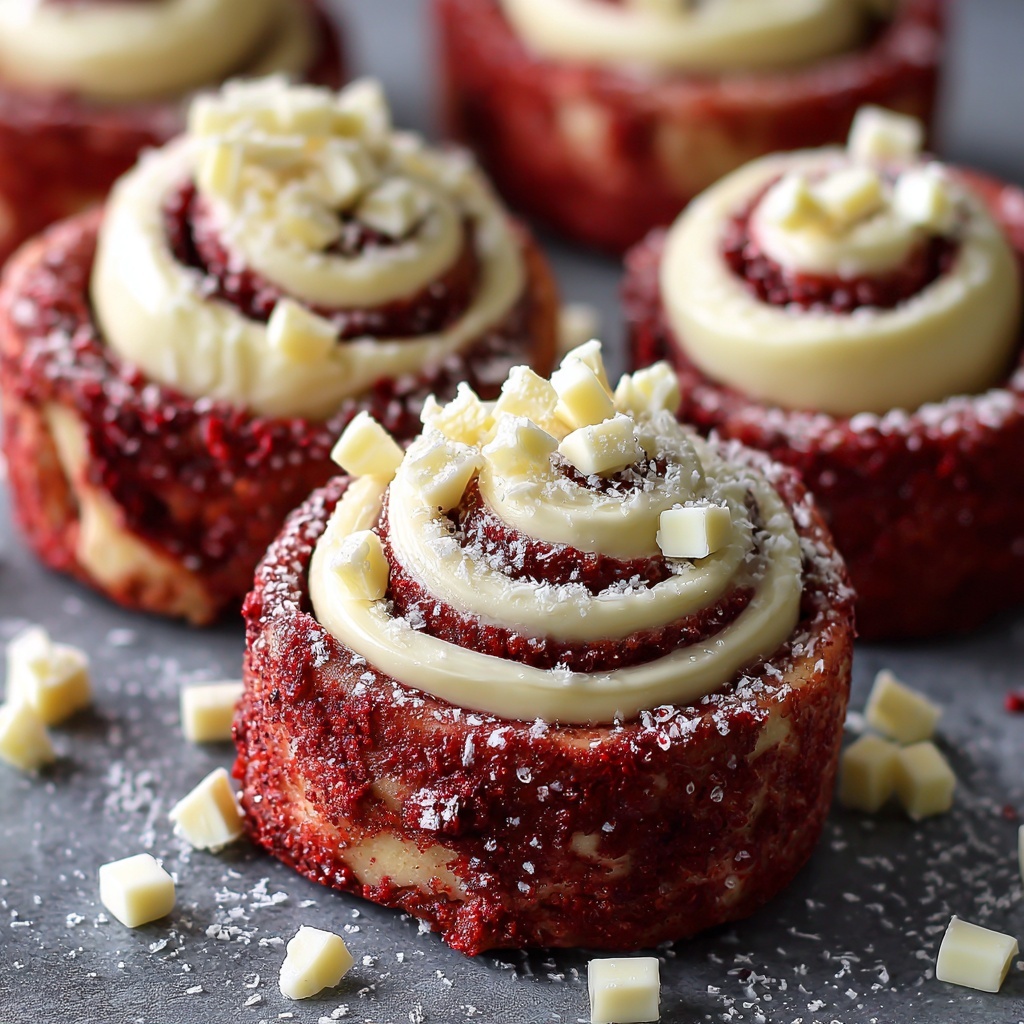
Mini Red Velvet Cinnamon Rolls are soft, fluffy, and perfectly festive with swirls of cocoa-spiced filling and a creamy cream cheese frosting. These bite-sized treats are perfect for holidays, brunch, or dessert tables.
Ingredients
- 2 cups all-purpose flour
- 2 tbsp unsweetened cocoa powder
- 2 tbsp granulated sugar
- 2 1/4 tsp active dry yeast (1 packet)
- 1/2 tsp salt
- 3/4 cup warm milk (110°F)
- 2 tbsp unsalted butter, melted
- 1 egg
- 1 tsp vanilla extract
- 1–2 tsp red food coloring
- Filling: 1/3 cup brown sugar, 1 1/2 tsp cinnamon, 2 tbsp softened butter
- Frosting: 4 oz cream cheese, 2 tbsp butter, 1 cup powdered sugar, 1/2 tsp vanilla extract
Instructions
- In a mixing bowl, combine warm milk, yeast, and sugar. Let sit for 5–10 minutes until foamy.
- Add melted butter, egg, vanilla, red food coloring, cocoa powder, salt, and flour. Mix until a soft dough forms. Knead for 5–7 minutes until smooth.
- Cover and let rise in a warm place for 1 hour or until doubled.
- Roll dough into a 10×12-inch rectangle. Spread with softened butter, then sprinkle evenly with brown sugar and cinnamon.
- Roll up tightly from the long edge and slice into 12 mini rolls. Place in a greased or parchment-lined baking dish.
- Cover and let rise another 20–30 minutes. Preheat oven to 350°F (175°C).
- Bake for 15–18 minutes, until rolls are puffed and lightly golden.
- Beat frosting ingredients until smooth. Spread over warm rolls and serve.
Notes
- Use gel food coloring for vibrant red color without thinning the dough.
- Make the dough ahead and refrigerate overnight before baking the next day.
- Freeze baked rolls (without frosting) and reheat when ready to serve.
- Top with festive sprinkles or white chocolate drizzle for extra flair.
- Prep Time: 25 minutes
- Cook Time: 18 minutes
- Category: Breakfast, Dessert
- Method: Baking
- Cuisine: American
Nutrition
- Serving Size: 1 roll
- Calories: 210
- Sugar: 13g
- Sodium: 140mg
- Fat: 9g
- Saturated Fat: 5g
- Unsaturated Fat: 3g
- Trans Fat: 0g
- Carbohydrates: 29g
- Fiber: 1g
- Protein: 3g
- Cholesterol: 30mg
Keywords: red velvet cinnamon rolls, mini cinnamon rolls, festive breakfast, holiday dessert, cream cheese frosting
A Dash of Nostalgia & A Splash of Red
This recipe actually has its roots in one of my favorite childhood memories. Every Christmas Eve, my grandma and I would stay up way past my bedtime to make a big batch of cinnamon rolls for Christmas morning. The kitchen would be a flour-dusted wonderland, filled with the sound of her old stand mixer humming and our laughter. I was always the official “sugar sprinkler,” and I took my job very seriously, often creating more of a cinnamon-sugar moat around the dough than a neat sprinkle.
One year, we decided to get creative. We’d been baking a red velvet cake earlier, and there was a little leftover red food coloring sitting on the counter. My grandma, with that twinkle in her eye, looked at me and said, “What do you think, Isla? Should we make Christmas rolls?” We carefully added a few drops to our dough, and we gasped as it turned the most beautiful, deep pink. They weren’t perfect, but to me, they were the most spectacular things I’d ever seen. These Mini Red Velvet Cinnamon Rolls are my grown-up, slightly more refined homage to that messy, magical kitchen experiment with my grandma. It’s a reminder that the best recipes are the ones that come with a story and a whole lot of heart.
Gathering Your Flavor Party
Before we start, let’s get our mise en place ready! (That’s just a fancy chef term for having all your ingredients prepped and measured—it makes everything flow so smoothly). Here’s everything you’ll need to create these fluffy, festive bites.
For the Dough:
- 2 ¼ tsp active dry yeast: This is our little magic maker, responsible for all that beautiful, airy rise. Make sure your yeast is fresh! If it doesn’t get foamy in the warm milk, it might be past its prime.
- ¾ cup warm milk: Whole milk will give you the richest, softest dough, but 2% works great too! The key is the temperature—it should be warm to the touch (around 110°F), not hot. Too hot, and you’ll put the yeast to sleep.
- ¼ cup granulated sugar: A little sweetness for the dough and a snack for the yeast to get it going.
- ¼ cup unsalted butter, melted: For that unbeatable, rich flavor and tender crumb. Using unsalted lets you control the salt level in the dough.
- 1 egg: Our binding agent that adds structure and richness.
- 2 tbsp unsweetened cocoa powder: This is the secret to the “red velvet” flavor! It’s not a strong chocolate taste, but it adds a beautiful depth that pairs perfectly with the cinnamon.
- 1 tsp red food coloring: I prefer gel food coloring because it’s more vibrant and won’t change the liquid content of your dough. You can use liquid, but you may need a bit more to get that classic red color.
- 2 ½–3 cups all-purpose flour: We’ll start with 2 ½ cups and add more as needed. The exact amount can depend on the humidity, so we go by feel!
- ½ tsp salt: Never forget the salt! It balances the sweetness and enhances all the other flavors.
For the Cinnamon-Sugar Filling:
- ¼ cup melted butter: Brushed onto the dough to help the sugary filling stick and create those irresistible, buttery layers.
- ½ cup brown sugar: I love the deep, molasses-like flavor of brown sugar here. It creates a slightly chewier, more caramel-like filling than white sugar would.
- 1 tbsp ground cinnamon: The star of the show! Use the freshest cinnamon you have for the most incredible aroma and flavor.
For the Tangy Cream Cheese Frosting:
- 4 oz cream cheese, softened: Truly softened! Take it out of the fridge at least 30 minutes before. This is the key to a lump-free, silky-smooth frosting.
- 2 tbsp butter, softened: Same rule applies here—softened is a must for a creamy texture.
- 1 cup powdered sugar: Sweetens and thickens our frosting beautifully.
- ½ tsp vanilla extract: A little splash of vanilla warmth to round out the frosting.
For the Garnish:
- White chocolate curls or shavings: This is the “snowy” finish that takes these from great to absolutely show-stopping! It’s optional, but oh-so-pretty.
Let’s Make Some Magic: Step-by-Step!
Ready to get your hands a little dusty with flour and a little stained with red? Let’s do this! I’ll walk you through every step with my favorite chef hacks to ensure your mini rolls are pure perfection.
Step 1: Wake Up the Yeast!
In a large bowl (or the bowl of your stand mixer), dissolve the yeast in the warm milk. Give it a quick stir and let it sit for 5-10 minutes. You’re waiting for it to get foamy and fragrant—that’s how you know your yeast is alive and ready to party! This is the most important step, so don’t rush it.
Step 2: Create the Vibrant Dough
Once your yeast is foamy, add in the sugar, melted butter, egg, cocoa powder, red food coloring, and salt. Mix it all together until it’s a lovely, shocking red. Now, gradually add in 2 ½ cups of flour, mixing with a dough hook or a wooden spoon until a shaggy dough forms. If the dough is still very sticky, add the remaining flour, a tablespoon at a time, until the dough pulls away from the sides of the bowl but is still soft and slightly tacky to the touch. Chef Hack: You want a soft dough, not a hard one! Over-flouring is the enemy of fluffy rolls.
Step 3: The Kneading Dance
Turn your dough out onto a lightly floured surface and knead for about 5 minutes, until it’s smooth and elastic. If you’re using a stand mixer with a dough hook, let it run for 4-5 minutes on medium speed. To test if it’s ready, give the dough a gentle poke with your finger—it should slowly spring back.
Step 4: The First Rise (The Patience Part!)
Place your beautiful red dough ball in a lightly oiled bowl, turning it once to coat it in oil. Cover the bowl with a clean kitchen towel or plastic wrap and let it rise in a warm, draft-free spot for about 1 hour, or until doubled in size. My favorite warm spot? An oven that’s been turned off but was warmed for just a minute beforehand. Chef Hack: No warm spot? Place the bowl of dough on top of a heating pad set to low, or in a microwave with a cup of just-boiled water.
Step 5: Roll, Fill, and Create the Swirl
Punch the dough down (so satisfying!) and turn it out onto a lightly floured surface. Roll it out into a roughly 12×16 inch rectangle. Brush the entire surface with the ¼ cup of melted butter, leaving a small border along one of the long edges. In a small bowl, mix the brown sugar and cinnamon, then sprinkle it evenly over the buttered dough. Now, starting with the long edge opposite the clean border, tightly roll the dough into a log, pinching the clean edge to seal it.
Step 6: Slice into Mini Rolls
Using a sharp serrated knife, dental floss, or a bench scraper, slice the log into 1-inch pieces. Chef Hack: For the cleanest cuts that won’t squish your beautiful swirl, use unflavored dental floss! Slide it under the roll, cross the ends over the top, and pull. Perfect slices every time. You should get about 24 mini rolls. Place them in a greased mini muffin pan or a 9×13 baking dish, spaced about an inch apart.
Step 7: The Second Rise & Bake to Perfection
Cover your rolls and let them rise again for about 30 minutes while you preheat your oven to 350°F (175°C). They should look puffy and cozy. Bake for 15-18 minutes, until the tops are set and the rolls sound hollow if you tap them gently. You want them baked, but not over-baked, to keep that soft, fluffy texture.
Step 8: Frost and Garnish!
While the rolls are baking, make the frosting. In a medium bowl, beat the softened cream cheese and butter together until completely smooth. Gradually beat in the powdered sugar and vanilla until you have a luscious, spreadable frosting. Let the rolls cool for just 5 minutes after they come out of the oven—you want them warm enough for the frosting to melt slightly into the nooks and crannies, but not so hot that the frosting completely melts off. Spread the frosting generously over the warm rolls and immediately sprinkle with those gorgeous white chocolate curls for that snowy, festive finish.
How to Serve These Festive Bites
Presentation is part of the fun! I love piling these Mini Red Velvet Cinnamon Rolls high on a beautiful cake stand or a rustic wooden board. They’re stunning all on their own, but for a real holiday brunch spread, serve them alongside a big pot of strong coffee, a pitcher of cold milk, or even some frothy hot chocolate. The deep red, bright white frosting, and snowy chocolate make them a natural centerpiece. Watch them disappear as your friends and family dive in—their vibrant color and incredible aroma are absolutely irresistible!
Ride Your Own Flavor Wave: Fun Variations!
One of my favorite things about cooking is making a recipe your own! Here are a few delicious twists on this classic:
- Chocolate Chip Swirl: Add a handful of mini chocolate chips to the cinnamon-sugar filling for a double-chocolate delight.
- Orange Zest Brightness: Add the zest of one orange to the cream cheese frosting for a beautiful, citrusy twist that cuts through the sweetness.
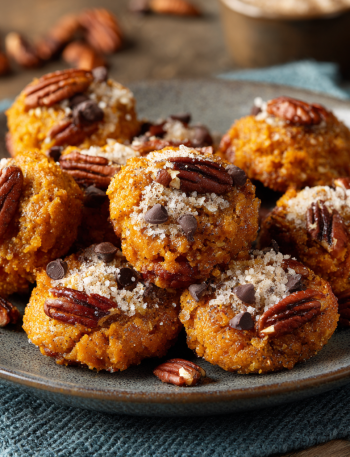
- Pecan Praline: Before baking, sprinkle chopped pecans over the rolls in the pan, or mix them right into the filling for a crunchy, nutty surprise.
- “Naughty or Nice” Glaze: For an adults-only version, add a teaspoon of bourbon or rum to the cream cheese frosting. So good!
- Natural Color: Want to skip the food coloring? You can! The cocoa will give you a lovely light brown roll that’s just as delicious. For a natural red, you can experiment with beet powder, though the color will be more subtle.

Isla’s Chef Notes & Kitchen Confessions
I’ve made these rolls more times than I can count, and they’ve evolved from that first pink experiment with my grandma into this foolproof recipe. A funny confession: the first time I tried the dental floss trick, I used mint floss. Let’s just say my rolls had a very… unique… minty freshness that year. Learn from my mistake and stick to unflavored!
This dough is wonderfully forgiving. If you’re in a hurry, you can sometimes get away with just one rise after you’ve shaped them—the rolls will be slightly denser but still utterly delicious. And don’t stress if your rectangle isn’t perfect or your slices aren’t exactly even. That’s the beauty of homemade food; the little imperfections are what make it special and full of love. The most important ingredient is always the joy you put into making them.
Your Questions, Answered!
Q: My dough didn’t rise. What went wrong?
A: The most common culprit is the yeast. Either the milk was too hot and killed it, or the yeast was old. Always test your yeast in warm milk first to ensure it gets foamy! The second culprit could be the environment—if your kitchen is cold, the dough will take much longer to rise. Find a warmer spot for it next time.
Q: Can I make these the night before?
A: Absolutely! This is my favorite hack for stress-free mornings. After you’ve placed the sliced rolls in the pan, cover them tightly with plastic wrap and pop them in the fridge overnight. In the morning, take them out, let them sit on the counter for 30 minutes to take the chill off, then bake as directed. You might need to add 1-2 extra minutes to the baking time.
Q: My frosting is too runny/thick. How can I fix it?
A: If it’s runny, your cream cheese or butter was probably too soft. Just pop the whole bowl of frosting into the fridge for 15-20 minutes to firm up. If it’s too thick, simply beat in a teaspoon of milk or cream at a time until it reaches your desired, spreadable consistency.
Q: I don’t have a mini muffin pan. What can I use instead?
A: No problem! A regular 9×13 inch baking dish works perfectly. Just place the rolls about an inch apart so they have room to expand. You can also use a round cake pan or even a cast-iron skillet for a rustic look.
Quick Nutrition Info
Prep Time: 20 minutes (+1 hr rise) | Bake Time: 18 minutes | Total Time: ~1 hour 40 minutes | Makes: 24 mini rolls
Per roll (approximate): Calories: 140 | Carbs: 19g | Fat: 6g | Sugar: 9g | Protein: 2g