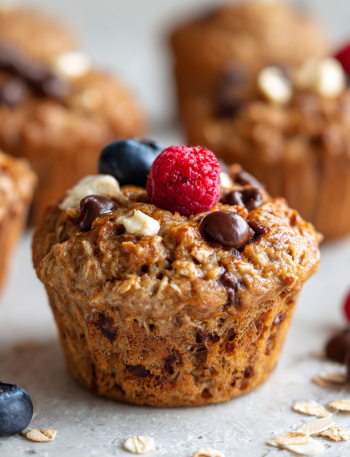
 Hey There, Brunch Bestie! Ready to Make Breakfast Magic?
Okay, let’s paint a picture. It’s a gorgeous, lazy weekend morning. The sun is streaming in, you’ve got your favorite playlist on, and the only plan is a slow, delicious brunch. But then… reality hits. You want something impressive, something that says “I totally have my life together,” but you also really, really don’t want to spend the next two hours juggling five different pans while your coffee gets cold. Sound familiar? Friend, I have been there more times than I can count.
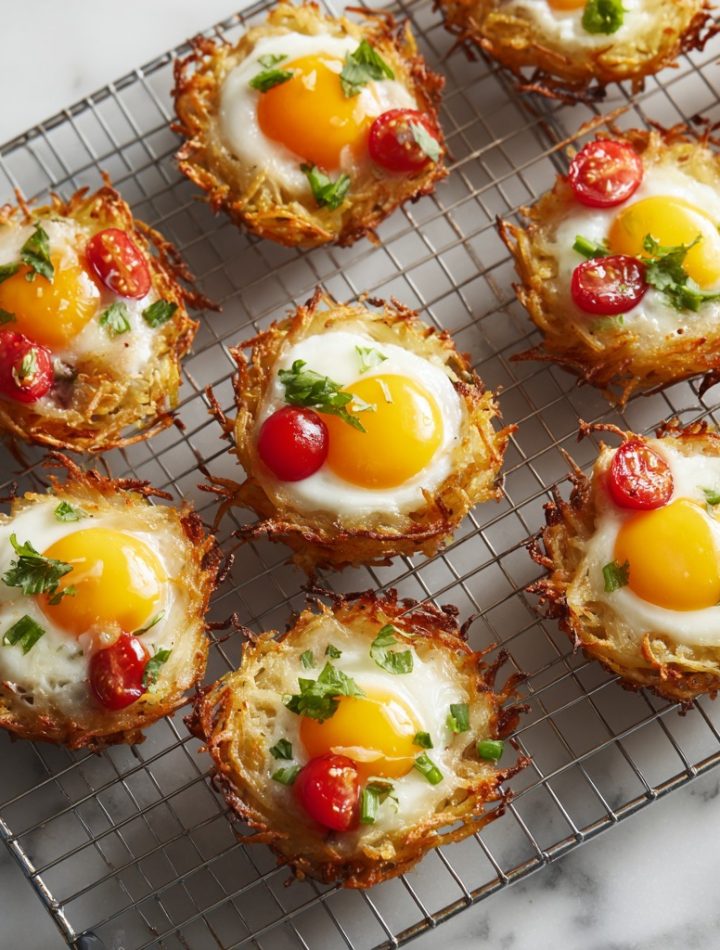
That exact tension—between crave-worthy and crazy-easy—is why I’m completely obsessed with these Mini Nest Hash Browns. Imagine the crispiest, most golden hash brown you’ve ever had, shaped into adorable little cups, just begging to be filled with all your brunch favorites. We’re talking a crunchy potato vessel for melty cheese, perfectly scrambled eggs, creamy avocado, or even a cute little “egg” made from a cherry tomato. They’re fun, they’re festive, and they taste like you fussed for hours. The secret? You basically stir, press, and bake. That’s it. No flipping, no spattering oil, no stress. This is the ultimate recipe for turning simple ingredients into a brunch centerpiece that will have everyone reaching for seconds (and asking for the recipe). So, tie on your apron, grab that bag of potatoes, and let’s make some kitchen magic that’s as easy as it is unforgettable.
Print
Mini Nest Hash Browns : A Crispy, Cheesy Spring Brunch Bite
- Total Time: 35 minutes
- Yield: 12 nests 1x
Description
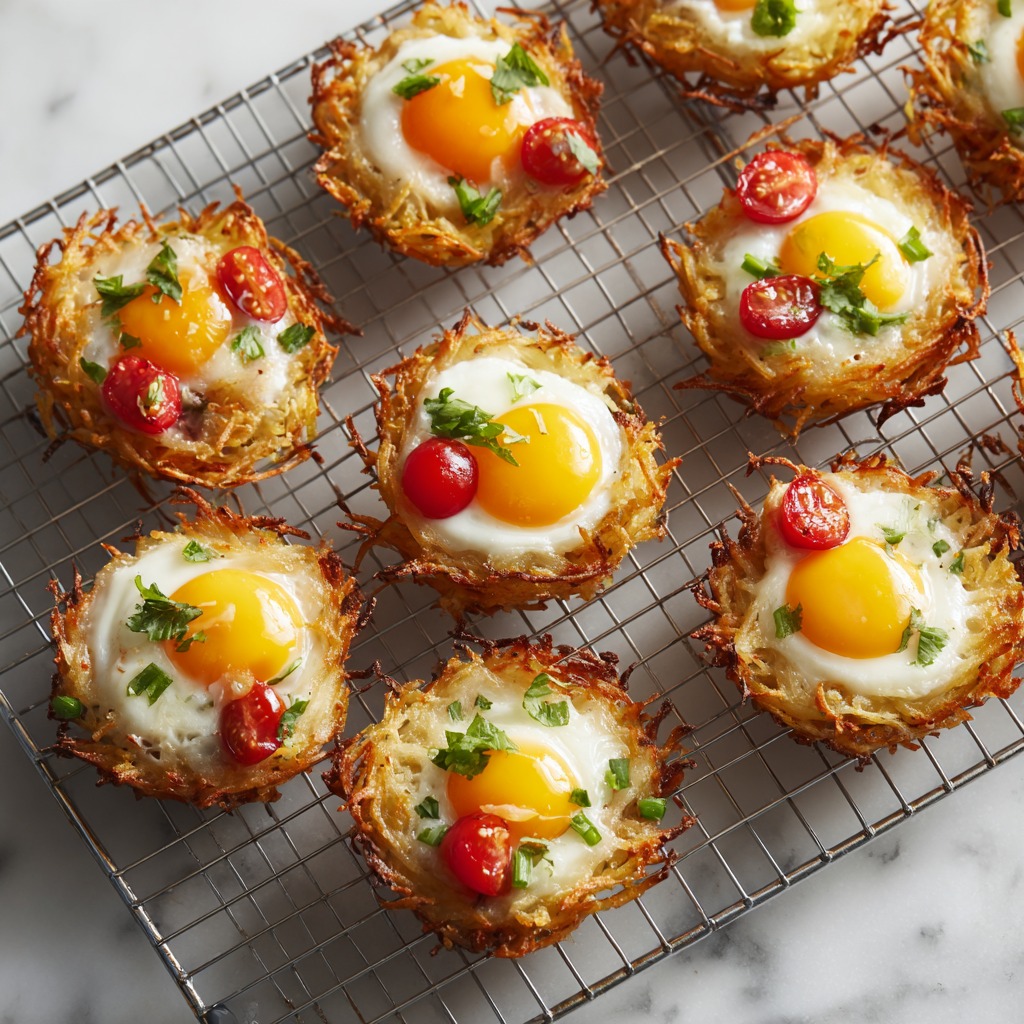
Mini Nest Hash Browns are a fun and festive way to serve breakfast or brunch. These crispy little nests are made from shredded potatoes, baked in muffin tins, and filled with your favorite toppings—think eggs, cheese, or even little “eggs” made from cherry tomatoes or peas for a nest-like look. They’re crunchy on the outside, tender in the middle, and totally irresistible.
Ingredients
3 cups shredded potatoes (fresh or thawed frozen hash browns)
1 cup shredded cheddar cheese
2 tablespoons melted butter or olive oil
Salt and pepper to taste
Optional fillings: scrambled eggs, cooked bacon or sausage, cherry tomatoes, peas, avocado
Instructions
Preheat oven to 400°F. Grease a 12-cup muffin tin.
In a bowl, mix shredded potatoes, cheese, melted butter, salt, and pepper.
Press the mixture into each muffin cup, shaping it up the sides to form a “nest.”
Bake for 20–25 minutes, or until golden and crisp.
Let cool slightly, then remove from tin. Fill with toppings of your choice and serve.
- Prep Time: 10 mins
- Cook Time: 25 mins
- Category: Breakfast
Nutrition
- Calories: ~120
- Fat: 7g
- Protein: 5g
The Hash Brown That Stole My Heart (And My Sunday Mornings)
My love affair with hash browns started not in a fancy restaurant, but at my grandma’s worn Formica countertop. Every Sunday after church, the smell of frying potatoes and onions would wrap around our little house like a warm hug. My job was “Chief Potato Squeezer.” I’d stand on a stool, hands wrapped around a tea towel bulging with freshly grated potatoes, squeezing out every last drop of starchy water while she’d say, “Harder, Isla! The crispier they get!” We’d listen to the sizzle as they hit the hot cast iron, a sound that promised pure comfort.
These Mini Nests are my playful, shareable love letter to those memories. They capture that essential, craveable crispiness but transform it into something you can pass around the table, customize, and eat with your fingers (brunch’s best utensil, if you ask me). They take that nostalgic, simple joy and make it party-ready. Every time I pull a golden-brown tray of these out of the oven, I think of my grandma and her no-nonsense approach to good food. It doesn’t have to be complicated to be spectacular. Now, let’s get you the ingredients to make your own new brunch tradition.
Gathering Your Flavor Crew: What You’ll Need
Here’s the beautiful part: the ingredient list is short, sweet, and probably already in your kitchen. Each one plays a starring role in creating that perfect nest texture.
- 3 cups shredded potatoes – This is your foundation! You can use fresh russets or Yukon Golds (peeled), or for ultimate convenience, thawed frozen shredded hash browns. Chef’s Insight: If using fresh, a box grater works, but a food processor with the shredding disk is a total game-changer for speed. The key, which we’ll get to, is removing moisture!
- 1 cup shredded sharp cheddar cheese – This isn’t just for flavor; the cheese helps bind the nests and adds to the glorious golden color. Sub Tip: Feel free to swap for pepper jack for a kick, gruyère for something fancy, or a Mexican blend. Pre-shredded is fine, but block cheese you shred yourself melts a bit better.
- 2 tablespoons melted butter or olive oil – This gives the potatoes richness and ensures they crisp up beautifully. Butter adds incredible flavor, while olive oil is a great dairy-free option.
- Salt and black pepper to taste – Don’t be shy! Potatoes need a good amount of seasoning. I start with 3/4 tsp kosher salt and 1/4 tsp fresh cracked pepper.
- Optional Fillings & Garnishes: This is where you shine! Think scrambled eggs, crumbled cooked bacon or sausage, diced avocado, cherry tomatoes (the perfect “eggs” for a vegetarian nest!), a dollop of sour cream, or fresh chives or green onions.
Let’s Build Those Nests: Your Step-by-Step Roadmap to Crispy Perfection
Ready? This process is so satisfying. Just follow these steps, and you’re golden (literally).
- Prep Your Station: Preheat your oven to a hot 400°F (200°C). This high heat is crucial for maximum crispiness. While it heats, generously grease a standard 12-cup muffin tin with non-stick spray, butter, or oil. Get in every nook and cranny—this is your insurance policy for easy release later!
- The Big Squeeze (The Most Important Step!): If you’re using fresh grated potatoes, place them in the center of a large, clean kitchen towel (or several layers of paper towels). Gather the edges and twist, twist, TWIST over the sink until you can’t get another drop of liquid out. This removes excess starch and water, which is the secret to avoiding soggy nests. If using thawed frozen hash browns, just give them a good squeeze in a colander or with paper towels.
- Mix It Up: In a large bowl, combine your thoroughly dried shredded potatoes, shredded cheese, melted butter or oil, salt, and pepper. Get in there with your hands or a fork and mix until everything is evenly distributed and coated. It should feel a bit clumpy from the cheese and butter.
- Shape the Nests: Grab a generous handful of the mixture (about 1/4 to 1/3 cup) and press it firmly into a prepared muffin cup. Use your fingers or a small glass to press the mixture firmly into the bottom and up the sides, creating a cup shape. The firmer you pack it, the better it will hold together. Don’t make the walls too thin at the top. Chef’s Hack: I like to build it up slightly higher than the rim of the cup—they shrink down a bit as they bake.
- Bake to Golden Glory: Slide the tin into your preheated oven and bake for 20-25 minutes. You’re looking for deeply golden brown edges and a firm structure. The cheese will be bubbly around the edges. If you want an extra crunch, you can broil for the last 1-2 minutes, but WATCH THEM like a hawk!
- The Great Release: Take the tin out of the oven and let it cool on a wire rack for a solid 5-10 minutes. This allows the nests to set and firm up, making them much easier to remove. Then, gently run a small offset spatula or butter knife around the edges of each nest and lift them out. They should pop right out!
How to Serve These Little Masterpieces
Presentation is half the fun! Arrange your crispy nests on a big wooden board or a pretty platter. Let everyone build their own brunch bite—set out bowls of warm scrambled eggs, crispy bacon bits, diced avocado, a bowl of cherry tomatoes, and a sprinkle of fresh chives. It’s interactive, colorful, and guaranteed to make people smile. For a more plated look, place two nests on a plate, fill one with eggs and bacon, the other with avocado and tomato, and add a little salad on the side. Don’t forget the hot sauce for those who like a kick!
Ride Your Own Flavor Wave: 5 Fun Twists to Try
- Everything Bagel Nest: Add 1 tbsp of everything bagel seasoning to the potato mix. Fill with herby cream cheese and smoked salmon for the ultimate deli-inspired bite.
- Southwest Fiesta: Mix in 1/2 tsp cumin and a pinch of chili powder. Fill with black beans, corn, pico de gallo, and a squeeze of lime.
- Green Goddess: Stir 1/4 cup finely chopped spinach and 2 tbsp of grated parmesan into the mix. Fill with a poached or soft-boiled egg for a runny yolk surprise.
- Sweet Potato Swap: Use shredded sweet potatoes instead! Their natural sweetness pairs amazingly with salty bacon and a drizzle of maple syrup.
- Loaded Baked Potato: Fill baked nests with a scoop of sour cream, cheddar, crumbled bacon, and a sprinkle of green onion. Brunch? Appetizer? Yes.
Isla’s Kitchen Confessions & Pro-Tips
I have to admit, the first time I made these, I was impatient. I didn’t squeeze the potatoes enough, and I tried to pry them out of the tin after just 2 minutes of cooling. It was… a nest wreck. A delicious, tasty, but completely crumbled wreck. Lesson learned! Patience with the drying and the cooling is non-negotiable. Over time, I’ve also started adding a tiny sprinkle of cornstarch (about 1 tsp) to the mix if my potatoes feel extra wet—it’s an extra crispy insurance policy. And the biggest evolution? I now always double the batch. They freeze like a dream after baking (just cool completely and freeze in a bag), then reheat straight from the freezer in a 375°F oven for 10-15 minutes. Having a stash of these in the freezer makes me feel like a brunch superhero on even the sleepiest of mornings.
Your Questions, Answered: Let’s Troubleshoot!
Q: My nests are soggy! What did I do wrong?
A: Ninety-nine percent of the time, this is a moisture issue. Did you squeeze the potatoes thoroughly? Even frozen ones hold a lot of water. Also, make sure you packed the mixture firmly—loose nests won’t crisp up properly. Lastly, are you filling them with wet toppings before baking? Only the potato mixture goes in the oven; add fillings after they’re baked and crisp.
Q: They’re sticking to the pan horribly. Help!
A: I feel your pain! First, ensure you greased the tin VERY well. Non-stick spray is my go-to. Second, and this is key, let them cool in the pan for at least 5-10 minutes before trying to remove them. This allows them to contract and release. Using a thin tool to gently loosen the edges is the final step.
Q: Can I make these ahead of time?
A> Absolutely! You have two great options: 1) Prep the mixture: Squeeze and mix the potato/cheese blend, store it covered in the fridge overnight, then shape and bake in the morning. 2) Bake fully ahead: Bake and cool the nests completely. Store in an airtight container in the fridge for 2 days or freeze for a month. Re-crisp in a 375°F oven for 5-10 minutes (15 from frozen) before filling and serving.
Q: I don’t eat dairy. Can I still make them?
A> Of course! Use olive or avocado oil instead of butter. Omit the cheese, but to help with binding, you can add an extra tablespoon of oil and maybe a tablespoon of nutritional yeast for a cheesy flavor. They’ll still be deliciously crispy.
Quick Nutrition Snapshot (Per Plain Nest, Without Fillings)
Calories: ~120 | Total Fat: 7g | Saturated Fat: 4g | Protein: 5g | Total Carbohydrates: 10g | Dietary Fiber: 1g | Sugars: 1g | Sodium: 180mg
Note: This is an estimate for the base nest. Toppings like eggs, avocado, and bacon will alter the nutritional profile.
These Mini Nest Hash Browns turn simple shredded potatoes into irresistible, crowd-pleasing brunch bites. With their crispy edges, versatile toppings, and easy make-ahead prep, they’re perfect for holidays, weekend breakfasts, or any gathering where you want a show-stopping side. Fun to assemble, endlessly customizable, and guaranteed to impress, these little nests make brunch feel both effortless and special.