 The Internet-Famous Banana Pudding You’ll Want to Make on Repeat
Hey there, friend! Isla here, from BiteTide. Can we talk about cravings for a second? You know the kind—the ones that hit you out of nowhere, scrolling through your phone at 10 PM, when a video of something so creamy, so dreamy, so perfectly layered pops up and you just have to have it. For me, and for millions online, that craving has a name: Magnolia Bakery Banana Pudding.
This isn’t just any dessert. It’s a phenomenon. A no-bake masterpiece that balances soft, vanilla-speckled pudding, ripe, sweet bananas, and those iconic, slightly crunchy Nilla wafers that soak up all the goodness. It’s the dessert that turns a simple potluck into a legend and has people asking for your recipe for years. The best part? It’s shockingly simple to make at home.
Today, I’m sharing my tried-and-true, fanatical-about-flavor version of this iconic treat. This copycat Magnolia Bakery Banana Pudding is ultra-creamy, perfectly sweet, and seriously addictive. It tastes like it came straight from the bakery counter, but with that special touch of love that only a homemade dessert can have. It’s a guaranteed crowd-pleaser, a potluck hero, and the ultimate “treat yourself” weekend project that gets even better as it chills. So, grab your biggest bowl and your favorite spoon—we’re about to make some magic.
Print
Magnolia Bakery-Style Banana Pudding : Creamy, Dreamy, Crowd-Favorite Dessert
- Total Time: 53 minute
- Yield: 16 servings 1x
Description
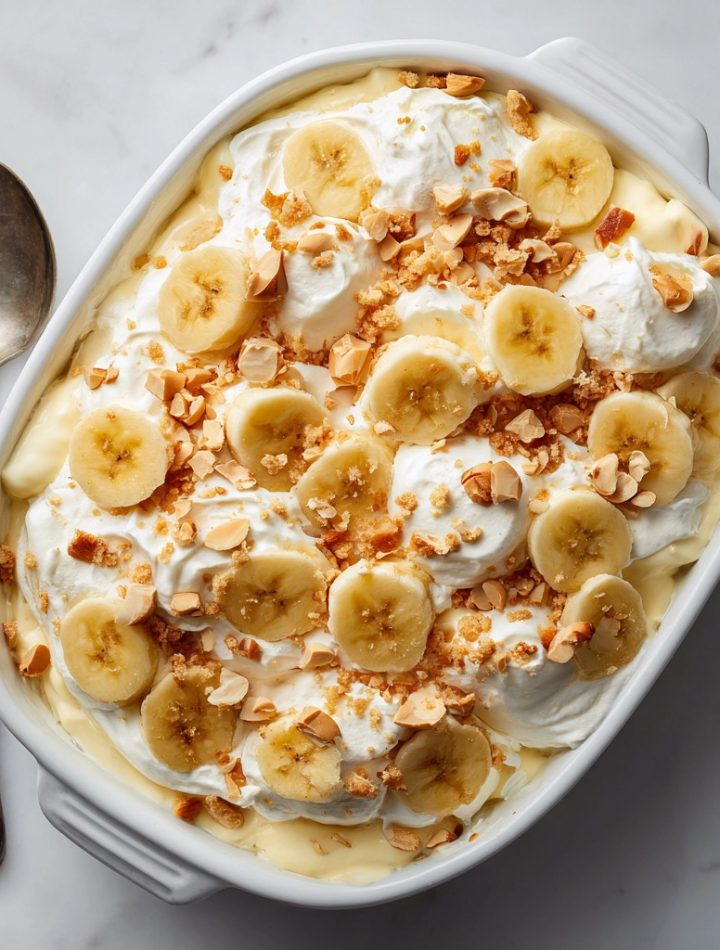
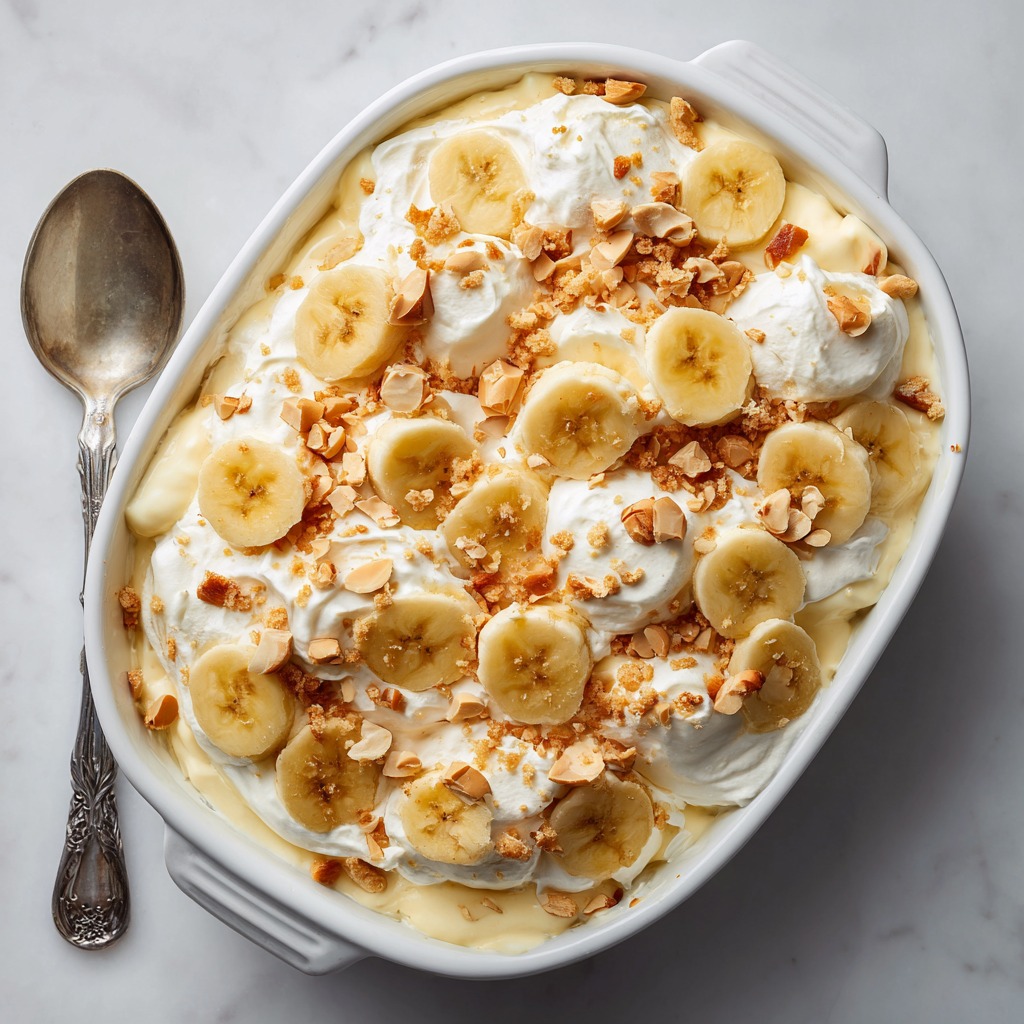
This copycat Magnolia Bakery Banana Pudding is ultra-creamy, layered with soft vanilla wafers and ripe bananas, and seriously addictive. It’s a no-bake showstopper that tastes like it came straight from the bakery—only better because you made it! Perfect for potlucks, parties, or just a weekend treat, this pudding gets better the longer it chills.
Ingredients
10 ripe bananas, sliced
3 boxes (27 oz total) mini Nilla Wafers
6 cups heavy cream
2 boxes (11.8 oz total) instant vanilla pudding mix
28 oz sweetened condensed milk
3 cups cold milk
Instructions
Add vanilla pudding mix and beat until no lumps remain. Cover and chill in the fridge for at least 4 hours or overnight for best texture.
When ready to assemble, whip the heavy cream in a separate bowl until stiff peaks form.
Gently fold the chilled pudding mixture into the whipped cream until fully blended and fluffy.
In a deep trifle dish, large bowl, or even individual jars, layer wafers, sliced bananas, and the pudding mixture. Repeat layers until full.
Finish with extra wafers and a sprinkle of crushed cookies for a pretty finish.
- Prep Time: 5 minutes
- Cook Time: 6 hrs+
- Category: Dessert
A Pudding That Tastes Like Sunshine & Laughter
My love for this pudding runs deep, but it didn’t start in a famous New York bakery. It started on a wobbly picnic table at my family’s beach cabin. My grandma, who believed dessert was its own food group, would make a simpler version every summer. She’d call it her “Lazy Day Pudding,” using boxed pudding, bananas from the fruit stand, and whatever cookies were on sale.
I remember the ritual so clearly: the *whir* of her hand mixer, the scent of vanilla filling the salty air, and the absolute chaos of us kids trying to “help” layer everything without eating all the wafers first. The bowl always looked a mess, with pudding smudged on the sides and banana slices sticking out at odd angles. But after a few hours in the old fridge, magic happened. The cookies softened into cakey layers, the bananas sweetened the pudding, and it transformed into this cohesive, glorious, spoonable cloud.
Every bite tasted like sunshine, laughter, and the simple joy of being together. That’s the spirit I bring to this recipe. It’s not about perfection; it’s about the happy, nostalgic, utterly delicious result that brings people right to your table. Let’s make some new memories, shall we?
Gathering Your Flavor Crew: Ingredients & Insights
Here’s your shopping list for this creamy dream. I’ve added my little chef insights and swap ideas so you can make it your own, no stress!
- 10 ripe bananas, sliced: The star! Look for bananas that are yellow with plenty of brown speckles. They’re at their peak sweetness and flavor, which is essential. Chef’s Tip: Slice them about ¼-inch thick—too thin and they’ll disappear, too thick and they can be overpowering.
- 3 boxes (27 oz total) mini Nilla Wafers: The iconic base. The minis are perfect for layering and soaking up pudding. Substitution: In a pinch, use regular Nilla Wafers or even chessman cookies for a buttery twist.
- 6 cups heavy cream: This is what creates that luxurious, cloud-like texture when whipped. Ensure it’s very cold for the best volume. Chef’s Insight: The fat content is non-negotiable here for structure and richness. Don’t swap for half-and-half.
- 2 boxes (11.8 oz total) instant vanilla pudding mix: Our secret weapon for flavor and stability. Instant pudding sets quickly without cooking. Note: Be sure it’s “instant” and not “cook-and-serve.”
- 28 oz sweetened condensed milk: The sweet, sticky, magical glue that gives the pudding its signature creamy body and caramel-like sweetness. You’ll use two standard 14-oz cans.
- 3 cups cold milk: Whole milk is my go-to for the creamiest result, but 2% works well too. The colder it is, the faster the pudding will set up.
Let’s Build That Pudding! Step-by-Step with Chef Hacks
Ready? Put on some tunes, clear some fridge space, and let’s do this. It’s more assembly than cooking, and every step is a joy.
- Create the Pudding Base: In your largest mixing bowl, combine the sweetened condensed milk and the cold milk. Whisk or beat with a hand mixer on low until it’s completely smooth and creamy. This might take a minute—you want no streaks of condensed milk left. Chef Hack: Running your cans of condensed milk under warm water for a minute makes them pour out like a dream!
- Incorporate the Pudding Mix: Sprinkle both boxes of instant vanilla pudding mix over the milk mixture. Beat immediately for about 2 minutes, scraping down the sides, until it’s thick, smooth, and no dry lumps remain. It will be quite thick already! Cover the bowl tightly with plastic wrap (press it right onto the surface of the pudding to prevent a skin) and chill for at least 4 hours, or overnight. Why so long? This step is CRUCIAL. It allows the pudding to fully hydrate and set, giving us a stable base to fold into our whipped cream later.
- Whip the Cream to Stiff Peaks: When you’re ready to assemble, pour the cold heavy cream into a spotlessly clean, cold bowl. Using a hand mixer or stand mixer with the whisk attachment, whip on medium-high until stiff peaks form. This means when you lift the whisk, the peak stands straight up and doesn’t flop over. Watch it closely! You’re going for pillowy, not buttery. It usually takes 3-4 minutes.
- The Grand Folding: Take your chilled pudding base out of the fridge. It will be firm. Add about one-third of the whipped cream to the pudding bowl. Using a large rubber spatula, gently fold it in—scoop from the bottom and turn over—to lighten the mixture. Now, add the lightened pudding mixture back into the bowl with the remaining whipped cream. Gently fold everything together until it’s one homogenous, fluffy, beautiful cloud. No white streaks! Be gentle to keep all that air you whipped in.
- Layer It Up! Now for the fun, artistic part! Grab your vessel—a deep 13×9 dish, a large trifle bowl, or individual jars work beautifully. Start with a layer of Nilla wafers, covering the bottom. Follow with a single layer of banana slices, then a generous layer of the pudding cream (about 1.5-2 inches thick). Repeat! Wafers, bananas, cream. I usually get 3 full layers. Pro Tip: Press the wafers and bananas slightly into the cream to help them start soaking up that flavor.
- The Finishing Touch: On your top layer of cream, arrange a few extra wafers artistically and maybe sprinkle some crushed cookies over the top. It looks pretty and gives a hint of texture.
- The Final Chill (The Hardest Part!): Cover your masterpiece and chill for at *least* 2 more hours. I know, the wait is torture! But this is when the alchemy happens. The wafers soften into cake-like layers, the bananas meld their sweetness throughout, and the whole dessert becomes one incredible, cohesive bite. Overnight is truly magical.
Serving Your Masterpiece
When it’s time to serve, dig in with a large spoon, making sure to get all the way to the bottom to capture every layer. I love serving it in a clear trifle bowl so everyone can see the beautiful stripes. For a party, individual mason jars are adorable and so easy to pass around. It’s rich, so a modest scoop is plenty… though seconds are almost always mandatory. No judgment here!
Ride Your Own Flavor Wave: Fun Variations
Once you’ve mastered the classic, try surfing these delicious twists!
- Chocolate Lover’s: Swap one box of vanilla pudding for chocolate instant pudding. Add a handful of mini chocolate chips between layers.
- Salted Caramel Pretzel: Use crushed salted pretzels in place of half the wafers for a sweet-salty crunch. Drizzle store-bought caramel sauce between layers.
- Tropical Vibes: Add 1 cup of toasted coconut to the pudding cream. Layer with bananas and crushed pineapple (well-drained). Use coconut cookies if you can find them!
- Berry Bliss: Add a layer of fresh strawberries or raspberries with the bananas. The tartness cuts through the sweetness beautifully.
- Boozy Banana Pudding (For the Grown-Ups): Add 2-3 tablespoons of bourbon, dark rum, or banana liqueur to the pudding base when you mix it with the milk.
Isla’s Chef Notes & Kitchen Confessions
This recipe has become my most-requested dish for gatherings, and it’s evolved in my kitchen. I once, in a pre-coffee haze, accidentally bought “cook-and-serve” pudding mix. Let’s just say I learned the importance of the word “instant” the hard way! Another time, my dog managed to swipe a single banana off the counter mid-assembly. Chaos ensued, but the pudding was no worse for wear.
I’ve made this in everything from a disposable aluminum pan for a beach BBQ to fancy glass coupes for a bridal shower. It works every single time. The recipe is forgiving. The real secret? Letting it rest. I promise, the longer it sits (up to 24 hours), the more the flavors marry and the texture becomes something truly special. It’s a lesson in delayed gratification that pays off big time.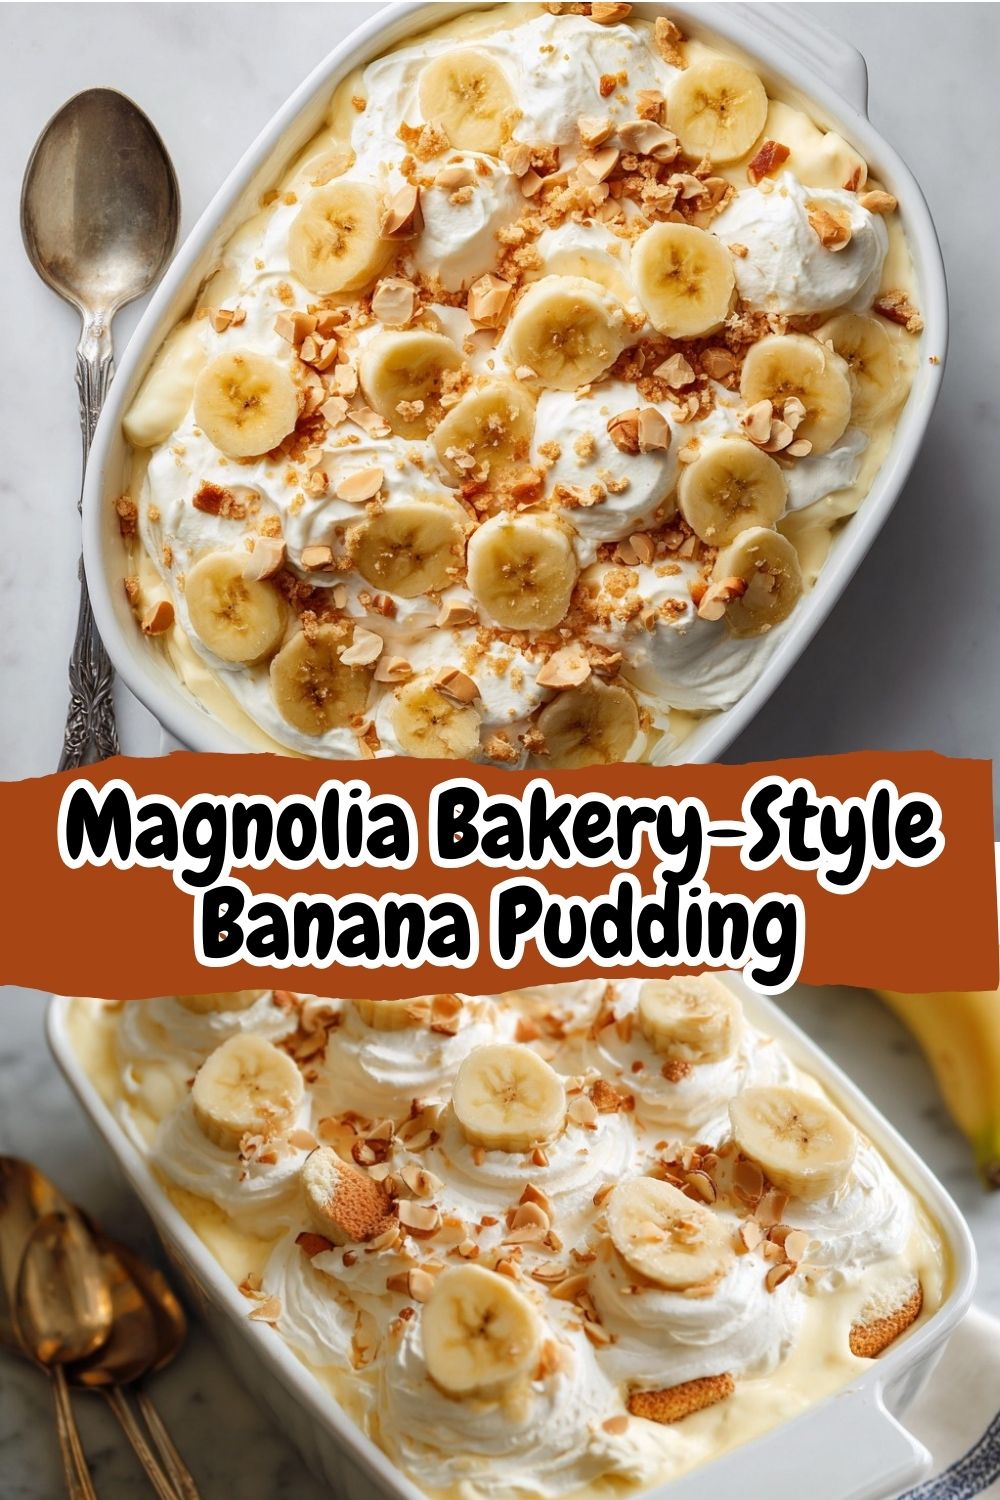
FAQs & Troubleshooting: Your Questions, Answered
Q: Can I make this ahead of time?
A: Absolutely! It’s actually better made ahead. You can complete the entire recipe up to 24 hours before serving. Just keep it tightly covered in the fridge. The wafers will be softer the longer it sits, which most people love.
Q: My bananas turned brown! Did I ruin it?
A: Not at all! The bananas will oxidize and turn a little brown where they touch the air, especially if you serve it the next day. This is totally normal and doesn’t affect the flavor one bit. If you want to slow it down for aesthetics, you can toss your banana slices in a tiny bit of lemon or pineapple juice before layering, but I find it changes the pure banana flavor, so I usually skip it.
Q: My pudding/whipped cream mixture seems runny. What happened?
A: Two likely culprits: 1) The pudding base didn’t chill long enough. It needs that full 4+ hours to set firmly. 2) The heavy cream was under-whipped or the bowl/utensils were warm. Make sure everything is cold and whip until you have firm, stable peaks. If it’s a bit soft, just pop the whole assembled dessert in the fridge—it will firm up considerably as it chills.
Q: Can I use homemade pudding instead of instant?
A: You can, but the texture will be different. Instant pudding is formulated to set firmly without eggs, which gives this dessert its characteristic, sliceable-yet-creamy body. A custard-based pudding will be delicious but may result in a softer, looser final product.
Nutritional Information (Per Serving)
Please note: This is a rich, celebratory dessert. These are estimates based on the specific ingredients used.
Calories: ~310 | Total Fat: 16g | Saturated Fat: 10g | Cholesterol: 55mg | Sodium: 180mg | Total Carbohydrates: 38g | Dietary Fiber: 1g | Sugars: 25g | Protein: 4g