The Only Honey Glazed Ham Recipe You’ll Ever Need
Hey there, friend! Isla here, from my cozy kitchen to yours. Can we talk about the star of the show, the pièce de résistance, the glorious centerpiece that has the power to make a simple Sunday feel like a full-blown holiday? I’m talking about a Honey Glazed Ham. That beautiful, glistening, sweet-and-savory masterpiece that everyone crowds around. Now, I know what you might be thinking—that a ham this good is something you only get from a fancy store, with a fancy price tag to match.
But what if I told you that the most incredible, mouth-watering, conversation-stopping honey glazed ham isn’t something you buy? It’s something you make. And it’s so much easier than you think. We’re talking about a ham that’s tender and juicy on the inside, with a sticky, buttery, spiced crust on the outside that crackles with every bite. The kind of ham where your family will genuinely pause, mid-chew, just to let out a happy sigh.
This recipe is my love letter to effortless elegance. It’s for the busy parent hosting their first big Easter, the couple wanting to make a special Sunday dinner, or anyone who just believes that good food is the heart of a good home. We’re skipping the crowds, saving a pretty penny, and rolling up our sleeves for some seriously satisfying kitchen magic. So, tie on your favorite apron, and let’s create some golden-baked perfection together. Your future self, carving into that beautiful ham surrounded by happy, hungry people, is already thanking you.
Print
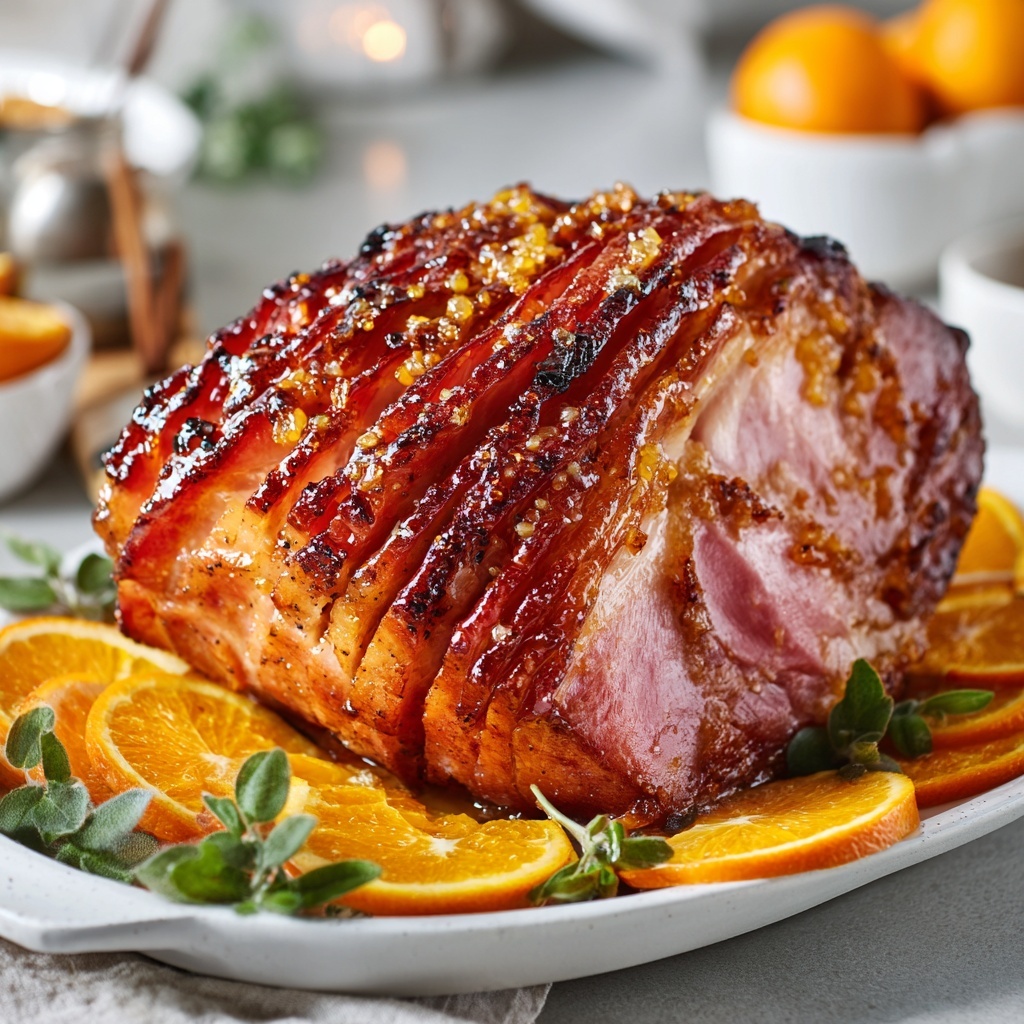
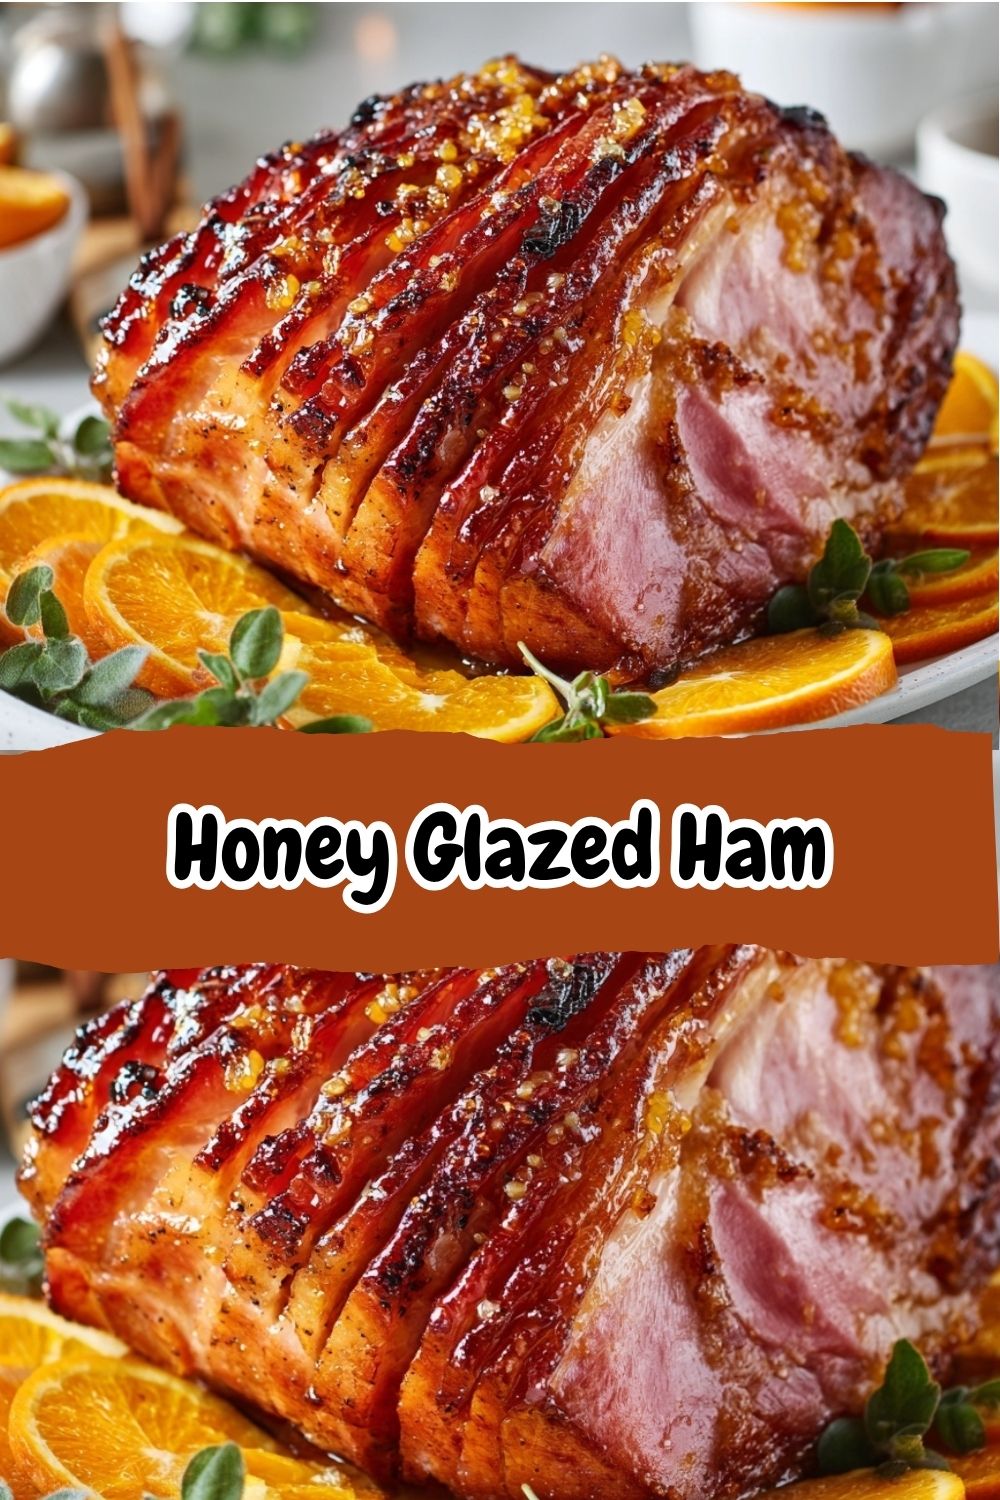
Honey Glazed Ham
- Total Time: 20 minutes
- Yield: Serves 15 1x
Description
Skip the crowds and savor the flavor with this homemade honey glazed ham that rivals the famous store-bought version—at a fraction of the cost. Sweet, buttery, and spiced with whole cloves, it’s tender, sticky, and golden-baked perfection. Serve it up for your next holiday feast or Sunday dinner centerpiece.
Ingredients
1 (5 lb) ready-to-eat ham (spiral-sliced if preferred)
¼ cup whole cloves
¼ cup dark corn syrup
2 cups honey
⅔ cup unsalted butter
Instructions
Prep the Ham: Preheat oven to 325°F (165°C). Score the surface of the ham in a diamond pattern if not presliced. Press whole cloves into the center of each diamond.
Make the Glaze: In a saucepan over low heat, combine honey, butter, and corn syrup. Stir until melted and smooth.
Bake & Baste: Place ham in a roasting pan and brush with glaze. Bake uncovered for about 1 hour and 15 minutes, basting every 10–15 minutes with the pan juices and extra glaze.
Finish: For a sticky crust, broil for 2–3 minutes at the end (optional, watch closely). Rest 10 minutes before carving.
- Prep Time: 20 mins
- Category: Dinner
A Ham, A Grandma, and A Whole Lot of Cloves
This recipe always takes me right back to my grandma’s warm, wonderfully chaotic kitchen. She was the undisputed queen of holiday feasts, and her honey glazed ham was legendary. My job, from the time I could safely stand on a stool, was to be the “Clove Captain.” Grandma would hand me the little jar of whole cloves and the pre-scored ham, and with the intense focus only a seven-year-old can muster, I’d press one single clove into the center of every single diamond.
It was a slow, meticulous process, and my little fingers would smell like spicy warmth for the rest of the day. But it was our ritual. She’d be humming along to some old jazz record, whisking the honey glaze, and I’d be in my own little world, creating what I thought was a masterpiece of flavor and pattern. She’d always lean over, give my work a scrutinizing look, and say, “Perfect, my love. You’ve got the magic touch.” I believed her with my whole heart. That ham wasn’t just food; it was a labor of love, a signal that our home was filled with people we cherished, and a memory I can still taste. Now, every time I press those cloves into the ham, it’s like she’s right there with me in the kitchen, reminding me that the best recipes are the ones seasoned with a little bit of story.
Gather Your Flavor Crew
Here’s the beautiful part: the ingredient list is short, sweet, and to the point. We’re letting a few high-quality ingredients do all the talking. No fuss, just fantastic flavor.
- 1 (5 lb) ready-to-eat ham (spiral-sliced if preferred): This is our superstar! Using a “ready-to-eat” or fully cooked ham is our number one secret to a stress-free, juicy result. It means we’re just warming it through and building that incredible glaze. A spiral-sliced ham is a fantastic shortcut for easy serving, but a whole ham you score yourself works beautifully and can look even more impressive!
- ¼ cup whole cloves: These little flavor powerhouses are non-negotiable for me. They infuse the ham with a warm, aromatic, slightly spicy essence that pairs magically with the sweet honey. Don’t be shy with them! They create little pockets of fragrance in every slice.
- 2 cups honey: The star of our glaze! Honey brings a deep, floral sweetness that caramelizes into a gorgeous, sticky crust. I love using a local wildflower honey for its complex flavor, but any good-quality honey will work wonders. For a richer flavor, try buckwheat honey.
- ⅔ cup unsalted butter: Butter equals richness and that luxurious, silky mouthfeel in our glaze. We use unsalted so we can control the overall saltiness of the dish, since the ham itself is already seasoned.
- ¼ cup dark corn syrup: Now, I know this one might raise an eyebrow, but trust your chef Isla! The dark corn syrup isn’t just for sweetness; it’s our secret weapon for a glossy, crackly glaze that doesn’t crystallize or burn too quickly. It gives the finished ham that professional, lacquered look. In a pinch, you can use maple syrup for a different, but equally delicious, flavor profile.
Let’s Build That Golden Glory: Step-by-Step
Okay, team! Time to transform these simple ingredients into the ham of your dreams. Read through these steps once, and you’ll see just how straightforward it is. I’ve packed in all my favorite chef hacks to ensure your success.
- Prep Your Stage: First things first, preheat your oven to a cozy 325°F (165°C). This gentle heat will warm the ham through without drying it out, giving the glaze plenty of time to work its magic. Take your ham out of the fridge and let it sit on the counter while the oven heats up. Chef Hack: Starting with a ham that’s not ice-cold helps it heat more evenly from the get-go.
- Score & Stud (The Fun Part!): If your ham isn’t pre-sliced, it’s time to get artistic! Using a sharp knife, score the surface fat in a diamond pattern. Don’t cut too deep—just about ¼ inch into the fat is perfect. This does two things: it allows the glaze to penetrate and creates those lovely little pockets for our cloves. Now, channel your inner “Clove Captain” and press a whole clove into the center of each diamond. It’s oddly therapeutic, I promise.
- Concoct the Liquid Gold (A.K.A. The Glaze): In a medium saucepan over low heat, combine the honey, unsalted butter, and dark corn syrup. We’re going low and slow here to gently melt everything together into a smooth, unified mixture. Stir it frequently with a wooden spoon or whisk. Chef Hack: Resist the urge to crank up the heat! Burnt honey is bitter, and we want pure, sweet, buttery bliss. Once it’s smooth and combined, take it off the heat.
- The Bake & Baste Marathon: Place your beautifully studded ham, cut-side down, in a roasting pan. I like to line my pan with foil for easier cleanup—because who wants to scrub after a feast? Now, using a pastry brush, give that ham a generous first coat of your liquid gold glaze. Get it into all the nooks and crannies! Pop it into the preheated oven, uncovered. Now, here is the single most important step for a truly spectacular ham: basting. Set a timer for every 10-15 minutes. When it goes off, open the oven, and brush the ham with more glaze and the delicious juices collecting in the bottom of the pan. This repeated layering is what builds that deep, sticky, flavor-packed crust. Bake for about 1 hour and 15 minutes total, or until the internal temperature reaches 140°F (60°C).
- The Grand Finale (The Optional Blowtorch Moment): Once your ham is gorgeously bronzed and heated through, you can call it done. But if you’re after that next-level, extra-sticky, slightly crackly crust, we’re going to broil. Remove the ham from the oven and turn your broiler to high. WATCH IT LIKE A HAWK. Place the ham back in the oven, about 6 inches from the broiler element, for just 2-3 minutes. You’ll see the glaze bubble and darken into a perfect, glossy finish. This step is fast and furious, so don’t walk away!
- The Torturous (But Essential) Rest: Pull that masterpiece out of the oven and transfer it to a cutting board. Now, you must let it rest for a full 10 minutes. I know, it’s torture with all those amazing smells filling your kitchen, but this allows the juices to redistribute throughout the ham, ensuring every single slice is moist and tender.
Serving Up the Sunshine
Presentation is part of the fun! I love placing my glazed ham on a large, rustic wooden board or a beautiful vintage platter. Scatter some fresh herbs like rosemary sprigs and thyme around the base for a pop of color and fragrance. If you really want to go for the “wow” factor, arrange some fresh orange slices or dried apple rings around it. When you carve, use a sharp, long knife to follow the natural lines of the ham, and watch as those perfect, glazed slices fall away. It’s a moment of pure culinary pride—savor it!
Ride Your Own Flavor Wave: Recipe Variations
The beauty of this base recipe is that it’s a canvas for your creativity! Here are a few of my favorite twists:
- Bourbon & Brown Sugar: Replace the corn syrup with ¼ cup of bourbon and add ½ cup of brown sugar to the glaze for a deep, caramelized, grown-up flavor.
- Citrus Zing: Add the zest and juice of one orange to the glaze mixture. The bright acidity cuts through the richness beautifully.
- Spicy & Sweet: Add 1-2 teaspoons of red pepper flakes or a few generous cracks of black pepper to the glaze for a sweet heat situation.
- Maple-Dijon Twist: Swap the honey for pure maple syrup and whisk in 2 tablespoons of whole-grain Dijon mustard for a classic flavor combo.
- Pineapple Classic: For a retro vibe, use pineapple juice instead of corn syrup and attach pineapple rings to the ham with toothpicks before glazing.
Isla’s Chef Notes & Kitchen Confessions
This recipe has been my go-to for years, and it’s evolved in tiny ways. I used to be terrified of broiling it at the end, convinced I’d ruin all my hard work. Then one year, I got brave, and oh my goodness, the textural difference it makes is everything! It’s now a non-negotiable step in my kitchen.
Another confession: I am the queen of “grocery store swaps.” If my local store is out of whole cloves, I’ll use ground cloves very, very sparingly (we’re talking a teaspoon, max) mixed right into the glaze. It’s not quite the same, but it gets the job done in a pinch. The goal is to get a delicious dinner on the table, not to achieve culinary perfection. And let me tell you, one time I was so busy chatting with my friends in the kitchen that I completely forgot a baste or two. You know what? The ham was still absolutely fantastic. This recipe is forgiving. It’s made for real life, with all its beautiful distractions.
Your Honey Glazed Ham Questions, Answered!
I’ve gotten so many wonderful questions about this ham over the years! Here are the most common ones to help you feel extra confident.
Q: My ham is spiral-sliced. Do I still need to score it and add cloves?
A: Great question! If it’s spiral-sliced, you can skip the scoring. As for the cloves, you can still add them! Just tuck them into the fatty cap on top or in between some of the slices where they’ll be visible and infuse their flavor. It’s a bit more freeform, but it works beautifully.
Q: Help! My glaze is burning in the pan during baking.
A: No worries! This can happen. The sugars in the glaze can caramelize and then burn on the hot pan. The easy fix is to add about a cup of water, apple juice, or even pineapple juice to the bottom of the roasting pan at the very beginning. This creates steam, prevents burning, and makes for an amazing base for pan gravy later!
Q: Can I make the glaze ahead of time?
A: Absolutely! You can make the glaze up to 3 days in advance. Just store it in an airtight container in the fridge. When you’re ready to use it, gently reheat it on the stove or in the microwave until it’s liquid and easy to brush on.
Q: How do I store leftovers, and what can I do with them?
A> Leftover ham is a gift! Let it cool completely, then store it in an airtight container in the fridge for up to 5 days. The possibilities are endless: dice it for omelets and fried rice, slice it for incredible sandwiches, chunk it up for a hearty soup or split pea soup, or toss it into a cheesy potato casserole. It’s the gift that keeps on giving!
Nutritional Information (Per Serving, Approximate)
Servings: 15 | Serving Size: 1 slice (approx. 4oz)
Calories: 410 | Protein: 27g | Fat: 18g | Carbohydrates: 30g | Sugar: 27g | Sodium: 920mg
Please note: This is an estimate based on the specific ingredients used. Values can vary depending on your ham and exact measurements.