Your New Go-To Weeknight Power Meal Is Here!
Hey, friend! Isla here, from my kitchen to yours. Let’s talk about that magical, mythical creature we’re all chasing on a busy Tuesday night: the dinner that’s fast, filling, freakishly delicious, and dirties exactly one pan. Sounds like a dream, right? I’m here to tell you it’s not only possible, it’s about to become your reality.
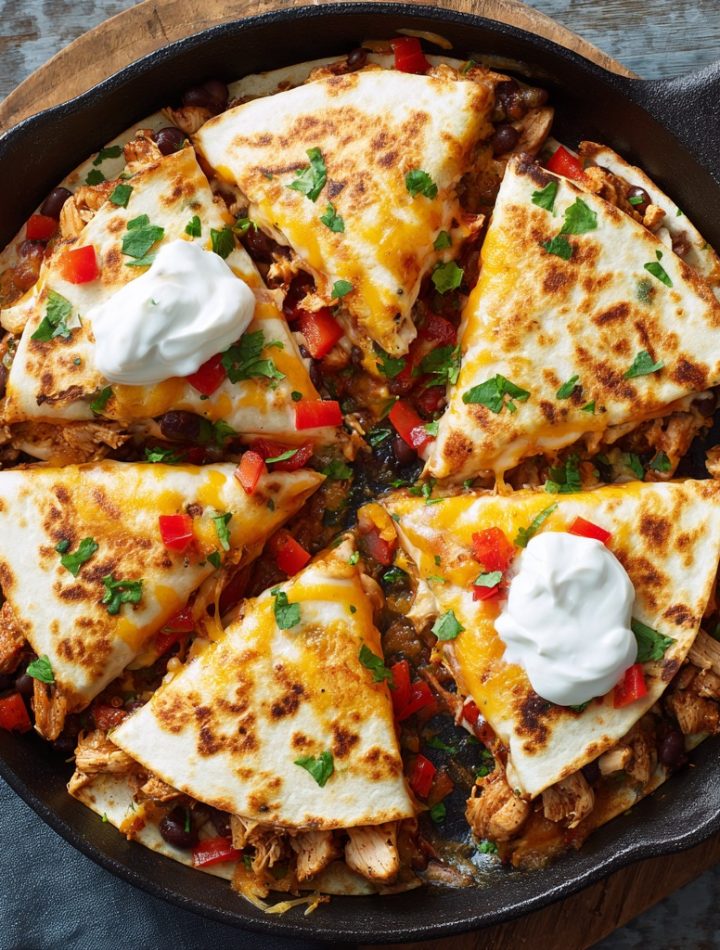
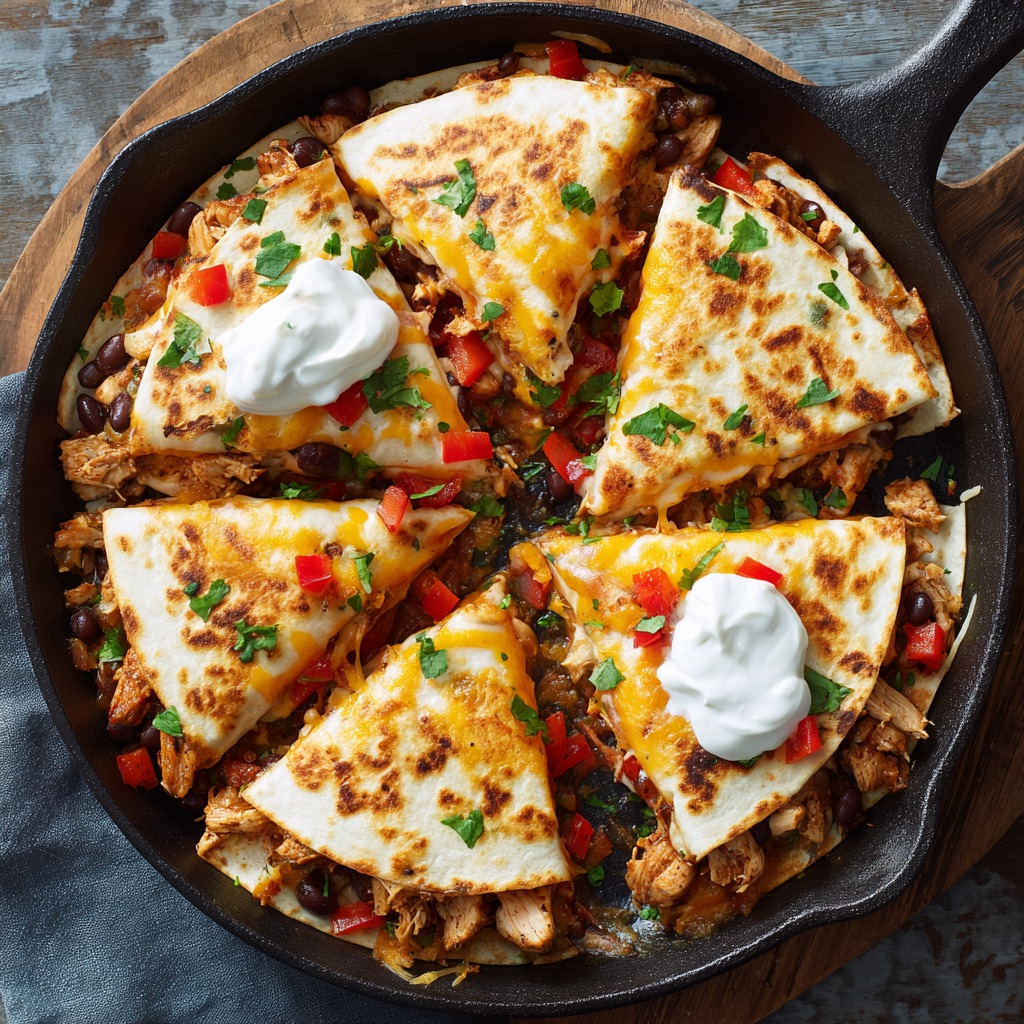
This isn’t just another quesadilla. Oh no. This is my High-Protein Quesadilla Skillet – a brilliant, no-flip, crispy-edged masterpiece that cooks in a single skillet and gets sliced into wedges like a pizza. It’s loaded with lean chicken and black beans, draped in melty cheese, and delivers a whopping 40 grams of protein per serving. It’s the love child of a classic quesadilla and a super-satisfying power bowl, and it’s here to solve your “what’s for dinner?” dilemmas for good.
I created this recipe for those nights when you’re short on time but not willing to compromise on flavor or feeling good after you eat. It’s for the post-workout hunger, the family feeding frenzy, or the cozy night in where you just want something cheesy and incredible without a sink full of dishes. So, tie on your apron (or don’t, I’m not the boss of you), grab your favorite skillet, and let’s make a meal that’s going to earn a permanent spot in your recipe rotation.
The Night That Inspired This Cheesy Masterpiece
This recipe was born from pure, unadulterated hunger and a slight aversion to doing dishes. Picture it: a rainy Wednesday, me and my best friend Maya after a long hike. We were ravenous, damp, and staring into a fridge that seemed to contain only “potential” and a leftover rotisserie chicken. The classic “quesadilla negotiation” began – who flips? Whose cheese melts faster? Whose tortilla tragically rips, spilling filling everywhere?
Then, I had a lightbulb moment fueled by hanger. What if we just… didn’t flip? What if we built the whole glorious thing in my trusty cast iron and let the oven do the work, creating one giant, crisp-bottomed, melty-topped quesadilla pie? We layered everything in, popped it in the oven, and spent those precious baking minutes chatting instead of hovering over the stove. When we pulled it out, golden and bubbling, and sliced it into wedges, we did a full-on happy dance. It was a triumph of laziness-turned-genius, and the one-pan, high-protein skillet quesadilla was officially baptized into my kitchen canon. Now, it’s your turn to experience that magic.
Print
High-Protein Quesadilla Skillets : One-Pan, Cheesy, and Packed with Power
- Total Time: 25 minutes
- Yield: 4 servings 1x
Description
This High-Protein Quesadilla Skillet is a smarter, skillet-style take on a classic favorite. It’s got all the cheesy, crispy edges of a quesadilla—without the flipping—plus a boost from lean chicken and fiber-rich beans. Cooked in one pan, sliced into wedges, and loaded with 40g+ of protein per serving.
Ingredients
2 cups cooked, shredded chicken breast
1 cup black beans, drained and rinsed
1 cup shredded Mexican blend or cheddar cheese
2 medium flour tortillas (high-protein if available)
1/2 cup diced bell pepper or onion
1/2 teaspoon cumin
Salt and pepper to taste
Olive oil or cooking spray for the pan
Optional toppings: salsa, Greek yogurt, avocado
Instructions
Preheat Skillet: Heat a large oven-safe skillet over medium. Lightly grease with oil or spray.
Layer First Tortilla: Place one tortilla flat in the skillet.
Add Filling: Layer with chicken, beans, cheese, bell pepper, cumin, and seasonings.
Top & Bake: Place the second tortilla on top. Press gently. Transfer skillet to oven and bake at 375°F (190°C) for 10–12 minutes, or until golden and crisp.
Slice & Serve: Let cool slightly, then slice into wedges. Serve with toppings.
- Prep Time: 10 mins
- Cook Time: 15 mins
- Category: Dinner
What You’ll Need (And Why!)
Here’s the squad. Every player has a purpose, and I’ve got some easy swaps if you need them. This is about flexibility, not fussiness.
- 2 cups cooked, shredded chicken breast: The protein powerhouse! I use leftover rotisserie chicken for zero-effort magic, or you can quickly poach or bake two breasts. Chef’s Swap: Shredded turkey, ground turkey or beef, or even rinsed canned chickpeas for a plant-based punch.
- 1 cup black beans, drained and rinsed: For fiber, texture, and that lovely, earthy flavor. Rinsing them gets rid of the extra sodium and that starchy can liquid. Chef’s Tip: Pinto or kidney beans work great too!
- 1 cup shredded Mexican blend or cheddar cheese: The glue that holds our dreams together! A pre-shredded blend is perfect for meltiness. For a sharper kick, grate your own pepper jack or sharp cheddar. Insight: The fat in the cheese helps create that gorgeous, crispy edge on the tortilla – it’s flavor science!
- 2 medium flour tortillas (high-protein if available): The foundation. Using high-protein or whole wheat tortillas bumps the nutrition even more. The key is they need to fit snugly in your skillet. Chef’s Hack: No oven-safe skillet? Use a regular large tortilla, fold it over the filling in the pan, and cook it like a giant half-moon, flipping once. Still delicious!
- 1/2 cup diced bell pepper or onion: A little freshness and crunch. I love the color of red or orange bell peppers, but a diced onion brings sweet, savory depth. Use what you’ve got!
- 1/2 teaspoon cumin: Just a hint. It whispers “taco night” and makes the whole kitchen smell amazing. Smoked paprika is a fantastic cousin if cumin’s not your thing.
- Salt and pepper to taste: Don’t sleep on these! Season your chicken and beans well as you layer. Taste as you go.
- Olive oil or cooking spray for the pan: Just a slick to ensure a golden, non-stick release. Avocado oil works beautifully too.
- Optional toppings: salsa, Greek yogurt, avocado: The finishing flair! Greek yogurt is my go-to tangy, high-protein sub for sour cream. Chunky salsa, creamy avocado slices, fresh cilantro, or a squeeze of lime juice make it a party.
Let’s Build Our Flavor Skillet! (Step-by-Step)
Follow these steps, and you’re golden—literally. I’m walking you through every bit with my favorite kitchen hacks.
- Prep and Preheat – Get Set! First, crank your oven to 375°F (190°C). This is our secret weapon for even cooking and crisping. While it heats, grab all your ingredients and have them ready to go (this is called mise en place and it makes you feel like a TV chef, trust me). Shred that chicken, dice those peppers, drain those beans.
- Heat the Skillet – The Foundation. Place your large, oven-safe skillet (cast iron is a superstar here, but any oven-safe pan works) over medium heat on the stovetop. Let it get warm for a minute, then add a drizzle of olive oil or a spritz of cooking spray. Swirl it around. We’re creating a non-stick surface for maximum crisp.
- Layer the First Tortilla – The Base Camp. Place one tortilla flat in the skillet. It should cover the bottom. If it ruffles up the sides a bit, that’s perfect—it’ll hold the filling. Let it toast in the pan for just 30 seconds. You’ll smell a lovely toasty aroma. This pre-toasting prevents sogginess!
- Build the Filling – The Fun Part! Now, layer with confidence! Sprinkle half of your cheese directly onto the tortilla—this first cheesy layer acts as a moisture barrier. Then, evenly distribute the shredded chicken and black beans. Scatter the diced peppers or onions over the top. Dust everything with the cumin, salt, and pepper. Finally, blanket it all with the remaining cheese. The cheese-on-top acts as the delicious glue for the top tortilla.
- Top, Press, and Bake – Hands-Off Magic. Carefully place the second tortilla on top. Give it a gentle but firm press with your hands or the bottom of a smaller pan. This helps everything meld. Now, here’s the easy part: using oven mitts, transfer the entire skillet to your preheated oven. Bake for 10-12 minutes, until the top is golden, the edges are crisp, and you see cheese eagerly bubbling out the sides.
- The Grand Finale – Slice and Serve! Oven mitts on again! Carefully remove the skillet (the handle will be VERY hot—I sometimes put a bright oven mitt over it as a reminder). Let it cool for 2-3 minutes—this lets the cheese set slightly so it doesn’t all gush out. Then, use a pizza cutter or a sharp knife to slice it into 4-6 wedges right in the pan. Serve directly from the skillet for ultimate cozy vibes (and minimal cleanup!).
How to Serve It Up in Style
This skillet is a showstopper right in the pan, so I love placing it in the middle of the table and letting everyone dig in. Slide the wedges onto plates and let the topping bar begin! I set out little bowls of chunky salsa, a dollop of Greek yogurt (or sour cream), sliced avocado or guacamole, fresh chopped cilantro, pickled jalapeños for heat, and lime wedges for a bright squeeze. For a full meal, a simple side of mixed greens tossed with lime juice or a quick corn and tomato salad is perfect. It’s communal, fun, and utterly satisfying.
Mix It Up! 5 Delicious Twists
Once you master the basic blueprint, the world is your cheesy oyster. Here are my favorite riffs:
- Buffalo Chicken: Toss shredded chicken with 1/3 cup of buffalo sauce before layering. Use a blue cheese or ranch dressing for dipping instead of salsa.
- Southwest Veggie: Ditch the chicken for a mix of corn, sautéed zucchini, and mushrooms. Add a pinch of chili powder.
- Breakfast-for-Dinner: Use scrambled eggs or crumbled cooked breakfast sausage as the protein. Add a handful of spinach and swap in pepper jack cheese.
- Taco Tuesday Special: Season 1 lb of cooked ground beef or turkey with 1 tbsp of your favorite taco seasoning. Use that as your protein layer.
- Everything “Pizza-dilla”: Use Italian seasoning, swap beans for sliced pepperoni or cooked Italian sausage, and use mozzarella/Parmesan cheese. Serve with marinara for dipping.
Isla’s Kitchen Notes & Stories
This recipe has become my culinary security blanket. I’ve made it while helping my nephew with homework (multitasking queen!), for last-minute guests, and more times than I can count for myself on deadline days. It’s evolved, too—I started with just chicken and cheese, but adding the beans was a game-changer for fiber and heartiness.
One funny fail turned triumph: I once was out of regular cheese and only had pre-sliced provolone. In a daring move, I used it anyway. The result was a uniquely stretchy, deliciously different “quesadilla” that had us laughing as we tried to cut the cheese strings. The moral? Use what you love and what you have. This recipe is a framework, not a formula. It’s supposed to make your life easier and tastier, not add stress. So have fun with it, and don’t forget the happy dance when you pull that golden skillet from the oven. You earned it.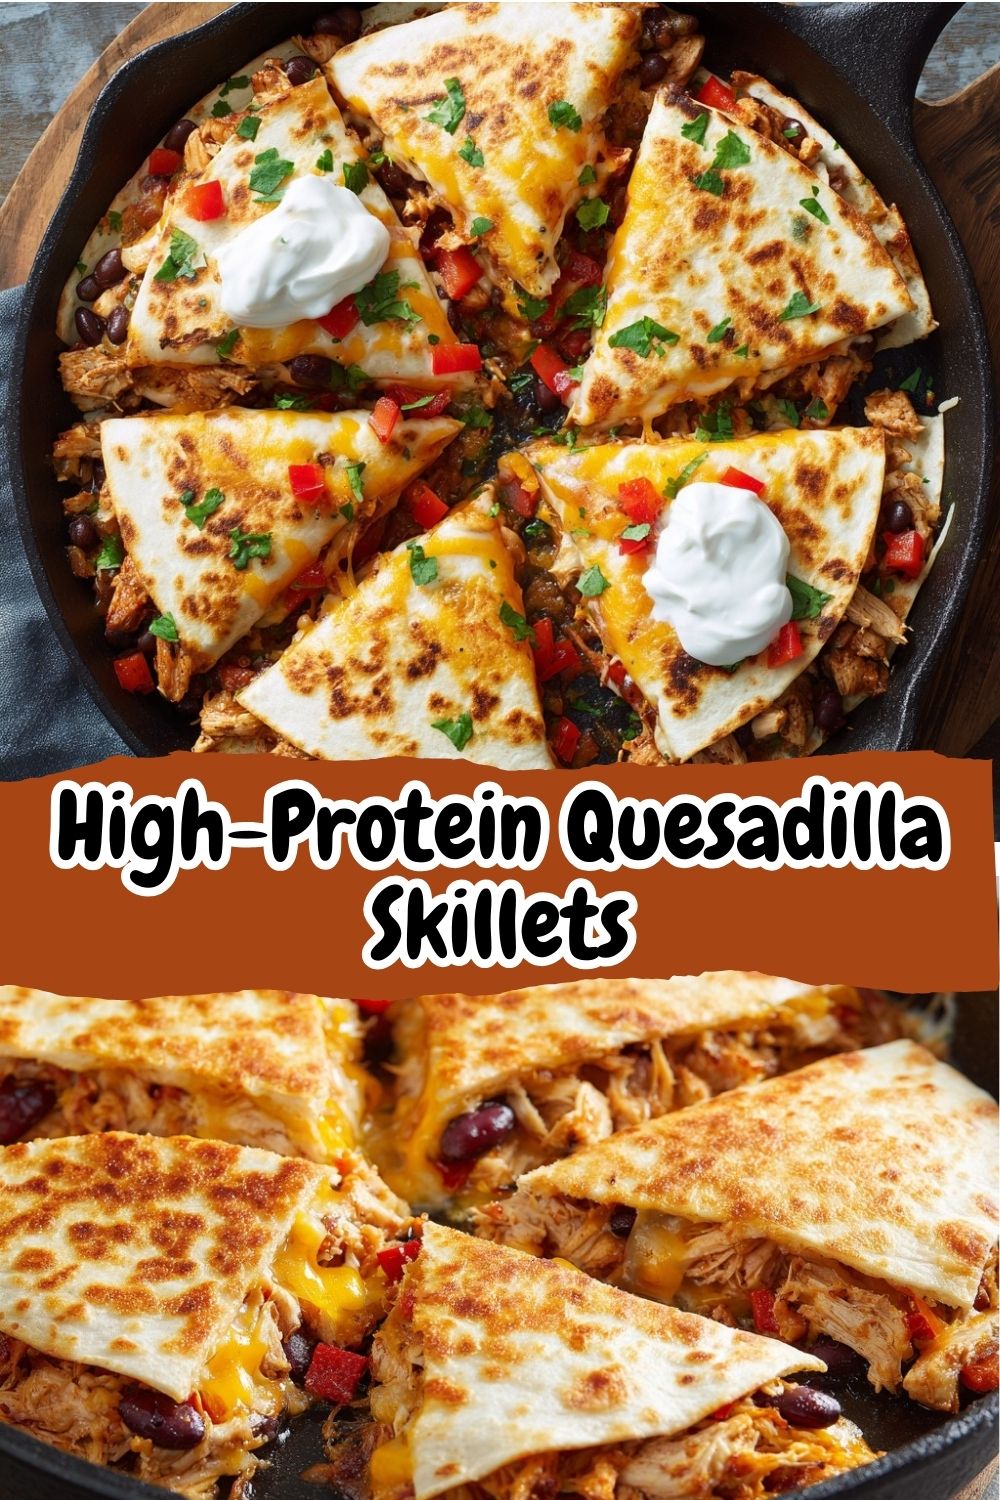
Your Questions, Answered!
Q: My skillet isn’t oven-safe. What do I do?
A: No problem! Simply cook it entirely on the stovetop. After adding the top tortilla and pressing, cover the skillet with a lid (or a large baking sheet) to help melt the top cheese. Cook over medium-low heat for 5-7 minutes. Then, carefully flip the whole thing (this is a two-spatula maneuver!) and cook for another 3-5 minutes until the second side is crisp. It’s a bit more hands-on, but just as tasty.
Q: Can I make this ahead of time?
A: You can prep the components! Shred the chicken, drain the beans, dice the veggies, and shred the cheese. Store them separately in the fridge. When ready to eat, assembly and cooking only takes 15 minutes. I don’t recommend assembling and baking it ahead, as the tortilla can get soggy.
Q: Why is my quesadilla skillet soggy in the middle?
A: Two likely culprits: 1) Too much wet filling: Make sure your beans are well-drained/rinsed and your chicken isn’t overly saucy or wet. Pat things dry if needed. 2) Not enough heat: Ensure your skillet is properly preheated before adding the first tortilla, and don’t skimp on the oven time—the top should be visibly golden and crisp.
Q: Can I freeze leftovers?
A: Absolutely! Cool the wedges completely, then wrap them individually in foil or place in a single layer in a freezer bag. Reheat in a toaster oven or air fryer for best crispiness, or in a regular oven at 375°F until hot through, about 10-15 minutes.
Nutritional Info (Per Serving – Serves 2)
Note: This is an estimate for the base recipe with flour tortillas, calculated using online nutrition software. Values will vary with specific ingredients and toppings.
- Calories: ~450
- Protein: ~42g
- Carbohydrates: ~30g
- Fat: ~20g
- Fiber: 6g
Prep Time: 10 min | Cook Time: 15 min | Total Time: 25 min