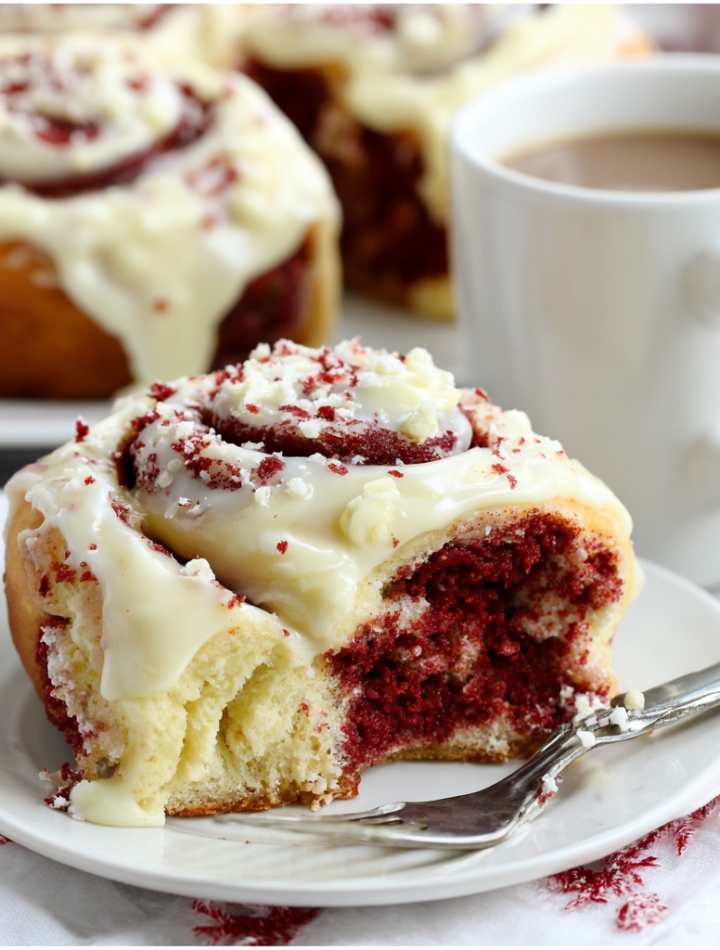
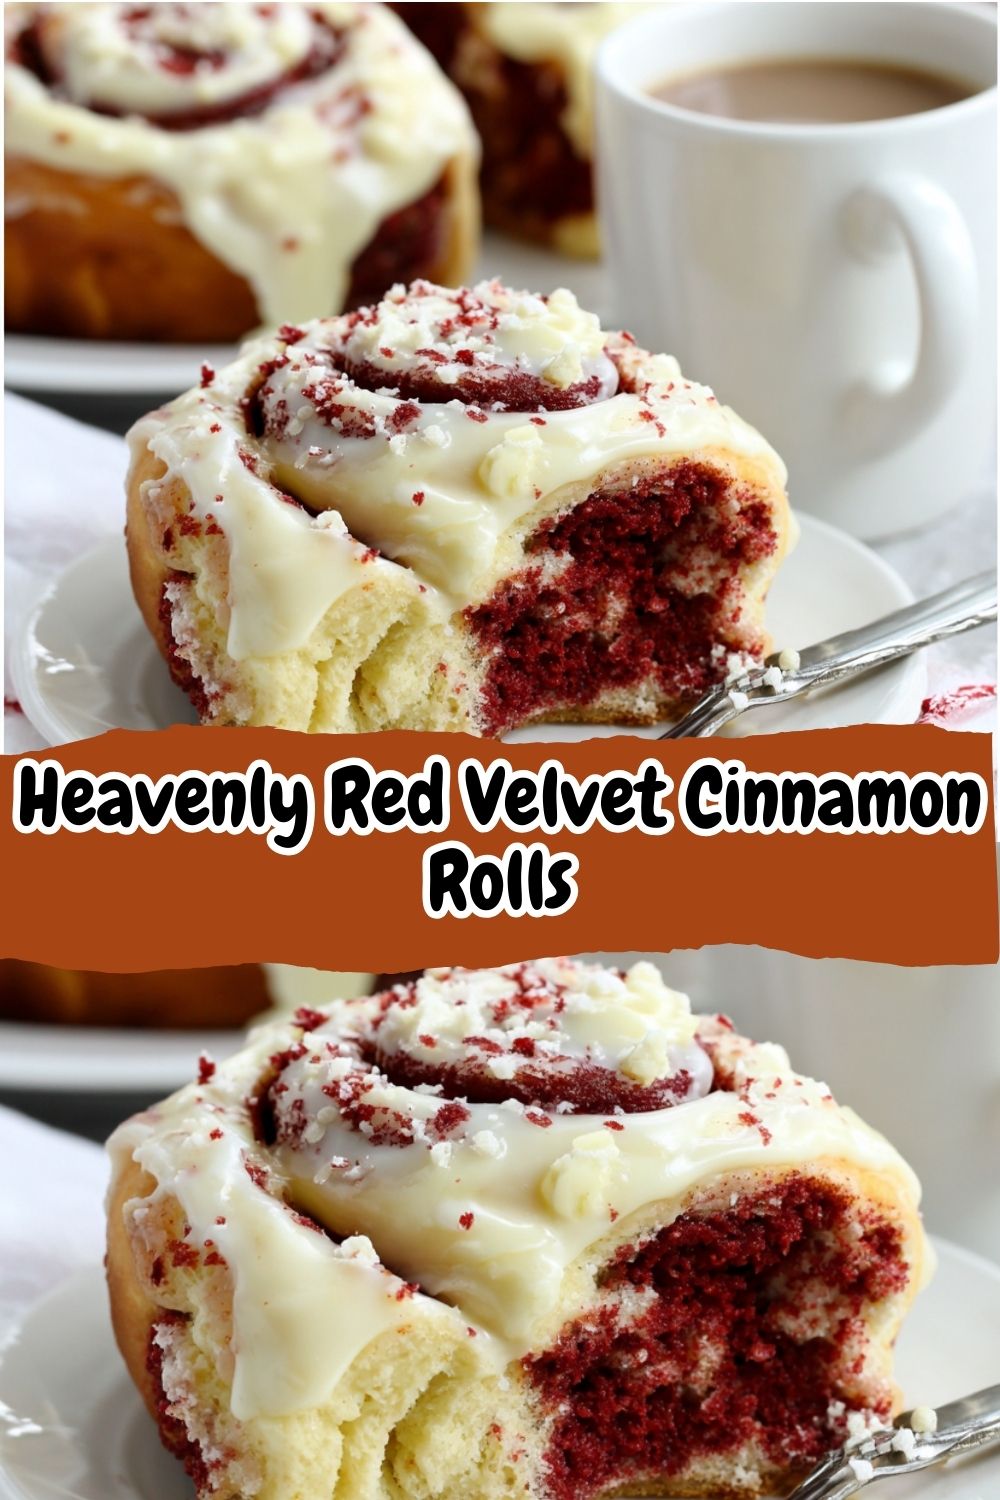
Heavenly Red Velvet Cinnamon Rolls: Your New Brunch Obsession
Hey there, friend! Isla here, from BiteTide. Let’s talk about those mornings that deserve a little more sparkle. You know the ones—a lazy Sunday, a birthday breakfast in bed, a holiday where the only thing on the agenda is eating, laughing, and maybe going back for seconds. On days like that, basic just doesn’t cut it. You need something that feels like a celebration in every single bite. And that, my friend, is exactly why we’re making these Heavenly Red Velvet Cinnamon Rolls today.
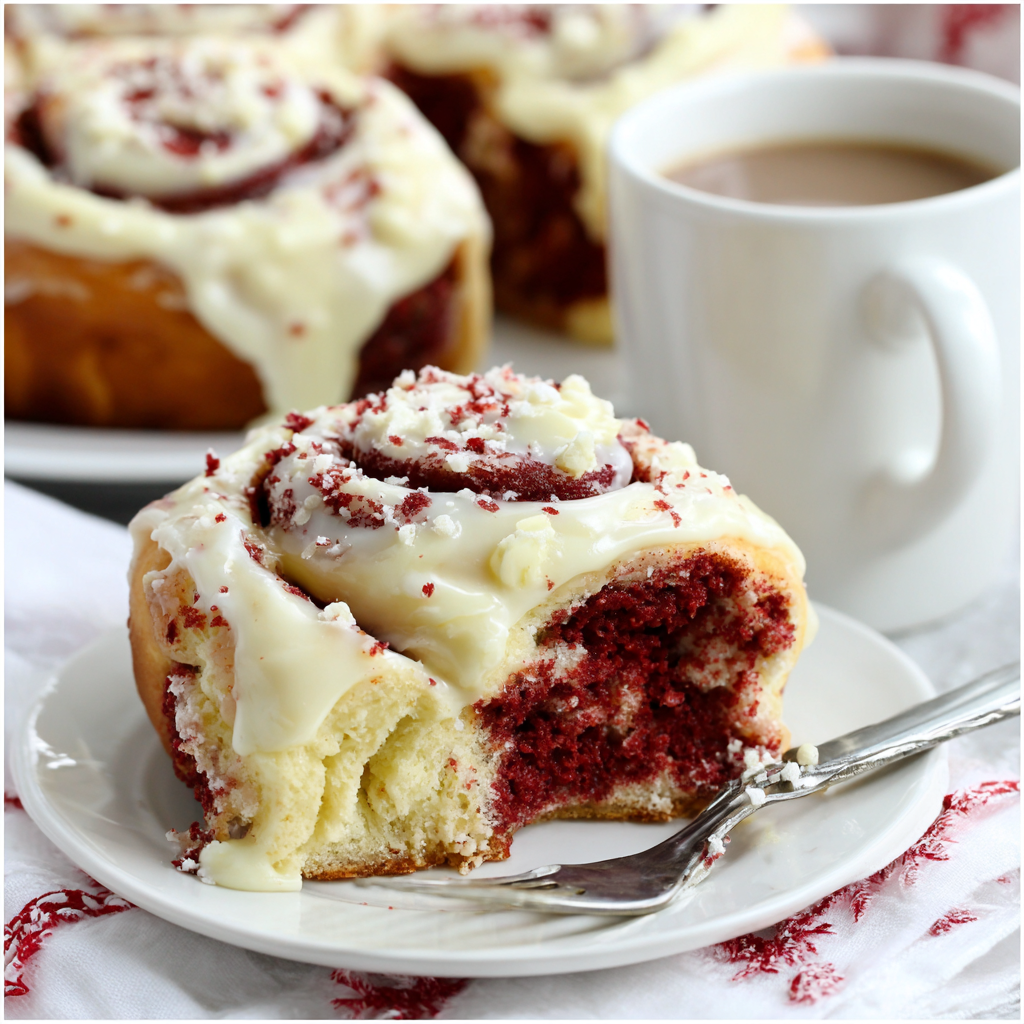
Imagine the softest, most pillowy cinnamon roll you’ve ever had. Now, imagine it got a gorgeous, cocoa-infused makeover and swirled itself into a stunning, deep red masterpiece. That’s what we’re creating. These aren’t just any cinnamon rolls; they’re a decadent twist on a classic, dripping with a tangy, sweet cream cheese glaze that perfectly balances the rich, buttery, cinnamony filling. They taste like they took all day, but I’ve packed this recipe with all my best kitchen hacks to make it totally approachable. So, tie on your favorite apron, put on some fun music, and let’s bake up some serious joy together. Trust me, your kitchen is about to smell absolutely incredible.
A Dash of Nostalgia: Where This Recipe Really Came From
This recipe has a little piece of my heart baked right into it. It takes me back to my grandma’s cozy, flour-dusted kitchen. Every Sunday after church, the whole family would pile around her table for a feast. But my favorite part was always Saturday night, when I’d get to help her make the cinnamon rolls for the next morning.
She was a wizard with dough, her hands moving with a gentle confidence I so admired. One year, for my birthday, which is right near Valentine’s Day, I begged her to make them “pink.” With a twinkle in her eye, she not only added a whole lot of red food coloring but also a secret spoonful of cocoa powder to her usual dough. The result was magical—a beautiful, blushing roll that tasted even more special than it looked. That memory of us, laughing and covered in red-streaked flour, is the soul of this recipe. It’s a reminder that the best cooking is about creativity, love, and not being afraid to make a beautiful mess.
Print
Heavenly Red Velvet Cinnamon Rolls
- Total Time: ~2 hrs 15 mins
- Yield: 12 servings 1x
Description
Soft, rich, and drenched in cream cheese glaze — these Red Velvet Cinnamon Rolls are a decadent twist on a classic breakfast treat. With their signature cocoa-kissed dough and swirls of buttery cinnamon sugar, each bite melts in your mouth. Perfect for brunches, birthdays, holidays — or whenever you’re craving something a little extra.
Ingredients
For the Dough:
3¾ cups all-purpose flour
¼ cup unsweetened cocoa powder
¼ cup granulated sugar
1 packet (2¼ tsp) active dry yeast
¾ cup warm milk
¼ cup unsalted butter, melted
2 eggs
1 tsp vanilla extract
Red gel food coloring
For the Filling:
½ cup brown sugar
2 tsp cinnamon
¼ cup butter, softened
For the Cream Cheese Glaze:
4 oz cream cheese, softened
2 tbsp butter
1 cup powdered sugar
1 tsp vanilla
2–3 tbsp milk (to thin)
Instructions
In a large bowl, mix flour, cocoa, sugar, and yeast.
Add warm milk, melted butter, eggs, vanilla, and red food coloring. Mix and knead until a smooth dough forms.
Let rise in a greased bowl for 1 hour or until doubled.
Roll out dough into a rectangle. Spread with softened butter, sprinkle with brown sugar and cinnamon.
Roll up tightly, slice into rolls, and place in a greased baking dish.
Let rise 30–45 minutes. Bake at 350°F (175°C) for 20–25 minutes.
Mix glaze ingredients until smooth and drizzle over warm rolls.
- Prep Time: 20 mins
- Cook Time: 25 mins
Nutrition
- Calories: 350
- Sugar: 22g
- Fat: 14g
- Carbohydrates: 50g
- Protein: 6g
Gathering Your Flavor Wave: The Ingredients
Don’t let the list intimidate you! We’re using simple, beautiful ingredients that work together to create something spectacular. Here’s everything you’ll need, with a few of my chef-y insights to guide you.
For the Dough:
- 3¾ cups all-purpose flour: The foundation of our soft, pillowy dough. I like to fluff my flour with a spoon before measuring to avoid packing it down, which leads to a drier dough.
- ¼ cup unsweetened cocoa powder: This is our secret weapon! It gives the red velvet its signature subtle chocolate flavor and deep, rich color. Use natural, not Dutch-process, for the best result.
- ¼ cup granulated sugar: Just enough to sweeten the dough and give the yeast a little treat to get it going.
- 1 packet (2¼ tsp) active dry yeast: The magic maker that makes our dough rise and become beautifully airy. Make sure your yeast is fresh for the best rise!
- ¾ cup warm milk: Whole milk will give you the richest, softest texture, but 2% works great too. Pro Tip: “Warm” means between 105-115°F (40-46°C)—warm to the touch, not hot. Too hot will kill the yeast!
- ¼ cup unsalted butter, melted: For that irresistible richness and tender crumb. Using unsalted lets us control the salt level.
- 2 eggs: They add structure, richness, and that beautiful golden-yellow color to the dough. Bring them to room temperature for easier mixing.
- 1 tsp vanilla extract: The flavor backbone. Always use pure vanilla extract for the best taste.
- Red gel food coloring: I highly recommend gel food coloring over liquid. It’s more concentrated, so you need less, and it won’t throw off the liquid balance in your dough. You’ll need about 1-2 teaspoons for a vibrant red.
For the Filling:
- ½ cup brown sugar: I prefer dark brown sugar for its deeper molasses flavor, but light brown works perfectly too.
- 2 tsp cinnamon: The classic, warm spice we all love. Feel free to add a pinch of nutmeg or cardamom for an extra flavor kick!
- ¼ cup butter, softened: Softened is key here! It should be spreadable, not melted. This makes it easy to create a smooth layer over the dough.
For the Cream Cheese Glaze:
- 4 oz cream cheese, softened: Again, softening is crucial for a lump-free glaze. Full-fat will give you the creamiest, most decadent result.
- 2 tbsp butter, softened: Adds a lovely silkiness and buttery flavor to the glaze.
- 1 cup powdered sugar: Sift it! This is the one step I never skip. It prevents any little lumps in your perfectly smooth glaze.
- 1 tsp vanilla extract: Because vanilla makes everything better.
- 2–3 tbsp milk: Whole milk or even a splash of heavy cream will thin the glaze to your desired drizzling consistency.
Let’s Get Baking: The Step-by-Step Guide
Ready to create some magic? Follow these steps, and you’ll be a cinnamon roll pro in no time. I’ve sprinkled in all my favorite tips to ensure your success!
- Wake Up the Yeast: In a small bowl or liquid measuring cup, combine your warm milk and a pinch of the granulated sugar. Sprinkle the yeast over the top, give it a gentle stir, and let it sit for about 5-10 minutes. You’ll know it’s active when it becomes foamy and fragrant. This is called “proofing” and it’s your first sign that you’re on the right track!
- Mix the Dry Goods: In the bowl of a stand mixer fitted with a dough hook (or a large mixing bowl if you’re kneading by hand), whisk together the flour, cocoa powder, sugar, and salt. This ensures everything is evenly distributed so every bite is perfect.
- Create the Dough: Pour the foamy yeast mixture, melted butter, eggs, vanilla, and your red gel food coloring into the dry ingredients. Mix on low speed until a shaggy dough forms. Chef’s Hack: Start with a lower amount of food coloring; you can always add more once the dough comes together to get your perfect shade of red!
- Knead to Perfection: Increase the mixer speed to medium and knead for 5-7 minutes, until the dough is smooth, elastic, and pulls away from the sides of the bowl. If it’s too sticky, add a tablespoon of flour at a time. If kneading by hand, turn the dough onto a floured surface and knead for 8-10 minutes. It’s a great arm workout!
- First Rise: Place your beautiful red dough ball into a lightly greased bowl, turning it once to coat. Cover the bowl with plastic wrap or a clean kitchen towel and let it rise in a warm, draft-free place for 1 hour, or until doubled in size. My favorite trick? I turn my oven on to the “warm” setting for one minute, then turn it OFF and place the bowl inside. It creates the perfect cozy environment for the yeast to work.
- Roll and Fill: Once doubled, punch the dough down to release the air. Turn it out onto a lightly floured surface and roll it into a roughly 10×15 inch rectangle. Spread the softened butter evenly over the entire surface, leaving a small border around the edges. In a small bowl, mix the brown sugar and cinnamon, then sprinkle it evenly over the butter. Gently press it down so it adheres.
- The Tight Roll: This is the most important step for those beautiful swirls! Starting from one long side, tightly roll the dough into a log, pinching the seam closed at the end. Make sure the roll is seam-side down.
- Slice with Ease: Using a sharp knife, serrated knife, or even a piece of unflavored dental floss, cut the log into 12 equal pieces. Pro Tip: For clean cuts that won’t squish the roll, use dental floss! Slide a piece under the roll, cross the ends over the top, and pull. It slices through perfectly every time.
- Second Rise: Arrange your swirls in a greased 9×13 inch baking dish. Cover them again and let them rise for 30-45 minutes, until they’re puffy and touching each other. They won’t quite double, but they will look noticeably fuller.
- Bake to Glory: Preheat your oven to 350°F (175°C). Bake the rolls for 20-25 minutes, until the tops are set and they sound slightly hollow when tapped. A toothpick inserted in the center should come out clean. Your kitchen will smell like a dream!
- Glaze and Devour: While the rolls bake, make the glaze. In a medium bowl, beat the softened cream cheese and butter until smooth. Sift in the powdered sugar, add the vanilla, and beat again. Add milk, one tablespoon at a time, until you reach a thick but pourable consistency. Let the rolls cool in the pan for about 10 minutes before drowning them in that glorious cream cheese glaze. Serve them warm and watch everyone’s eyes light up.
How to Serve These Beautiful Buns
Presentation is part of the fun! I love serving these right from the baking dish for a cozy, family-style vibe. For a special touch, you can place a warm roll on a individual plate and drizzle extra glaze over the top and let it pool around the bottom. A light dusting of extra cinnamon or even a few red sprinkles makes them perfect for a holiday or birthday. They are best served warm, alongside a hot cup of coffee, a cold glass of milk, and a side of good conversation.
Ride Your Own Flavor Wave: Fun Variations
Once you master the base recipe, the world is your oyster! Here are a few of my favorite twists:
- White Chocolate Drizzle: Swap the cream cheese glaze for a simple glaze made with melted white chocolate and a splash of cream. It’s a next-level delicious pairing with the red velvet.
- Orange Zest Infusion: Add the zest of one orange to the cream cheese glaze for a bright, citrusy kick that cuts through the sweetness beautifully.
- Nutty Swirl: Sprinkle a half cup of finely chopped pecans or walnuts over the cinnamon-sugar filling for a wonderful crunch.
- Mini Rolls: Divide the dough in half and create two smaller logs. Slice into 1-inch pieces for adorable, bite-sized rolls perfect for a party platter.
- Vegan-Friendly: Use plant-based milk, vegan butter, a flax egg (1 tbsp ground flax + 3 tbsp water per egg), and vegan cream cheese. The dough might be slightly less rich, but it will still be delicious!
Isla’s Chef Notes & Kitchen Stories
This recipe has evolved so much since that first pink batch with my grandma. I’ve made it in tiny apartment kitchens, for huge holiday crowds, and even once at a friend’s house where we realized too late we had no rolling pin—a wine bottle works in a serious pinch, I’ll have you know!
The biggest lesson I’ve learned? Don’t stress about the rise. Yeast can sense fear, I swear! Just find a warm spot and let it do its thing. Sometimes it takes an hour, sometimes a bit longer. The dough will tell you when it’s ready. And if your first attempt isn’t picture-perfect, I promise it will still taste incredible. The real goal is to have fun and create something with your own two hands. The happy dance you do when you pull these beauties out of the oven is the most important step of all.
Your Questions, Answered: FAQs & Troubleshooting
Q: Can I make these the night before?
A: Absolutely! You can do an overnight rise. After you place the sliced rolls in the baking dish, instead of letting them rise at room temperature, cover the dish tightly with plastic wrap and immediately place it in the refrigerator. The next morning, take them out, let them sit on the counter for about an hour to come to room temperature and finish rising, then bake as directed. Easy morning magic!
Q: My dough didn’t rise very much. What happened?
A: This usually points to one of three things: 1) Your yeast was old or expired. Always check the date! 2) Your liquid was too hot and killed the yeast. Remember, warm, not hot. 3) The environment wasn’t warm enough. Try my “warm oven” trick next time for a foolproof rise.
Q: Why did you use gel food coloring instead of liquid?
A: Liquid food coloring adds extra moisture to the dough, which can throw off the balance of wet and dry ingredients. You’d need a ton of it to get a vibrant red, which could make the dough sticky and require you to add more flour, leading to a tougher roll. Gel coloring is highly concentrated, so you use less and get a more vibrant color without altering the texture.
Q: My glaze is lumpy! How can I fix it?
A: The number one cause of lumpy glaze is not softening the cream cheese and butter enough. They need to be at room temperature. If you have lumps, you can try whisking vigorously, or for a perfectly smooth finish, press the glaze through a fine-mesh sieve. It works every time!
Nutritional Information*
*This is an estimate per roll, calculated using an online nutrition calculator. Values may vary based on specific ingredients used.
- Calories: ~350
- Fat: 14g
- Carbohydrates: 50g
- Sugar: 22g
- Protein: 6g