
Galentine’s Heart Sprinkle Strawberries: A No-Bake Treat for Your Favorite People
Hey there, flavor friend! Isla here, from my cozy kitchen to yours. Can we just take a moment to celebrate one of the best holidays of the year? No, not that one—I’m talking about Galentine’s Day! The one day that’s all about celebrating the incredible women in our lives, the friends who are our chosen family, the ones who’ve seen us at our best and still love us after we’ve stress-eaten a whole bag of chips. It’s a day for brunch, for laughter that makes your stomach hurt, and for treating your soulmates-without-the-romance to something sweet, colorful, and made with a whole lot of love.
And what better way to say “I love you, pal” than with a treat that’s as fun to make as it is to eat? Enter these Galentine’s Heart Sprinkle Strawberries. We’re talking plump, juicy strawberries, dipped in a wave of creamy pink or white chocolate, and then showered with the most adorable heart-shaped sprinkles you’ve ever seen. They’re the edible equivalent of a confetti cannon—pure, unapologetic joy.
The best part? This is a no-bake, zero-fuss situation. You don’t need to be a pastry chef to pull these off. In fact, some of the most fun I’ve had in the kitchen has been with a friend, a bowl of melted chocolate, and a case of the giggles. So, grab your bestie, put on a killer playlist, and let’s create a sweet little memory together. This is the kind of kitchen magic I live for at BiteTide—delicious, approachable, and guaranteed to spark a happy dance.
Print
“Galentine’s” Heart Sprinkle Strawberries : Sweet, Festive, and No-Bake Fun
- Total Time: 35 minutes
Description
These “Galentine’s” heart sprinkle strawberries are dipped in creamy pink or white chocolate and decked out with playful heart-shaped sprinkles. They’re the perfect DIY treat for sharing with your besties—sweet, colorful, and made to celebrate love in every form.
Ingredients
1 pint fresh strawberries, washed and thoroughly dried
1 cup pink, red, or white chocolate melts (or white chocolate + food coloring)
¼ cup heart-shaped sprinkles
Optional: edible glitter or drizzle for extra flair
Instructions
Line a baking sheet with parchment paper.
Melt chocolate melts in a microwave-safe bowl in 20-second intervals, stirring until smooth.
Dip each strawberry into the melted chocolate, letting excess drip off.
Immediately sprinkle with heart sprinkles before the chocolate sets.
Place strawberries on the baking sheet and chill for 15–20 minutes until firm.
Optional: add a final drizzle of contrasting chocolate or a touch of edible glitter for sparkle.
- Prep Time: 15 mins
- Cook Time: 20 minutes
- Category: Dessert
- Cuisine: American
A Sweet Tradition is Born
This recipe takes me right back to my first-ever “Galentine’s” celebration, long before I knew it had a name. My two best friends from college, Sarah and Chloe, showed up on my doorstep one freezing February evening. I was living in a tiny apartment, feeling a little down, and my kitchen was about the size of a postage stamp. They barged in, arms full of grocery bags, and declared, “We’re not moping. We’re making a mess.”
Out came strawberries, a hodgepodge of chocolate chips we melted in a questionable microwave, and a container of sprinkles that were definitely from someone’s birthday party the month before. We didn’t have piping bags, so we used Ziplocs with the corners cut off. We didn’t have a double boiler, so we used a bowl precariously balanced on a pot. What we did have was laughter, stories, and the kind of easy companionship that fills your soul. Those strawberries we made were lopsided, a little messy, and absolutely perfect. They tasted like friendship and resilience. Ever since, making something sweet and silly with the people I love has been my favorite way to celebrate any occasion, big or small.
What You’ll Need for Your Flavor Wave
Gathering your ingredients is the first step to kitchen fun! Here’s the simple lineup for these festive treats. I’ve included my favorite chef insights and substitutions so you can ride this wave with whatever you have on hand.
- 1 pint fresh strawberries – Look for berries that are bright red, firm, and have a vibrant green cap. A plump, symmetrical strawberry is your best friend for a smooth, beautiful dip. Chef’s Insight: Seriously, dry these guys THOROUGHLY after washing. Any extra water will cause the chocolate to seize up and become clumpy. Patience here is your secret weapon!
- 1 cup pink, red, or white chocolate melts – I’m a big fan of “candy melts” or “confectionery coating” for this because they set firmly and are formulated for dipping. Substitution Tip: You can use high-quality white chocolate chips or bars and mix in a drop of pink or red gel food coloring. Just know that real chocolate can be a bit more temperamental when melting. If you go this route, add a teaspoon of coconut oil to help it stay smooth and dippable.
- ¼ cup heart-shaped sprinkles – This is where the personality comes in! Go for classic red and pink, or mix in some gold and silver for extra glam. Chef’s Insight: Pour your sprinkles into a shallow bowl or plate before you start dipping. You want to be able to roll your strawberry in them the second it’s coated in chocolate. Speed is key for maximum sprinkle adhesion!
- Optional: edible glitter or a contrasting chocolate drizzle – This is for my overachievers, my glam squad, my “go big or go home” crew. A little edible gold dust or a zig-zag drizzle of dark chocolate takes these from cute to absolutely spectacular. Chef’s Insight: For a drizzle, just melt a tablespoon of dark or milk chocolate, put it in a small Ziploc bag, snip a TINY corner, and have fun with it!
Let’s Make Some Magic: The Step-by-Step
Okay, team! It’s go time. This is where we turn simple ingredients into little edible jewels. Follow these steps, and you’ll be a strawberry-dipping pro in no time.
- Prep Your Station. Line a baking sheet with parchment paper. This is your landing pad for your gorgeous, chocolate-dipped creations. Little Chef Hack: Do this first! The last thing you want is to have a perfectly dipped strawberry in your hand with nowhere to put it. A little prep work makes the whole process feel smooth and zen-like.
- Melt the Chocolate. Pour your chocolate melts into a microwave-safe bowl. Heat them in the microwave in 20-second intervals, stirring well after each burst. Do not rush this! The secret to silky, smooth chocolate is low and slow. Overheating is the enemy—it will scorch and turn into a thick, graasy mess. You want it just melted enough to be fluid. Little Chef Hack: If your chocolate is still a little thick, stir in a tiny bit (we’re talking ½ a teaspoon) of coconut oil or vegetable shortening. This will thin it out to the perfect dipping consistency.
- The Big Dip. Hold a strawberry by its leafy stem. Dip it into the melted chocolate, swirling it gently to coat about three-quarters of the way up. Gently lift it out and let the excess chocolate drip back into the bowl for a second or two. Little Chef Hack: To get a nice, clean base, you can use a spoon to help scoop chocolate over the top of the strawberry, then use the back of the spoon to wipe off the excess from the bottom as you pull it out.
- Sprinkle Time! This is the fun part! Immediately after dipping, while the chocolate is still wet, roll or sprinkle your strawberry with the heart sprinkles. Don’t be shy—coat it well! Little Chef Hack: Hold the strawberry over the sprinkle bowl while you do this. It catches the fallout, and you can easily pour those extra sprinkles back into your main container. Less waste, more fun!
- Chill Out. Carefully place your finished strawberry on the parchment-lined baking sheet. Once your tray is full, pop it into the refrigerator for 15-20 minutes, or until the chocolate is completely firm to the touch. Little Chef Hack: Don’t leave them in there for hours on end. The strawberries can start to sweat when you take them out, which can make the chocolate sticky. 20 minutes is the sweet spot!
- Add the Final Flourish (Optional). If you’re feeling fancy, now’s the time for that glitter or drizzle! A light dusting of edible glitter with a small brush, or a quick zig-zag of melted dark chocolate will make your treats truly Instagram-worthy.
How to Serve These Sweethearts
Presentation is part of the fun! You’ve made these beautiful treats, now let’s show them off. I love arranging them on a tiered cake stand for a real “wow” effect at a Galentine’s brunch. For something more rustic and charming, a simple wooden board or a white platter lets the vibrant colors of the strawberries really pop. If you’re making them as gifts, little cellophane bags tied with a cute ribbon turn them into a sweet, handmade present for each of your friends. However you serve them, do it with a smile—it’s the secret ingredient!
Ride Your Own Flavor Wave: Fun Variations
Feel like mixing it up? This recipe is a perfect canvas for your creativity. Here are a few of my favorite twists:
- Dark Chocolate Dream: Swap the pink chocolate for rich, dark chocolate. It’s a gorgeous, sophisticated contrast to the sweet strawberry.
- Nutty Crunch: After dipping in chocolate, roll the strawberries in finely chopped pistachios, pecans, or toasted coconut for a delicious textural surprise.
- “Tuxedo” Berries: Dip half the strawberry in white chocolate and let it set. Then, dip the other half in dark or milk chocolate for a dapper, two-toned look.
- Vegan-Friendly: Use vegan white chocolate melts (read the label!) and ensure your sprinkles are plant-based. It’s an easy swap that makes everyone feel included.
- Citrus Zest: Add a teaspoon of orange or lemon zest to your melted white chocolate for a bright, zesty flavor that cuts through the sweetness.
Isla’s Chef Notes & Kitchen Confessions
This recipe has seen many iterations in my kitchen. The first time I made them for the blog, I was so focused on getting the perfect photo that I completely forgot to add the sprinkles before the chocolate set. I had a whole tray of plain pink strawberries staring back at me! My solution? I re-melted a tiny bit of chocolate, put it in a bag, and “glued” the sprinkles on individually. It took forever, but it worked! The moral of the story? There’s almost always a kitchen fix. Don’t stress the small stuff.
Over time, I’ve learned that the berries with the broadest “shoulders” are the easiest to dip, and that turning on some upbeat music makes the dipping-and-sprinkling process feel like a party. This recipe is truly about the experience as much as the outcome. So, laugh if your strawberries are a little messy. Celebrate the one that’s absolutely perfect. The best food is always made with a generous pinch of joy.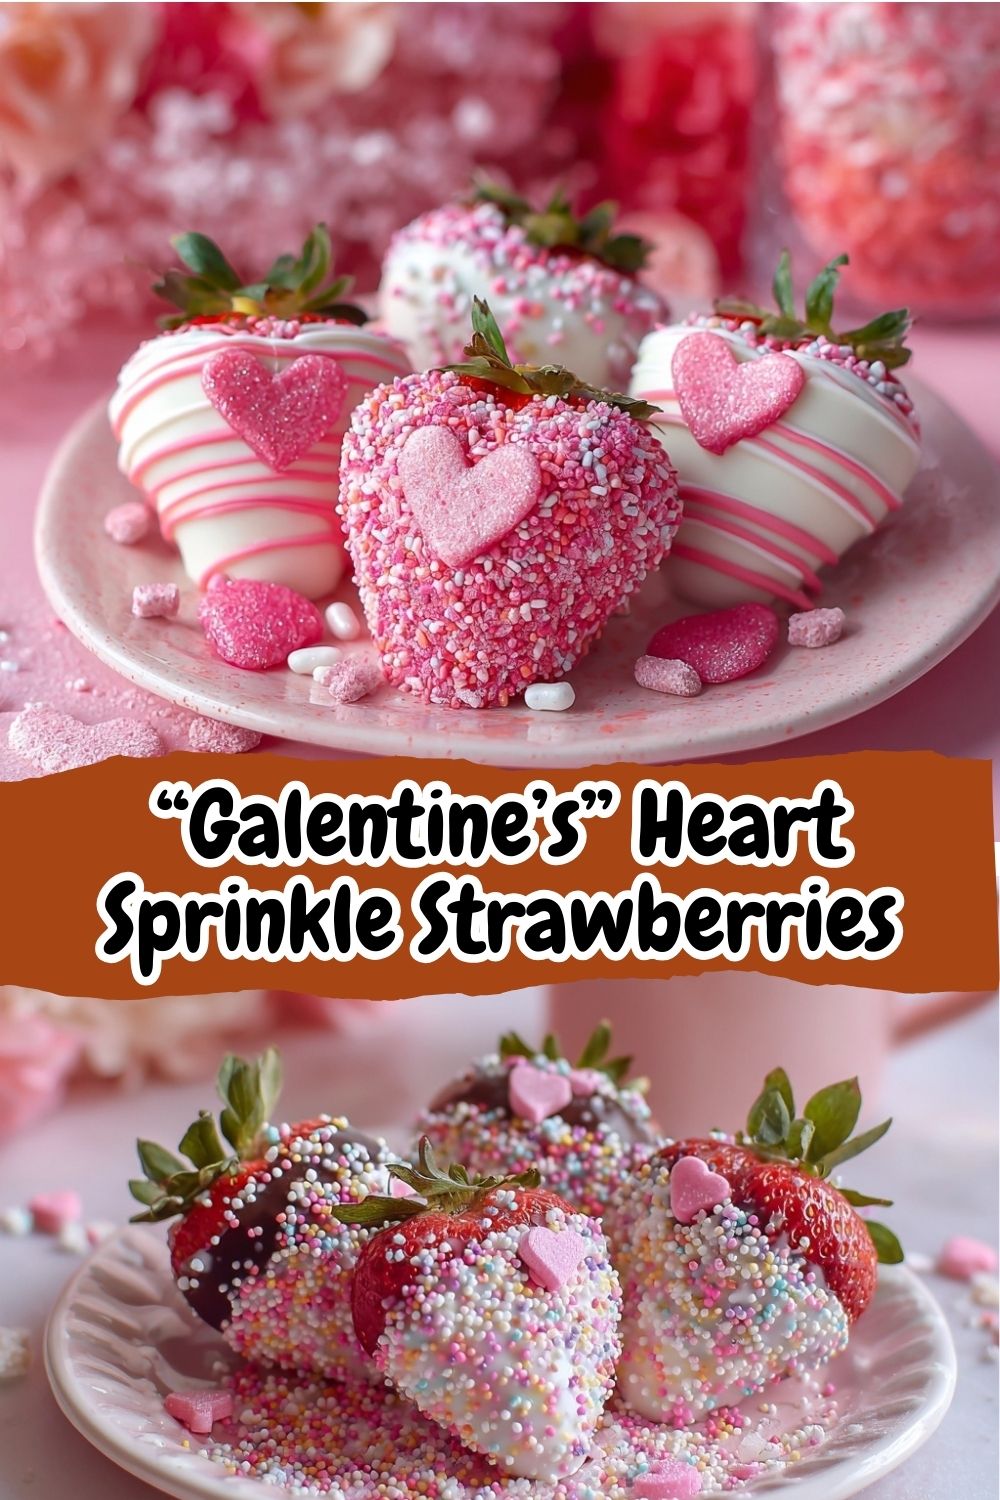
Your Questions, Answered!
I’ve made these a zillion times, and I’ve answered tons of questions from the BiteTide community. Here are the most common ones to help you out!
- Why did my chocolate get thick and clumpy? Ah, the dreaded “seized” chocolate! This usually happens if a tiny drop of water or steam got into your melting chocolate. To fix it, try stirring in a small amount of coconut oil or vegetable shortening (about a teaspoon at a time) until it smooths out again. If it’s beyond repair, no worries—just start over with a new bowl. It happens to the best of us!
- Can I make these ahead of time? You can! They are best enjoyed the same day, but you can absolutely make them up to 24 hours in advance. Store them in a single layer in an airtight container in the fridge. Just be aware that the strawberries may release a little moisture over time, so they’re at their peak crunch and beauty within a day.
- My sprinkles won’t stick! What am I doing wrong? This almost always comes down to timing. The chocolate starts to set very quickly. You need to have your sprinkles ready to go and apply them the very second you’ve finished dipping each strawberry. If the chocolate has even a slight skin, the sprinkles won’t adhere. Move with purpose, and you’ll be a sprinkle master in no time.
- What’s the best way to store leftovers? Keep them in the refrigerator in a single layer (or with parchment between layers) in an airtight container. Don’t leave them at room temperature for too long, as the chocolate will get soft and sweaty.
Quick Nutrition & Prep Details
Prep Time: 15 minutes | Chill Time: 20 minutes | Total Time: 35 minutes
Yields: 16-20 strawberries
Type: No-Bake Dessert, Holiday Treat, Valentine’s-Inspired
Skill Level: Easy
Approximate Per Strawberry: Calories: 80 | Protein: <1g | Carbs: 9g | Fat: 5g | Fiber: 1g
Well, that’s it, my friend! You are now fully equipped to bring a tidal wave of sweetness to your Galentine’s Day, Valentine’s Day, or just-because-Tuesday. I hope this recipe brings as much laughter and joy to your kitchen as it has to mine.
If you make these (and I really hope you do!), I’d be absolutely thrilled to see your creations. Tag me on Instagram @BiteTide or pin your favorite photo to Pinterest so I can share in the fun! And if you have any questions, just drop a comment below—I read every single one.
Until next time, keep riding the flavor wave!
– Isla 💛